Best 10 Healthy Salad Recipes for Quick and Delicious Meals
As someone who loves quick and healthy meals, I've discovered that salads can be both delicious and satisfying, making them the perfect solution for any busy day. In my journey to find the best recipes, I've compiled a list of ten vibrant and tasty salad ideas that will not only tantalize your taste buds but…
As someone who loves quick and healthy meals, I've discovered that salads can be both delicious and satisfying, making them the perfect solution for any busy day. In my journey to find the best recipes, I've compiled a list of ten vibrant and tasty salad ideas that will not only tantalize your taste buds but also boost your well-being. From creamy chicken pasta salads to refreshing avocado mango delights, there’s something here for everyone. So, get ready to whip up these nutritious creations that promise to be both effortless and incredibly satisfying, transforming your mealtime routine!
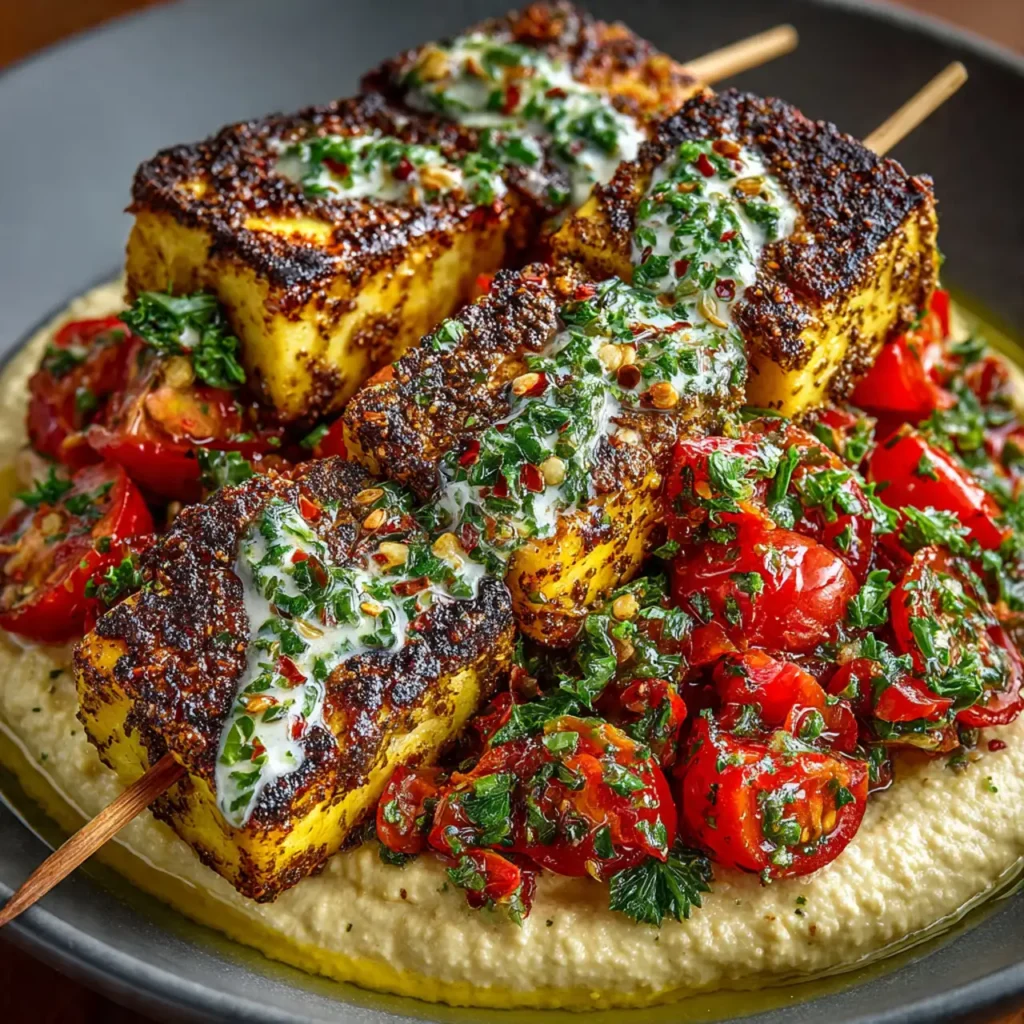
1. Healthy Za’atar Tofu Skewers with Hummus and Tomato Salad (Vegan)
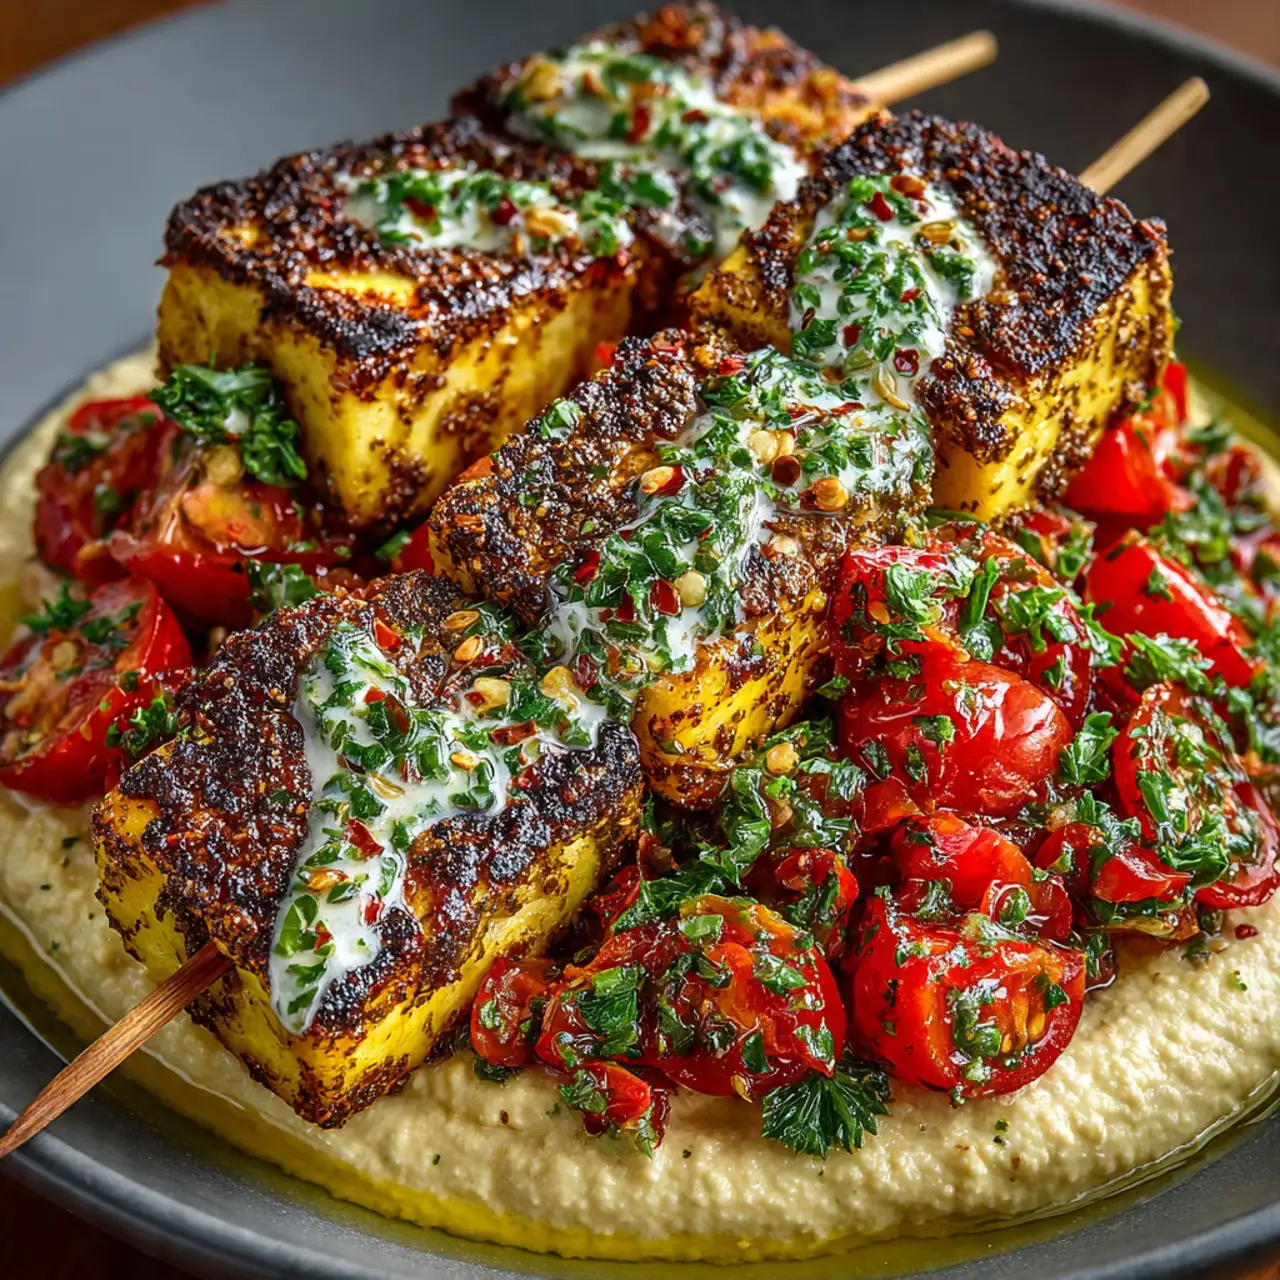
This meal is a vibrant explosion of Mediterranean flavors that will completely change how you think about plant-based protein. These Za’atar Tofu Skewers are crusted with an earthy and tangy spice blend, then served over a creamy swoosh of hummus with a bright salad of tomatoes, cucumbers, and olives. The best part is that you can have this impressive, restaurant-quality dinner on the table in under 30 minutes. It is a fresh and satisfying dish that proves vegetarian weeknight meals can be just as exciting as they are healthy.
Get ready to discover your new favorite way to eat tofu, a recipe so simple, wholesome, and bursting with flavor, it’s destined to become a staple in your healthy meal rotation.
Why These Tofu Skewers are a Weeknight Powerhouse
You are going to be completely amazed by how much flavor and satisfaction is packed into this simple, wholesome bowl. It’s a true nutritional champion. Here’s why:
- A High-Protein Plant-Powered Meal: Loaded with protein from both the tofu and the hummus, this is a hearty, satisfying vegetarian meal that will keep you full and fueled for hours.
- Ready in Under 30 Minutes: This is the ultimate fast and fresh meal. While the tofu grills for a few minutes, you can toss together the simple, vibrant salad.
- Bursting with Bold Mediterranean Flavors: The combination of earthy za’atar, briny olives and capers, fresh lemon, and creamy hummus is a true flavor explosion.
- A Perfect Grilling Recipe: This is a fantastic way to use your grill or grill pan. The tofu gets a beautiful, smoky char that adds an incredible depth of flavor.
- Incredibly Fresh, Healthy, and Vibrant: This is a beautiful, rainbow-colored meal that is as nourishing as it is delicious, packed with fiber, protein, and healthy fats.
Recipe Snapshot
| Prep Time | 15 minutes |
| Cook Time | 10 minutes |
| Total Time | 25 minutes |
| Servings | 4 servings |
| Calories | 460 kcal per serving (estimated) |
| Course | Main Course, Lunch, Dinner |
| Cuisine | Mediterranean, Middle Eastern-Inspired |
| Difficulty/Method | Easy / Grill |
Your Shopping List for This Fresh & Healthy Meal
This impressive dinner comes together with a beautiful array of fresh, powerful ingredients.
→ For the Tofu Skewers & Toppings
- 1 (14-oz.) package extra-firm tofu → Drained and pressed. This is essential for a firm, meaty texture!
- 3 tsp za’atar → Divided. This Middle Eastern spice blend is the star of the show!
- 4 Tbsp extra-virgin olive oil → Divided for the salad, for grilling, and for drizzling.
- 1 ¼ tsp kosher salt → Divided for seasoning every component perfectly.
- ¾ cup hummus → Your favorite store-bought brand or homemade.
- Chopped fresh flat-leaf parsley → For an optional, but recommended, fresh garnish.
- Pita bread → For serving and scooping up every last bite!
→ For the Tomato & Olive Salad
- 1 cup cherry tomatoes → Halved.
- 2 small Persian cucumbers → Thinly sliced. Their thin skin and minimal seeds are perfect for salads.
- ½ cup pitted mixed olives → Halved. A mix of Kalamata and green olives is great.
- ½ cup thinly sliced red onion → For a sharp, crunchy bite.
- 1 Tbsp fresh lemon juice → For a bright, acidic kick.
- 2 Tbsp capers → Drained, for a wonderful, briny pop of flavor.
Let’s Get Cooking! Your 25-Minute Guide
Ready for the most delicious and satisfying plant-based bowl of your life? Let’s get to it!
Part 1: The Fresh Salad & Tofu Prep
- Make the Salad: In a medium bowl, combine the halved cherry tomatoes, sliced cucumbers, halved olives, and sliced red onion. Add the lemon juice, 1 tablespoon of olive oil, the capers, and ½ teaspoon of salt. Toss everything to coat and set aside to let the flavors marinate.
- Prep the Tofu: The secret to great grilled tofu is removing the water! Press your drained block of tofu well, then pat it dry with paper towels and cut it into ¾-inch cubes.
- Skewer and Season: Thread 4 pieces of the pressed tofu onto each of 8 (10-inch) skewers. Place them on a plate and sprinkle them with 2 teaspoons of the za’atar and ½ teaspoon of salt, turning and rolling the skewers to coat the tofu evenly on all sides. Drizzle with 1 tablespoon of the olive oil.
Part 2: Grill to Perfection
- Preheat the Grill: Preheat a grill pan or an outdoor grill to high heat (450°F to 500°F). Carefully brush the hot pan or grates with the remaining 2 tablespoons of oil.
- Grill the Skewers: Place the seasoned tofu skewers on the hot grill. Cook, turning occasionally, for about 8 minutes. You’re looking for beautiful, dark grill marks on all sides and a firm, meaty texture.
- Final Seasoning: Transfer the hot, grilled skewers to a large plate and immediately sprinkle them with the remaining ¼ teaspoon of salt.
Part 3: Assemble Your Power Bowls
- Create the Base: Spoon a generous amount (about 3 tablespoons) of hummus onto each of four plates or into shallow bowls. Use the back of the spoon to create an artistic swoosh.
- Add the Salad and Skewers: Top the hummus with a generous portion of the tomato-olive salad. Lay two of the hot tofu skewers on top of each bowl.
- The Final Flourish: Sprinkle the remaining 1 teaspoon of za’atar over the tofu. Top with fresh parsley and serve immediately with warm pita bread on the side for dipping!
Grilled Za’atar Tofu Skewers with Tomato Salad and Hummus
Ingredients
Equipment
Method
-
In a medium bowl, combine tomatoes, cucumbers, olives, onion, lemon juice, 1 tablespoon oil, capers, and 1/2 teaspoon salt. Toss to coat and set aside.
-
Press and pat tofu cubes dry with kitchen towels. Thread 4 pieces of tofu onto each of 8 (10-inch) skewers.
-
Sprinkle the tofu skewers with 2 teaspoons za’atar and 1/2 teaspoon salt, turning to evenly coat. Drizzle with 1 tablespoon of olive oil.
-
Preheat a grill pan or grill to high. Brush the grates with the remaining 2 tablespoons oil. Grill the skewers, turning occasionally, until grill marks appear on all sides, about 8 minutes.
-
Transfer the hot skewers to a large plate and sprinkle with the remaining 1/4 teaspoon salt.
-
To serve, spoon 3 tablespoons of hummus onto each of 4 plates. Top with the tomato-olive salad and two tofu skewers.
-
Sprinkle the tofu with the remaining 1 teaspoon za’atar. Top with parsley and serve with pita bread, if desired.
Notes
Hot Grill is Key: Make sure your grill pan or grill is fully preheated to get those beautiful, flavorful char marks on the tofu.
No Skewers? No problem: If you don’t have skewers, simply sear the seasoned tofu cubes in a hot skillet until golden on all sides.
WiseRecipes’ Top Tips for a Perfect Tofu Bowl
These simple secrets will ensure your vegetarian meal is a flawless, flavorful triumph.
- Press Your Tofu! This is the most important step for great tofu texture. Pressing out the excess water allows the tofu to get firm, “meaty,” and develop a beautiful crust on the grill instead of just steaming. You can use a dedicated tofu press or simply wrap the block in paper towels and place a heavy skillet on top for 15 minutes.
- Get Your Grill Pan Screaming Hot. Just like with searing meat, a very hot pan is key to getting those beautiful, flavorful grill marks on your tofu and preventing it from sticking.
- Don’t Skimp on the Za’atar. This incredible Middle Eastern spice blend is the star of the show. The final sprinkle over the hot, grilled skewers is a crucial step that adds a huge burst of fragrant, toasty flavor.
- Season in Layers. This recipe smartly seasons every component—the salad, the tofu before grilling, and the tofu again after grilling. This builds a deep, cohesive flavor throughout the entire dish.
- No Grill? Use a Skillet! As the recipe notes, a cast-iron or nonstick skillet is a great alternative. Just get it nice and hot with some oil and sear the tofu cubes on all sides until they are golden brown and crispy.
Keep It Fresh! Storing & Meal Prep Instructions
This bowl is a meal prepper’s dream. Here’s how to store the components for fresh bowls all week.
- Meal Prep Storage: For the best results, store all the components in separate airtight containers in the refrigerator for up to 4 days. Keep the grilled tofu, the tomato-olive salad, and the hummus all separate.
- Assembly: Assemble your bowl just before you’re ready to eat. You can enjoy the tofu and salad cold straight from the fridge, or you can quickly reheat the tofu skewers in an air fryer or skillet for a few minutes to warm them through.
FAQs: Your Za’atar Tofu Questions, Answered!
What is za’atar? Where can I find it?
Za’atar is a traditional Middle Eastern spice blend. While the exact ingredients can vary, it typically consists of dried thyme, oregano, sumac (for a tangy, lemony flavor), and toasted sesame seeds. You can find it in the spice aisle of most major supermarkets or at any specialty or Middle Eastern grocery store.
What if I don’t have skewers?
No problem at all! You can simply sear the seasoned tofu cubes directly in your hot grill pan or skillet. Just toss them around until they have a nice color on all sides, then spoon them over your salad and hummus.
Can I add other vegetables to the salad?
Absolutely! Finely chopped bell peppers, chickpeas (for even more protein!), or some crisp romaine lettuce would all be fantastic additions to the tomato and cucumber salad.
Is this recipe vegan?
Yes, this recipe is fully vegan! Just make sure the pita bread you serve it with is also vegan (most are, but it’s always good to check for dairy or honey).
Final Thoughts: Your New Favorite Plant-Powered Meal
There is nothing more empowering than creating a meal that is a true powerhouse of nutrition and also happens to be bursting with exciting, gourmet flavor. This Za’atar Tofu Skewer bowl is the perfect example of a balanced, satisfying, and beautiful dish that will make you feel amazing. It’s a taste of the fresh, vibrant Mediterranean, and I hope it becomes a new staple in your healthy meal rotation. Happy Cooking!
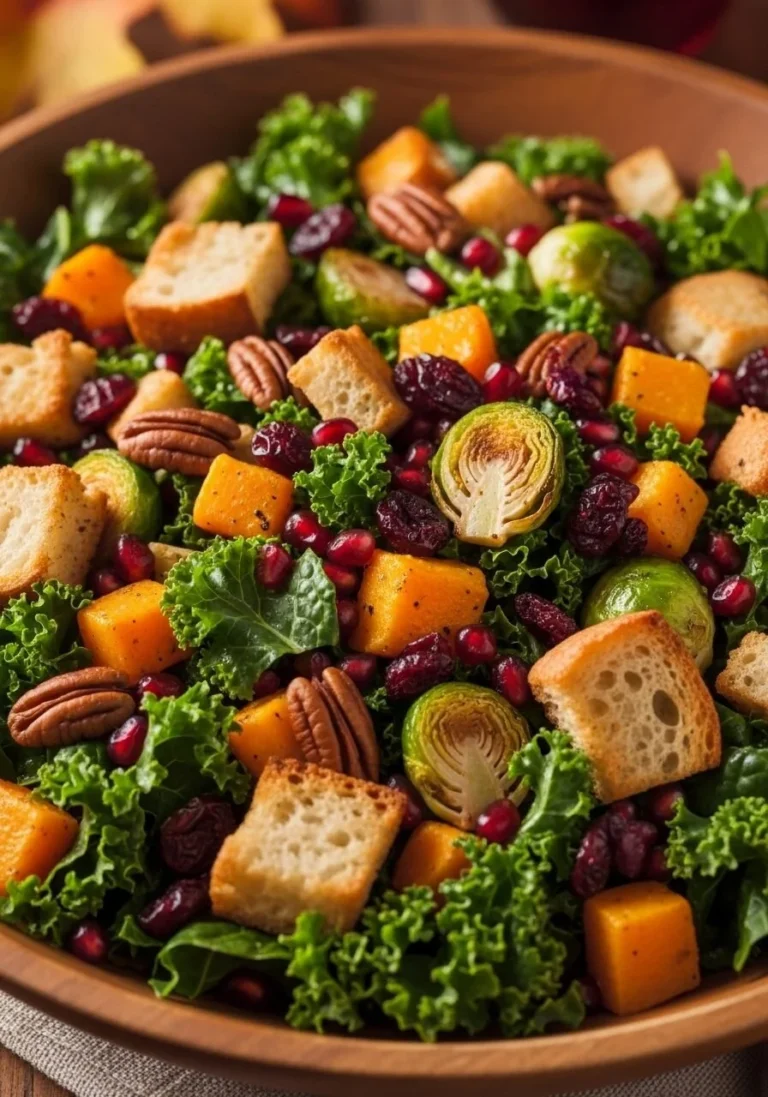
2. The Ultimate Halloween Fruit Salad (A Fun & Healthy Halloween Breakfast Idea!)
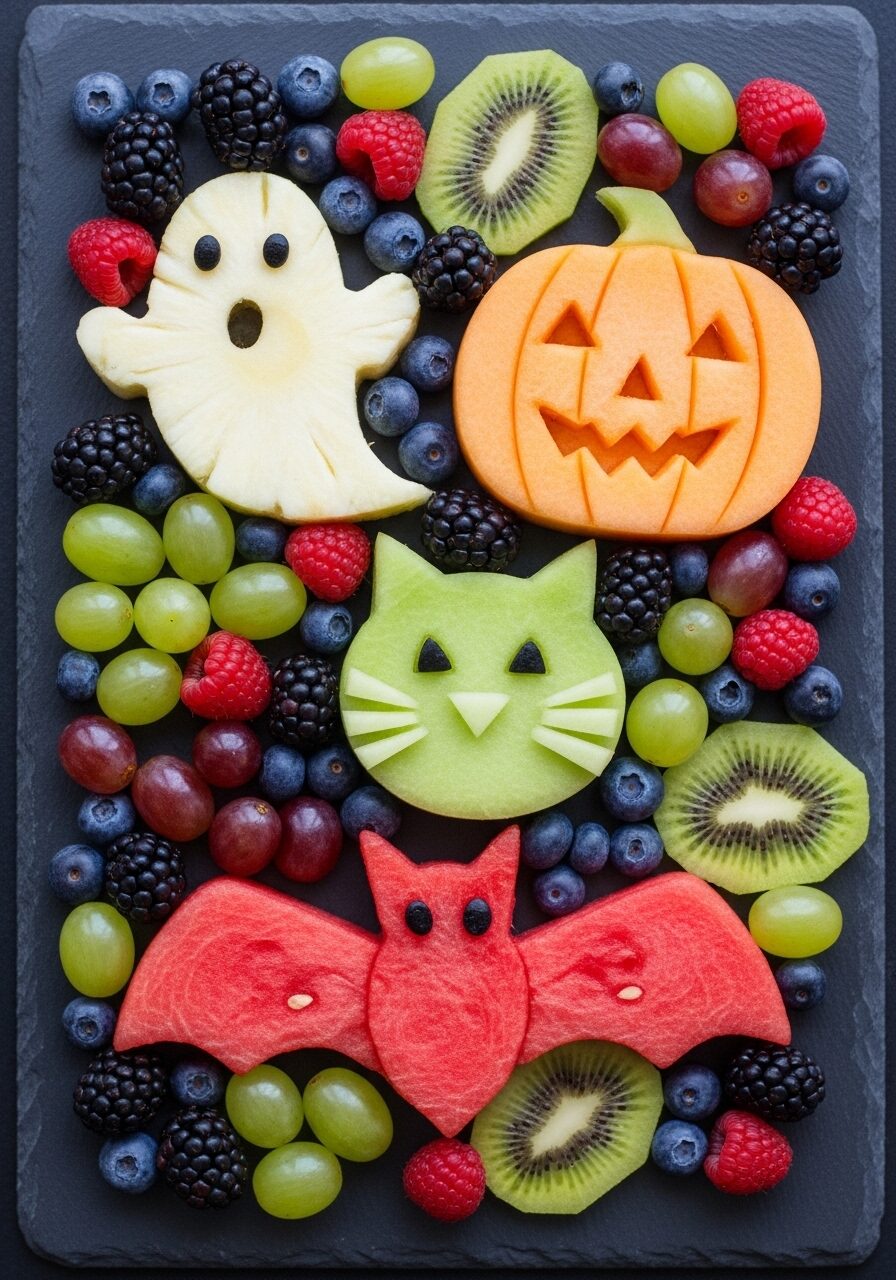
Imagine starting a fun-filled Halloween day not with a sugar crash, but with a vibrant, spooky, and secretly healthy breakfast that the kids will go absolutely wild for. Picture a platter bursting with jewel-toned fruits, featuring adorable, ghostly pineapple, spooky melon bats, and cute pumpkin-shaped cantaloupe. That, my friends, is the pure magic of this Halloween Fruit Salad, and it is, without a doubt, one of the best Halloween breakfast ideas for a memorable and wholesome celebration.
Here’s the thing about Halloween morning: the excitement is already at a fever pitch! I wanted to create a recipe that channels that energy into something positive and fun, a perfect antidote to the candy-filled day ahead. This isn’t just a fruit salad; it’s an interactive art project. The secret is simply using a few Halloween-themed cookie cutters to transform ordinary fruit into a spooky, edible masterpiece.
I promise you, there is no greater joy than watching your little monsters’ eyes light up as they help create—and then devour—this incredible spread. Because it’s naturally vegan, gluten-free, and free from common allergens, it’s one of those rare halloween breakfast ideas that truly everyone can enjoy. It’s the perfect centerpiece for a fun family breakfast or a festive brunch party.
Get ready to create the cutest, healthiest, and most talked-about dish of your Halloween celebration!

Why This Is the Best Spooky Breakfast Idea!
You are going to be completely charmed by how easy it is to create something so impressive and fun. This is destined to become a new family tradition. Here’s why you’ll love it:
- A Fun and Healthy Halloween Breakfast Idea: It’s the perfect way to kick off a candy-filled day with a dose of nutritious, wholesome fun that still feels incredibly festive.
- So Easy, The Kids Can Help: The best part of this recipe is getting the kids involved! Letting them press the cookie cutters and arrange the fruit is where the real memories are made.
- A True Visual Show-Stopper: The vibrant colors and adorable spooky shapes make this a stunning centerpiece for any Halloween breakfast or party table.
- Allergy-Friendly for Everyone: This fruit salad is naturally vegan, gluten-free, dairy-free, and nut-free, making it a safe and delicious option for all your guests.
- No Sugar Crash Here: All the sweetness comes naturally from the delicious fruit, making it a wonderful alternative to sugary Halloween snacks and cereals.
Recipe Snapshot
| Prep Time | 20 minutes |
| Cook Time | 0 minutes |
| Total Time | 20 minutes |
| Servings | 8 servings |
| Calories | 353 kcal per serving |
| Course | Breakfast, Dessert, Snack |
| Cuisine | British / American |
| Difficulty/Method | Easy / No-Bake |
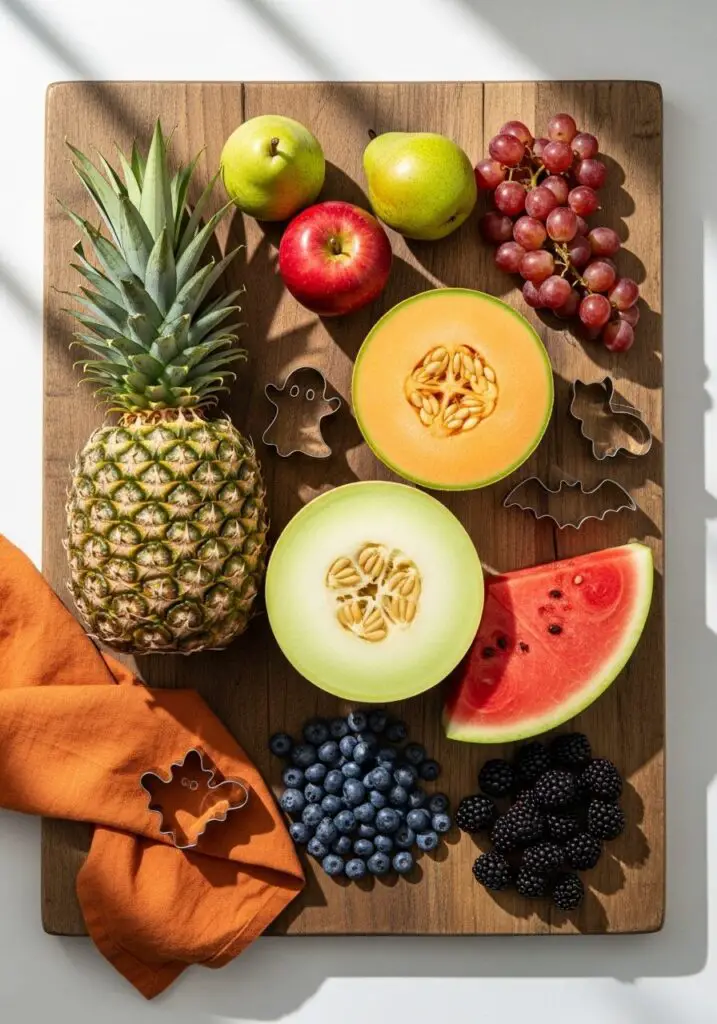
Your Shopping List for This Spooky Fruit Platter
The beauty of this recipe is its flexibility! Use these fruits as a guide, or choose your family’s favorites.
→ For the Fruit Salad Base
- 2 Passion Fruit → Adds a tangy, tropical flavor.
- 1 Apple & 2 Pears → For slicing. We’ll use a trick to keep them from browning!
- ½ Bottle Soda Water → The secret weapon to prevent apples and pears from browning.
- 2 Kiwi → For a vibrant green color and sweet-tart taste.
- 1 punnet each of Blueberries, Grapes, & Blackberries → These jewel-toned fruits are perfect for filling in the gaps.
- 4 Satsumas or Clementines → Easy to peel and segment for a pop of orange.
→ For the Halloween Shapes
- 1 Pineapple, 1 Cantaloupe Melon, 1 Honey Dew Melon, ½ Watermelon → These firm, colorful fruits are perfect for using with cookie cutters.
- 2 slices Cucumber → A clever trick for creating little green “pumpkin stalks.”
- 1 tub Edible Cake Decorations → Small edible pearls or balls are perfect for making spooky eyes!
Let’s Get Spooky! Your Step-by-Step Guide
Ready to create the most fun and festive fruit platter ever? It’s all about the prep and the playful assembly.
Part 1: Prep the Fruits
- Slice and Soak: Thinly slice your apple and pears. Place them in a bowl and cover them with soda water. Pop them in the fridge; this simple trick will keep them bright and white while you work!
- Prep the Melons and Pineapple: Carefully remove the skin from all the melons and the pineapple. Slice them lengthwise into thick, even slabs (about ½ to ¾ inch thick) to create a large surface area for cutting your shapes. Cut any leftover scraps into bite-sized chunks.
- Prep the Other Fruits: Peel and segment the satsumas, wash the berries and grapes, and slice the kiwis.
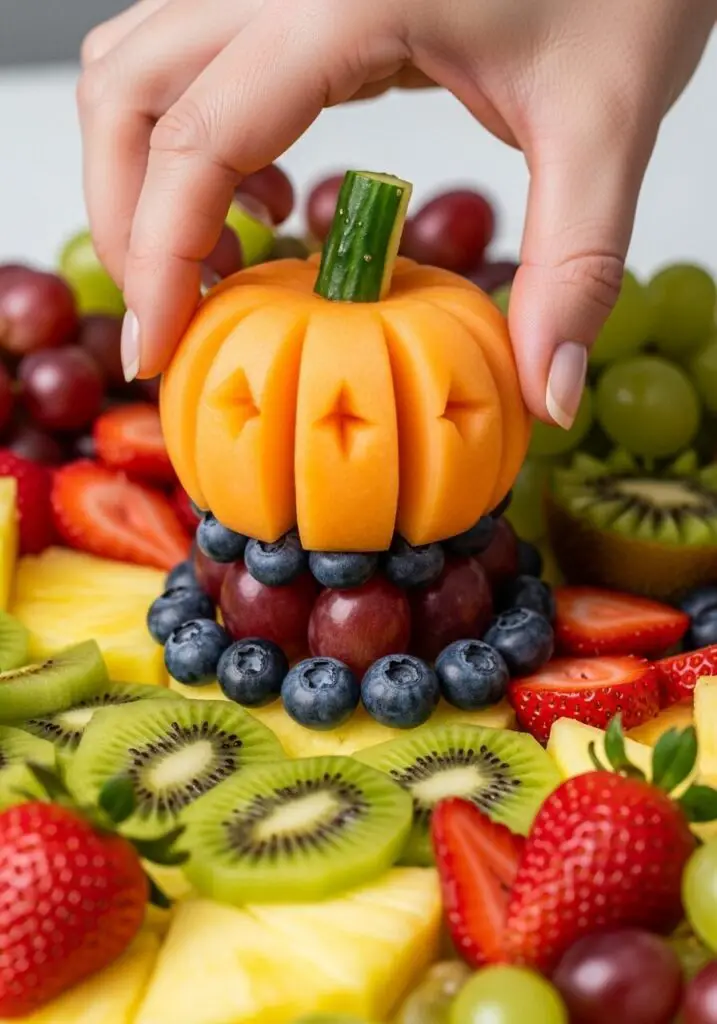
Part 2: Create the Spooky Shapes
- Cut Out Your Shapes: This is the fun part! Press your Halloween-themed cookie cutters firmly into the slabs of pineapple and melon to create cats, ghosts, bats, pumpkins, and more.
- Make the Eyes: For the shapes that need eyes (like ghosts and cats), use a cocktail stick or a wooden toothpick to gently poke small holes where the eyes should go.
- Add the Eyes: Gently press your chosen edible decorations into the holes you created. This brings your spooky characters to life!

Part 3: Assemble Your Masterpiece
- Create a Base: Start by layering the leftover chunks of melon and pineapple onto a large platter or in a shallow bowl.
- Layer the Fruits: Begin arranging the other fruits—like the satsuma segments, kiwi slices, and soaked apple/pear slices—around the platter. Sprinkle the berries and grapes throughout to fill in any gaps.
- Position Your Stars: Once the platter is looking full and colorful, start placing your Halloween shapes on top. You can use the smaller fruits like grapes and blueberries to prop them up and make them stand out.
- Add the Final Touches: For your pumpkin shapes, tuck a small chunk of the cucumber slice at the top to look like a stalk. Keep the finished platter covered and refrigerated until you’re ready to serve!
WiseRecipes’ Top Tips for a Perfect Fruit Platter
These simple secrets will ensure your spooky fruit salad is a huge success.
- The Soda Water Trick is a Game-Changer. Soaking sliced apples and pears in soda water (or any carbonated water) is a fantastic, flavor-neutral way to prevent them from oxidizing and turning brown. It works like a charm!
- Choose Firm Fruits for Your Shapes. The best fruits for getting clean cuts with cookie cutters are firm and dense. Melons (cantaloupe, honeydew, watermelon) and pineapple are the absolute best choices.
- Cut Your Slabs Thick Enough. Make sure your melon and pineapple slices are at least ½-inch thick. If they are too thin, the shapes will be flimsy and might break when you try to move them.
- Get the Kids Involved! This is the ultimate recipe for little helpers. Let them choose the shapes, press the cutters, and help arrange the fruit on the platter. It makes the experience so much more fun for everyone.
- Build in Layers for a Lush Look. Don’t just dump everything on the plate! Creating a base layer with the chunked fruit gives you a foundation to build on and helps you prop up your spooky shapes to make them the stars of the show.
Keep It Fresh! Storing Your Halloween Fruit Salad
While best enjoyed fresh, you can definitely prep this ahead to save time!
- Best Eaten Fresh: For the absolute best taste and texture, this fruit salad should be assembled and enjoyed on the same day.
- Make-Ahead Components: The best way to prep is to do all your chopping in advance! You can cut all the melons and pineapple into slabs and chunks and store them in separate airtight containers in the fridge for up to 2 days. The berries can be washed and stored as well. Then, on the day of your party, all you have to do is the fun part: cutting the shapes and assembling the platter!
Halloween Fruit Salad
Ingredients
Equipment
Method
-
Slice apple & pears thinly and place them in a bowl with soda water in the fridge to prevent browning.
-
Remove the skin from all the melons and the pineapple. Slice them lengthwise into thick slabs (about 1/2-inch thick). Cut leftover fruit into chunks.
-
Use Halloween cookie cutters to cut out shapes from the melon and pineapple slices.
-
Prepare all other fruits (peel satsumas, wash berries, slice kiwis, etc.).
-
On a large platter, create a base layer with the leftover chunks of melon and pineapple. Begin layering the other fruits around the platter.
-
Once the platter is full, place your Halloween shapes on top, using smaller fruits like grapes and blueberries to help prop them up.
-
Use a cocktail stick to make small holes for eyes on your shapes, then gently push in your edible decorations.
-
Keep the finished platter covered and refrigerated until ready to serve.
Notes
Best Fruits for Shapes: Firm, dense fruits like pineapple, cantaloupe, honeydew, and watermelon work best for getting clean cuts with cookie cutters.
Make-Ahead: You can chop all the fruits and store them in separate airtight containers in the fridge for up to 2 days. Assemble the platter just before serving for the best results.
FAQs: Your Spooky Fruit Salad Questions, Answered!
What are the best cookie cutters to use?
Metal cookie cutters tend to give the cleanest, sharpest cuts. Look for a fun Halloween set that includes simple, recognizable shapes like ghosts, bats, cats, and pumpkins. Avoid overly intricate designs, as they can be difficult to release from the fruit.
Is this really a good Halloween breakfast idea?
Absolutely! It’s one of the best. On a day that’s destined to be full of sugar, starting with a fun, festive, and naturally sweet fruit salad is a fantastic way to get some great nutrition in while still feeling celebratory. It’s the perfect light and healthy kickoff to a fun-filled day.
What if I don’t have edible decorations for the eyes?
You can get creative! For light-colored fruits like pineapple ghosts, you can use mini chocolate chips (pointy-side in), small pieces of a black grape, or even chia seeds. For the darker fruits, a tiny dollop of yogurt or cream cheese could work.
My fruit shapes are breaking. What did I do wrong?
This is usually caused by one of two things: your fruit slabs are too thin, or the fruit itself is too soft or overripe. Make sure your slices are at least 1/2-inch thick and that you’re using firm, fresh melon and pineapple.
Final Thoughts: Your Healthiest Halloween Treat
There is such a special joy in creating a holiday treat that is not only beautiful and fun but also genuinely good for you. This Halloween Fruit Salad is a true celebration of creativity and wholesome ingredients. It’s one of those rare halloween breakfast ideas that will leave everyone feeling great and ready for a day of fun. I hope it brings a big, spooky smile to your table. Happy Halloween!
3. The Ultimate Healthy Chicken Pasta Salad (Creamy & Zesty!)
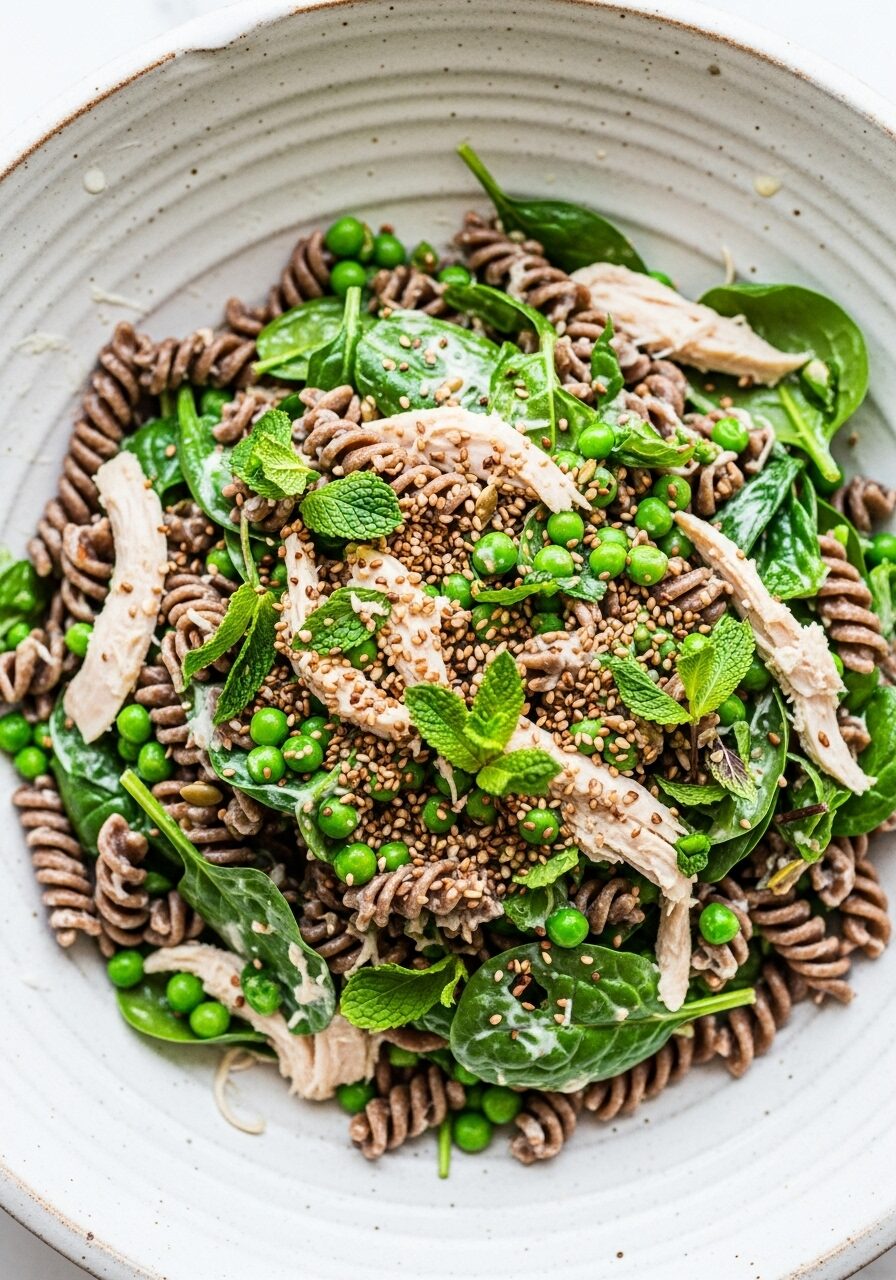
Imagine a classic creamy chicken pasta salad, but given a vibrant, modern, and unbelievably healthy makeover. Picture this: hearty buckwheat pasta, tender shredded chicken, and a rainbow of crisp green veggies, all tossed in a light, zesty, and lusciously creamy buttermilk dressing, finished with a crunch of toasted seeds. That, my friends, is this incredible Healthy Chicken Pasta Salad, and it’s destined to become your new favorite lunch.
Here’s the thing about pasta salad: it’s a beloved classic, but it can often be heavy and weighed down by mayonnaise. I was determined to create a version that delivered all the satisfying creaminess I craved, but in a way that felt bright, fresh, and nourishing. This recipe is the glorious result. The secret is the buttermilk and chipotle mayo dressing—it’s creamy, tangy, and has just a hint of smoky spice, without any of the heaviness.
I promise you, there is no greater meal-prep victory than a bowl of this beautiful pasta salad waiting for you in the fridge. The combination of textures and flavors is simply divine: the earthy pasta, the sweet peas and crunchy sugar snaps, the cool fresh mint, and the savory chicken. It’s a complete, satisfying meal that tastes like a treat.
Get ready to redefine what a healthy pasta salad can be and create a stunning, flavor-packed dish that you’ll make again and again.

Why This Will Be Your New Go-To Pasta Salad!
You are going to be amazed at how this light and healthy salad can be so incredibly creamy and satisfying. This recipe is a true game-changer. Here’s why you’ll love it:
- Creamy Dressing, Without the Guilt: The zesty buttermilk and chipotle mayonnaise dressing is light, tangy, and incredibly flavorful, delivering all the creaminess you crave in a healthier way.
- Packed with Protein & Veggies: Loaded with shredded chicken, spinach, and two kinds of peas, this is a well-rounded, nutrient-dense meal that will keep you full and satisfied.
- Incredibly Fresh & Vibrant Flavor: The combination of fresh mint leaves and bright lemon zest and juice makes this pasta salad taste exceptionally fresh and lively.
- Perfect for Meal Prep: This salad holds up beautifully in the refrigerator, making it the perfect solution for a week of delicious, healthy, and exciting lunches.
- Quick and Easy to Assemble: With a few smart shortcuts (like using pre-cooked chicken), this entire stunning salad comes together in no time.
Recipe Snapshot
| Prep Time | 15 minutes |
| Cook Time | 10 minutes |
| Total Time | 25 minutes |
| Servings | 4 servings |
| Calories | 500 kcal per serving |
| Course | Salad, Side Dish, Main Course |
| Cuisine | American |
| Difficulty/Method | Easy / Stovetop |
Your Shopping List for This Vibrant Salad
This recipe uses a wonderful mix of fresh ingredients and healthy pantry staples.
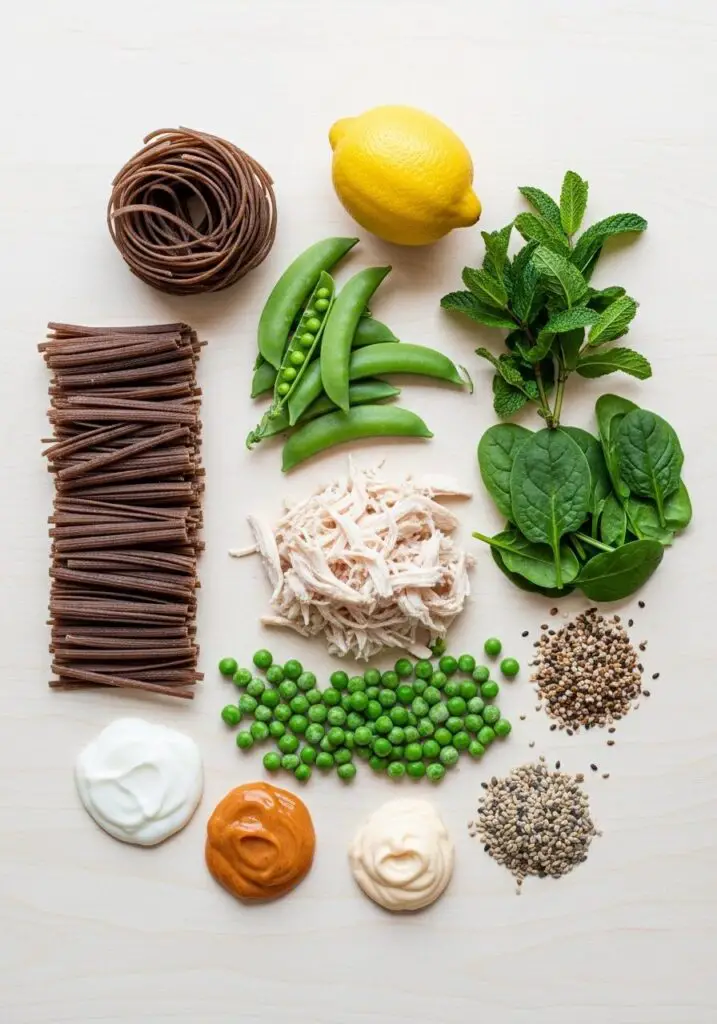
→ For the Pasta Salad
- 250g buckwheat or chickpea pasta → A hearty, gluten-free, and protein-packed base.
- 150g sugar snap peas, trimmed → For a wonderful, sweet crunch.
- 150g (1 cup) frozen peas, thawed → For a pop of sweetness and color.
- 50g spinach leaves → Fresh baby spinach adds nutrients and fresh flavor.
- 300g shredded barbecue chicken → A huge time-saver! A plain rotisserie chicken works perfectly, too.
- 1/2 cup fresh mint leaves → The secret ingredient for an incredibly fresh, vibrant flavor.
- 2 tbsp seed mix (pine nut, pepita, sunflower seed), toasted → For a final nutty, crunchy topping.
→ For the Zesty Buttermilk Dressing
- 1 lemon, zested and juiced → The zest goes in the salad, the juice goes in the dressing for a bright, acidic punch.
- 80 ml (1/3 cup) buttermilk → The key to a creamy, tangy, and light dressing.
- 1 tbsp chipotle mayonnaise → Adds a wonderful creaminess and a subtle, smoky heat.
- Salt and black pepper → To season the dressing perfectly.
Let’s Get Cooking! Your Step-by-Step Guide
Ready to create the most delicious and healthy pasta salad? Let’s break it down into three simple parts.
Part 1: Cook the Pasta and Peas
- Cook the Pasta: Bring a large saucepan of salted water to a rolling boil. Add the pasta and cook according to the package directions until it’s perfectly al dente.
- Blanch the Peas: During the very last minute of the pasta’s cooking time, add the trimmed sugar snap peas and the thawed frozen peas to the pot. This will cook them perfectly while keeping them crisp and bright green.
- Drain and Cool: Drain the pasta and peas in a colander and immediately rinse them under cold running water. This is a crucial step that stops the cooking process and prevents the pasta from becoming sticky.
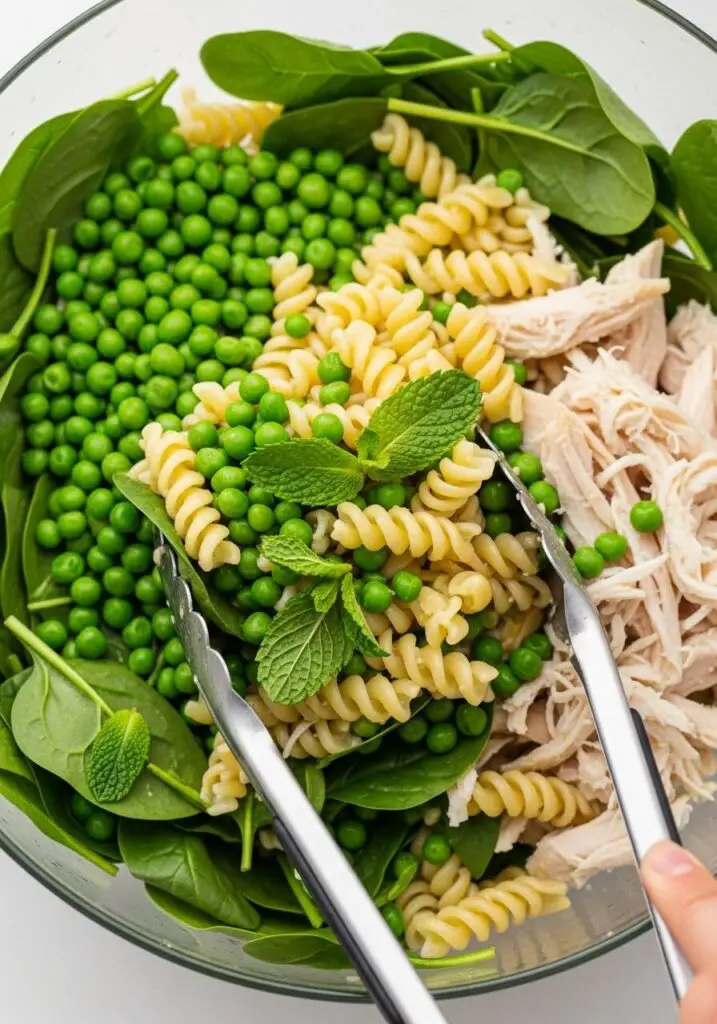
Part 2: Assemble the Salad
- Combine the Main Ingredients: In a large bowl, place the cooled pasta and pea mixture. Add the fresh spinach leaves, the shredded chicken, the fresh mint leaves, and the zest of one lemon.
- Toss Gently: Gently toss all the ingredients together until everything is well combined.
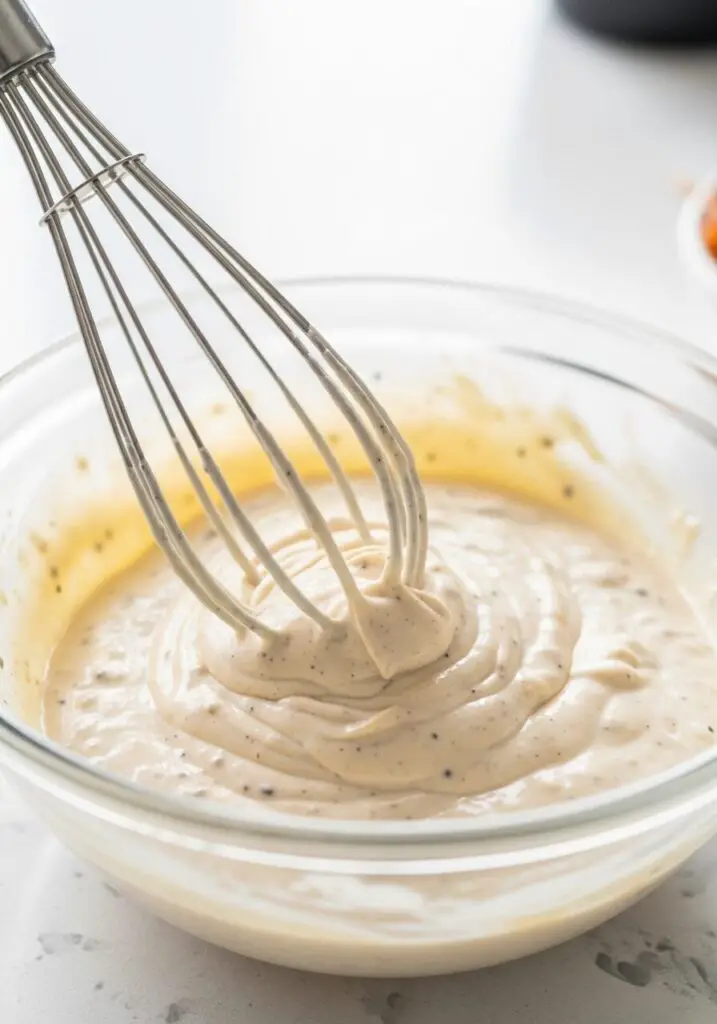
Part 3: Make the Dressing and Serve
- Whisk the Dressing: In a small bowl, whisk together 1-2 tablespoons of the fresh lemon juice with the buttermilk and chipotle mayonnaise. Season well with salt and black pepper.
- Serve it Up: Divide the pasta salad among your serving bowls. Drizzle the creamy dressing over the top of each portion.
- Garnish and Enjoy: Finish with a generous scatter of the toasted seed mix and serve immediately!
WiseRecipes’ Top Tips for Pasta Salad Perfection
These simple secrets are the key to taking your pasta salad from good to absolutely unforgettable.
- Don’t Overcook Your Pasta. Al dente is key! The pasta will continue to absorb a little bit of moisture from the dressing as it sits, so cooking it perfectly al dente ensures it will have the best chewy texture and won’t become mushy.
- Rinse Your Pasta Under Cold Water. For a cold pasta salad, this step is non-negotiable. It immediately stops the cooking process (keeping your pasta and peas perfectly textured), and it washes away excess starch, which prevents the pasta from clumping together into a sticky mess.
- Don’t Skip the Fresh Mint. I know it might seem like an optional herb, but the fresh, cool flavor of the mint is a true game-changer in this salad. It brightens everything up and provides a wonderful, surprising contrast to the savory chicken and creamy dressing.
- Use a Rotisserie Chicken. This is the ultimate time-saving hack for any recipe that calls for cooked chicken. Pick up a pre-cooked rotisserie chicken (barbecue or plain), and you’ll have perfectly seasoned, moist shredded chicken in minutes.
- Toast Your Seeds! Toasting the seed mix in a dry skillet for a few minutes until fragrant releases their natural oils and deepens their nutty flavor. It’s a small step that adds a huge amount of crunchy, flavorful texture to the finished dish.
Keep It Fresh! Storing Your Healthy Pasta Salad
This salad is a meal-prep dream! Here’s how to store it for the best results.
- Refrigerator: Store leftover pasta salad in an airtight container in the refrigerator for up to 3-4 days. The spinach will wilt slightly, but the flavors will continue to meld and taste fantastic.
- Meal Prep Pro-Tip: For the absolute best texture for meal prep, you can store the dressing separately from the pasta salad. Toss everything together just before serving to maintain the crunch of the vegetables.
Healthy Chicken Pasta Salad with Zesty Buttermilk Dressing
Ingredients
Method
-
Cook pasta in a large saucepan of boiling, salted water according to packet directions until al dente. Add the sugar snap peas and thawed peas during the last minute of cooking.
-
Drain the pasta and peas, and immediately rinse under cold running water until cool. Drain very well.
-
Place the cooled pasta and peas in a large bowl. Add the spinach leaves, shredded chicken, mint leaves, and the lemon zest. Toss everything together to combine.
-
In a small bowl, whisk 1-2 tablespoons of the fresh lemon juice with the buttermilk and chipotle mayonnaise. Season well with salt and pepper.
-
Divide the salad between serving bowls. Drizzle the dressing over the top and scatter with the toasted seed mix to serve.
Notes
Time-Saver: Using a pre-cooked rotisserie chicken (plain or barbecue) makes this recipe come together incredibly fast.
Meal Prep: For the best texture, store the dressing separately from the salad in an airtight container in the refrigerator. Toss together just before serving.
FAQs: Your Pasta Salad Questions, Answered!
Can I use regular pasta instead of buckwheat or chickpea?
Absolutely! While the recipe calls for a healthier, gluten-free pasta, you can use an equal amount of any short pasta shape you love. Rotini, fusilli, or penne would all be fantastic choices as their shapes are great for catching the dressing.
How can I make this vegetarian?
This salad is wonderful as a vegetarian dish! Simply omit the chicken and replace it with a 15-ounce can of rinsed and drained chickpeas or some crumbled feta cheese for a salty, savory bite.
Can I make the dressing dairy-free?
Yes, you can. To make a dairy-free version of the dressing, you can use a plain, unsweetened dairy-free yogurt (like almond or soy) in place of the buttermilk, and make sure your chipotle mayonnaise is also dairy-free.
What if I can’t find chipotle mayonnaise?
No problem! You can easily make your own. Simply mix a regular, good-quality mayonnaise with a small amount of adobo sauce from a can of chipotle peppers until you reach your desired level of smoky heat.
Final Thoughts: Your New Favorite Healthy Lunch
There is such a wonderful feeling in creating a meal that is vibrant, satisfying, and makes you feel fantastic. This Healthy Chicken Pasta Salad is the perfect embodiment of that. It’s proof that you don’t have to sacrifice creaminess or flavor to eat well. I hope this bright and beautiful salad becomes a staple in your meal-prep rotation. Happy cooking!
4. The Ultimate Green Goddess Pasta Salad (A Vibrant & Healthy Favorite!)

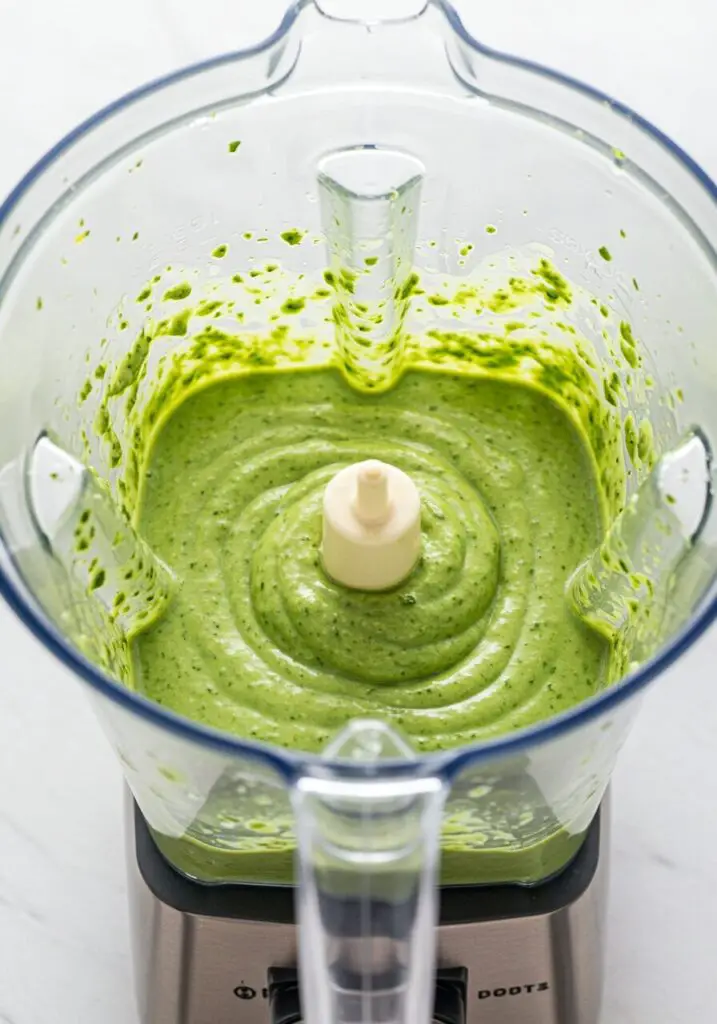
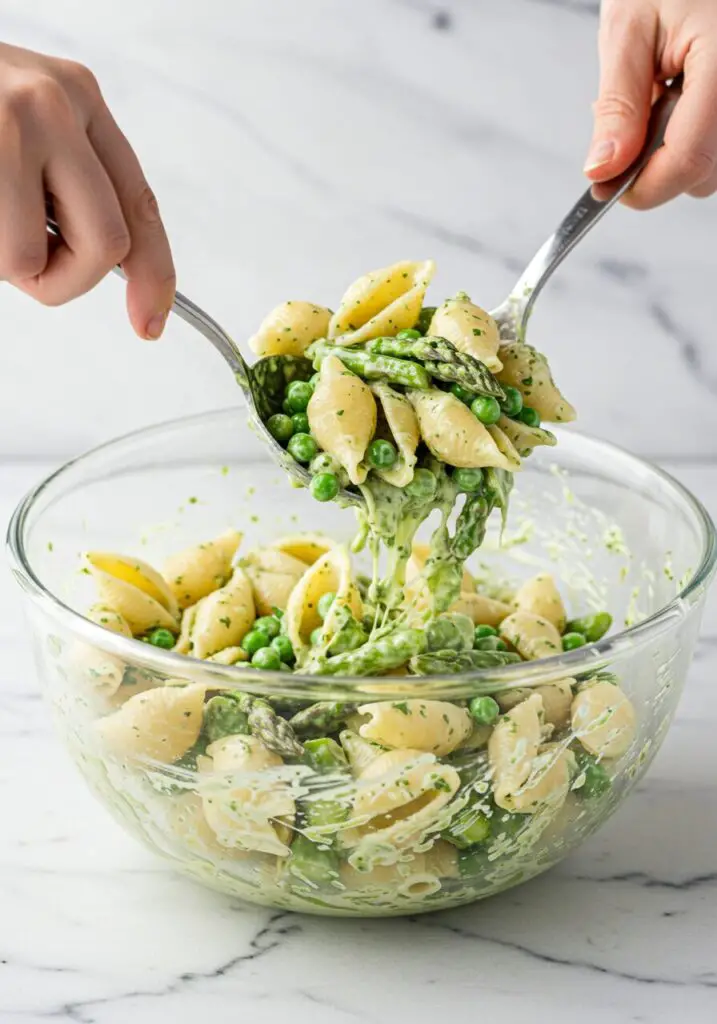
Hello, my friends! If you’re looking for a pasta salad that is bursting with the fresh, vibrant, and verdant flavors of spring, then you have come to the right place. Today, we are making a dish that is as beautiful as it is delicious: this incredible Green Goddess Pasta Salad. Imagine tender pasta shells, sweet spring peas, and crisp-tender asparagus, all tossed in the most luscious, creamy, and intensely green dressing imaginable. It’s a celebration of all things green and glorious.
The secret to this salad is the homemade Green Goddess dressing. We’re creating a silky, dairy-free sauce in a blender using fresh basil, spinach, garlic, and creamy cashews. It’s so packed with flavor, you’ll want to put it on everything! This isn’t just a side dish; it’s a vibrant, nourishing, and stunning meal that’s perfect for potlucks, picnics, or as a light and satisfying main course.

Why This Pasta Salad Will Be Your New Go-To
This isn’t just another pasta salad; it’s a fresh and exciting take on a classic. Here’s why it’s so special.
- An Explosion of Fresh Flavor: The homemade Green Goddess dressing is the star of the show. It’s packed with so much fresh basil, spinach, lemon, and garlic that every bite tastes alive and vibrant.
- The Creamiest Vegan Dressing: Raw cashews are the secret weapon here. When blended, they create an unbelievably creamy, rich texture without any dairy at all.
- Packed with Spring Veggies: This salad is a beautiful showcase for tender spring produce like asparagus and sweet peas.
- A Stunning, Vibrant Color: Let’s be honest, the gorgeous, all-natural green color of this dish is a true showstopper. It looks so impressive in a serving bowl!
- Perfect for Making Ahead: Like most pasta salads, the flavors here actually get better as they sit, making this an ideal, stress-free dish for entertaining.
Gather Your Fresh & Vibrant Ingredients
Let’s get our beautiful, green ingredients ready to create this masterpiece.
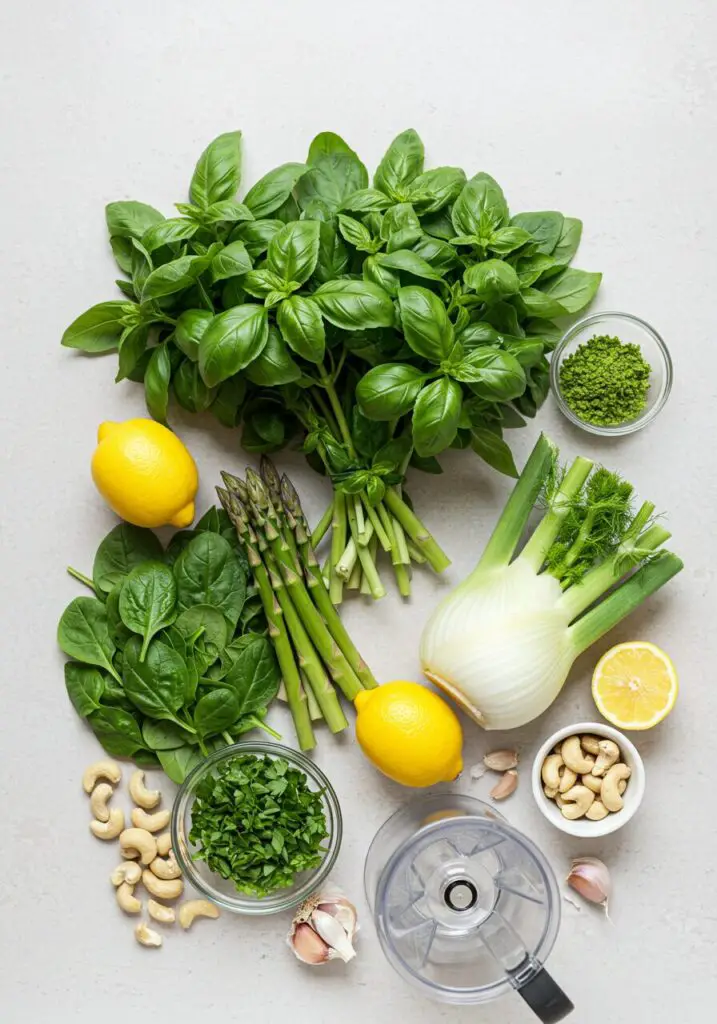
For the Green Goddess Dressing:
- 2 Lemons, for zest and juice
- ½ cup Olive Oil
- 1 ¼ cups Basil Leaves, tightly packed
- 1 cup Baby Spinach Leaves, tightly packed
- 2 cloves Garlic
- ¼ cup Raw Cashews: No need to soak them!
- ⅓ cup Nutritional Yeast or Grated Parmesan Cheese: Nutritional yeast keeps it vegan and adds a cheesy, nutty flavor.
- 1 teaspoon Salt & ½ teaspoon Freshly Ground Black Pepper
For the Pasta Salad:
- 1 pound Dry Medium Pasta Shells
- 1 tablespoon Salt, for the pasta water
- 1 ½ cups Frozen Peas
- 12 spears Thin Green Asparagus, trimmed and cut into ½-inch pieces
- 1 Fennel Bulb, cored and very thinly sliced: Adds a wonderful, subtle anise crunch.
- 6 ounces Drained, Jarred Pitted Green Olives
- 3 tablespoons Finely Chopped Chives
- 3 Scallions, thinly sliced
Crafting Your Salad: Step-by-Step Guide
Let’s build this beautiful, verdant salad together.
- Prep the Dressing & Boil Water: First, get a large pot of water boiling for your pasta. While it comes to a boil, let’s make the incredible dressing. Zest your two lemons and set the zest aside for later. Then, juice the lemons—you’ll need about 3 tablespoons. In a blender, combine the lemon juice, olive oil, basil, spinach, garlic, raw cashews, nutritional yeast (or Parmesan), salt, and pepper. Blend on high until the dressing is completely smooth, creamy, and a gorgeous, vibrant green.
- Cook the Pasta and Veggies (The Easy Way!): Once your pot of water is at a rolling boil, add 1 tablespoon of salt and then your pasta. Now for a great time-saving trick: about 2 minutes before the pasta is done cooking (check your package directions for the “al dente” cook time), add the frozen peas and the cut asparagus directly into the pot with the pasta. Let them all cook together for the final 2 minutes.
- Drain and Cool: Drain everything into a colander in the sink. Immediately rinse the pasta and veggies with cold tap water. This is crucial for stopping the cooking process so your vegetables stay crisp-tender and your pasta doesn’t get mushy. Let it all drain very well.
- Toss and Serve: In a very large bowl, add the cooled pasta, peas, and asparagus. Add the thinly sliced fennel, green olives, chives, scallions, and the lemon zest you saved earlier. Pour in that beautiful green goddess dressing and toss until every single piece is evenly coated. Give it a taste and season with more salt and pepper if you like. You can serve it immediately at room temperature, or chill it in the fridge for a bit before serving.
Wise Tips for the Best Pasta Salad
- The “Cook with the Pasta” Hack: Cooking the peas and asparagus in the same pot as the pasta for the final two minutes is a brilliant shortcut. It saves you from having to use and wash another pot!
- Don’t Forget to Salt Your Pasta Water: This is your only chance to season the pasta itself from the inside out. A generously salted pot of water makes a huge difference in the final flavor of the dish.
- Rinse Your Pasta! Just like with a shrimp pasta salad, this is a time when you absolutely should rinse your pasta. The cold water stops the cooking and washes away excess starch, which prevents the salad from becoming gummy.
- Thinly Sliced Fennel: For the best texture, use a mandoline or a very sharp knife to slice your fennel as thinly as possible. It will add a wonderful, delicate crunch and subtle flavor.
Vibrant Green Goddess Pasta Salad
Ingredients
Method
-
Zest the lemons and set zest aside. In a blender, combine the juice from the lemons (about 3 tbsp), olive oil, basil, spinach, garlic, cashews, nutritional yeast (or Parmesan), 1 tsp salt, and pepper. Blend until very smooth.
-
Bring a large pot of water with 1 tbsp salt to a boil. Add the pasta. About 2 minutes before the pasta is cooked al dente, add the frozen peas and asparagus to the pot. Cook for the remaining 2 minutes.
-
Drain everything into a colander and immediately rinse with cold tap water to stop the cooking. Drain thoroughly.
-
In a large bowl, add the cooled pasta, peas, and asparagus, plus the fennel, olives, chives, scallions, and reserved lemon zest. Pour in the dressing and toss until evenly coated. Season to taste with more salt and pepper and serve.
Frequently Asked Questions (FAQ) – Green Goddess Pasta Salad
- What is nutritional yeast? Do I have to use it?
Nutritional yeast is a deactivated yeast that is popular in vegan cooking. It has a savory, nutty, and cheesy flavor. You can find it in the health food aisle of most grocery stores. If you’re not vegan, you can substitute it with an equal amount of finely grated Parmesan cheese. - Can I use other pasta shapes?
Of course! Medium shells are great because they cup the dressing and the peas, but rotini, fusilli, or farfalle (bow ties) would all be fantastic choices. - Can I add a protein to this salad?
This salad would be incredible with some shredded rotisserie chicken, a can of rinsed and drained chickpeas, or even some grilled shrimp to make it a more substantial main course. - How long will this pasta salad keep in the fridge?
Leftovers are delicious! Store them in an airtight container in the refrigerator for up to 3 days. The flavors will continue to meld and it’s often even better the next day.
Conclusion
This Green Goddess Pasta Salad is a true celebration of fresh, vibrant, and healthy food. It’s a dish that is bursting with life, color, and so much incredible flavor. The creamy, herby dressing is a revelation, and it beautifully coats all the delicious pasta and spring vegetables. It’s the perfect, impressive side dish for any occasion. I hope you love it as much as I do!
5. The Ultimate 5-Minute Salmon Salad Recipe: Your Quick & Healthy Lunch Solution!
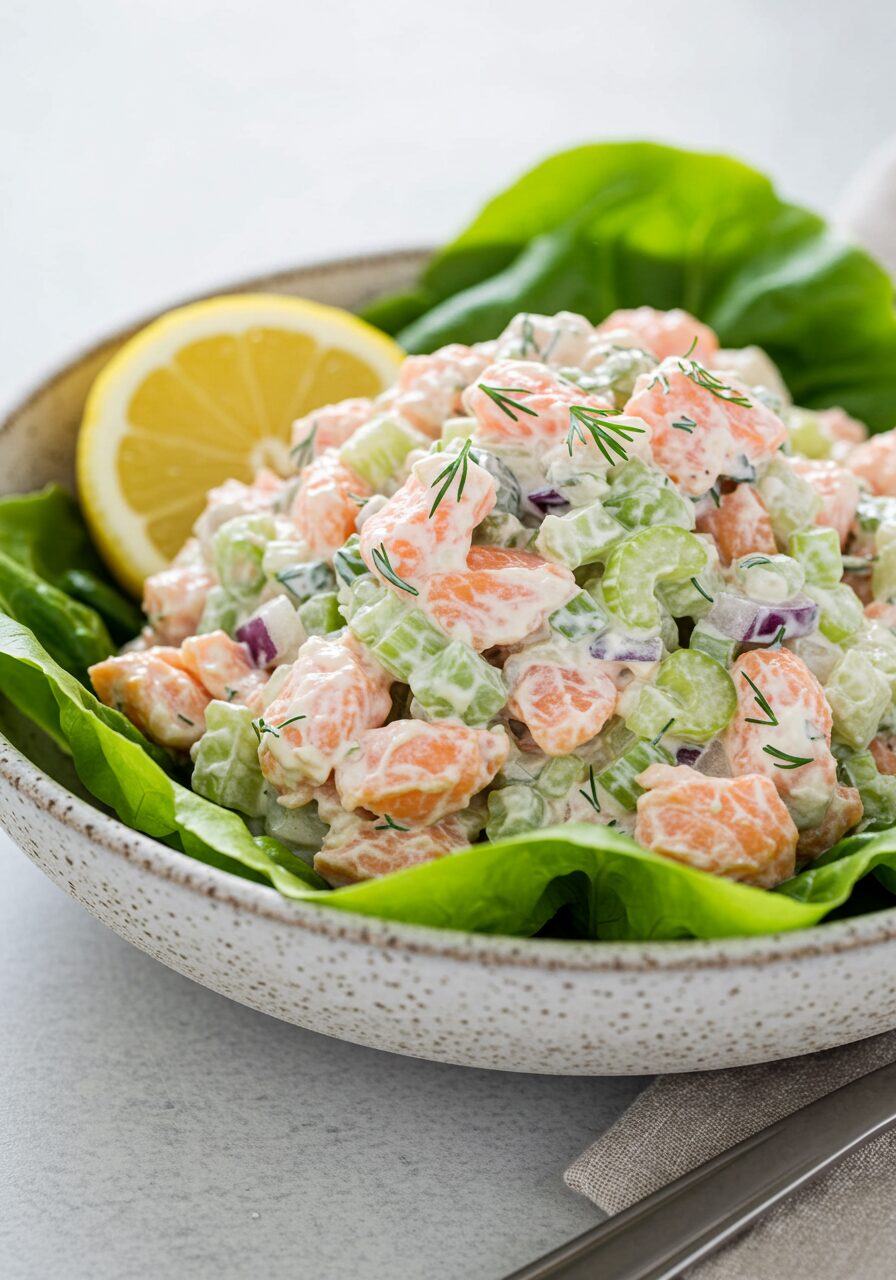
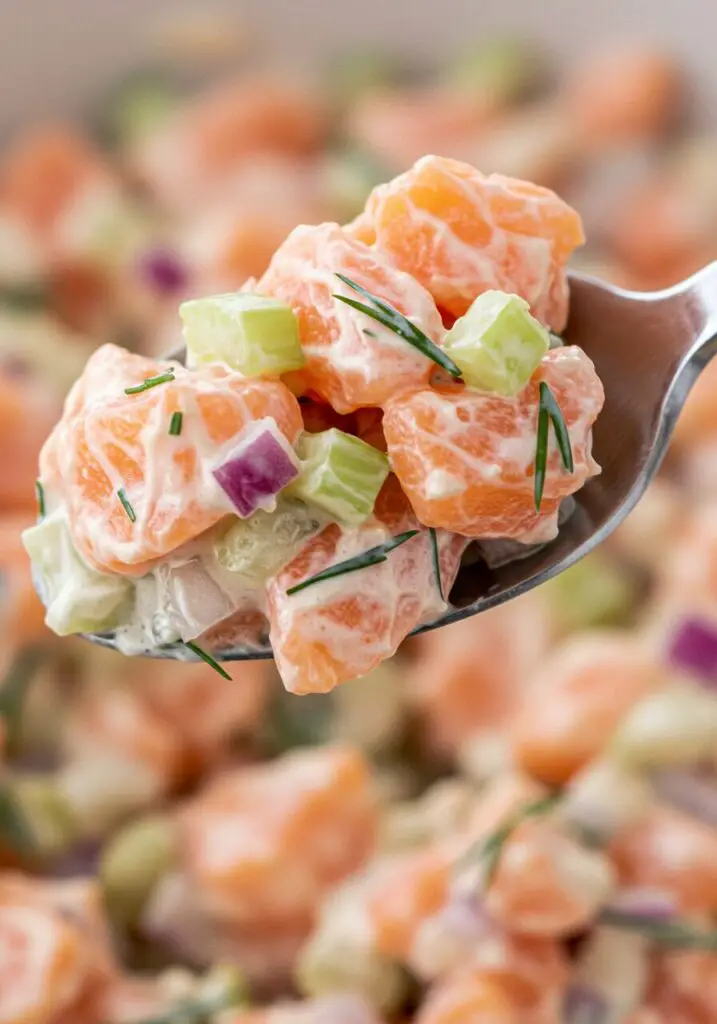
Hello, WiseRecipes readers and fellow fans of meals that are incredibly fast, ridiculously easy, and packed with nutrition! Are you looking for the perfect healthy lunch that comes together in a flash? Then you absolutely must try my Ultimate 5-Minute Salmon Salad recipe! This quick and delicious salad, made with canned or leftover cooked salmon, is packed with essential nutrients like protein and omega-3 fatty acids.
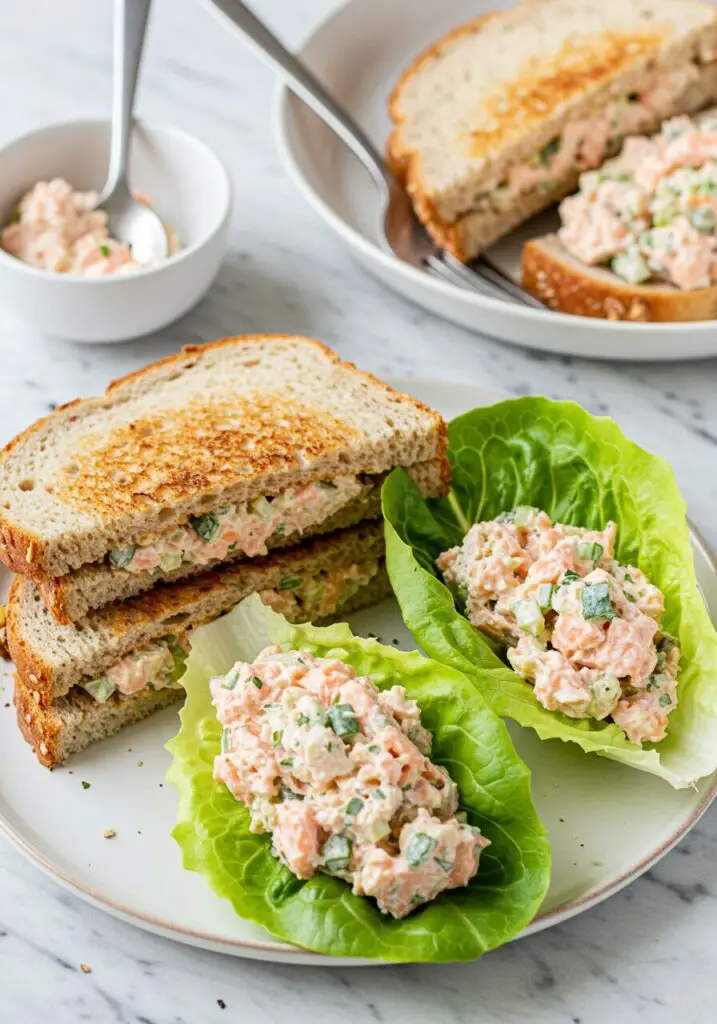
Imagine flaky salmon, gently tossed in a creamy dressing with crunchy celery, sharp red onion, and fresh dill. This easy 5 minute healthy salmon salad recipe is a game-changer for busy schedules. My family loves it for quick lunches, and it’s great for meal prep. It’s truly the best canned salmon salad recipe with mayonnaise and dill you’ll find, delivering fantastic flavor with minimal effort.
My journey to perfecting this Salmon Salad recipe was all about celebrating simplicity and creating a go-to that I could rely on anytime. We’ll explore how to make a quick and easy salmon salad for sandwiches, lettuce wraps, or just enjoying with a fork. This meal prep friendly protein packed salmon salad is as versatile as it is delicious.
So, if you’re ready for a low carb keto friendly salmon salad recipe with celery and onion that’s bursting with fresh flavor and ready in minutes, let’s get our bowls ready for this amazing Salmon Salad recipe!

Why This 5-Minute Salmon Salad is a Lunchtime Legend
If “5 minutes” isn’t enough, here’s why this Salmon Salad recipe will become your new favorite:
- Incredibly Quick & Easy: True to its name, this salad comes together in about 5 minutes, making it the ultimate fast and easy meal. This is the heart of our Salmon Salad recipe.
- Packed with Protein & Healthy Fats: Canned or leftover salmon is a fantastic source of protein and heart-healthy omega-3 fatty acids.
- Perfect for Meal Prep: Make a big batch at the beginning of the week for effortless, healthy lunches all week long.
- Delicious & Flavorful: The simple combination of salmon, creamy mayo, crunchy celery, zesty onion, and fresh dill is a classic for a reason.
- Versatile Serving Options: Fantastic in sandwiches, wraps, lettuce cups, on crackers, or as a salad topper.
- Dietary-Friendly: Naturally low-carb, gluten-free, and can be easily adapted to be dairy-free or Paleo.
- Uses Pantry Staples: Relies on convenient ingredients like canned salmon for a meal you can make anytime.
Gather Your Quick & Healthy Ingredients: What You’ll Need
Let’s get our simple yet powerful components ready for this delightful Salmon Salad recipe, based on the provided list.
Key Ingredients (Makes 4 servings):
- Canned Salmon (Drained): 2 cans (5-6 oz each). The recipe notes like for Wild Planet and Safe Catch brands. Leftover cooked, flaked salmon also works perfectly!
- Mayonnaise: ⅓ cup (or more to reach desired consistency). For an egg-free version, choose a vegan mayo or use plain Greek yogurt.
- Medium Stalk Celery: 1, finely chopped.
- Red Onion: 3 tablespoons, finely chopped.
- Fresh Dill (or 1 teaspoon dried dill): 1 tablespoon, chopped. Fresh is highly recommended for the best flavor.
- Fresh Lemon Juice (Optional): 1–3 teaspoons (add to taste for brightness).
- Black Pepper: Freshly ground, to taste.
- (Note on salt): The recipe uses canned salmon and mayo, which are already salty, so it suggests seasoning to taste.
Mixing Up Your 5-Minute Masterpiece: Step-by-Step Guide
Let’s create this incredibly easy and flavorful Salmon Salad recipe!
Step 1: Prepare Your Ingredients
- Drain Salmon: Open and thoroughly drain the 2 cans of salmon. Place the drained salmon in a medium or large bowl and use a fork to flake it into smaller pieces.
- Chop Veggies & Herbs: Finely chop the celery stalk and red onion. If using fresh dill, chop it as well.
Step 2: Combine, Mix, and Serve!
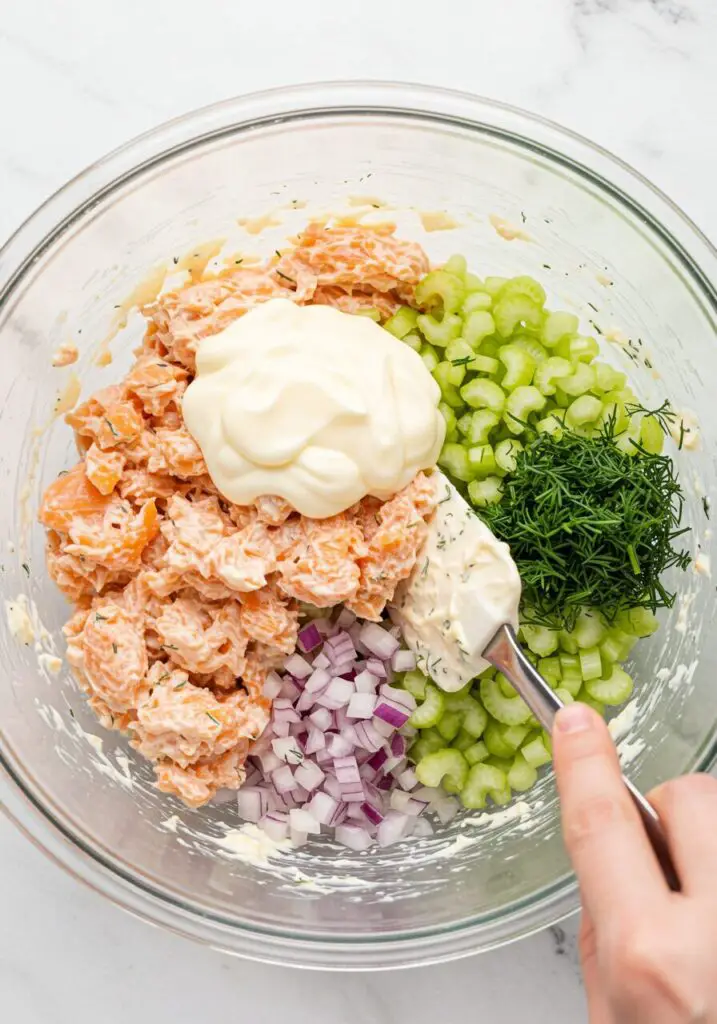
- Combine All Ingredients: In a medium or large bowl, combine the drained salmon, ⅓ cup mayonnaise, finely chopped celery, finely chopped red onion, chopped dill, and optional lemon juice and black pepper. This is how to make a quick and easy salmon salad for sandwiches and more!
- Stir Until Well Mixed: Stir everything together gently with a fork or spoon until well mixed.
- Adjust Consistency & Seasoning: Add additional mayo to reach desired consistency. If you like a creamier salmon salad, add another tablespoon or two. Taste, adjusting seasonings as necessary. Does it need a pinch of salt? More black pepper? Another squeeze of lemon juice? Perfect your Salmon Salad recipe now.
- Serve Immediately or Chill: You can serve the salmon salad right away, or for best flavor, cover and chill it in the refrigerator for at least 20-30 minutes to allow the flavors to meld.
Wise Tips for the Best 5-Minute Salmon Salad
Make your Salmon Salad recipe truly exceptional with these hints:
- Use Quality Canned Salmon: A good quality canned salmon (like Wild Planet or Safe Catch, as suggested) will have a better flavor and texture. Look for wild-caught options packed in water or olive oil.
- Drain Salmon Well: This is crucial for preventing a watery salad.
- Don’t Overmix: Gently fold the ingredients together to keep some of the flaky texture of the salmon intact.
- Fresh Herbs for the Win: Fresh dill has a much brighter, more vibrant flavor than dried. If you must use dried, use about one-third the amount. This makes for the best canned salmon salad recipe with mayonnaise and dill.
- Chill for Better Flavor: While it’s great right away, allowing the salad to chill for even 30 minutes lets all the flavors marry and deepen.
- Customize Your Crunch: Finely chopped celery adds a classic crunch. Feel free to add other crunchy veggies like bell peppers or radishes if you like.
- Acid is Key: The optional lemon juice really brightens up the rich salmon and creamy mayonnaise. Don’t skip it if you have it!
Delicious Variations & Serving Ideas
This classic Salmon Salad recipe is a perfect canvas!
- Add Capers or Pickles: For a briny kick, stir in a tablespoon of drained capers or finely chopped dill pickles/relish.
- Different Herbs: Fresh parsley, chives, or even tarragon would be delicious substitutes or additions to dill.
- Make it Creamier & Tangier: As suggested, substitute some or all of the mayonnaise with plain Greek yogurt for a lighter, tangier, and higher-protein salad.
- Spice it Up: Add a dash of your favorite hot sauce, a pinch of cayenne pepper, or some Old Bay seasoning.
- Add Hard-Boiled Eggs: Chopped hard-boiled eggs are a classic addition to creamy salads and would be fantastic here.
- Serving Suggestions (As mentioned):
- As a sandwich on your favorite bread or croissant.
- In a lettuce wrap using crisp butter lettuce or romaine leaves for a great low carb keto friendly salmon salad recipe with celery and onion.
- On a bed of greens for a more substantial salad.
- Enjoyed with cucumber slices, crackers, or chips for dipping.
Storing Your Quick & Easy Salmon Salad
This Salmon Salad recipe is perfect for meal prep!
- Storage: As the recipe notes, “Store leftovers in an airtight container in the fridge for up to 5 days.” (Note: For best quality and food safety, 3-4 days is often a safer recommendation for mayo-based salads).
- Note on Texture: The celery and onion will stay relatively crisp for the first couple of days. The salad is ready to eat straight from the fridge!
- Do Not Freeze: Mayonnaise-based salads should not be frozen, as they will separate and become watery upon thawing.
Easy 5-Minute Salmon Salad
Ingredients
Method
-
In a medium or large bowl, combine the drained and flaked salmon, ⅓ cup mayonnaise, finely chopped celery, finely chopped red onion, chopped dill, and optional lemon juice and black pepper.
-
Stir with a fork until well mixed. Add additional mayonnaise to reach your desired consistency. Taste and season with additional salt and pepper as necessary.
-
Serve immediately or refrigerate for up to 5 days in an airtight container. Serve as a sandwich, in a lettuce wrap, on greens, or with crackers.
Frequently Asked Questions (FAQ) – 5-Minute Salmon Salad Recipe
Your common questions about this quick and healthy lunch favorite:
- What kind of canned salmon is best? Skinless/boneless or with skin and bones?
Both work! Skinless and boneless is the most convenient option for a quick Salmon Salad recipe. However, canned salmon with skin and soft, edible bones is often wild-caught and provides extra calcium and omega-3s. The bones are usually so soft they can be easily mashed into the salad and are unnoticeable. It’s a matter of personal preference. - Can I use leftover cooked salmon instead of canned?
Yes, absolutely! Leftover baked, grilled, or poached salmon is perfect for this recipe. Just flake it with a fork and proceed with the recipe. You’ll need about 10-12 ounces of cooked salmon to equal two cans. - My salmon salad seems a bit dry. What can I do?
Simply add more mayonnaise, one tablespoon at a time, until it reaches your desired creaminess. You could also add a little extra lemon juice or a dollop of Greek yogurt. - Is this Salmon Salad recipe healthy?
Yes, it is very healthy! It’s packed with protein and omega-3 fatty acids from the salmon. Using a good quality mayonnaise made with avocado oil can enhance the healthy fats. Serving it in lettuce wraps or with veggie sticks makes it a fantastic low-carb meal. - What if I don’t like mayonnaise?
You can substitute the mayonnaise with an equal amount of plain Greek yogurt for a tangy, high-protein alternative. A ripe, mashed avocado can also work as a creamy binder, though the flavor will be different.
This 5-Minute Salmon Salad recipe is a true lifesaver for busy days, proving that a meal prep friendly protein packed salmon salad can be both incredibly fast and wonderfully delicious. It’s an easy 5 minute healthy salmon salad recipe that makes for the best canned salmon salad recipe with mayonnaise and dill. Learning how to make a quick and easy salmon salad for sandwiches or lettuce wraps will revolutionize your lunch routine!
I am so excited for you to try this recipe and experience its simple, fresh, and satisfying flavor! If you make this Salmon Salad, please come back and let me know your favorite way to enjoy it in the comments below! Did you add any fun mix-ins? Happy mixing!
6. Hawaiian Chicken Salad: Gluten-Free & Whole Health Flexi-Plan
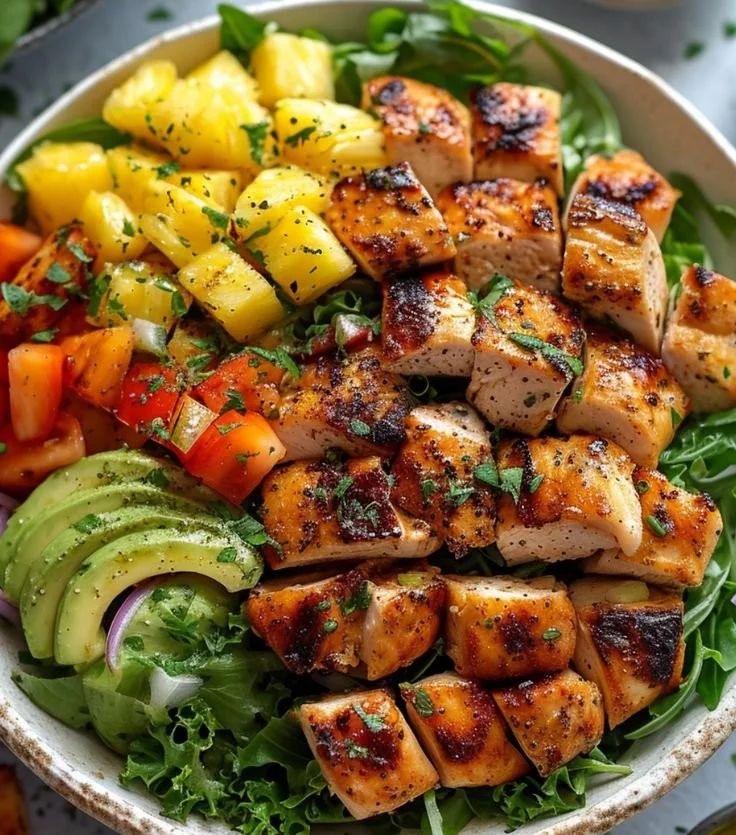
There’s something truly delightful about Hawaiian Chicken Salad; it’s not just a salad; it’s a vibrant celebration of flavors that transports you straight to a sunny beach with its bright colors and tropical tastes! This dish blends succulent chicken with fresh, juicy pineapple, creamy avocado, and a refreshing dressing that will wake up your taste buds. It’s not only gluten-free but also fits perfectly into a whole health flexi-plan, making it a wonderful choice whether you’re following a specific diet or just craving something healthy and delicious.
What Makes This Meal a Must-Try
- Tropical Fusion: The combination of chicken, pineapple, and avocado creates a dish that feels like a mini vacation on your plate.
- Quick and Easy: Despite its gourmet appearance, this salad comes together quickly, perfect for busy weeknights or impromptu gatherings.
- Nutrient-Packed: With lean protein, healthy fats, and plenty of veggies, you’re treating your body well without sacrificing flavor.
- Customizable: This salad is a blank canvas! You can switch up ingredients or dressing based on what’s fresh or in season, making it a versatile go-to.
- A Crowd-Pleaser: Whether you’re hosting a summer barbecue or just want a beautiful meal at home, this dish looks stunning and tastes even better.
Your Shopping List
Gather these wonderful ingredients to create your Hawaiian Chicken Salad, ensuring a burst of flavor in every bite:
- 1/3 cup light coconut milk: Adds a creamy, tropical twist that balances out the other flavors beautifully.
- 1/4 cup fresh pineapple juice: Sweet and tangy, this provides that quintessential island vibe.
- 1 tbsp gluten-free tamari sauce: A great substitute for traditional soy sauce, enhancing umami while keeping it gluten-free.
- Zest of 1 lime: The zest brightens up the flavors with its zesty aroma and vibrant kick.
- 2 garlic cloves: Fresh garlic lends both depth and an aromatic quality to the marinade.
- 1/4 tsp onion powder: A subtle sweetness to round out the savory notes.
- 1/4 tsp cumin: It provides warmth and earthiness.
- 1/4 tsp paprika: Adds a gentle smokiness and lovely color.
- 1/4 tsp ginger powder: Elevates the tropical feel with a hint of spiciness.
- 1/4 tsp salt: Essential for bringing out all the flavors.
- 1/2 tbsp olive oil: Used for cooking the chicken, it keeps it moist and adds richness.
- 1 large chicken breast: The star protein of the salad, ensuring it’s both filling and satisfying.
- 3/4 cup fresh pineapple pieces: Fresh fruit adds sweetness and juiciness.
- 6 cups chopped romaine lettuce: Crisp and refreshing, it’s the perfect base for our salad.
- 1/2 avocado: Creamy avocado provides healthy fats and a luxurious texture.
- 1/2 red onion: Adds a pop of color and a sharp bite that pairs well with the sweetness of the pineapple.
- 1/2 cup cherry tomatoes: Their sweetness and juiciness are delightful bursts in every bite.
- 1 1/2 cups cooked quinoa: A fabulous protein source that adds a delightful chewy texture.
- 1 1/2 tbsp lime juice: Bright, tangy, and refreshing, it compliments the other components beautifully.
- 2 1/2 tbsp olive oil: A key player in the dressing, contributing both flavor and smoothness.
- 2 tbsp finely chopped cilantro: A splash of herbal brightness that adds freshness.
- 1/2 tsp honey: Adds a touch of sweetness to balance out the lime and other flavors.
- 1/4 tsp salt: Adjusting seasoning for the dressing.
- Black pepper: Just a touch to elevate the flavors.
Crafting Your Delightful Dish
Let’s dive into the simple yet rewarding process of making the Hawaiian Chicken Salad, step by step. Enjoy the journey as much as the destination!
-
Marinate the Chicken: In a bowl, whisk together the coconut milk, pineapple juice, tamari sauce, lime zest, garlic, onion powder, cumin, paprika, ginger powder, and salt. Add the chicken breast, coat thoroughly, and cover it. Refrigerate for a minimum of 3 hours, preferably overnight for the best flavor infusion. Trust me, the longer, the better!
-
Prepare the Dressing: In a jar, combine the lime juice, olive oil, cilantro, honey, salt, and black pepper. Close the lid and give it a good shake until everything is well blended. Let it sit for at least 15 minutes to allow the flavors to meld.
-
Cook the Chicken: Heat 1/2 tablespoon of olive oil in a non-stick skillet over high heat. Add the marinated chicken to the pan, cooking for about 3 minutes on each side or until golden and cooked through. Remove from the skillet, cover loosely with foil, and let it rest for 5 minutes. Then slice it into thick pieces.
-
Sear Pineapple: In the same skillet, add the pineapple pieces and sear them until golden brown on all sides. This step caramelizes the natural sugars, enhancing their flavor.
-
Assemble the Salad: On a large platter, beautifully arrange the chopped romaine lettuce, avocado slices, red onion, cherry tomatoes, and cooked quinoa. Top with sliced chicken and the perfectly seared pineapple. Let your creativity shine!
-
Serve with Dressing: Drizzle your prepared dressing generously over the salad. Toss lightly if desired, and enjoy the vibrant colors and aromas of your creation!
Insider Tips for Ultimate Success
- Marination Time: Don’t skimp on marinating! Letting the chicken soak up all those lovely flavors not only enhances its taste but also guarantees juiciness.
- Fresh Ingredients: Use the freshest produce you can find. It makes a remarkable difference, especially with the pineapple and avocado.
- Customize Your Salad: Don’t be afraid to switch up the add-ins or proteins! Grilled shrimp or tofu make wonderful alternatives.
- Sear the Fruit: Sautéing the pineapple gives it a caramelized finish that intensifies its sweetness and adds another layer of complexity to the salad.
- Add Texture: Consider topping your salad with some crunchy nuts or seeds for an extra delightful crunch.
Creative Twists to Explore
Who says you can’t personalize this dish? Here are some fun variations to make it your own:
- Fruit Medley: Swap pineapple for mango or papaya for a different sweet twist, or mix in berries for a burst of sweetness.
- Different Proteins: Try shredded rotisserie chicken or even grilled tofu for a vegetarian option; both work beautifully.
- Add Crunch: Toss in some toasted almonds or walnuts for a delightful texture contrast.
- Spice it Up: Add jalapeños for a spicy kick that pairs beautifully with the sweetness of the pineapple.
- Herb-Rich: Experiment with fresh basil or mint in addition to or instead of cilantro for an exciting flavor twist.
Serving Your Tropical Creation
When it comes to enjoying your Hawaiian Chicken Salad, presentation is key! Utilizing a large platter showcases the vibrant colors of your ingredients, inviting your guests to dig in. Imagine a bed of lush green romaine, bright yellow and orange chunks of pineapple, juicy red cherry tomatoes, and creamy avocado nestled together—it’s simply mouthwatering. This salad is perfect for a sunny barbecue, where it can shine alongside grilled meats, or as a light, refreshing option for lunch. Garnish with additional lime wedges and a sprinkle of fresh herbs for extra flair.
How to Store Your Salad for Later
If you have any leftovers (though they are rare with a salad this delicious!), here’s how to keep them fresh:
- Refrigeration: Store any salad components separately in airtight containers. The chicken, dressing, and salad mixture should be kept apart to retain their textures.
- Best Within 2 Days: For the freshest taste, enjoy your salad within 2 days. The avocado can brown quickly, so consider adding it fresh just before serving.
- Reheating Chicken: When reheating the chicken, do so gently either in the microwave or on a skillet over low heat to maintain its moisture.
Answers to Common Queries
-
Can I prepare this salad in advance? Absolutely! You can marinate the chicken and prepare the dressing a day in advance, but it’s best to assemble the salad right before serving to keep everything fresh and crisp.
-
Is this recipe kid-friendly? Yes! The natural sweetness from the pineapple makes it appealing to kids. Plus, it’s a fun way to introduce them to new flavors.
-
Can I substitute quinoa? Certainly! If you’re in the mood for something different, use brown rice, bulgur, or couscous for a nice base instead.
-
What if I’m allergic to nuts? This recipe is naturally nut-free, but always check labels of any pre-packaged ingredients to be safe.
With its bright colors, refreshing flavors, and satisfying textures, Hawaiian Chicken Salad isn’t just a meal; it’s a cheerful addition to any table. I can almost hear the ocean waves and feel the sunshine when I dig into this burst of flavor! So, gather your ingredients, and let’s create this tropical delight that’s not only nourishing but also incredibly delicious! Enjoy every bite of your culinary adventure!
Hawaiian Chicken Salad
Ingredients
Method
-
In a bowl, whisk together coconut milk, pineapple juice, tamari sauce, lime zest, garlic, onion powder, cumin, paprika, ginger powder, and salt. Add the chicken breast, coat thoroughly, and refrigerate for at least 3 hours or overnight.
-
Combine lime juice, olive oil, cilantro, honey, salt, and black pepper in a jar. Shake until blended and let sit for at least 15 minutes.
-
Heat 1/2 tablespoon of olive oil in a non-stick skillet over high heat. Add the marinated chicken and cook for about 3 minutes on each side until golden and cooked through. Rest for 5 minutes and slice.
-
In the same skillet, add pineapple pieces and sear until golden brown on all sides.
-
On a large platter, arrange chopped romaine lettuce, avocado slices, red onion, cherry tomatoes, and cooked quinoa. Top with sliced chicken and seared pineapple.
-
Drizzle prepared dressing over the salad. Toss lightly if desired, and enjoy.
Notes
7. High Protein Cottage Cheese Chicken Salad
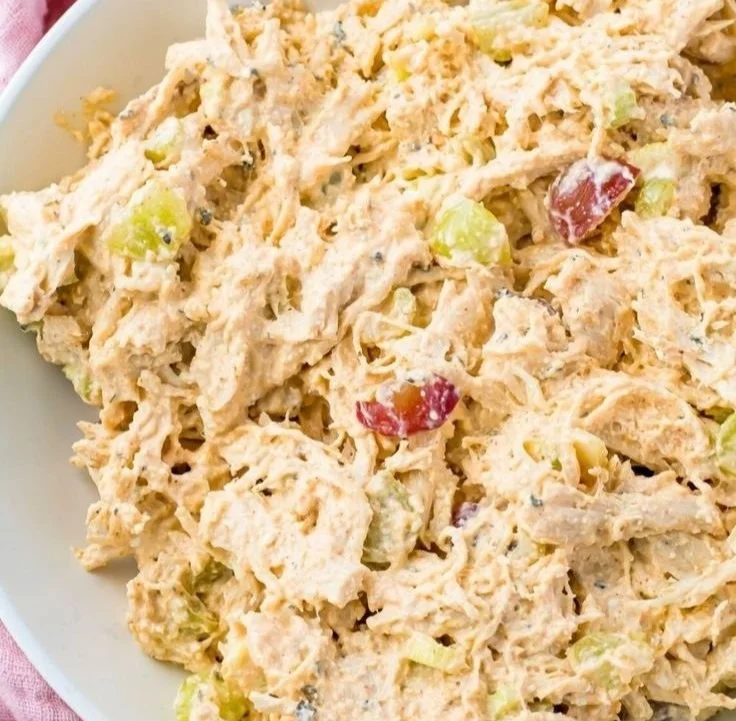
There’s something especially satisfying about a refreshing, protein-packed salad that’s easy to whip up yet incredibly fulfilling. Imagine taking a spoonful of creamy cottage cheese mingling with tender chunks of chicken, sweet grapes, and the sharp crunch of celery and red onion. Each bite bursts with flavor, making this High Protein Cottage Cheese Chicken Salad the perfect dish for both a light dinner and a hearty lunch. As summer beckons, this salad becomes even more appealing, with its delightful mix of textures and brightness—a perfect partner for sunny picnics or lazy afternoons.
This Recipe is a Winner
When I first stumbled across the idea of using cottage cheese in a chicken salad, I was skeptical but curious. What I found was a dish that not only tantalizes the taste buds but also packs a nutritional punch. Here’s why this cottage cheese chicken salad deserves a spot on your dining table:
-
Packed with Protein: The cottage cheese and chicken combo delivers a significant protein boost, making this salad a great option for those looking to stay full and energized throughout the day.
-
Diverse Textures and Flavors: With the creamy cottage cheese, tender chicken, crisp celery, juicy grapes, and a hint of pungent onion, this salad presents a symphony of flavors and textures that keeps your palate excited with every bite.
-
Quick and Easy to Prepare: If you’re crunched for time or just don’t want to spend the whole day in the kitchen, this salad comes together in mere minutes, making it perfect for busy weekdays.
-
Versatile Serving Options: Whether you enjoy it piled on fresh greens, in a wrap, or nestled between two slices of whole-grain bread, this salad adapts beautifully to whichever way you like to enjoy it.
-
A Perfect Make-Ahead Meal: Planning for lunches in advance? This salad stores well in the fridge, so you can prepare it ahead of time and have nutritious meals ready to go for days.
Gathering Your Ingredients
Ready to dive into making this delightful salad? Here’s what you’ll need to gather:
-
1 cup cottage cheese: This creamy base provides a wonderful, velvety texture and a hint of tanginess.
-
1 cup cooked chicken, shredded: Opt for rotisserie chicken for an easy time-saver, or use leftover grilled chicken to add great flavor.
-
1/2 cup grapes, halved: Their natural sweetness and juiciness create a refreshing contrast to the other savory ingredients.
-
1/4 cup chopped celery: This ingredient adds that delightful crunch that balances the creaminess of the cottage cheese.
-
1/4 cup chopped red onion: A little goes a long way! This brings a lovely sharpness that elevates all the flavors in the salad.
-
1 tablespoon mustard: This ingredient introduces a punchy flavor—feel free to use dijon for a bit more heat or yellow mustard for mildness.
-
Salt and pepper to taste: Always essential for enhancing flavors—don’t skip this step!
-
Greens for serving (optional): Fresh romaine or spinach can serve as a lovely bed for your chicken salad.
-
Wraps or bread for sandwich (optional): Perfect if you want to create a heartier meal!
Crafting Your Perfect High Protein Cottage Cheese Chicken Salad
Now that everything is laid out, let’s put it all together! Follow these simple steps, and you’ll have a delicious salad ready in no time:
-
In a large bowl, combine the cottage cheese, shredded chicken, grapes, chopped celery, chopped red onion, and mustard.
-
Mix well until all ingredients are evenly coated with the creamy cottage cheese.
-
Season with salt and pepper to taste, giving it a good stir to blend the flavors beautifully.
-
Serve over a refreshing bed of greens, tuck it into a wrap, or enjoy it between slices of hearty bread.
And just like that, you have a delightful salad that’s bursting with flavor!
Pro Tips for Perfection
To ensure your High Protein Cottage Cheese Chicken Salad turns out just right, keep these handy tips in mind:
-
Choose the Right Cottage Cheese: For creaminess, go for full-fat cottage cheese. If you prefer a lighter option, low-fat varieties work too, but they may alter the texture slightly.
-
Herbs Make It Shine: Fresh herbs like dill, parsley, or cilantro can elevate your salad even further. Just chop them finely and mix them in!
-
Don’t Overmix: By gently folding the ingredients together, you’ll preserve the textures and prevent the grapes from turning mushy.
-
Taste as You Go: Adjust the seasoning according to your preference! Adding a bit of lemon juice can also brighten the salad if you enjoy a zesty kick.
-
Chill Before Serving: For optimal flavor, let the salad chill in the refrigerator for about 30 minutes. This allows the flavors to meld together beautifully.
Creative Twists to Try
While this recipe sings with its original ingredients, it’s also wonderfully adaptable! Keep things exciting with these variations:
-
Swap the Protein: Try Greek yogurt instead of cottage cheese for a tangy flavor or use canned tuna for a completely different take.
-
Fresh Fruits: Go seasonal! Swap grapes with diced apples, pears, or even pineapple for a tropical twist.
-
Nuts and Seeds: Add a handful of nuts like almonds or walnuts for an extra crunch and healthy fats.
-
Spicy Kick: A pinch of cayenne pepper or before serving can add a nice heat to the salad!
-
Different Mustards: Experiment with a honey mustard or a spicy brown mustard for unique flavor layers that suit your taste.
How to Enjoy High Protein Cottage Cheese Chicken Salad
Presentation is key when serving this delightful salad. Here are a few of my favorite ideas to enjoy it fully:
-
Luscious Green Bed: Serve it over a bed of crisp greens, complemented by slices of avocado or sprinkled with sunflower seeds, creating a vibrant, colorful plate.
-
Sandwich Surprise: Slather it generously onto hearty bread with layers of sliced tomatoes and leafy lettuce for a satisfying sandwich that’s sure to impress.
-
Wrap It Up: Roll this salad in a whole wheat wrap, adding slices of cucumber for an extra crunch. Perfect for on-the-go lunches!
-
Side Dish Star: This salad works beautifully alongside grilled meats or fish, adding a refreshing and protein-packed side to your meals.
Keep It Fresh
Leftovers? Here’s how to store your High Protein Cottage Cheese Chicken Salad properly!
-
Refrigeration: Store your salad in an airtight container in the refrigerator, where it will stay fresh for up to 3 to 5 days.
-
Freezing Not Recommended: Due to the creaminess of the cottage cheese, freezing isn’t ideal, as it can change the texture once thawed.
-
Reheating: If you must reheat, do so gently, but I find it is best enjoyed chilled or at room temperature, allowing the flavors to remain bright.
Your Questions Answered
Curious about this dish? Here are some common questions:
-
Can I use Greek yogurt instead of cottage cheese? Absolutely! It will change the flavor slightly but will still provide that wonderful creaminess.
-
Is this salad good for meal prep? Yes, it holds up well and is perfect for meal prep, as the flavors only get better after a day in the fridge.
-
What are some good sides to pair with this salad? Consider serving it with whole-grain crackers, a fruit salad, or a light soup for a complete meal.
-
Can I add more vegetables? You bet! Adding diced bell peppers, cucumbers, or even shredded carrots can enhance the color and nutrition.
This High Protein Cottage Cheese Chicken Salad is not just a dish; it’s a celebration of flavor, texture, and convenience! It showcases how nourishing ingredients can come together to create something both delightful and easy to prepare. I invite you to give this recipe a try and taste the joy that comes from making a meal that delights both body and soul. Happy cooking!
High Protein Cottage Cheese Chicken Salad
Ingredients
Method
-
In a large bowl, combine the cottage cheese, shredded chicken, grapes, chopped celery, chopped red onion, and mustard.
-
Mix well until all ingredients are evenly coated with the creamy cottage cheese.
-
Season with salt and pepper to taste, stirring gently to blend the flavors.
-
Serve over a bed of greens, tuck into a wrap, or enjoy between slices of hearty bread.
Notes
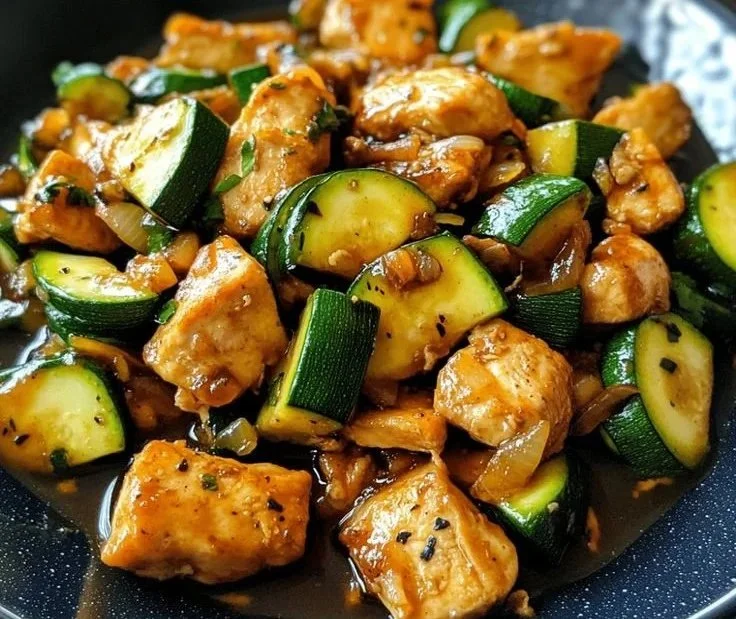
8. Crispy Healthy Air Fryer Cajun Chicken Cubes
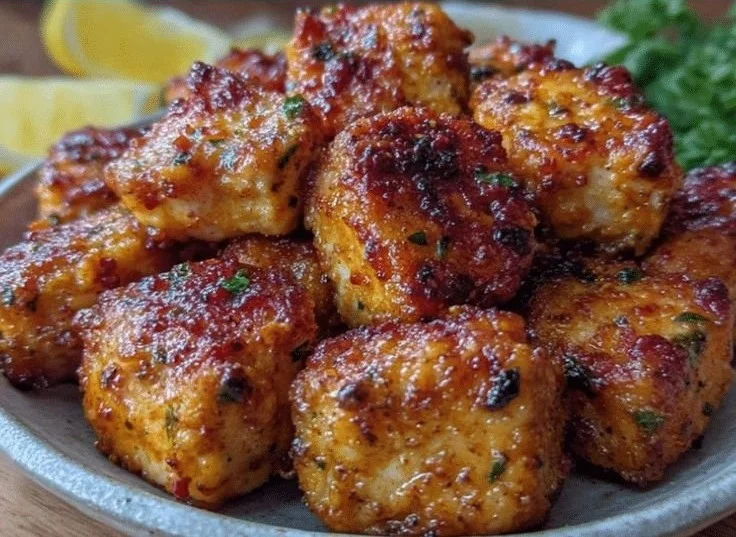
There’s something uniquely satisfying about the crunch of perfectly cooked chicken, and when you pair that with the zesty, aromatic kick of Cajun spices, you have an unforgettable dish on your hands. Crispy Healthy Air Fryer Cajun Chicken Cubes strike the perfect balance between indulgence and health, making them a fantastic addition to any meal—whether you’re serving them as an appetizer, tossing them into a salad, or enjoying them solo for dinner!
Why Crispy Healthy Air Fryer Cajun Chicken Cubes Deserves a Spot in Your Kitchen
- Health-Conscious Cooking: This recipe utilizes an air fryer, cutting down on oil and fat while still delivering that satisfying crunch we all love.
- Flavor Explosion: With a medley of Cajun spices that tantalize your taste buds, each bite is a journey through warm, aromatic flavors.
- Quick and Easy: Ready in less than 20 minutes, these chicken cubes are perfect for weeknight dinners or last-minute gatherings.
- Versatile: Serve them alone or toss them in salads or wraps; these chicken cubes can adapt to any meal occasion.
- Kid-Friendly Option: The crispy texture and fun flavors make these chicken cubes a hit with picky eaters, making dinner time easier for everyone.
Gathering Your Ingredients
Let’s gather everything we need for this delicious dish! Each ingredient plays a crucial role, bringing flavor and texture to our Cajun chicken cubes.
- 1 pound boneless skinless chicken breast: Tender and juicy, cut into 1-inch cubes for that perfect bite-sized piece.
- 2 tablespoons Cajun seasoning: A robust blend that usually includes paprika, garlic, onion, cayenne, and thyme—this spice mix is what gives our chicken that unforgettable kick.
- 1 tablespoon extra virgin olive oil: Not only does it add richness, but olive oil helps in getting that crispiness; a must-have for any air-fried dish!
- 1 teaspoon garlic powder: For that lovely, garlicky aroma and depth of flavor that pairs beautifully with Cajun spices.
- ½ teaspoon salt: Just a pinch to elevate all the delicious flavors.
Let’s Get Cooking
Now that we have everything ready, let’s dive into the steps to create this crispy magic. Trust me; you’re going to love how rewarding this is!
-
Rinse and prepare the chicken. This step not only ensures cleanliness, but patting dry the chicken helps with crisping later. Cut your 1 pound of boneless skinless chicken breast into evenly sized 1-inch cubes, perfect for even cooking.
-
Season it up! In a medium mixing bowl, combine 2 tablespoons Cajun seasoning, 1 teaspoon garlic powder, and ½ teaspoon salt. Stir well so all spices mingle, creating that aromatic blend we’re excited about.
-
Coat the chicken. Drizzle 1 tablespoon of olive oil over the chicken cubes and toss them gently to coat. Then, sprinkle the seasoning mix over and toss again until every delicious piece is covered in that spicy goodness.
-
Preheat your air fryer. Set it to 400°F (200°C) for about 3 minutes. This little step ensures your chicken starts cooking quickly and crisply.
-
Air fry those cubes! Place the seasoned chicken cubes in a single layer inside the air fryer basket. Avoid overcrowding to ensure that glorious crispiness.
-
Cook with finesse. Air fry them at 400°F (200°C) for about 10 minutes. Halfway through—around 5 minutes—give the basket a shake or flip them with tongs for even cooking.
-
Check for doneness. Using a meat thermometer, ensure the internal temperature reaches 165°F (74°C). If they need a little extra time, don’t hesitate to cook for another 2-3 minutes until the chicken is fully cooked and has that shiny, crispy exterior.
-
Rest and serve. Allow the chicken to rest for 3-5 minutes before serving. Resting helps keep the juices locked in, ensuring every bite is as tender as it is crispy!
Helpful Hints
- Quality Chicken: For the best texture, go for chicken breast that’s as fresh as possible; it really makes a difference.
- Avoid Overcrowding: This one is key in air frying—give the chicken room to breathe, and you’ll get that golden crisp all over.
- Experiment with Spices: If you love a bit of heat, consider adding extra cayenne. Likewise, if you like it milder, reduce the seasoning or use a mild Cajun blend.
- Rotate your basket: Different air fryers can vary on temperature accuracy, so if your air fryer allows, rotate the basket halfway for even cooking!
Mix It Up
Feeling adventurous? Here are a few variations to play with the flavors of your Cajun chicken:
- Spice It Up: Add a squeeze of lemon or lime juice for a tangy kick after cooking or toss the cubes in a sauce like buffalo for an extra layer of flavor.
- Herb Infusions: Try adding fresh herbs like chopped parsley or cilantro for freshness to the mix before cooking.
- Vegetable Medley: Toss in some cubed bell peppers or zucchini in the basket with the chicken to create a one-pan wonder.
- Different Protein: Substitute chicken with shrimp or tofu to cater to different dietary preferences while maintaining that crispy goodness.
Perfect Pairings
These Crispy Healthy Air Fryer Cajun Chicken Cubes shine brightly on their own, but they truly come alive when paired with other dishes. Consider serving them over a bed of fragrant jasmine rice or mixed greens tossed in a light vinaigrette. You could also sandwich these cubes in a warm and flaky pita, topped with cool tzatziki or ranch dressing for an added burst of flavor.
Keeping Your Leftovers Fresh
Let’s say you’ve got some leftovers (if that’s possible!). Here’s how to keep them fresh:
- Refrigeration: Store any leftover chicken in an airtight container in the refrigerator for up to 3 days.
- Freezing: For longer storage, freeze them in a single layer on a baking sheet, then transfer to a freezer-safe bag. They’ll keep for up to 3 months.
- Reheating: To get that crispy texture back when reheating, pop the chicken cubes back into the air fryer at 350°F (175°C) for about 5-7 minutes. You’ll hardly be able to tell they were leftover!
Your Questions Answered
-
Can I use skin-on chicken for this recipe? While skin-on chicken can be used, it may not yield the same crispy effect in an air fryer as skinless. Stick with skinless for a healthier finish!
-
How can I tell if my chicken is fully cooked? Use a meat thermometer to check that the internal temperature reaches 165°F (74°C). This ensures both safety and moisture retention.
-
Can I make this gluten-free? Absolutely! All the ingredients are naturally gluten-free, just make sure your Cajun seasoning is gluten-free too.
-
What’s the best way to serve these for a gathering? You can serve them on a platter with toothpicks for easy dipping or make mini sliders with Hawaiian rolls and your choice of sauce for an extra festive flair.
These Crispy Healthy Air Fryer Cajun Chicken Cubes are a perfect blend of flavor and texture, making them a sensational addition to your kitchen repertoire. Not only are they simple to make, but they also promise to impress family and friends alike! I encourage you to try this recipe—trust me, you won’t be disappointed!
Crispy Healthy Air Fryer Cajun Chicken Cubes
Ingredients
Method
-
Rinse and prepare the chicken. Pat dry and cut into 1-inch cubes.
-
In a medium mixing bowl, combine Cajun seasoning, garlic powder, and salt. Stir to mix.
-
Drizzle olive oil over the chicken cubes, toss to coat, then sprinkle with the seasoning mix and toss again.
-
Preheat your air fryer to 400°F (200°C) for about 3 minutes.
-
Place the seasoned chicken cubes in a single layer inside the air fryer basket.
-
Air fry at 400°F (200°C) for about 10 minutes, shaking the basket or flipping the chicken halfway through.
-
Check for doneness with a meat thermometer; the internal temperature should reach 165°F (74°C). Cook for an additional 2-3 minutes if necessary.
-
Allow the chicken to rest for 3-5 minutes before serving.
Notes
9. Orzo Salad
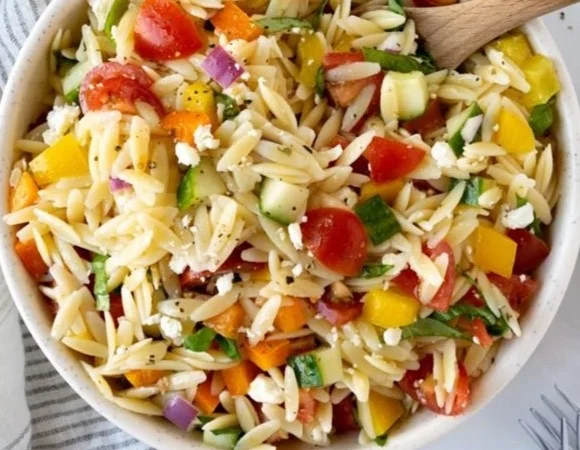
When I think about the perfect dish for warm days filled with sunshine and laughter, Orzo Salad always comes to mind. This delightful, vibrant medley of flavors combines the hearty texture of orzo pasta with the fresh crunch of vegetables and a zesty dressing that makes every bite feel like a celebration. Whether you’re hosting a summer picnic, bringing a dish to a potluck, or simply enjoying a cozy meal at home, this salad is sure to be a hit. Trust me; your taste buds will thank you!
You’re Going to Love This
- Refreshing and Light: Orzo Salad is light yet filling, making it a fantastic option for warm weather meals. The combination of fresh ingredients and a bright vinaigrette is a fantastic way to enjoy vegetables without feeling heavy.
- Versatile: One of the best parts about Orzo Salad is how easily it adapts to suit any occasion. Whether it’s a casual lunch or a festive dinner, it fits right in.
- Quick and Easy: With a preparation time of under 30 minutes, this dish is a lifesaver on busy days. You can whip it up in no time at all!
- Make Ahead Friendly: This salad tastes even better after a little while in the refrigerator, allowing the flavors to meld. It’s a perfect make-ahead meal prepping dish.
- Colorful Presentation: With its array of colors and textures, this salad is as beautiful to look at as it is delicious to eat. It adds a splash of brightness to any table setting.
Gathering Your Ingredients
Let’s get our kitchen stocked up with everything we need to create this fantastic Orzo Salad. Here’s what you’ll need:
- 1 cup orzo pasta: This small, rice-shaped pasta provides the perfect base, soaking up flavors and adding a nice chewy texture.
- 1 cup cherry tomatoes, halved: Sweet and juicy, these tomatoes add a burst of freshness and color.
- 1 cucumber, diced: The crisp texture of cucumber complements the other ingredients and adds a refreshing crunch.
- 1 bell pepper, chopped: Use any color you love! The pepper brings sweetness and a lovely crunch to the mix.
- 1/4 red onion, finely chopped: For a bit of zing, red onion is the perfect choice, adding just the right amount of sharpness.
- 1/4 cup feta cheese, crumbled: Creamy and savory, feta cheese elevates this salad with its rich flavor.
- 1/4 cup fresh parsley, chopped: Fresh herbs brighten up the dish and contribute lovely aromatic notes.
- 3 tablespoons olive oil: A good quality olive oil creates a luscious dressing that ties everything together beautifully.
- 2 tablespoons lemon juice: The acidity of lemon juice adds brightness and a lovely tang, enhancing the overall flavor of the salad.
- Salt and pepper to taste: Essential seasonings that will help to bring all the flavors together.
Let’s Get Cooking
Now that we’ve gathered our ingredients, let’s dive into the steps to make this stunning Orzo Salad. It’s simple and rewarding, I promise you’ll feel like a kitchen pro in no time!
- Cook the orzo pasta according to package instructions, then drain and rinse under cold water. Rinsing helps stop the cooking process and prevents the pasta from becoming mushy.
- In a large bowl, combine the cooked orzo, cherry tomatoes, cucumber, bell pepper, red onion, feta cheese, and parsley. Look at those colors! It’s a feast for the eyes already.
- In a small bowl, whisk together the olive oil, lemon juice, salt, and pepper. This dressing is where the magic happens—it’s aromatic and fresh!
- Pour the dressing over the salad and toss to combine. Ensure that every ingredient gets a good coating of that lovely dressing.
- Chill in the refrigerator for at least 30 minutes before serving. This time allows the flavors to mingle and develop, making the salad even more delicious!
Pro Tips for Perfection
- Cook the Orzo Just Right: Be careful not to overcook the orzo. Aim for al dente, as it will soak up the dressing without being mushy.
- Brighten with Citrus: A splash of lime juice or orange juice in addition to lemon juice can add a unique twist to the flavor profile.
- Add Protein: For a heartier dish, consider tossing in some grilled chicken, shrimp, or even chickpeas. It transforms the salad into a more substantial meal.
- Season Generously: Don’t be shy with the salt and pepper. Adjust to your liking, and don’t hesitate to taste as you go!
- Serve Fresh: While this salad is great for make-ahead meals, try to consume it within 3-4 days for optimal freshness and flavor.
Creative Twists to Consider
Feeling adventurous in the kitchen? Here are some delightful variations to consider when making your Orzo Salad:
- Mediterranean Vibes: Add Kalamata olives, sun-dried tomatoes, and a sprinkle of oregano for a bold Mediterranean twist.
- Spicy Kick: Toss in a diced jalapeño or some crushed red pepper flakes for heat if you enjoy a little spice!
- Seasonal Fruits: Adding fruits like diced mango or strawberries will infuse a sweet surprise into the salad.
- Roasted Vegetables: Consider roasting bell peppers, zucchini, or asparagus for a deeper, caramelized flavor profile.
- Nutty Crunch: Add a handful of toasted pine nuts or walnuts for a crunchy element and added richness.
Perfect Pairings
Now that your Orzo Salad is ready to be enjoyed, let’s talk serving suggestions! This vibrant dish is perfect for:
- Picnics or Barbecues: Serve this salad alongside grilled meats or as a bright addition to a buffet-style spread.
- Lunch Meal Prep: Portion it out in jars and pair it with a slice of crusty bread for a satisfying lunch that you can grab on the go.
- Elegant Dinners: Add a touch of elegance by presenting it on a large platter, garnished with additional herbs and whole cherry tomatoes.
- Brunch Gatherings: It’s a fantastic option for brunch, pairing beautifully with egg dishes or quiches.
Keep It Fresh
Leftovers? No worries! Here are some storage tips to help keep your Orzo Salad fresh and tasty:
- Refrigerate Promptly: Store leftovers in an airtight container in the refrigerator. It’s best eaten within 3-4 days.
- Freeze with Caution: While the pasta can be frozen, the fresh vegetables won’t hold up well. If you want, consider freezing just the orzo with the dressing and freshening up the vegetables when you thaw and serve.
- Refreshing Leftovers: If the salad feels a bit dry after cooling, a dash of olive oil or a squeeze of fresh lemon juice can bring it back to life!
Your Questions Answered
- Can I use other types of pasta? Absolutely! While orzo is traditional, feel free to substitute with any pasta shape you love — just be sure to adjust the cooking time accordingly.
- Can I make it vegan? Yes! Simply leave out the feta cheese or replace it with a plant-based alternative. You might also want to add nutritional yeast for a cheesy flavor.
- What can I serve this with? Orzo Salad pairs wonderfully with grilled chicken, fish, or a hearty vegetable dish. It’s also a perfect stand-alone option for a light lunch.
- How can I make it gluten-free? Swap the orzo for a gluten-free pasta option; there are many great varieties available now that mimic traditional pasta’s texture quite well.
This Orzo Salad truly encapsulates what summer cooking is all about—fresh ingredients, vibrant flavors, and sharing delicious memories with loved ones. I invite you to try this recipe and make it your own. Customize it with ingredients you love, and enjoy every bite! Whether it’s a family gathering or a simple weeknight dinner, this dish is bound to bring smiles and satisfaction to your table. Happy cooking!
Orzo Salad
Ingredients
Method
-
Cook the orzo pasta according to package instructions, then drain and rinse under cold water.
-
In a large bowl, combine the cooked orzo, cherry tomatoes, cucumber, bell pepper, red onion, feta cheese, and parsley.
-
In a small bowl, whisk together the olive oil, lemon juice, salt, and pepper.
-
Pour the dressing over the salad and toss to combine.
-
Chill in the refrigerator for at least 30 minutes before serving.
Notes
10. Avocado Mango Salad with Zesty Lime Dressing
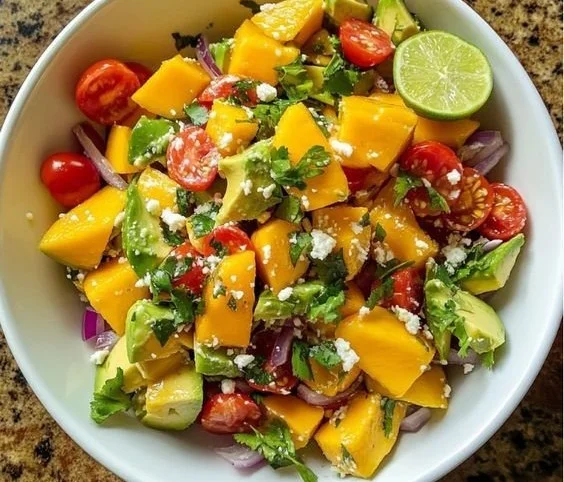
Just imagine a warm, sun-soaked afternoon, the gentle breeze whispering through the trees, and a bowl of vibrant Avocado Mango Salad with Zesty Lime Dressing waiting for you at the table. This delightful dish brings together the creamy richness of ripe avocados and the sweet, tropical essence of juicy mangoes, perfectly complemented by a zesty lime dressing that dances on your palate. It’s refreshing, colorful, and oh-so-easy to prepare, making it the ideal addition to any gathering or a simple weeknight dinner.
Why Avocado Mango Salad with Zesty Lime Dressing is Simply Irresistible
- Bursting with Freshness: This salad sings with the flavors of summer, combining sweet and savory elements that make it utterly refreshing.
- Vibrant Colors: The bright hues of the diced mangoes, luscious avocados, and cherry tomatoes create a visually stunning dish that’s almost too beautiful to eat.
- Nutrient-Packed: Loaded with vitamins, healthy fats, and antioxidants, this salad not only tastes good but is good for you too!
- Versatile Delight: Perfect as a side dish or a light meal, it accompanies everything from barbecued meats to grilled fish, or can stand alone for a healthy lunch.
- Quick and Easy: With only a few simple ingredients and minimal preparation, it’s a recipe you can whip up in no time, making it perfect for impromptu gatherings.
Your Shopping List for a Delicious Medley
To bring this glorious salad to life, here’s what you’ll need:
- 2 ripe mangoes, diced: Sweet and juicy, they add a tropical flair to the dish.
- 2 ripe avocados, diced: Creamy and rich, giving the salad a luscious texture.
- 1 red onion, thinly sliced: Adds a sharpness that contrasts beautifully with the sweetness of the fruits.
- 1 cup of cherry tomatoes, halved: Bursting with flavor and a pop of color, they lend a beautiful freshness.
- ¼ cup of fresh cilantro, chopped: Aromatic and bright, it elevates the flavor profile.
- 1 small jalapeño (optional), thinly sliced: For those who like a hint of heat, it adds a delightful kick.
- ¼ cup of crumbled feta cheese or cotija cheese (optional): Brings creaminess and a salty bite that harmonizes wonderfully with the other flavors.
- 3 tablespoons of fresh lime juice: The zesty backbone of this dish that ties everything together.
- 1 tablespoon of lime zest: Intensifies the lime flavor with a fragrant brightness.
- 2 tablespoons of olive oil: Adds richness and helps to marry all the ingredients.
- 1 teaspoon of honey (optional): For a touch of sweetness to balance the acidity of the lime.
- 1 garlic clove, minced: Provides warmth and depth to the dressing.
- Salt and pepper to taste: Essential for seasoning and enhancing all the flavors.
Let’s Get Cooking!
Now that you have everything ready, it’s time to dive into the kitchen. This process is straightforward, and it’s hard to mess up something this delicious!
-
Prepare the Ingredients: Start by dicing your mango and avocado into bite-sized pieces. The goal is to make them easy to enjoy in every forkful. For the red onion, thinly slice it to keep its sharp flavor manageable, and halve the cherry tomatoes. Then, chop the cilantro, letting its fresh aroma fill your kitchen.
-
Make the Lime Dressing: In a bowl or blender, combine the fresh lime juice, lime zest, olive oil, minced garlic, honey (if using), and a pinch of salt and pepper. Whisk or blend until the mixture is smooth and creamy—this dressing will be a burst of sunshine in your salad.
-
Toss the Salad: Take a large bowl and combine the diced mango, avocado, cherry tomatoes, red onion, and cilantro. Drizzle the zesty lime dressing over the top and gently toss everything together. Be careful not to mash the avocados; you want to enjoy their creamy texture!
-
Serve and Garnish: Serve immediately for the best flavor and freshness. If you’d like, top with crumbled cheese and add a sprinkle of lime zest or slices of jalapeño for some extra flair.
Pearls of Wisdom for a Perfect Salad
- Choose Ripe Fruits: Make sure your mangoes and avocados are perfectly ripe to achieve that creamy, delectable texture. They should yield slightly to gentle pressure but not feel mushy.
- Adjust the Dressing: Feel free to tweak the lime juice and honey according to your taste buds. A little more sweetness or acidity can make all the difference!
- Chill Before Serving: Allowing the salad to chill in the fridge for about 30 minutes can enhance the flavors. The waiting time allows the ingredients to mingle and create a more harmonious taste experience.
- Fresh Ingredients: When possible, use fresh herbs and produce for the best flavor. It truly elevates the dish from good to unforgettable.
- Keep It Simple: Less is more with this salad. Let each ingredient shine through without overcrowding the bowl.
Fun Twists to Try with Your Salad
- Add Protein: Toss in grilled shrimp or chicken for a hearty meal. They complement the tropical flavors beautifully.
- Grain Boost: Mix in quinoa or farro for added texture and nutrition. It turns this salad into a filling dish you can enjoy for lunch.
- Change the Cheese: Try goat cheese or mozzarella for a different cheese experience that still brings creaminess without overpowering the dish.
- Fruity Variations: Experiment with other fruits like diced pineapple or pomegranate seeds to bring unique flavors and textures to your salad.
Elevating Your Dining Experience
This Avocado Mango Salad is best served chilled on a warm day, making it perfect for picnics, barbecues, or as a side for your favorite grilled dishes. Picture a beautiful serving bowl filled with this colorful medley, surrounded by friends and family as you indulge in laughter and good conversation. It’s a visual feast, and every bite transports you to a sunny, tropical paradise!
Keeping It Fresh for Later
If you happen to have leftovers (though I can’t imagine there will be any!), store your Avocado Mango Salad in an airtight container. It’s best enjoyed fresh, but you can keep it in the fridge for up to a day. Just be aware that the avocado may start to brown and the salad could lose its crispness. For long-term storage, consider keeping the dressing separate until you’re ready to dig in.
Got Any Questions?
-
Can I make this salad ahead of time?
While it’s best enjoyed fresh, you can prepare the ingredients a few hours in advance. Just keep the dressing separate until serving. -
Is this salad good for meal prep?
Absolutely! Just store the components separately, and assemble them when you’re ready to eat. -
Can I use frozen mangoes?
Frozen mangoes can work, but they won’t have the same texture as fresh. If you decide to use them, make sure to thaw and drain any excess liquid. -
What can I pair this salad with?
It pairs beautifully with grilled chicken, fish tacos, or a simple sandwich. It also stands out on its own as a light lunch.
Every time I make this Avocado Mango Salad with Zesty Lime Dressing, I’m reminded of the simple joys of cooking and sharing good food with loved ones. It’s a delightful way to celebrate fresh ingredients and vibrant flavors—perfect for those sunny days ahead. So go ahead and give it a try; I can’t wait to hear how yours turns out!
Avocado Mango Salad
Ingredients
Method
-
Start by dicing your mango and avocado into bite-sized pieces.
-
Thinly slice the red onion and halve the cherry tomatoes.
-
Chop the cilantro.
-
In a bowl or blender, combine the fresh lime juice, lime zest, olive oil, minced garlic, honey (if using), and a pinch of salt and pepper.
-
Whisk or blend until the mixture is smooth and creamy.
-
In a large bowl, combine the diced mango, avocado, cherry tomatoes, red onion, and cilantro.
-
Drizzle the zesty lime dressing over the top and gently toss everything together.
-
Serve immediately for the best flavor and freshness.
-
Optional: Top with crumbled cheese and garnish with lime zest or slices of jalapeño.