Best 10 Keto Dinner Recipes for Quick and Delicious Meals
If you're looking for quick, mouthwatering meals that align with your keto lifestyle, you've come to the right place! I know how challenging it can be to whip up delicious dinners on busy nights, so I’ve gathered my favorite keto recipes that promise both flavor and convenience. From cheesy chicken dishes to zesty wraps and…
If you're looking for quick, mouthwatering meals that align with your keto lifestyle, you've come to the right place! I know how challenging it can be to whip up delicious dinners on busy nights, so I’ve gathered my favorite keto recipes that promise both flavor and convenience. From cheesy chicken dishes to zesty wraps and protein-packed bowls, each recipe offers a unique twist that will keep your dinner table exciting. Get ready to dive into these delightful meals that not only satisfy your cravings but also support your health goals. Let's get cooking!
1. Delicious Keto Crunchwraps Recipe for Guilt-Free Indulgence

There’s something profoundly satisfying about biting into a crunchy, cheesy, and loaded wrap that feels indulgent but guilt-free. If you’re on a keto journey or just trying to keep things lighter without sacrificing flavor, my Delicious Keto Crunchwraps Recipe for Guilt-Free Indulgence will become a fast favorite! Picture perfectly crisp tortillas hugging a melty cheese sauce, seasoned beef, fresh veggies, and all the toppings. You can easily whip this up for lunch, dinner, or even meal prep, and I promise you’ll be reaching for seconds!
This Recipe is a Winner
What makes these keto crunchwraps stand out in a sea of recipes? Here’s why you’re going to love them:
-
Versatile and Customizable: Whether you’re a seasoned keto dieter or just looking for a delicious low-carb meal, these wraps can be tailored to accommodate your preferences, making it easy to swap in your favorite ingredients.
-
Texture Galore: You get that delightful crunch from the tortillas, which balances beautifully with the creamy cheese sauce and juicy beef. Each bite is a lovely contrast that keeps things exciting.
-
Satisfying Flavor: Infused with zesty taco seasoning and fresh toppings, these wraps are a burst of bold, vibrant flavors. They transport you straight to a cozy taco night at home.
-
Easy Meal Prep: Perfect for those busy evenings or when you want to have ready-to-eat meals on hand, these crunchwraps hold up nicely in the fridge and can be assembled in a jiffy.
-
Kid-Friendly: If you have picky eaters at home, they’ll likely devour these wraps without a second thought, enjoying the fun shape and delicious filling!
Gathering Your Ingredients
Let’s round up the star players for our delicious keto crunchwraps! Here’s what you’ll need, along with a little snippet about what makes each ingredient shine:
-
2 tablespoons Butter (Unsalted): This is for sautéing the beef and adding richness to the cheese sauce.
-
4 ounces Cream Cheese: It gives us that dreamily creamy texture in the cheesy goodness. If you’re avoiding dairy, feel free to swap this with a dairy-free alternative.
-
1/4 cup Heavy Whipping Cream: A perfect low-carb liquid to pour in for ultra-creamy sauce. Coconut cream works as a great option too!
-
1 cup Shredded Cheddar Cheese: I love using sharp cheddar for an intense, satisfying flavor that pairs so well with the seasoned beef.
-
1 pound Ground Beef: Cooked to perfection, this beef layer is rich and hearty. Ground turkey or chicken can be your leaner substitutes.
-
2 tablespoons Taco Seasoning: You can either use your favorite store-bought version or mix up a homemade batch to suit your spice level.
-
4 pieces Low-Carb Tortillas: Brands like Mission Carb Balance work beautifully, but homemade almond flour tortillas can elevate your crunchwrap experience.
-
1 cup Sour Cream: This smooth layer balances the spice and adds a cooling component. Greek yogurt is a lighter option if you wish.
-
1 cup Lettuce: Shredded iceberg or romaine keeps things fresh and crisp with every bite.
-
1 medium Tomato: Juicy and vibrant, it adds a fresh element. If you’re watching carbs closely, bell peppers are a great alternative!
-
1 cup Extra Cheddar Cheese: Because who doesn’t love a bit more cheese? For added heat, you can consider pepper jack.
-
1/4 cup Cilantro: A fresh garnish that brightens the whole dish. If cilantro isn’t your jam, use parsley instead.
-
1/2 cup Jalapeño Slices: Optional for those who enjoy a little kick! You could also use fresh diced jalapeños for more intense flavor.
-
1 tablespoon Olive Oil: Any neutral cooking oil will work for frying, but I love olive oil for its heart-healthy properties.
Let’s Get Cooking
Ready to craft your savory crunchwraps? Here’s how to put it all together in just a few simple steps. I promise you’ll be proud of your kitchen skills after this!
-
Cheese Sauce Preparation: In a small saucepan over medium heat, melt the butter before stirring in the cream cheese. Gradually add the heavy whipping cream, mixing them until smooth. Toss in 1 cup of cheddar cheese and stir until it’s melted and combined. Set aside for that luscious cheese layer.
-
Beef Cooking: In a skillet over medium heat, add the ground beef. Brown it until it’s cooked through, about 8-10 minutes. Use the taco seasoning as per your preference and mix well, allowing those flavors to meld beautifully.
-
Tortillas Crisping: In another skillet (you can use the same one after cleaning), add a touch of oil and crisp each tortilla on both sides until golden brown. This creates the perfect crunchy base for your wrap.
-
Crunchwrap Assembly: On a crisp tortilla, dollop on some cheese sauce first, followed by a generous layer of beef, sour cream, lettuce, chopped tomato, cilantro, jalapeños (if using), and a sprinkle of extra cheddar. Top with another tortilla, and repeat the crispy process with this second layer if desired.
-
Crunchwrap Cooking: Once assembled, return the crunchwrap to the hot skillet, seam side down. Cook for about 2-4 minutes on each side until golden brown and crisp.
-
Serving: Slice the crunchwrap in half to reveal the colorful and enticing layers within. Serve it warm and enjoy the symphony of textures and flavors!
Pro Tips for Perfection
Want to impress friends and family with your crunchwrap skills? Here are some of my best bits of advice:
-
Season Your Beef: Don’t be shy with the taco seasoning! A good amount really amps up the flavor. If you have time, marinate your beef for even deeper flavor development.
-
Don’t Skip the Crunch: Crispy tortillas give the wrap its signature texture. Make sure they are well-cooked on the skillet to prevent sogginess.
-
Customize Your Layers: Feel free to add a layer of guacamole or any other favorite toppings you enjoy—taco night is all about personalization!
-
Avoid Over-Filling: It can be tempting to pile on every delicious ingredient, but less is often more for the crunchwrap’s structural integrity.
-
Experiment with Wrap Sizes: Use smaller tortillas for mini crunchwraps—perfect for appetizers or lunchboxes!
Creative Twists Await
Want to get adventurous with your crunchwraps? Here are some ideas to keep things fresh and exciting:
-
Southwest Twist: Swap the ground beef for shredded rotisserie chicken, and add smoky chipotle sauce for a smoky flavor punch.
-
Veggie Lovers: Go meatless by substituting the beef with sautéed mushrooms, zucchini, and peppers for a hearty vegetarian crunchwrap.
-
Breakfast Crunchwrap: For a morning treat, fill your wrap with scrambled eggs, cheese, avocado, and salsa!
-
Spicy BBQ Chicken: Use shredded BBQ chicken instead of beef for a tangy twist, coupled with crispy slaw for crunch.
-
Mediterranean Flavor: Try feta cheese, olives, and roasted red peppers for a refreshing and unique variation.
Serving Suggestions
When it comes to enjoying your delicious keto crunchwraps, presentation is everything! Serve them warm with a side of crisp salad and a small bowl of salsa or guacamole for dipping. The pops of color from fresh veggies, along with the sizzling crunchwraps, create a vibrant table setting perfect for any casual gathering.
I love to surround my crunchwraps with crunchy tortilla chips (keto-friendly versions, of course) and a zesty salsa verde that adds a refreshing coolness to the meal. Don’t forget to garnish with lime wedges—squeezing fresh lime juice brings out all the wonderful flavors!
Keep It Fresh
To ensure your delicious keto crunchwraps last, let them cool completely before storing. Place them in an airtight container and refrigerate for up to 3 days. They also freeze wonderfully! Just wrap each crunchwrap in parchment paper and freeze, ready to be reheated in the oven or skillet when the craving strikes.
If reheating, I suggest using the oven to regain that glorious crunch—a mere 10-15 minutes will do the trick in a preheated oven set to 350°F.
Your Questions Answered
How can I make keto crunchwraps vegetarian?
Absolutely! Simply replace the ground beef with sautéed vegetables or beans. You could even use a mix of both for a heartier filling.
Can I make these ahead of time?
Yes, meal prepping is a fantastic idea! Prepare the fillings and store each component separately in the fridge. Assemble and cook your crunchwraps when you’re ready to eat.
What if I don’t have taco seasoning?
No worries! Spice up your beef with cumin, chili powder, paprika, and garlic powder to create your own delicious seasoning blend.
Can I bake these instead of frying?
Definitely! Brush the crunchwraps with a little oil and place them on a baking sheet. Bake at 400°F for about 15 minutes or until golden brown and crisp.
Each bite of these Delicious Keto Crunchwraps is a journey through flavor and comfort, reminding us that diet food doesn’t have to be boring or limiting. I encourage you to give this recipe a try and let your creativity shine as you make it your own! Remember, cooking is all about joy, and who doesn’t love a good crunchwrap? Enjoy every moment in the kitchen!
Keto Crunchwraps
Ingredients
Method
-
In a small saucepan over medium heat, melt the butter before stirring in the cream cheese.
-
Gradually add the heavy whipping cream, mixing until smooth.
-
Toss in 1 cup of cheddar cheese and stir until melted and combined. Set aside.
-
In a skillet over medium heat, brown the ground beef until cooked through, about 8-10 minutes.
-
Add the taco seasoning to the beef, mixing well to meld the flavors.
-
In another skillet, add a touch of oil and crisp each tortilla on both sides until golden brown.
-
On a crisp tortilla, start with a dollop of cheese sauce, followed by a layer of beef, sour cream, lettuce, chopped tomato, cilantro, jalapeños (if using), and a sprinkle of extra cheddar.
-
Top with another tortilla and repeat the crisping process with this second layer if desired.
-
Return the assembled crunchwrap to the skillet, seam side down, and cook for about 2-4 minutes on each side until golden brown and crisp.
-
Slice the crunchwrap in half and serve warm, enjoying the textures and flavors.
Notes
2. Keto Crispy Reuben Roll-Ups

There’s a special kind of magic that happens when you transform classic flavors into delightful, crispy bites, and Keto Crispy Reuben Roll-Ups are no exception! With just the right balance of savory corned beef, tangy sauerkraut, and gooey Swiss cheese, these roll-ups are a one-way ticket to flavor town. Perfect for a hearty snack or as a unique appetizer at your next get-together, they encapsulate the spirit of a traditional Reuben sandwich but in a low-carb format that will leave you feeling satisfied yet guilt-free. Trust me, your taste buds are in for a treat!
Why Keto Crispy Reuben Roll-Ups Deserve a Spot in Your Kitchen
- Satisfying Crunch: The crispy cheese exterior provides a satisfying crunch that beautifully contrasts the tender corned beef and zesty sauerkraut inside.
- Flavor Explosion: Each bite is a harmonious blend of flavors. The richness of the corned beef, the bite from the horseradish, and the acidity from the sauerkraut create a symphony that will dance on your palate.
- Quick and Easy: These roll-ups come together in a flash, making them perfect for busy weeknights or last-minute gatherings. You can whip them up and serve them within half an hour!
- Low-Carb Delight: Staying true to your keto lifestyle doesn’t mean sacrificing flavor. This recipe preserves all that classic Reuben goodness without the extra carbs, so you can indulge without the guilt.
- Versatile Experience: Whether you serve them as an appetizer, a snack, or even a light dinner, they adapt beautifully to your meal plans and preferences, appealing to both keto and non-keto eaters alike.
Gathering Your Ingredients
When it comes to whipping up these delectable roll-ups, gathering your ingredients is essential for that seamless cooking experience. Here’s what you’ll need:
- 2 cups Shredded Swiss Cheese: This melty goodness forms the base of your roll-ups, providing a rich, nutty flavor.
- 1/2 pound Sliced Corned Beef Deli Meat: The hero of our dish, tender and seasoned just right to infuse each bite with savory depth.
- 1 cup Sauerkraut: Adds a tangy crunch, elevating the taste profile and balancing out the richness of the beef and cheese.
- 1/4 cup Mayonnaise: Brings a creamy element that ties everything together; I like to opt for a good quality mayo for the best flavor.
- 1 tsp Worcestershire Sauce: A little drizzle goes a long way in enhancing the umami depth of your dipping sauce.
- 1 1/2 tbsp Sugar-Free Ketchup: A nod to tradition, this sweet component balances the dish beautifully while keeping it keto-friendly.
- 2 tsp Swerve Confectioner’s Sugar Substitute: This is my go-to for sweetness; it mimics sugar without the carbs.
- 1 tbsp Horseradish Sauce: For that spicy kick that the classic Reuben is known for. Adjust to taste if you want it less fiery!
- 1 pinch Paprika: Just a sprinkle adds a warm earthiness and a touch of color, making your roll-ups visually appealing.
Let’s Get Cooking
Now that you have all your ingredients prepped and ready to go, it’s time to bring your roll-ups to life! Follow these simple steps, and soon your kitchen will be filled with irresistible aromas.
-
Preheat your oven to 400 degrees. This ensures that your cheese gets perfectly crisped to the right texture.
-
Arrange the cheese: Create 8 circular heaps of shredded Swiss cheese on a parchment-lined baking sheet. You might need two baking sheets to accommodate everything.
-
Bake to perfection: Pop the cheese circles in the oven and bake for 6-8 minutes. You’ll want to watch closely; they should be bubbling and just starting to brown at the edges.
-
Mix the dressing: While the cheese is baking, stir together the mayonnaise, Worcestershire sauce, sugar-free ketchup, Swerve confectioner’s sugar, and horseradish in a bowl. This creamy dressing will add a delicious tang.
-
Cool and fill: Remove the cheese from the oven after baking, and let it cool for about a minute. While still slightly soft, top each circle with a few slices of corned beef, a generous scoop of sauerkraut, and a drizzle of the dressing.
-
Roll it up!: Carefully fold each cheese circle over the filling before it completely hardens. This ensures a delightful bite!
-
Final crisping: Allow your roll-ups to cool and crisp up for a few moments before serving. This step is crucial for that perfect crunchy texture.
My Favorite Tricks
Here are some tips to make sure your Keto Crispy Reuben Roll-Ups come out perfect every time:
- Watch the Cheese: Different ovens can behave differently, so keep an eye on the cheese. You want it crispy, but not burnt!
- Don’t Overstuff: It can be tempting to pile on the ingredients, but too much filling can cause them to fall apart when you roll them. Stick to the recommended amounts for the best results.
- Experiment with Cheese: If Swiss isn’t your style, try other cheeses that melt nicely, like mozzarella or provolone. Each will bring its unique flair!
- Use Fresh Sauerkraut: Opt for freshly fermented sauerkraut if possible. The flavor is incredibly vibrant and really adds something special to the dish.
- Serve Immediately: These roll-ups are at their best when served fresh and crispy, so aim to enjoy them right out of the oven for the ultimate experience.
Creative Twists Worth Trying
Feel free to personalize your Keto Crispy Reuben Roll-Ups with these fun alternatives:
- Add a Spin: Include fresh herbs like dill or parsley in the filling for a burst of fresh flavor.
- Spicy Variants: For those who love heat, consider adding pickled jalapeños into the mix alongside the sauerkraut.
- Bacon Boost: Crumbled, crispy bacon can add an irresistible smoky flavor that complements the corned beef beautifully.
- Different Meats: Swap out the corned beef for pastrami or turkey for a lighter option while still maintaining the deliciousness.
- Cheesy Variations: Mix in cream cheese with the Swiss for an ultra-creamy filling or try flavored cheeses for an unexpected twist!
Enjoying Your Tasty Creation
Now that your Keto Crispy Reuben Roll-Ups are ready, it’s time to plate them up! Serve them warm with a side of that luscious dipping sauce made from the dressing you prepared earlier. A sprinkle of fresh herbs on top adds a touch of class and color. These roll-ups are delightful as finger food at gatherings, or enjoyed solo as a satisfying snack while cultivating those cozy evening vibes at home. Pair them with a crisp side salad or some roasted vegetables for a balanced meal that makes you feel good inside!
Keep It Fresh
You might be wondering about leftovers (if there are any!). Here’s how to store your roll-ups so they stay delicious for days:
- Refrigeration: Keep any leftovers in an airtight container in the fridge. They should stay fresh for about 3 days.
- Freezing for Later: If you want to prepare ahead, these roll-ups freeze well! Just wrap each cooled roll-up individually in plastic wrap and pop them in a freezer-safe bag. They can last up to a month.
- Reheating Tips: When you’re ready to enjoy again, reheat them in the oven at 350 degrees for about 10 minutes to bring back that delightful crispiness. Microwaving is not recommended, as it can make them chewy rather than crispy.
Your Questions Answered
- Are these roll-ups really keto-friendly? Absolutely! With no bread and a focus on cheese and meats, these are perfect for a low-carb lifestyle.
- Can I make them ahead of time? Yes! Prepare the ingredients in advance, but roll them up right before baking for the best texture.
- What can I serve them with? These roll-ups pair beautifully with a zesty salad or a low-carb dipping sauce, such as a homemade ranch or blue cheese dressing.
- Can I adjust the spice level? Certainly! Feel free to modify the amount of horseradish to suit your taste or experiment with different types of mustards to add a twist.
These Keto Crispy Reuben Roll-Ups are sure to become a favorite in your kitchen. Packed with flavor and easy to whip up, they’re ideal for any occasion—whether it’s a casual movie night at home or a lively gathering with friends. I hope you give this recipe a try, and when you do, let the crunchy exterior and savory filling transport you to your happy culinary place! Enjoy!
Keto Crispy Reuben Roll-Ups
Ingredients
Method
-
Preheat your oven to 400 degrees F.
-
Create 8 circular heaps of shredded Swiss cheese on a parchment-lined baking sheet.
-
Bake the cheese circles for 6-8 minutes, until bubbling and starting to brown at the edges.
-
In a bowl, stir together the mayonnaise, Worcestershire sauce, sugar-free ketchup, Swerve confectioner’s sugar, and horseradish.
-
Remove the cheese from the oven after baking, and let cool for about a minute.
-
While still slightly soft, top each circle with corned beef, sauerkraut, and a drizzle of the dressing.
-
Fold each cheese circle over the filling before it completely hardens.
-
Allow the roll-ups to cool and crisp up for a few moments before serving.
Notes
3. Creamy Spinach Artichoke Chicken Skillet (Paleo, Whole30, Keto)
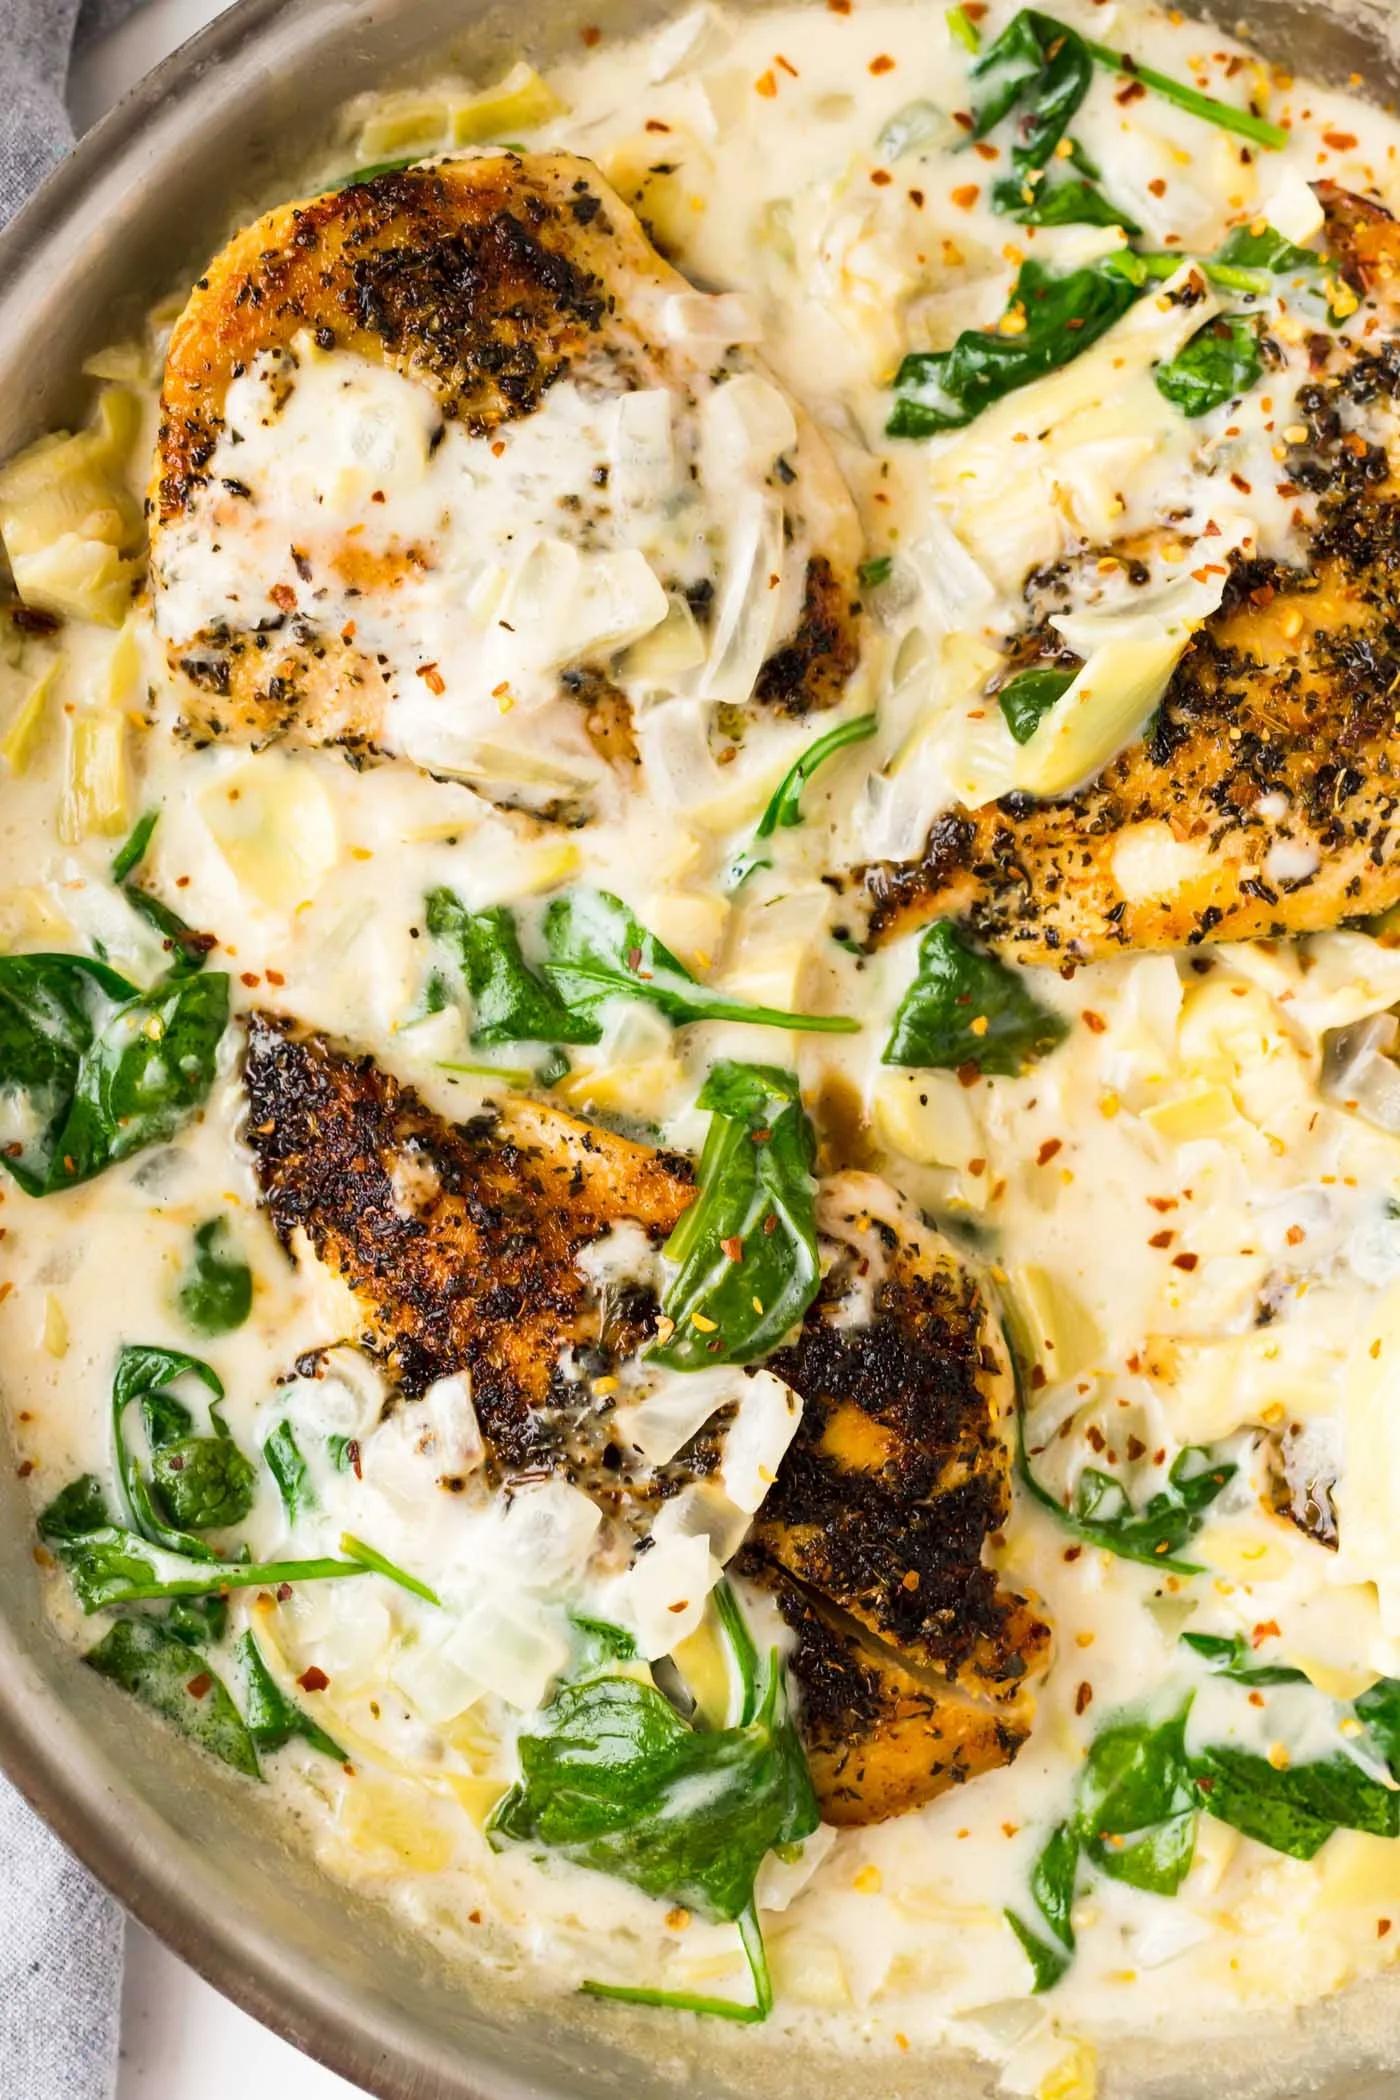
There’s something undeniably comforting about a fragrant skillet bubbling away on the stove, and when it comes to this Creamy Spinach Artichoke Chicken Skillet, you’re in for a delightful treat! Imagine perfectly seared chicken nestled in a velvety sauce, bursting with the fresh flavors of spinach and artichoke. Each bite is a warm hug from the inside, making it not just a meal but an experience you’ll want to share with your loved ones.
The Best Parts About This Dish
You might be wondering why this creamy chicken skillet deserves a place in your kitchen. Here are just a few stellar reasons:
-
Health-Conscious Delight: This dish is not only scrumptious but also fits perfectly into Paleo, Whole30, and Keto diets. You can indulge without guilt!
-
Quick and Easy: Whipping up this dish will take you less than 30 minutes from start to finish. Perfect for those busy weeknights when you still want something wholesome and satisfying.
-
One Pan Wonder: Minimal clean-up is always a win! Everything cooks in one skillet, letting you focus on enjoying your meal rather than washing piles of dishes.
-
Bursting with Flavor: The combination of creamy coconut milk, savory garlic, and the tang of artichokes and spinach creates a symphony of flavors that dance beautifully together.
-
Impressive Presentation: Serve this dish, and you’ll wow your family and friends with delicious and eye-catching plates brimming with vibrant colors.
Gathering Your Ingredients
Ready to bring this culinary delight to life? Here’s a handy list of what you’ll need, along with a little insight about each ingredient:
-
4 small-medium boneless skinless chicken breasts (or 2 large halved): This serves as the protein base, juicy and tender when cooked right.
-
1 tablespoon dried basil: Adds an aromatic, slightly sweet flavor that beautifully complements the creaminess.
-
1 tablespoon garlic powder: An essential ingredient for that wonderful garlicky punch in every bite.
-
1 teaspoon sea salt and ½ teaspoon black pepper: Simple seasonings that enhance the chicken’s natural flavors.
-
2 tablespoons ghee (or olive oil): Ghee offers a rich, buttery flavor while being Whole30 compliant; olive oil can be a lighter alternative.
-
3 cloves garlic, minced: Fresh garlic gives an enticing aroma and deep flavor that brings the dish to life.
-
1 yellow onion, finely chopped: The sweet and savory notes of onion make everything deliciously aromatic.
-
¼ cup chicken broth: This adds moisture and a depth of flavor; feel free to use low-sodium for a healthier option.
-
1 13.5-ounce can unsweetened full-fat coconut milk (Thai Kitchen recommended): This lends creaminess and a touch of sweetness, creating a luxurious base for your sauce.
-
Juice of ½ lemon: The acidity balances the richness, brightening the dish in the best way possible.
-
1 tablespoon arrowroot starch: A fantastic thickening agent for that satisfying, creamy texture.
-
½ teaspoon salt and ¼ teaspoon black pepper: Additional seasoning to keep the flavors harmonious.
-
1 14-ounce can quartered artichoke hearts, drained and chopped: Adds a deliciously tangy pop and hearty texture.
-
2 cups packed spinach: Fresh spinach wilts down nicely, infusing nutrient-rich goodness, and a beautiful vibrant green color.
-
Red pepper flakes, for garnish: A touch of heat to bring the whole dish together; you can control how fiery you want it!
Let’s Get Cooking
Now that you have everything ready, let’s roll up our sleeves and make this happen! Follow these straightforward steps to create your creamy masterpiece:
-
Season the chicken breasts on both sides with basil, garlic powder, sea salt, and black pepper. Let’s give every bite incredible flavor right from the get-go!
-
In a large skillet, heat your ghee (or olive oil) over medium heat. Once hot, sauté the seasoned chicken breasts for about 6-8 minutes on each side until they’re golden brown and fully cooked. Then, transfer the cooked chicken to a plate while we prepare the sauce.
-
In the same skillet (just wipe away any burnt bits if they’re too dark), melt more ghee. Add the minced garlic and chopped onions, sautéing for about 1-2 minutes until they’re fragrant and translucent.
-
Pour in the chicken broth, coconut milk, lemon juice, arrowroot starch, salt, and pepper, whisking them together. Let this simmer gently for 2-3 minutes until it thickens up beautifully.
-
Reduce the heat to low and stir in the chopped artichoke hearts and fresh spinach. Fold these leafy gems into the sauce, allowing them to wilt and become part of our luscious mixture.
-
Return the chicken to the skillet, spooning that creamy sauce over the top. For an added touch, garnish with a sprinkle of red pepper flakes to deliver just a hint of heat. Serve it hot, and watch everyone dig in with delight!
Tips for Success
To ensure your Creamy Spinach Artichoke Chicken Skillet turns out perfectly every time, here are my favorite tips:
-
Don’t rush the browning: Allow the chicken to sear properly; this caramelization builds flavor!
-
Adjust the thickness: If the sauce isn’t thick enough, lower the heat and let it simmer longer. For a thicker sauce, you can always add a little more arrowroot starch dissolved in water.
-
Fresh herbs are delightful: If you have fresh basil or oregano on hand, feel free to toss them in for an even more vibrant flavor boost.
-
Check the seasoning: Always taste as you go! Adjust the salt, pepper, or lemon juice to suit your palette.
Mixing It Up
Feeling adventurous? Here are a few creative twists to make this dish even more exciting:
-
Nutty Crunch: Add a handful of toasted pine nuts or walnuts as a garnish for additional texture and a lovely nutty flavor.
-
Creamy Spinach Artichoke Bake: Transfer everything into a baking dish, top with some almond flour and bake until golden for a comforting casserole style.
-
Protein Swaps: Swap out the chicken for shrimp or tofu. Both options will pair beautifully with the sauce!
-
Veggie Boost: Toss in other colorful veggies like bell peppers or zucchini to sneak in more nutrients.
Serving Suggestions
Now, let’s talk about how to enjoy this delightful dish! I love to serve it over a bed of cauliflower rice or alongside a fresh green salad. Picture that creamy sauce cascading over a mound of perfectly cooked cauliflower rice—it’s truly an indulgent experience!
Plate it up family-style, garnished with fresh herbs and extra lemon wedges for added zing. The vibrant greens of spinach and the lovely golden-brown chicken create a beautiful presentation that’s sure to impress.
Keep It Fresh
Wondering how to store leftovers? Here are some handy tips to keep your dish tasting fantastic:
-
Refrigeration: Store the leftovers in an airtight container in the refrigerator for up to 3 days. The flavors will deepen over time—what a treat!
-
Freezing: If you want to make it ahead, freeze it in individual portions. Just make sure to cool it completely first! It can be thawed in the fridge overnight before reheating.
-
Reheating: Gently reheat it on the stove over low heat, stirring occasionally to ensure even warming and to maintain that creamy loveliness.
Your Questions Answered
Got a question? You’re not alone! Here are some common queries that pop up:
-
Can I use frozen spinach? Absolutely! Just thaw and squeeze out any excess moisture before adding it to the skillet.
-
Is it necessary to use coconut milk? While coconut milk gives it that rich creaminess, you can substitute it with heavy cream if you’re not on a dairy-free plan.
-
What if I don’t have arrowroot starch? No worries! Cornstarch works as a great alternative. Just make a slurry before adding it to the sauce to avoid clumping.
-
Can this be made in advance? Certainly! Prepare everything ahead of time and follow the cooking instructions when you’re ready to enjoy it.
This Creamy Spinach Artichoke Chicken Skillet isn’t just a meal—it’s a chance to bring everyone together for good food, laughter, and warm memories. So grab those ingredients, make some magic happen in your kitchen, and relish the gorgeous flavors and aromas that will undoubtedly fill your home. Happy cooking!

Creamy Spinach Artichoke Chicken Skillet
Ingredients
Method
-
Season the chicken breasts on both sides with basil, garlic powder, sea salt, and black pepper.
-
In a large skillet, heat ghee (or olive oil) over medium heat and sauté the seasoned chicken breasts for about 6-8 minutes on each side until golden brown and fully cooked.
-
Transfer the cooked chicken to a plate while preparing the sauce.
-
In the same skillet, melt more ghee and add the minced garlic and chopped onions. Sauté for 1-2 minutes until fragrant.
-
Pour in chicken broth, coconut milk, lemon juice, arrowroot starch, salt, and black pepper. Whisk together and let simmer for 2-3 minutes until thickened.
-
Reduce heat to low, then stir in chopped artichoke hearts and fresh spinach, folding gently into the sauce until wilted.
-
Return the chicken to the skillet, spooning the creamy sauce over the top. Garnish with red pepper flakes and serve hot.
Notes
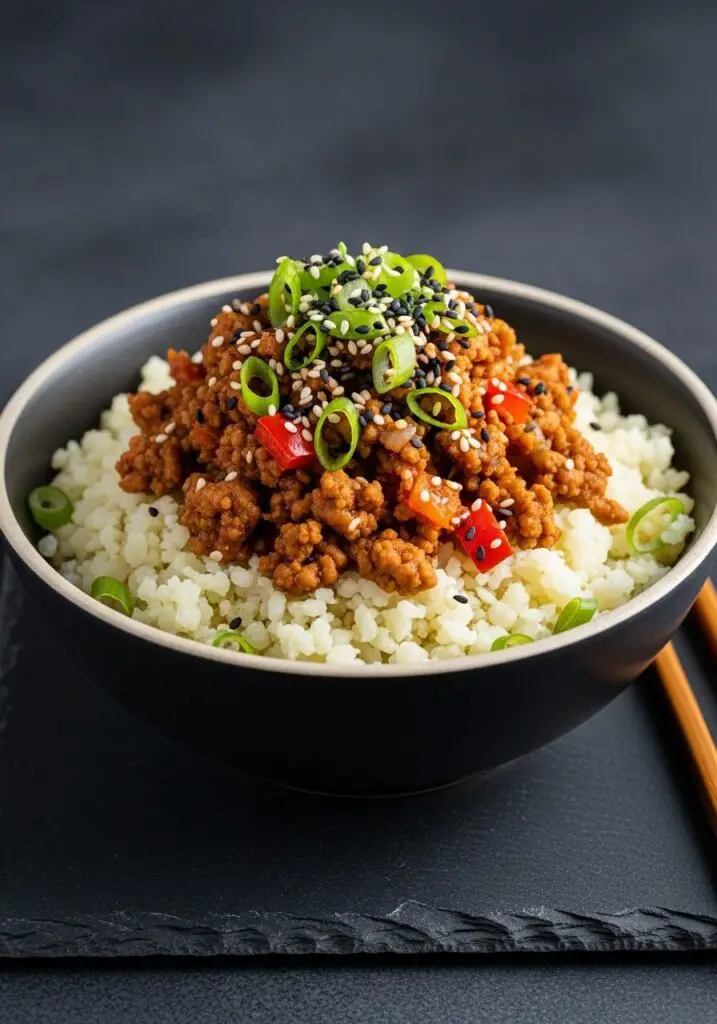
4. The Best Keto Teriyaki Turkey Bowl (Ready in 20 Minutes!)
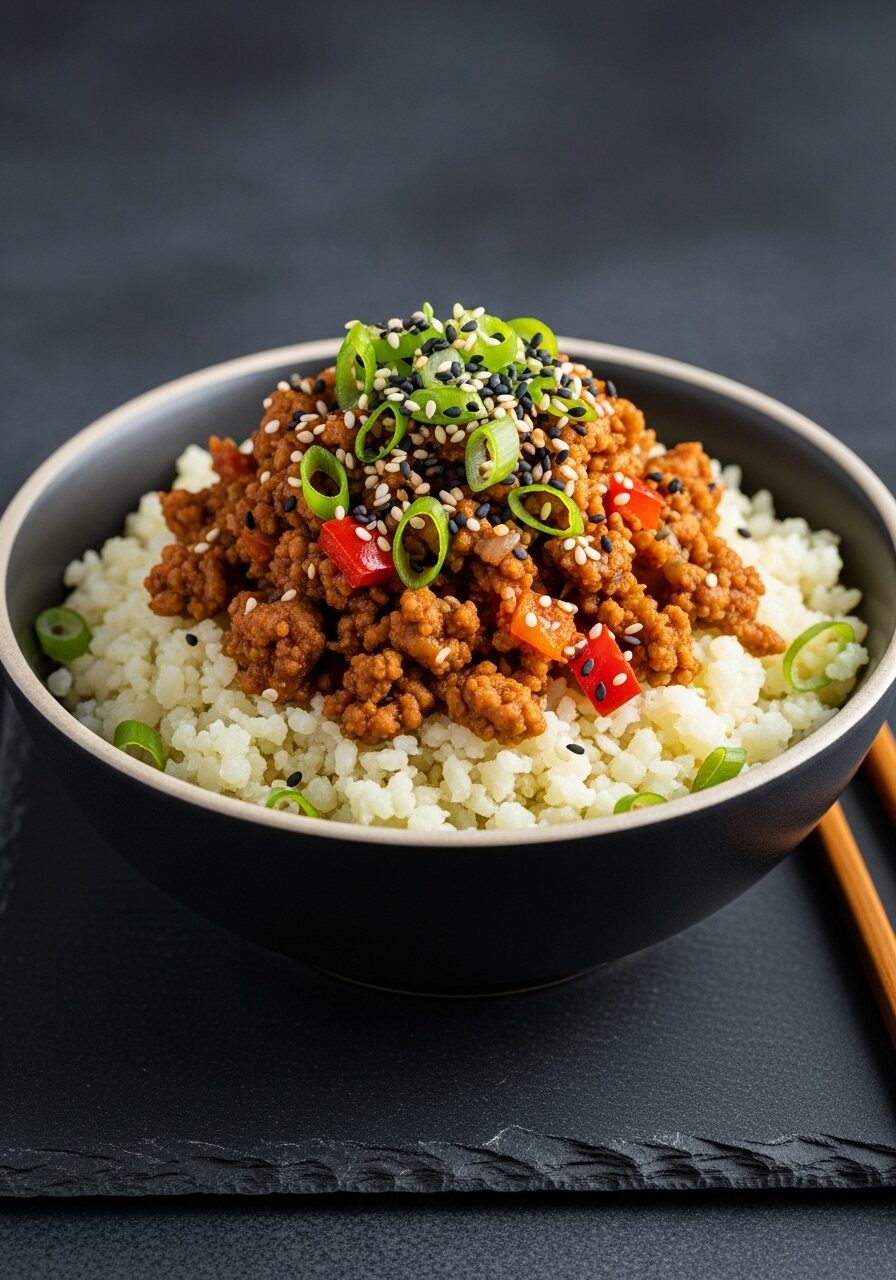
Imagine a deeply savory, slightly sweet, and perfectly spicy bowl of deliciousness that comes together in one pan, in just 20 minutes, and is completely keto-friendly. That, my friends, is the weeknight magic of this Keto Teriyaki Turkey Rice Bowl, and it is, without a doubt, the most flavorful and satisfying low-carb meal you will make.
Here’s the thing about sticking to a low-carb or keto lifestyle: you crave those easy, satisfying, flavor-packed meals that don’t taste like a compromise. I created this recipe for that exact reason. It captures all the addictive, umami-rich flavor of a classic teriyaki bowl but smartly swaps sugary sauces and carb-heavy rice for keto-friendly alternatives that are just as delicious.
I promise you, there is no greater weeknight dinner victory than a one-pan meal that is on the table faster than you can order takeout. The savory ground turkey, tender-crisp vegetables, and fluffy cauliflower rice are all brought together by a quick, sugar-free teriyaki sauce. It’s a true show-stopper that is packed with protein and nutrients to keep you feeling full and fantastic.
Get ready to master this incredibly fast and easy recipe that will become a new favorite for your entire family, whether they’re keto or not!
Why This Is the Perfect Healthy Weeknight Dinner!
You are going to be absolutely blown away by how much flavor is packed into this 20-minute, one-pan meal. This recipe is a keeper for so many reasons. Here’s why you’ll love it:
- Ready in Just 20 Minutes: This is the definition of a quick and easy meal. From prep to plate, you’re only 20 minutes away from a delicious, satisfying dinner.
- A True One-Pan Wonder: The turkey and vegetables all cook together in a single skillet, which means minimal cleanup and a completely fuss-free process.
- Packed with Keto-Friendly Flavor: The combination of teriyaki coconut aminos, fresh garlic, and savory turkey creates a huge punch of flavor without any of the sugar or carbs.
- Perfect for Meal Prep: This recipe is fantastic for making ahead. Portion it out for a week of healthy, low-carb lunches that you’ll actually be excited to eat.
- Incredibly Versatile: You can easily customize this bowl with different low-carb vegetables or switch up the protein to keep things interesting.
Recipe Snapshot
| Prep Time | 5 minutes |
| Cook Time | 15 minutes |
| Total Time | 20 minutes |
| Servings | 6 servings |
| Calories | 304 kcal per serving |
| Course | Main Course, Dinner |
| Cuisine | Asian Inspired |
| Difficulty/Method | Easy / Stovetop |
Your Shopping List for This Low-Carb Bowl
This recipe uses simple, healthy ingredients to create a spectacular and flavorful meal.

→ For the Teriyaki Turkey
- 2 tbsp olive oil → For sautéing the turkey and vegetables.
- 1 lb ground turkey → A lean and flavorful protein base.
- ½ yellow onion, finely diced → Adds a foundational savory sweetness.
- 3 cloves garlic, diced → Use fresh for the best aromatic flavor.
- ½ red or yellow bell pepper, diced finely → For a pop of color and tender-crisp texture.
- 1 tsp celtic sea salt → To enhance all the flavors.
- ¼ cup teriyaki coconut aminos → The secret to a sweet, savory, sugar-free teriyaki flavor.
- 1 tbsp coconut aminos → For an extra splash of salty, umami depth.
→ For the Bowls & Garnish
- 4 cups cauliflower rice → The perfect low-carb substitute for traditional rice.
- 1 tsp sesame seeds or black sesame seeds → For a nutty crunch and beautiful presentation.
- 1 tsp Korean chili flakes (gochugaru) → Optional, but highly recommended for a touch of smoky heat.
- 2 tbsp sliced green onions → A fresh, sharp garnish to finish the dish.
Let’s Get Cooking! Your Step-by-Step Guide
Ready for the fastest, most flavorful dinner of your week? Grab one skillet, and let’s go!
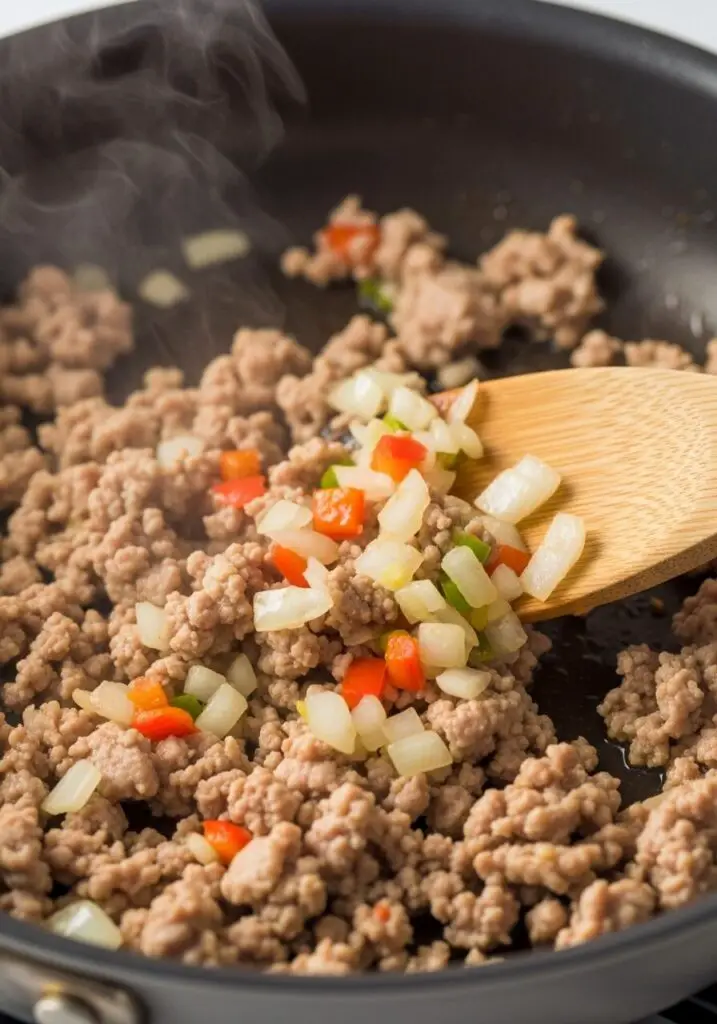
Part 1: Cook the Turkey & Veggies
- Heat the Pan: In a large skillet, heat the olive oil over medium-high heat until it’s shimmering.
- Brown the Turkey: Add the ground turkey to the hot pan. Use a spatula to break it apart and crumble it as it cooks.
- Add the Veggies: After about 6 minutes, when the turkey is starting to brown, add in the finely diced onion, garlic, and bell peppers.
- Sauté Until Tender: Continue to cook for another 6 minutes, stirring occasionally, until the turkey is well-browned and cooked through, and the vegetables are soft and tender.
- Season the Mixture: Season the turkey and vegetables with the salt and the 1 tablespoon of coconut aminos. Stir everything well to combine.
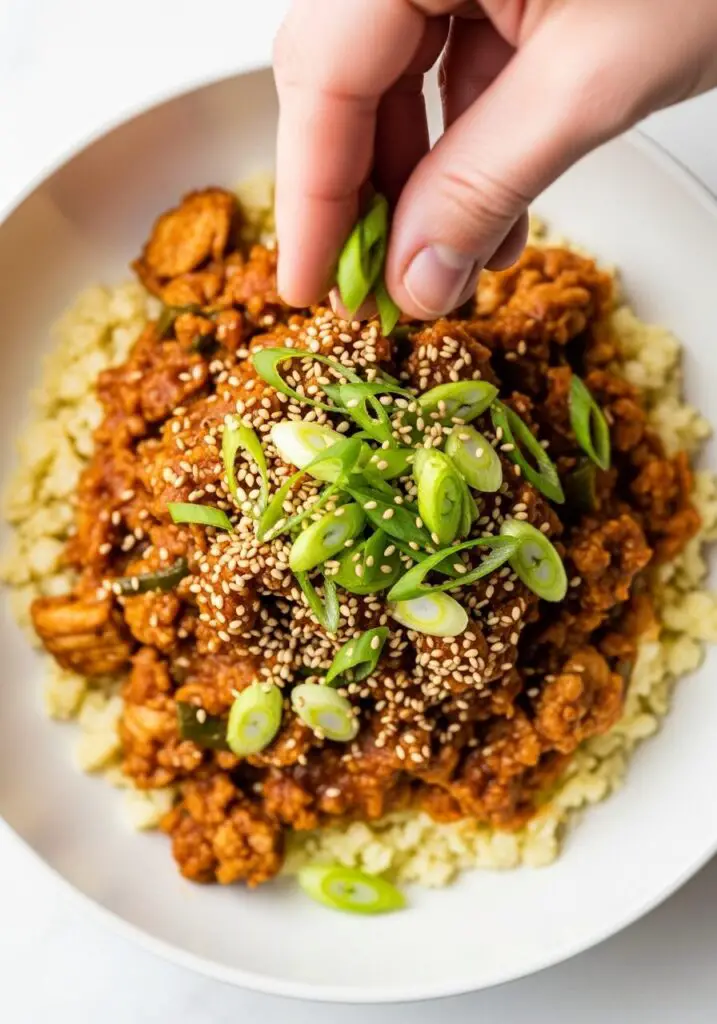
Part 2: Assemble Your Delicious Bowls
- Create the Base: Warm your cauliflower rice according to package directions or by sautéing it lightly. Divide the cauliflower rice evenly among your serving bowls.
- Top with Turkey: Spoon the hot teriyaki turkey and vegetable mixture generously over the cauliflower rice in each bowl.
- Drizzle with Sauce: Drizzle the ¼ cup of teriyaki coconut aminos over the turkey mixture in the bowls.
- Garnish and Serve: Finish your bowls with a sprinkle of sesame seeds, Korean chili flakes (if using), and fresh sliced green onions. Enjoy immediately!
WiseRecipes’ Top Tips for Keto Bowl Mastery
These simple secrets will ensure your teriyaki turkey bowls are perfect every single time.
- Use a Hot Pan. Don’t add your turkey to a cold pan! Preheating the skillet with the oil until it shimmers is key to getting a good, flavorful brown sear on the meat instead of just steaming it.
- Dice Your Veggies Finely. For the vegetables to cook quickly and become tender at the same rate as the turkey, make sure to dice the onion and bell pepper into small, uniform pieces.
- What are Coconut Aminos? If you’re new to them, coconut aminos are your new keto best friend! They are a savory, slightly sweet sauce made from fermented coconut sap that’s a fantastic, lower-sodium, and soy-free substitute for soy sauce. The teriyaki version adds that classic flavor without any sugar.
- Don’t Overcook the Cauliflower Rice. Whether you’re using fresh or frozen, cauliflower rice needs only a few minutes to cook. The goal is to warm it through so it’s tender but still has a slight bite, just like real rice. Mushy cauliflower rice is no one’s friend!
- Customize Your Bowl! The beauty of a bowl meal is its versatility. Feel free to add other low-carb veggies like sautéed mushrooms, steamed broccoli, or fresh spinach to pack in even more nutrients.
Keto Teriyaki Turkey Rice Bowl
Ingredients
Method
-
In a large skillet, heat olive oil on medium-high heat until shimmery.
-
Add ground turkey to the pan and crumble it with a spatula while it cooks.
-
As the turkey starts to brown after about 6 minutes, add in the diced onion, garlic, and peppers.
-
Cook until the turkey is well browned and the vegetables are soft, about 6 more minutes, stirring occasionally.
-
Season with salt and the 1 tbsp of coconut aminos, stirring to mix well.
-
To serve, add warmed cauliflower rice to each bowl.
-
Spoon the turkey mixture over the cauliflower rice, drizzle with the 1/4 cup of teriyaki coconut aminos, and top with sesame seeds, korean chili flakes, and green onions.
Notes
Meal Prep: Store the cooked turkey mixture and cauliflower rice in separate airtight containers in the refrigerator for up to 4 days.
Keep It Fresh! Storing Your Teriyaki Turkey Bowls
This recipe is a meal-prepper’s dream. Here’s how to store it for easy lunches.
- Refrigerator: Store the cooked teriyaki turkey mixture and the cauliflower rice in separate airtight containers in the refrigerator for up to 4 days. Store any fresh garnishes like green onions separately.
- Reheating: To reheat, simply microwave the turkey mixture and the cauliflower rice until warmed through. You can heat them together or separately. Assemble the bowl and add your fresh garnishes just before serving.
FAQs: Your Keto Bowl Questions, Answered!
How can I lower the carb count even more?
As the recipe notes, the onions and peppers do contribute to the carb count. For a very strict keto diet, you can omit them. The dish will still be delicious with just the turkey, garlic, and teriyaki sauce, but it will have a simpler flavor profile.
Can I use a different ground meat?
Absolutely! This recipe is fantastic with ground chicken, ground pork, or lean ground beef. Just follow the same cooking instructions.
Can I make my own cauliflower rice?
Yes, and it’s very easy! Simply pulse cauliflower florets in a food processor until they resemble the size of rice grains, or use the large holes on a box grater. Be careful not to over-process, or it will become mushy.
Where can I find teriyaki coconut aminos and Korean chili flakes?
Most well-stocked grocery stores now carry coconut aminos in the soy sauce or health food aisle. Korean chili flakes (also called gochugaru) can be found in the international aisle or at any Asian market. They have a wonderful, smoky, and mild heat that is different from standard red pepper flakes.
Final Thoughts: Your New Favorite Weeknight Win
There is nothing better than discovering a recipe that is lightning-fast, incredibly healthy, and bursting with so much flavor it feels like a treat. This Keto Teriyaki Turkey Rice Bowl is exactly that. It’s proof that healthy eating can be exciting, easy, and absolutely delicious. I hope it becomes a staple in your kitchen. Happy cooking!
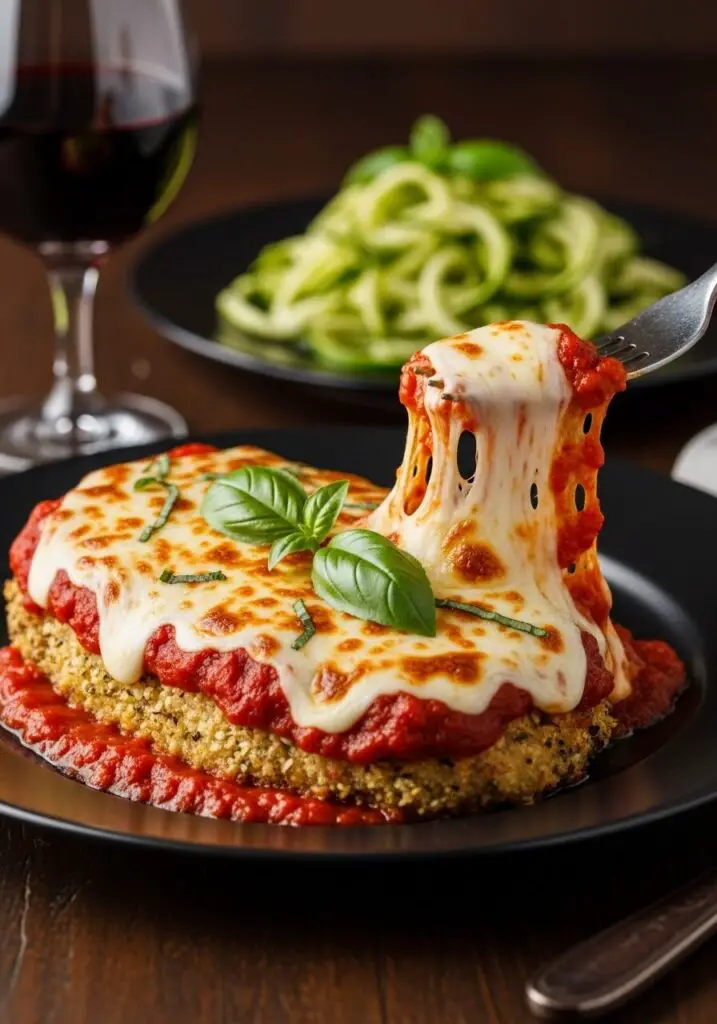
5. Ultimate Keto Chicken Parmesan (So Easy & Cheesy!)

There are certain comfort food classics that feel like a distant memory when you’re living a low-carb lifestyle. At the top of that list for me was always a big, beautiful plate of Chicken Parmesan. That crispy, golden breading, the rich marinara, the glorious blanket of bubbly, melted cheese… it felt like an impossible craving to satisfy. Well, I am thrilled to tell you that you can officially welcome this Italian-American superstar back into your life. This is the Ultimate Keto Chicken Parmesan, and it is a masterpiece of low-carb cooking that sacrifices absolutely nothing. We’ve replaced the breadcrumbs with a brilliant and flavorful almond flour and Parmesan crust that gets unbelievably crispy and golden when fried. The tender chicken is then smothered in a sugar-free marinara sauce, topped with plenty of fresh mozzarella and more Parmesan, and baked until it’s a gooey, molten, cheesy dream. This isn’t just a “keto version” of a classic; it’s a legitimately spectacular dish in its own right that will satisfy every single one of your comfort food cravings. It’s the recipe that proves you can have it all: incredible flavor, and a meal that you can feel amazing about eating.
Why This is the Best Keto Chicken Parm You’ll Ever Make!
- Unbelievably Crispy Crust: The almond flour and Parmesan breading creates a wonderfully crispy, golden-brown crust that rivals any traditional breadcrumb version.
- All the Classic Comfort: This recipe delivers 100% of the authentic, savory, cheesy, and satisfying flavors of the restaurant classic you know and love.
- Quick and Easy: From start to finish, this impressive meal is ready in about 30 minutes, making it perfect for a satisfying weeknight dinner.
- Perfectly Juicy Chicken: By pounding the chicken thin, we ensure it cooks quickly and evenly, resulting in a tender, juicy cutlet every single time.
- Low-Carb & Guilt-Free: With only 2g net carbs per serving, this is a hearty, indulgent meal that fits perfectly into a keto or low-carb lifestyle.
Recipe Snapshot
| Prep Time | 5 minutes |
| Cook Time | 25 minutes |
| Total Time | 30 minutes |
| Servings | 6 servings |
| Calories | 349 kcal per serving |
| Course | Main Course |
| Cuisine | Keto, Italian-American |
| Method | Stovetop & Baking |
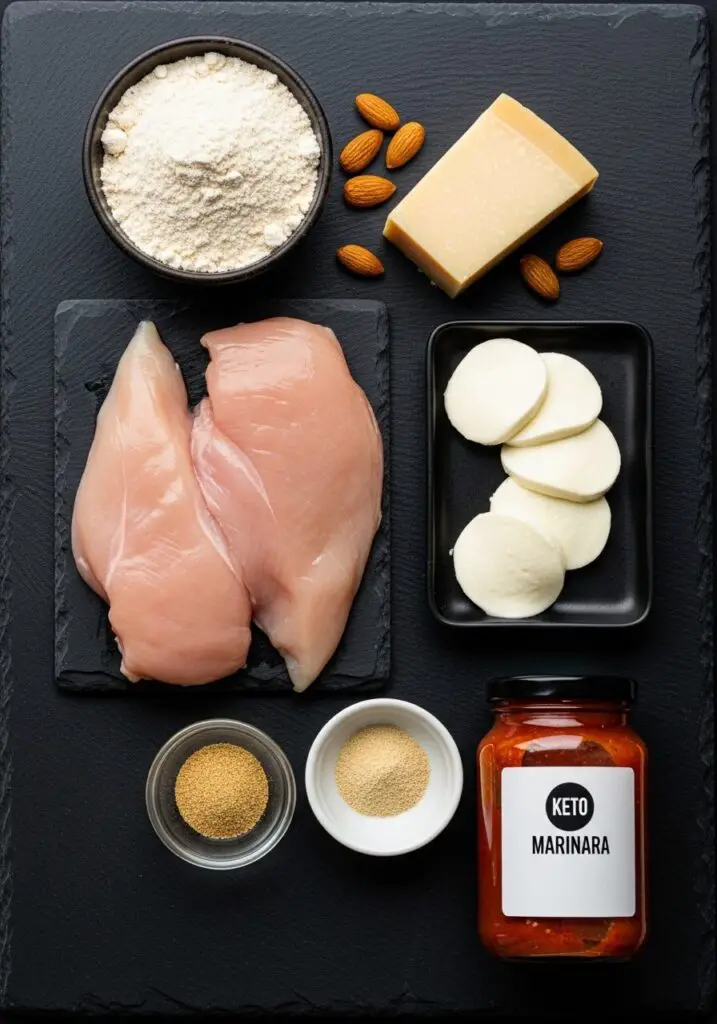
Your Keto Shopping List
Creating this low-carb masterpiece is easy with a handful of smart, keto-friendly ingredients.
→ For the Chicken & Crispy Breading
- Chicken Breasts: 6 small breasts (about 1.5 lbs total). Pounding them thin is key!
- Almond Flour: 2 cups. This is the secret to our crispy, golden, gluten-free breading.
- Eggs: 3 large ones, to act as the binder for our delicious crust.
- Parmesan Cheese: 1/2 cup, plus more for topping. Use freshly grated for the best flavor and melt.
- Spices: Garlic powder and onion powder to season the breading perfectly.
- Oil for Frying: 2 tablespoons. A high-smoke point oil like avocado oil is a great choice.
- Salt: For seasoning the chicken.
→ For the Cheesy Topping
- Keto Marinara Sauce: 2 cups. Look for a brand with no added sugar to keep it keto-friendly.
- Mozzarella Cheese: 1 1/2 cups. Freshly sliced or shredded low-moisture mozzarella will give you that epic cheese pull.
Let’s Cook! Crafting Your Perfect Keto Chicken Parmesan
This recipe is quick and so satisfying. We’ll bread, fry for crispiness, and then bake for the final cheesy melt. Let’s get started!
Phase 1: Prep the Chicken (Time: ~5 minutes)
This first step is the most important for ensuring your chicken is tender and cooks evenly.
- Pound the Chicken. Place the chicken breasts between two pieces of parchment paper or plastic wrap and use a meat mallet or rolling pin to pound them to an even 1/4-inch thickness.
Why it matters: Pounding the chicken not only tenderizes it but also ensures it cooks quickly and evenly, preventing dry spots. - Initial Flour Coat. Sprinkle the pounded chicken breasts with salt, then lightly coat both sides with almond flour, shaking off any excess. Set aside the remaining almond flour for the final breading step.
Phase 2: The Crispy Breading Station (Time: ~5 minutes)
An assembly line is the key to a clean and efficient breading process.
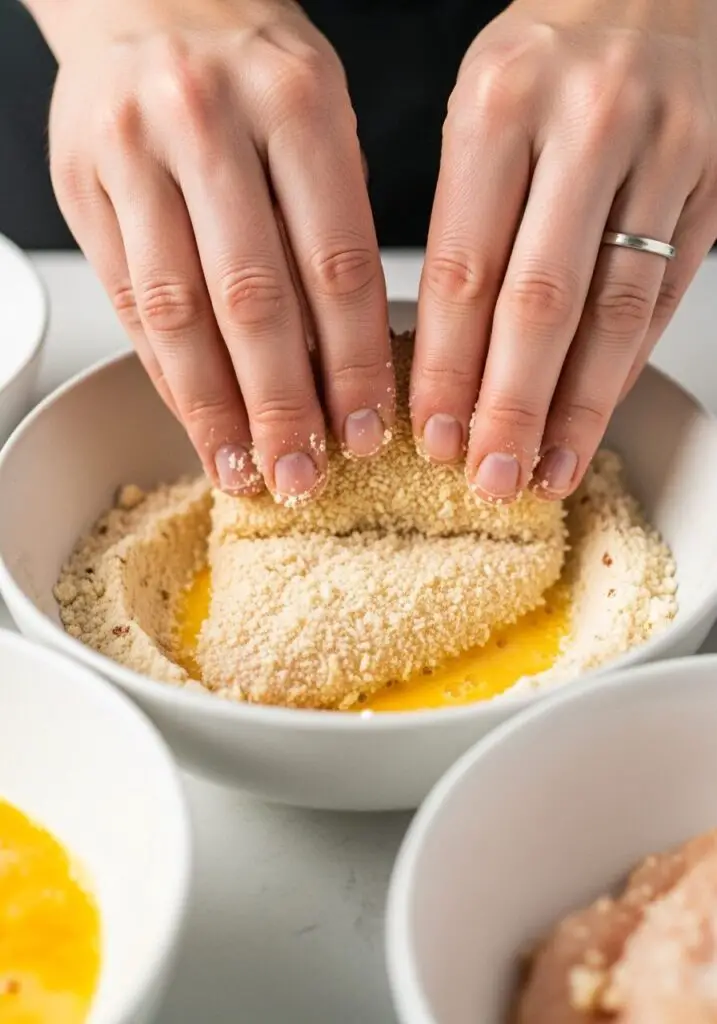
- Set Up Your Bowls. You’ll need two shallow bowls. In the first one, whisk the 3 large eggs. In the second bowl, combine the remaining almond flour, the grated parmesan cheese, garlic powder, and onion powder.
- Bread the Chicken. Working with one piece at a time, dip a chicken breast into the whisked eggs, letting any excess drip off. Then, press the egg-coated chicken firmly into the parmesan/almond flour mixture, ensuring it’s completely coated on all sides. Repeat with all the chicken pieces.
Phase 3: Fry for a Golden Crust (Time: ~10 minutes)
This is where we build that incredible crispy texture before the final bake.
- Heat the Pan. Place the oil in a large non-stick skillet over medium heat.
- Fry the Chicken. Once the oil is hot, carefully add the breaded chicken to the pan (work in batches to avoid overcrowding). Fry for 2-3 minutes on the first side until golden brown. Flip and cook for another 3 minutes on the other side. Transfer the fried chicken to a paper-towel-lined plate to soak up any excess oil.
Phase 4: The Final Cheesy Bake (Time: ~10-15 minutes)
Now we bring it all together for the glorious, cheesy finish.

- Preheat and Arrange. Preheat your oven to 400°F (200°C). Line a large baking sheet with parchment paper and place the fried chicken cutlets on it in a single layer.
- Top and Bake. Spoon enough keto marinara sauce over each chicken breast to cover the top. Add 2-3 slices of mozzarella cheese and a sprinkle of parmesan cheese on each one.
- Bake to Bubbly Perfection. Bake for 10-15 minutes, or until the cheese is completely melted, bubbly, and just starting to turn golden brown on top.
- Garnish and Serve. Remove the chicken parmesan from the oven, garnish with a little fresh basil or parsley if desired, and serve immediately.
WiseRecipes’ Top Tricks for Perfect Keto Chicken Parm
- Don’t Skip Pounding the Chicken: This is the number one secret to tender, juicy chicken that cooks in minutes. An even thickness is key.
- Use Freshly Sliced/Shredded Cheese: For the absolute best, gooiest cheese pull, use low-moisture mozzarella that you slice or shred yourself. Pre-shredded cheeses have additives that prevent them from melting as smoothly.
- Read Your Marinara Label: Many store-bought marinara sauces are packed with hidden sugars. Be sure to choose a brand that has no added sugar to keep this recipe truly keto-friendly.
- Don’t Overcrowd the Pan: When pan-frying the chicken, cook it in batches if necessary. Overcrowding the pan will cause the chicken to steam instead of fry, and you won’t get that beautiful crispy crust.
- Press the Breading Firmly: When you’re coating the chicken in the final almond flour mixture, use your hands to gently press it on. This helps the breading adhere so it doesn’t fall off during cooking.
The Ultimate Keto Chicken Parmesan (Chicken Parm)
Ingredients
Equipment
Method
-
Pound the chicken breasts to 1/4 inch thickness. Sprinkle with salt and lightly coat both sides with almond flour.
-
In a small bowl, whisk the eggs. In a separate bowl, combine the remaining almond flour, 1/2 cup parmesan cheese, garlic powder, and onion powder.
-
Dip each chicken breast in the eggs, then press firmly into the parmesan/almond flour mixture to coat completely.
-
Heat oil in a large non-stick pan over medium heat. Add the chicken and fry for 2-3 minutes per side until golden brown. Transfer to a paper towel-lined plate.
-
Preheat the oven to 400F/200C. Line a large baking sheet with parchment paper.
-
Place the fried chicken onto the baking sheet. Top with marinara sauce, followed by mozzarella slices and the remaining 1/3 cup parmesan cheese.
-
Bake for 10-15 minutes, or until the cheese is melted and slightly golden on top. Serve immediately.
Notes
Air Fryer Method: Place breaded chicken in the air fryer basket and cook at 400F/200C for 10 minutes, flipping halfway. Top with sauce and cheese and air fry for another 1-2 minutes until melted.
Storage: Leftovers can be stored in the refrigerator, covered, for up to 5 days.
Freezing: Place individual portions in a shallow, freezer-safe container and store in the freezer for up to 6 months.
Creative Twists: Delicious Ways to Customize Your Parm!
- Make it Spicy: Add a generous pinch of red pepper flakes to your marinara sauce or the breading mixture for a fiery kick.
- Add Pepperoni: Place a few slices of pepperoni on top of the marinara sauce before you add the mozzarella for a delicious pizza-parm hybrid.
- Use Pork Rind Crumbs: For an even crispier, zero-carb breading, substitute some or all of the almond flour with finely crushed pork rinds (panko).
- Chicken Parm Casserole: Dice the cooked chicken and layer it in a baking dish with the sauce and cheese for an easy, scoopable casserole.
- Serve with Zoodles: Serve your finished chicken parmesan over a bed of sautéed zucchini noodles to catch all the extra sauce.
- Try Different Cheeses: Sliced provolone is a fantastic and classic substitute for mozzarella.
Storing, Freezing & Reheating Your Chicken Parm
This recipe is fantastic for meal prep! Here are the best ways to store it.
Refrigerator Storage
Store leftovers in an airtight container in the refrigerator for up to 5 days. The breading will soften slightly upon reheating but will still be delicious.
Freezing
This dish freezes beautifully. Place individual cooked portions in a shallow, freezer-safe container. They will keep well in the freezer for up to 6 months.
Reheating
For the best results and to re-crisp the breading, reheat the chicken parmesan in an air fryer or in an oven at 350°F until warmed through. The microwave will work, but the breading will be soft.
FAQs: Your Keto Chicken Parmesan Questions, Answered!
Can I bake the chicken instead of frying it first?
Yes, absolutely. To oven-bake the breaded chicken, place it on a baking tray and bake at 350°F (180°C) for about 20 minutes, flipping halfway through. Then, remove it from the oven, add the toppings, and bake again as directed to melt the cheese.
Can I use an air fryer to cook the breaded chicken?
An air fryer is a fantastic option! Place the breaded chicken in the air fryer basket in a single layer (you may need to work in batches). Cook at 400°F (200°C) for about 10 minutes, flipping halfway through. Once cooked, you can add the toppings and air fry for another 1-2 minutes to melt the cheese.
What should I serve with keto chicken parmesan?
This dish is wonderful served with zucchini noodles, spaghetti squash, cauliflower mash, or a simple, fresh arugula salad with a lemon vinaigrette.
What if I don’t have almond flour?
For another great keto option, you can use finely crushed pork rinds (pork panko). You could also try other finely ground nut flours like pecan or walnut flour, though the flavor will be different.
This Keto Chicken Parmesan is a true celebration of comfort food, proving that you never have to feel deprived on a low-carb journey. It’s a rich, savory, and deeply satisfying meal that will delight even the most skeptical carb-lovers in your family. I hope this recipe brings a little taste of Italy and a whole lot of joy to your dinner table. Let me know how you enjoy it in the comments below!
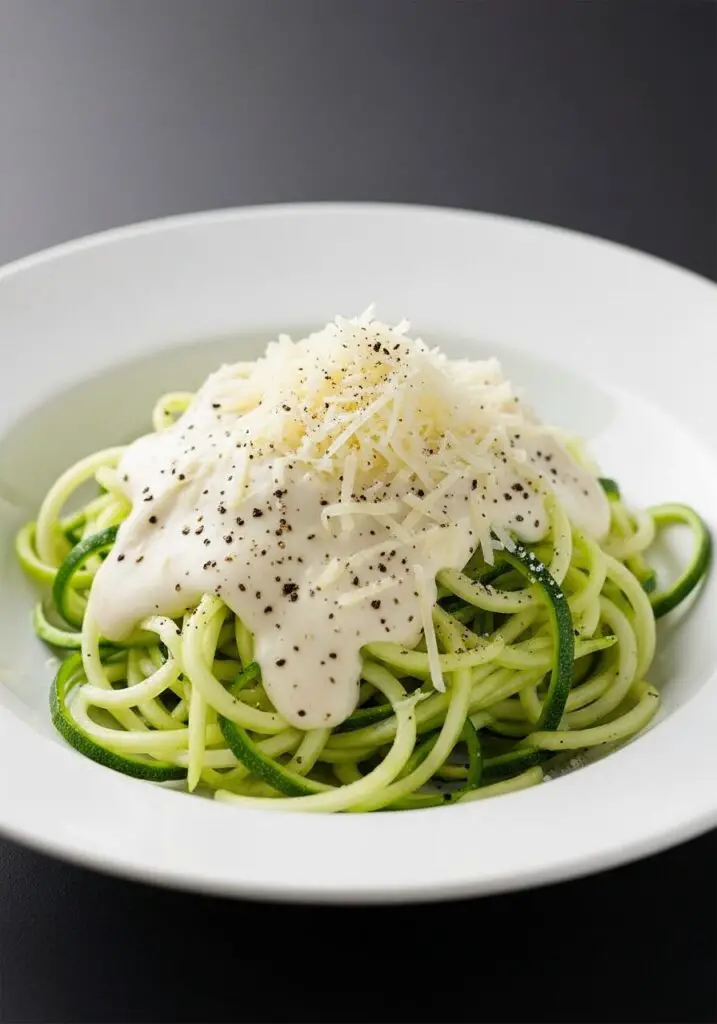
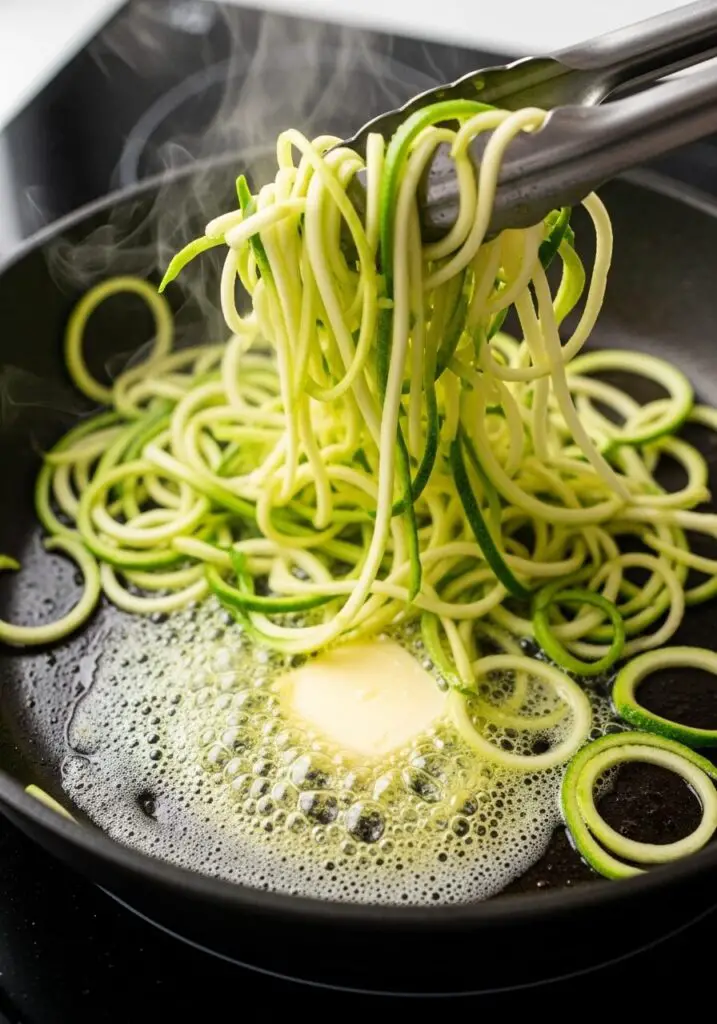
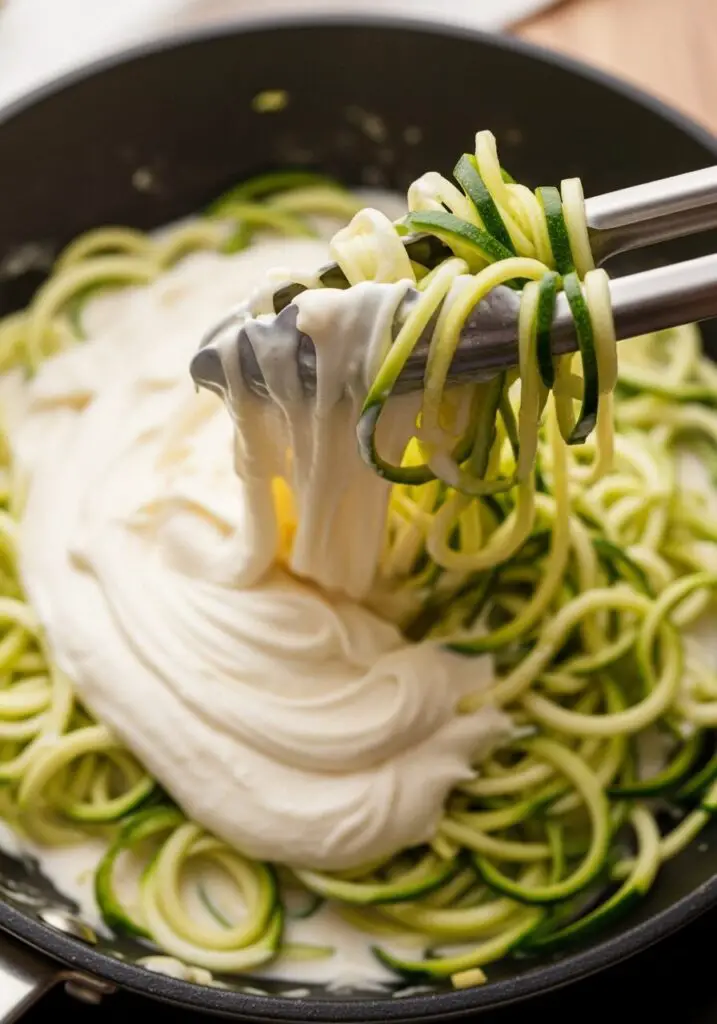
6. The Ultimate Keto Zucchini Alfredo (Ready in 10 Minutes!)

I have a question for you. What if I told you that you could have a bowl of rich, decadent, unbelievably creamy alfredo pasta on the table in just 10 minutes? And what if I told you it was also low-carb, keto-friendly, vegetarian, and made in a single pot? You’d probably think it was magic. Well, it is pure kitchen magic, and it’s a recipe that has completely saved my busiest weeknights. This is the ultimate Keto Zucchini Alfredo, and it is a true game-changer. We’re talking tender-crisp zucchini noodles, or “zoodles,” enrobed in the most luscious and velvety sauce you’ve ever tasted, made from a brilliant combination of cream cheese, heavy cream, and Parmesan. There’s no complicated roux, no endless stirring, just a simple, 7-ingredient sauce that comes together in the time it takes to cook the zucchini. This is the meal I turn to when I get home late, I’m craving serious comfort food, but I don’t want to undo my healthy habits. It’s pure, guilt-free indulgence, and it’s so fast you’ll be eating before you could have even decided on a takeout order.
Why This Keto Alfredo Will Be Your New Obsession!
- A True 10-Minute Meal: This is not a drill! From start to finish, this entire, satisfying meal is on the table in 10 minutes, making it the king of quick and easy dinners.
- Unbelievably Creamy & Rich: The genius cream cheese base creates a silky, luxurious sauce that clings to every single zoodle. You won’t believe it’s so simple and low-carb.
- One-Pan Wonder: The entire dish comes together in a single frying pan, which means cleanup is an absolute breeze. It’s the perfect low-effort, high-reward recipe.
- Satisfies Pasta Cravings: This dish delivers all the comforting, slurpable satisfaction of a classic alfredo, keeping you on track with your keto or low-carb goals.
- Just 7 Simple Ingredients: You don’t need a long, complicated shopping list to create this masterpiece. It’s built on a handful of simple, easy-to-find ingredients.
Recipe Snapshot
| Prep Time | 5 minutes |
| Cook Time | 5 minutes |
| Total Time | 10 minutes |
| Servings | 4 servings |
| Calories | 232 kcal per serving |
| Course | Main Course |
| Cuisine | Keto, Low-Carb, Vegetarian |
| Method | One-Pot, Stovetop |
Your Shopping List for Keto Creaminess
This lightning-fast meal comes together with just seven simple ingredients. It’s all about quality here!

→ For the ‘Noodles’ & Sauce
- Extra Virgin Olive Oil & Butter: The perfect duo for sautéing. The oil prevents the butter from browning too quickly.
- Zucchini Noodles: Two 250g packets. Using pre-spiralized “zoodles” is the ultimate shortcut for a 10-minute meal!
- Garlic: 2 cloves, finely chopped. For that essential aromatic, savory flavor.
- Cream Cheese: 100g, chopped. This is the secret to our ultra-creamy, no-fuss sauce. Use full-fat for the best texture.
- Thickened Cream (Heavy Cream): 1 tablespoon. Just a touch to enrich the sauce and make it extra luscious.
- Parmesan Cheese: Finely grated, for that salty, nutty, umami flavor. Use a vegetarian hard cheese to keep the dish fully vegetarian.
Let’s Cook! Making Your 10-Minute Alfredo, Step-by-Step
This recipe moves at lightning speed, so have all your ingredients prepped and ready by the stove before you start. Let’s go!
Phase 1: Cook the Zucchini ‘Noodles’ (Time: ~2 minutes)
The key to perfect zoodles is a very quick cook time. This ensures they are tender-crisp, not mushy.
- Heat the Pan. Heat the olive oil and butter in a large frying pan or skillet over medium-high heat until the butter is melted and foamy.
- Sauté the Zoodles. Add the zucchini noodles to the hot pan. Use tongs to toss them occasionally for just 1-2 minutes. You want them to be just slightly wilted but still have a nice bite.
Critical Tip: Do Not Overcook! This is the number one rule of zucchini noodles. Overcooking them will release too much water and make your final dish soggy. - Remove the Zoodles. Use your tongs to transfer the cooked zucchini noodles to a plate, leaving the flavorful oil and butter behind in the pan.
Phase 2: Create the Silky Alfredo Sauce (Time: ~5 minutes)
Using the same pan, we’ll whip up our incredible, creamy sauce in just a few minutes.
- Sauté the Garlic. Add the finely chopped garlic to the same pan. Cook, stirring constantly, for about 1 minute until it’s fragrant. Be careful not to let it brown.
- Build the Cream Sauce. Add the chopped cream cheese, the tablespoon of heavy cream, and 60ml (1/4 cup) of water to the pan. Reduce the heat to low. Cook, stirring often, for about 3 minutes.
Visual Cue: The cream cheese will melt into the liquid, creating a smooth, cohesive sauce. Use a whisk if needed to break up any small lumps. - Add the Parmesan. Stir in the grated parmesan cheese until it has melted into the sauce. Season with salt and pepper to taste.
Phase 3: Combine and Serve (Time: ~1 minute)
Now we bring it all together for the grand finale!
- Toss to Combine. Add the cooked zucchini noodles back into the pan with the creamy alfredo sauce. Use tongs to toss everything together gently until every strand is coated in the luscious sauce.
- Serve Immediately. Divide the keto alfredo among four bowls. Serve right away, garnished with an extra sprinkle of parmesan cheese.
WiseRecipes’ Top Tips for Perfect Keto Alfredo
- The Quick-Cook is Key: The most important rule for zucchini noodles is to cook them as little as possible. A quick 1-2 minute toss in the hot pan is all they need. This keeps them from releasing water and turning your sauce soupy.
- Full-Fat for Full Flavor: For the creamiest, most satisfying sauce, use full-fat cream cheese and heavy cream. The fat is what makes it so rich and keto-friendly.
- Gentle Heat for the Sauce: When you’re melting the cream cheese, keep the heat on low. This prevents the sauce from breaking or becoming grainy and allows it to melt into a perfectly smooth consistency.
- Grate Your Own Parmesan: For the best melt and flavor, always grate your own Parmesan from a wedge. Pre-shredded cheeses often contain anti-caking agents that can make your sauce gritty.
- Don’t Be Afraid to Add Water: The small amount of water called for in the sauce is crucial. It helps the cream cheese melt smoothly and creates the perfect saucy consistency.
Creative Twists: Delicious Ways to Customize Your ‘Zoodles’!
- Add a Protein Punch: This dish is a fantastic base for protein. Toss in some cooked, shredded chicken, sautéed shrimp, or crispy crumbled bacon.
- Stir in More Veggies: Sauté some sliced mushrooms with the garlic or wilt in a large handful of fresh spinach at the very end for an extra vegetable boost.
- Make it Spicy: Add a pinch of red pepper flakes with the garlic to give your creamy sauce a little bit of warmth.
- Add a Burst of Freshness: Stir in some freshly chopped parsley or a squeeze of fresh lemon juice at the end to brighten up all the rich flavors.
- Pesto Alfredo: Swirl a tablespoon of your favorite pesto into the finished sauce for a delicious, herby twist.
- Add Sun-Dried Tomatoes: Stir in some finely chopped, oil-packed sun-dried tomatoes for a sweet and tangy flavor contrast.
One-Pot Keto Vegetarian Zucchini Alfredo
Ingredients
Equipment
Method
-
Heat the oil and butter in a large frying pan over medium-high heat until the butter is foamy. Add the zucchini noodles and toss occasionally for 1-2 minutes until slightly wilted. Do not overcook.
-
Using tongs, transfer the cooked zucchini noodles to a plate, leaving the oil and butter in the pan.
-
Add the finely chopped garlic to the same pan. Cook, stirring, for 1 minute until aromatic.
-
Add the cream cheese, cream, and 60ml (1/4 cup) water to the pan. Reduce heat to low. Cook, stirring often, for 3 minutes until the mixture is smooth.
-
Stir in the parmesan cheese and season with salt and pepper.
-
Add the cooked zucchini noodles back into the pan with the sauce. Use tongs to toss everything together to combine.
-
Serve immediately with an extra sprinkle of parmesan cheese.
Notes
Vegetarian Cheese: To ensure this dish is fully vegetarian, use a vegetarian-friendly hard cheese instead of traditional Parmesan, which often contains animal rennet.
Full-Fat is Best: For the creamiest, most keto-friendly sauce, use full-fat cream cheese.
Storing Your Leftover Zucchini Alfredo
Zucchini noodle dishes are notoriously best when eaten fresh, but leftovers can still be enjoyed!
Refrigerator Storage
Store any leftovers in an airtight container in the refrigerator for up to 2 days. Be aware that the zucchini will naturally release more water as it sits, so the sauce may be thinner upon reheating.
Reheating
Gently reheat the leftovers in a skillet over low heat, stirring occasionally until warmed through. This is preferable to the microwave, as it can help some of the excess water evaporate and prevent the sauce from breaking.
FAQs: Your Keto Zucchini Alfredo Questions, Answered!
How do I make my own zucchini noodles if I can’t buy them?
It’s easy! The best tool is a spiralizer, which creates long, perfect spaghetti-like strands. You can also use a julienne peeler to create thinner strands or a mandoline fitted with a julienne blade.
My sauce ended up watery. What went wrong?
This is the most common issue with zoodle dishes, and the culprit is almost always overcooked zucchini. If you cook the zucchini for too long, it releases a lot of water, which will thin out your beautiful cream sauce. The 1-2 minute quick-sauté is the secret!
Is there a substitute for cream cheese?
Cream cheese is really the star of this particular quick sauce method. You could try using a very thick, high-fat mascarpone cheese, but the flavor and texture will be slightly different.
How do I make this recipe dairy-free?
You can experiment with dairy-free alternatives, but it will change the recipe significantly. You would need to use a high-quality, meltable dairy-free cream cheese, a dairy-free butter substitute, and a rich, unsweetened plant-based cream (like a cashew or coconut cream). The results will vary based on the brands you use.
This One-Pot Keto Zucchini Alfredo is a true testament to the magic of simple, smart cooking. It’s the recipe that proves you can have a decadent, creamy, and deeply satisfying pasta-like experience in just 10 minutes, all while staying perfectly on track with your health goals. It’s a weeknight lifesaver and a crave-worthy dish all in one. I hope you fall in love with its creamy, dreamy simplicity. Let me know what you think in the comments below!
7. The Ultimate Steak Dinner for Two (with Blender Hollandaise)
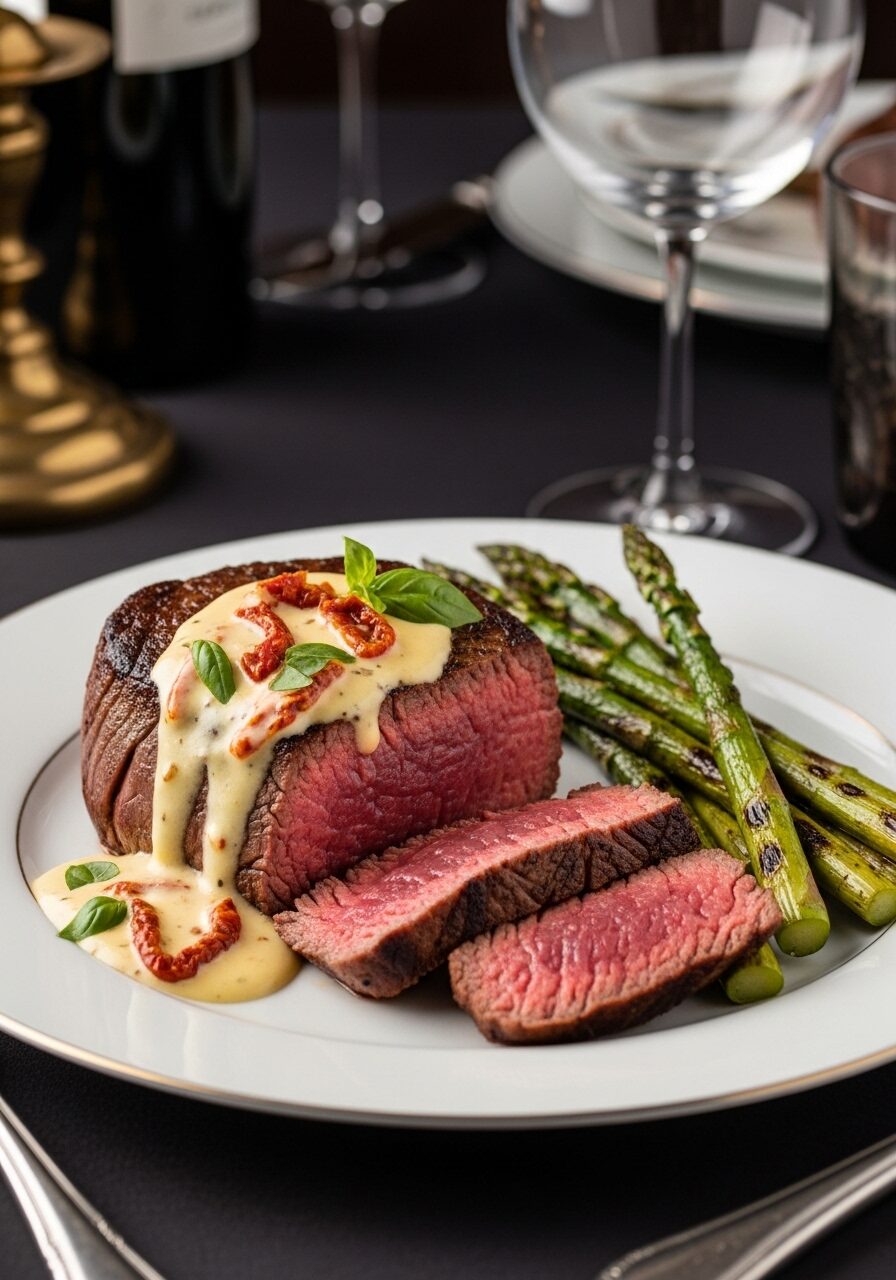
There is nothing more romantic than a perfectly cooked steak dinner. It’s the quintessential date night meal, a true celebration of flavor and indulgence. But the thought of creating that restaurant-quality experience at home—especially a notoriously tricky sauce like hollandaise—can feel intimidating. Well, I am here to share a recipe that will change everything. This is the ultimate steak dinner for two, a dish that is stunningly elegant, wildly delicious, and secretly, unbelievably easy. Imagine a thick, tender filet mignon or sirloin, seared to perfection with a deep, savory crust, and a juicy, pink center. Alongside it, crisp-tender asparagus spears, beautifully charred and seasoned. And the sauce? The sauce is pure magic. We are making a foolproof, no-fail blender hollandaise, infused with the sweet tang of sun-dried tomatoes and fresh basil. It’s rich, creamy, and comes together in about 60 seconds. This is the meal I make when I want to create a truly special, unforgettable evening without any of the stress. It’s pure luxury, made simple.

Why This is the Only Date Night Steak Recipe You Need!
- Foolproof Blender Hollandaise: Forget the endless whisking and fear of broken sauces. This immersion blender method is a game-changer, creating a perfect, creamy hollandaise every single time.
- Restaurant-Quality Results at Home: From the perfectly seared steak to the elegant sauce, this meal looks and tastes like it came from a high-end steakhouse.
- Ready in About 30 Minutes: While it looks incredibly sophisticated, this entire, complete meal comes together in about half an hour, making it perfect for a weeknight indulgence.
- Perfectly Balanced Flavors: The rich, savory steak and creamy hollandaise are perfectly balanced by the fresh, charred asparagus and the bright notes of basil and lemon.
- Naturally Low-Carb & Keto-Friendly: This is a naturally high-protein, low-carb meal that feels incredibly decadent and satisfying, perfect for a keto lifestyle.
Recipe Snapshot
| Prep Time | 15 minutes |
| Cook Time | 15 minutes |
| Total Time | 30 minutes |
| Servings | 2 servings |
| Calories | 991 kcal per serving |
| Course | Main Course |
| Cuisine | Modern American, French-Inspired |
| Method | Pan-Seared, Blender |
Your Shopping List for a Five-Star Meal
This elegant dinner is built on a foundation of high-quality ingredients. Choosing a great cut of steak will make all the difference!

→ For the Tomato-Basil Hollandaise
- Butter or Ghee: 1/2 stick (4 tbsp). This will be the rich, warm base of our sauce.
- Large Egg Yolks: 2 of them. These are the key to the emulsification that creates a creamy sauce.
- Lemon Juice: 2 teaspoons, for that classic tangy brightness.
- Sun-Dried Tomatoes: 2 tablespoons, chopped. They add a sweet, tangy, umami depth.
- Fresh Basil: 1 tablespoon, finely chopped. For a burst of fresh, herbal flavor.
→ For the Steak & Asparagus
- Lean Beef Steaks: Two large steaks like sirloin or filet mignon (about 8-10 oz each). The star of the show!
- Avocado or Olive Oil: Just a teaspoon for searing.
- Asparagus Spears: About 12-16 spears. Look for spears that are firm and bright green.
- Extra Virgin Olive Oil: 1 tablespoon for tossing the asparagus.
- Sea Salt & Freshly Ground Black Pepper: For seasoning everything to perfection.
Let’s Cook! Crafting Your Perfect Steak Dinner, Step-by-Step
The key to a stress-free steak dinner is preparation. Make the sauce first, then focus on cooking the steak and asparagus to perfection.
Phase 1: Make the Foolproof Blender Hollandaise (Time: ~5 minutes)
This is where the magic happens. Grab your immersion blender and a mason jar, and prepare to be amazed.

- Prepare the Steaks and Ingredients. Before you begin, take your steaks out of the fridge and let them sit at room temperature for at least 15-20 minutes. This helps them cook more evenly.
- Melt the Butter. In a large-mouthed mason jar that your immersion blender can fit into, melt the butter or ghee in the microwave until it’s hot and bubbling.
- Blend the Sauce. Add the two egg yolks and the lemon juice directly into the hot butter in the jar. Immediately place the head of the immersion blender at the very bottom of the jar and turn it on. As the sauce begins to thicken and emulsify, slowly lift the blender up towards the top of the mixture. This whole process takes less than a minute!
- Add Flavorings. Stir in the chopped sun-dried tomatoes and fresh basil. You can give it a quick pulse with the blender if you want them fully incorporated, or simply stir them in for more texture. Season to taste with salt and pepper. Set the sauce aside.
Phase 2: Cook the Steak and Asparagus (Time: ~15 minutes)
With the sauce ready, it’s time to focus on the main event. A very hot pan is your best friend here.

- Prep the Asparagus. Snap off the woody, tough ends of the asparagus spears. Place them in a bowl and toss with 1 tablespoon of olive oil, salt, and pepper.
- Heat the Pan. Preheat a cast-iron skillet, griddle pan, or other heavy-bottomed skillet over high heat until it is very hot.
- Sear the Steaks. Pat the room-temperature steaks completely dry with a paper towel. Rub them with a little oil and season generously on all sides with salt and pepper. Carefully place the steaks in the hot pan. Cook for 3-5 minutes per side, depending on the thickness and your desired level of doneness.
- Rest the Steaks. This is a crucial step! Remove the steaks from the pan, place them on a cutting board, and cover them loosely with foil. Let them rest for at least 5-10 minutes.
- Cook the Asparagus. While the steaks rest, place the asparagus on the hot pan. Cook for about 5-10 minutes, turning occasionally, until they are tender and nicely charred in spots.
Phase 3: Serve and Enjoy (Time: ~2 minutes)
- Plate Your Dinner. Slice the rested steak against the grain. Arrange the sliced steak and the charred asparagus on two plates.
- Sauce and Serve. Gently warm the hollandaise sauce if needed (do not boil!). Drizzle the incredible tomato-basil hollandaise over the steak and asparagus. Serve immediately.
WiseRecipes’ Top Tricks for a Perfect Steak Dinner
- Room Temperature Steak is Key: Letting your steaks rest at room temperature for at least 15 minutes before cooking is essential. A cold steak will not cook evenly and won’t get as good of a crust.
- A Screaming Hot Pan: For a perfect, deep-brown crust (the Maillard reaction!), your pan must be very hot before the steak goes in. Don’t be afraid of the sizzle!
- Rest Your Meat! This is the most important rule of cooking steak. Resting the meat for 5-10 minutes before you slice it allows the juices to redistribute throughout the steak, ensuring it is moist and tender, not dry.
- The Blender Hollandaise Secret: The magic of the immersion blender method is that the hot butter cooks the egg yolks just enough while the powerful blades create a fast, stable emulsion. It’s science, and it’s delicious.
- Pat Your Steak Dry: Before seasoning, use a paper towel to pat your steaks completely dry. A dry surface is essential for forming a perfect, golden-brown crust.
Creative Twists: Delicious Ways to Customize Your Date Night!
- Make it Surf and Turf: Sear some large shrimp or scallops in the pan after the steak and serve them alongside.
- Add Sautéed Mushrooms: Sauté some sliced cremini mushrooms in the steak pan while the meat is resting and serve them on the side.
- Spice Up the Hollandaise: Add a pinch of cayenne pepper or a dash of your favorite hot sauce to the hollandaise for a little kick.
- Try a Different Herb: Swap the basil in the hollandaise for fresh tarragon for a more classic French flavor profile.
- Change the Vegetable: This meal is also fantastic with charred broccolini or green beans instead of asparagus.
- Top with Blue Cheese: For an extra decadent touch, crumble some blue cheese over the steak just before drizzling with the hollandaise.
The Ultimate Steak Dinner for Two (with Blender Hollandaise)
Ingredients
Equipment
Method
-
Take steaks out of the fridge to come to room temperature.
-
In a large-mouthed mason jar, melt the butter in the microwave until hot. Add the egg yolks and lemon juice to the hot butter.
-
Place an immersion blender at the bottom of the jar and blend, lifting it slowly as the mixture emulsifies into a thick sauce.
-
Stir in the chopped sun-dried tomatoes and fresh basil. Season to taste with salt and pepper. Set aside.
-
Snap off the woody ends of the asparagus and toss the spears in a bowl with 1 tbsp olive oil, salt, and pepper.
-
Preheat a griddle pan or large skillet over high heat until very hot. Pat the steaks dry, rub with 1 tsp oil, and season generously with salt and pepper.
-
Place steaks on the hot pan and cook for 3-5 minutes per side for medium-rare, depending on thickness. Remove from the pan, cover loosely with foil, and let rest for 5-10 minutes.
-
While the steaks rest, place the asparagus on the hot pan and cook for about 5-10 minutes, turning occasionally, until tender and charred.
-
Slice the rested steaks and serve alongside the charred asparagus. Drizzle generously with the tomato-basil hollandaise.
Notes
Blender Hollandaise Tip: Ensure your butter is hot and bubbling when you add the egg yolks. This heat helps to gently cook the yolks while the blender creates a fast, foolproof emulsion.
Room Temperature Meat: Letting your steaks sit out for 15-20 minutes before cooking helps them cook more evenly.
Storing & Reheating Your Leftovers
While this meal is best enjoyed fresh, here’s how to handle any delicious leftovers.
Refrigerator Storage
Store the leftover steak and asparagus in one airtight container and the hollandaise sauce in a separate airtight jar in the refrigerator for up to 3 days.
Reheating
Reheating hollandaise is tricky, as high heat will cause it to “break” or separate. The best method is to warm it very gently in a small saucepan over the lowest possible heat, whisking constantly. You can also place the jar in a bowl of warm water. It’s best to reheat the steak and asparagus in a skillet or air fryer to preserve their texture.
FAQs: Your Steak Dinner Questions, Answered!
How do I know when my steak is done?
The most accurate way is with an instant-read meat thermometer. For a medium-rare steak, you’re looking for an internal temperature of about 130-135°F (54-57°C). For medium, aim for 135-145°F (57-63°C). Remember to let it rest!
My hollandaise sauce broke or separated! Can I fix it?
Yes! This is less likely with the blender method, but if it happens, you can often save it. In a clean bowl, whisk a new egg yolk with a teaspoon of warm water. Then, very, very slowly, drizzle the broken sauce into the yolk while whisking constantly. The new yolk should help it re-emulsify.
Can I make the hollandaise sauce without an immersion blender?
You can, but you’ll need to use the traditional method, which requires more care. It involves slowly drizzling the hot melted butter into the egg yolks while whisking constantly in a double boiler. The immersion blender method is specifically designed to be foolproof and fast.
What is the best cut of steak for a date night dinner?
Filet mignon is the classic choice for a special occasion because it is incredibly tender. However, a well-marbled sirloin, New York strip, or ribeye will also be fantastic and often have an even richer, beefier flavor.
This Steak Dinner for Two is the ultimate expression of love through food. It’s an elegant, satisfying, and deeply delicious meal that proves you don’t need a restaurant reservation to have an unforgettable date night. It’s about taking simple, high-quality ingredients and turning them into something truly special. I hope you and your loved one enjoy every single delicious bite. Let me know how your special dinner turns out in the comments below!
8. The Ultimate Perfect Air Fryer Shrimp Recipe: Dinner Ready in 10 Minutes!
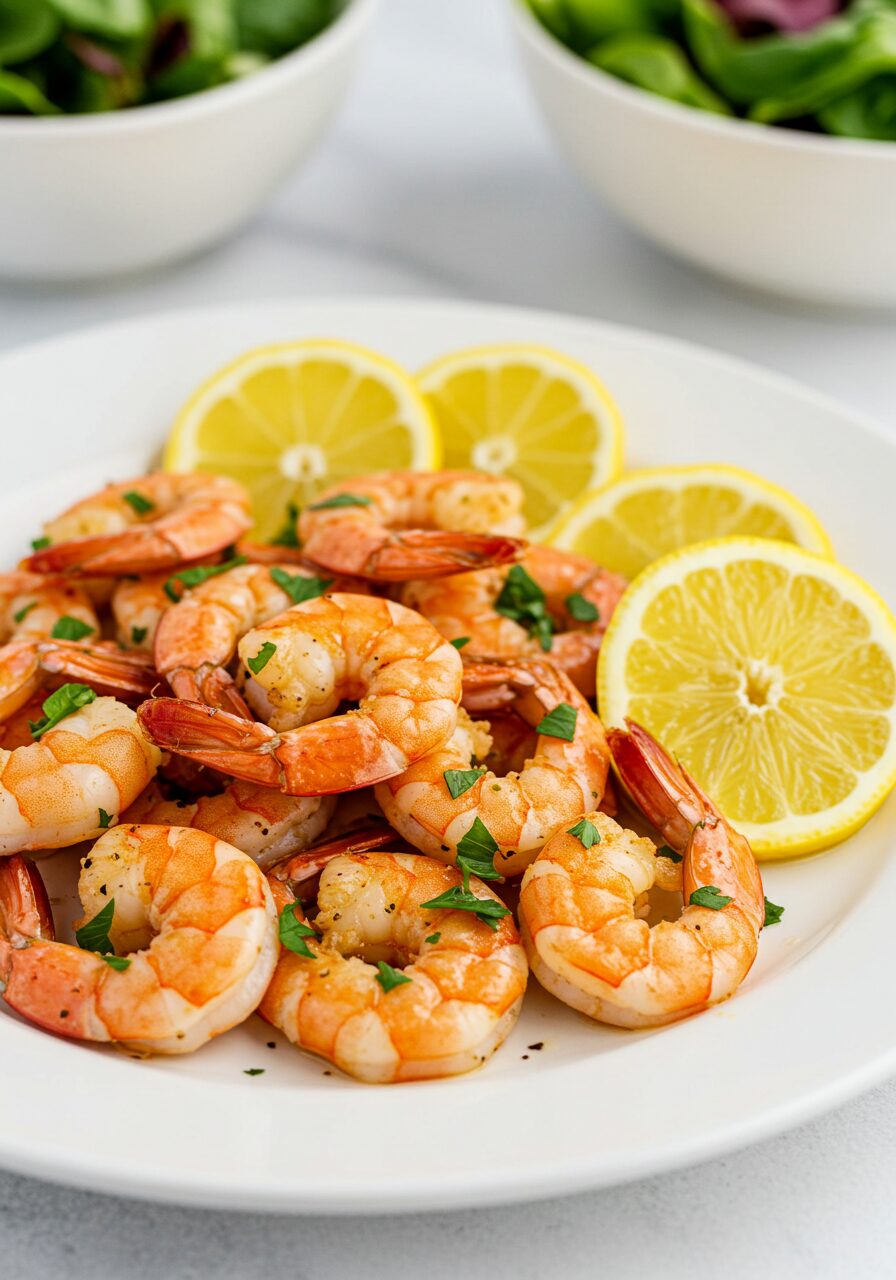
Hello, WiseRecipes readers and fellow fans of meals that are lightning-fast, incredibly delicious, and effortlessly healthy! When I want to whip up a quick dinner on busy weeknights, I love making this easy Air Fryer Shrimp that comes out perfectly every time. Get ready to discover your new favorite way to cook shrimp with my Ultimate Perfect Air Fryer Shrimp recipe!
Imagine plump, juicy jumbo shrimp, perfectly seasoned with a simple yet flavorful blend of paprika, garlic, and herbs, then cooked to tender perfection in minutes. This easy 10 minute air fryer shrimp for dinner is a true game-changer. The magic of the air fryer circulates hot air to cook the shrimp quickly and evenly, ensuring they are succulent and delicious, never rubbery. This is the best healthy quick air fryer shrimp with olive oil and spices.
My journey with this Air Fryer Shrimp recipe was all about achieving that “perfectly every time” result with minimal fuss. We’ll explore how to cook perfect juicy shrimp in an air fryer that will make you wonder why you ever cooked it any other way. This quick low carb keto friendly air fryer shrimp recipe is as versatile as it is speedy.
So, if you’re ready for a flavorful paprika garlic shrimp in air fryer that’s on the table in a flash and tastes amazing, let’s get that air fryer preheating for this incredible Air Fryer Shrimp recipe!

Why This Air Fryer Shrimp is “Perfectly Every Time”
If “10 minutes total” isn’t enough, here’s why this Air Fryer Shrimp recipe is a weeknight superstar:
- Incredibly Fast: With just 4 minutes of prep and 6 minutes of cook time, dinner is truly on the table in 10 minutes. This is the heart of our Air Fryer Shrimp recipe.
- Perfectly Cooked & Juicy: The air fryer provides even, consistent heat that cooks shrimp perfectly, keeping them tender and succulent.
- Minimal Oil & Healthy: Requires just a small amount of olive oil, making it a light and healthy way to enjoy this protein-packed seafood.
- Super Easy & Foolproof: Simply season, arrange in the basket, and air fry. It’s a great recipe for beginner cooks.
- Versatile Protein: These shrimp are perfect for adding to tacos, salads, pasta, rice bowls, or just eating as a delicious appetizer.
- Easy Cleanup: Cooking in the air fryer basket is often much less messy than pan-searing.
- Dietary-Friendly: Naturally gluten-free, low-carb, and keto-friendly, making it a great option for many lifestyles.
Gather Your Quick & Flavorful Ingredients: What You’ll Need
Let’s get our simple yet impactful ingredients ready for this speedy Air Fryer Shrimp recipe, based on the provided list.
Key Ingredients (Yields 4 servings):
- Jumbo Peeled and Deveined Shrimp: 32 (about 1 ¼ pounds), thawed if frozen and patted dry.
- Extra-Virgin Olive Oil: 2 tablespoons.
- Garlic Powder: ¾ teaspoon.
- Sweet Paprika: ¾ teaspoon.
- Dried Parsley: ¾ teaspoon.
- Kosher Salt: ¼ teaspoon.
- Freshly Ground Black Pepper: To taste (optional, but recommended).
- Nonstick Cooking Spray: For the air fryer basket.
- Lemon Wedges: For serving.
From Prep to Plate in 10 Minutes: Your Air Fryer Shrimp Guide
Let’s create this incredibly fast and delicious Air Fryer Shrimp recipe!
Step 1: Preheat the Air Fryer & Season the Shrimp
- Preheat Air Fryer (Optional but Recommended): While many recipes say you don’t have to, preheating your air fryer for a few minutes ensures the shrimp start cooking immediately at the right temperature. If your model requires it, preheat to 400°F (200°C).
- Prep Shrimp: Ensure your shrimp are fully thawed and pat them thoroughly dry with paper towels. This is crucial for the seasonings to stick and for the shrimp to roast rather than steam.
- Combine Seasoning: Mix the 2 tablespoons olive oil with the ¾ teaspoon garlic powder, ¾ teaspoon sweet paprika, ¾ teaspoon dried parsley, and ¼ teaspoon kosher salt (and a few grinds of black pepper) in a medium bowl.
- Coat the Shrimp: Add the shrimp and mix well with the seasoning mixture on both sides to coat. Make sure every shrimp is lightly and evenly coated with the seasoned oil. This is key for a flavorful Air Fryer Shrimp recipe.
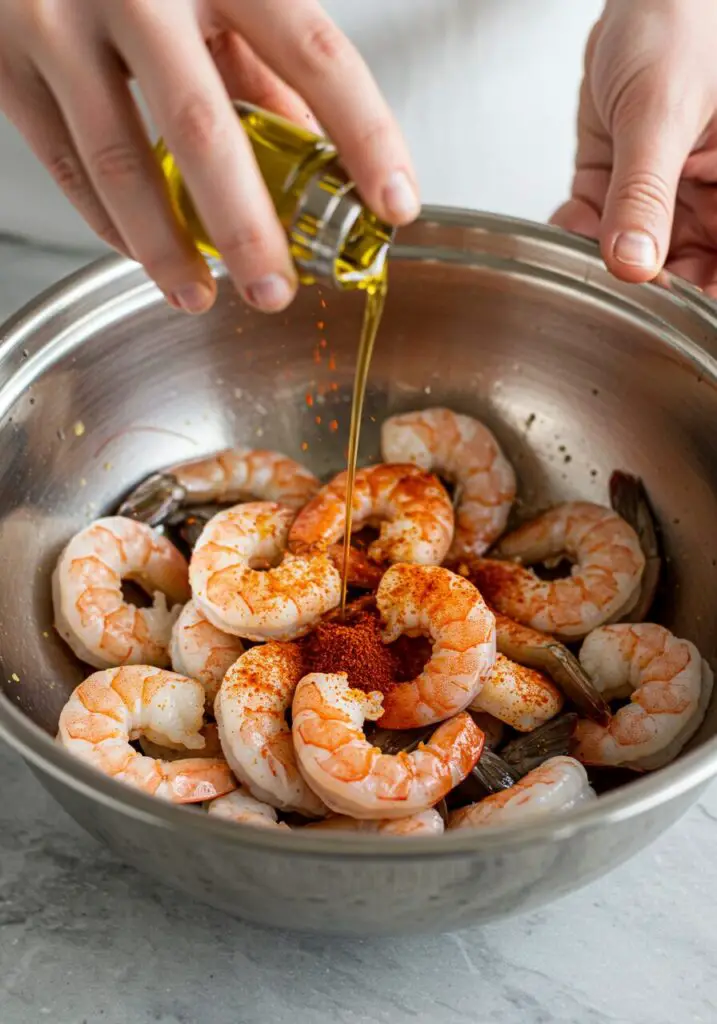
Step 2: Air Fry to Juicy Perfection!
- Prepare Basket: If your air fryer basket is prone to sticking, you can lightly spray it with nonstick cooking spray.
- Arrange Shrimp in Basket: Arrange the seasoned shrimp in the air fryer basket in a single layer. Do not overcrowd the basket; cook in batches as needed to ensure even cooking and the best texture. This is how to cook perfect juicy shrimp in an air fryer.
- Air Fry:Air fry at 400°F (200°C) for 5 to 6 minutes, shaking the basket halfway.
- The shrimp are done when they are pink, opaque, and slightly curled. Be careful not to overcook them! This easy 10 minute air fryer shrimp for dinner cooks very fast.
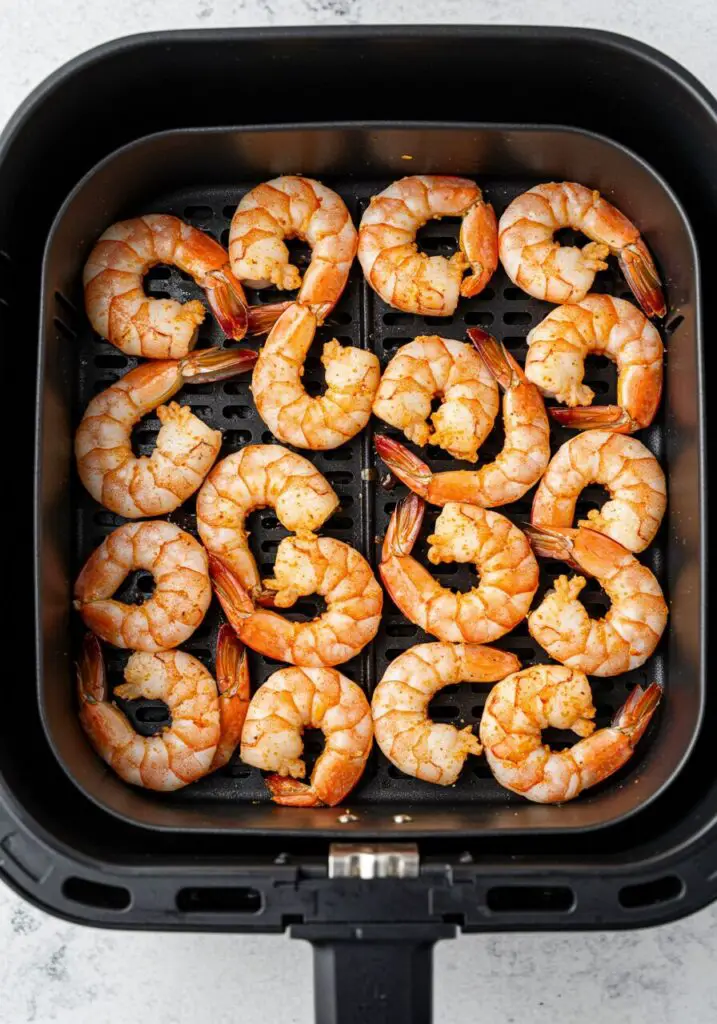
Step 3: Serve Your Speedy & Delicious Shrimp!
- Serve Immediately: As soon as they are cooked, remove the shrimp from the air fryer basket.
- Garnish & Enjoy: Serve your perfect Air Fryer Shrimp recipe immediately with lemon wedges for squeezing over the top. They are fantastic on their own, or as part of a larger meal.
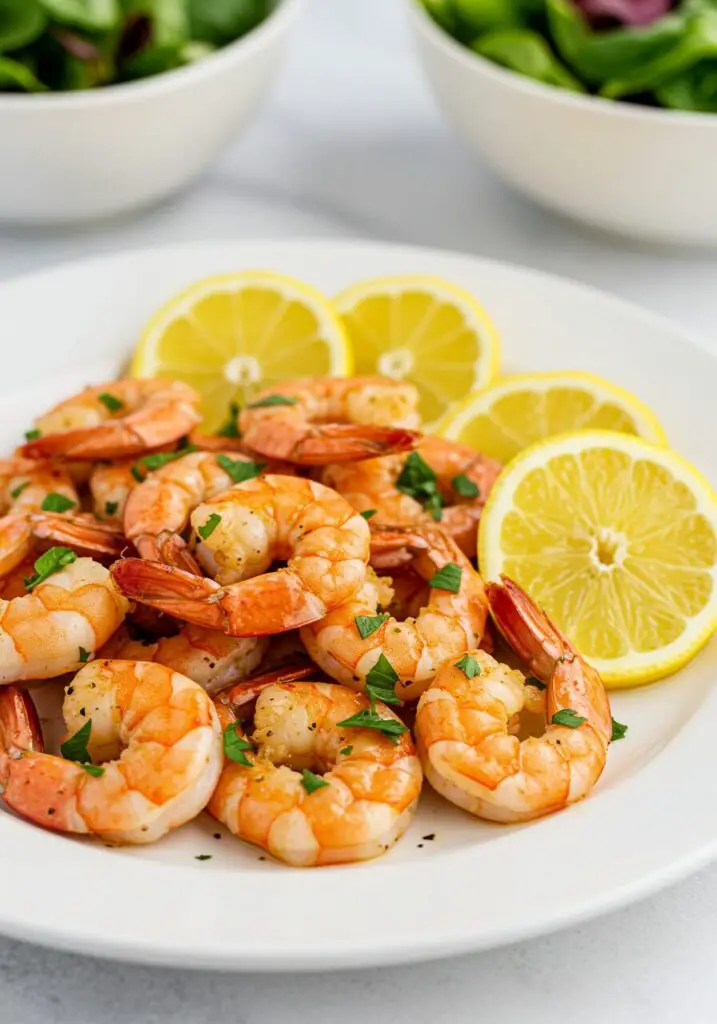
Wise Tips for the Best Air Fryer Shrimp Every Time
Make your Air Fryer Shrimp recipe truly perfect with these essential hints:
- Don’t Overcook the Shrimp: This is the most important rule for tender shrimp! Air fryers cook fast. Start checking at the 5-minute mark. They’re done when they turn pink and opaque.
- Pat Shrimp Thoroughly Dry: This helps the oil and seasonings adhere properly and prevents the shrimp from steaming, leading to a better texture.
- Single Layer is Key: Do not overcrowd the air fryer basket. The hot air needs to circulate around each shrimp for them to cook evenly and get a slight roast. Cook in batches if you have to for your Air Fryer Shrimp recipe.
- Shake the Basket: A quick shake halfway through cooking helps to ensure all sides of the shrimp are exposed to the hot air and cook evenly.
- Adjust Time for Shrimp Size: The recipe calls for jumbo shrimp. If you use smaller shrimp, they will cook even faster (as little as 3-4 minutes). If using colossal shrimp, they might need an extra minute or two.
- Use a Good Seasoning Blend: The simple paprika, garlic, parsley, and salt blend is delicious, but feel free to experiment! This simple seasoned salt air fryer salmon fillets (concept) works just as well for shrimp.
Perfect 10-Minute Air Fryer Shrimp
Ingredients
Method
-
Preheat an air fryer to 400°F (200°C) for 2 minutes if desired.
-
In a medium bowl, mix together olive oil, garlic powder, sweet paprika, dried parsley, and kosher salt.
-
Pat shrimp dry. Add the shrimp to the seasoning mixture and toss well to coat on all sides.
-
Spray the air fryer basket with nonstick cooking spray. Arrange shrimp in the basket in a single layer, working in batches if needed. Air fry at 400°F for 5 to 6 minutes, shaking the basket halfway through. Shrimp are done when pink, opaque, and cooked through.
-
Serve immediately with fresh lemon wedges.
Delicious Variations & Serving Ideas
This basic Air Fryer Shrimp recipe is a perfect starting point!
- Different Spice Blends:
- Cajun/Blackening: Use your favorite Cajun or blackening spice blend for a spicy kick.
- Lemon Pepper: A classic! Use lemon pepper seasoning for a zesty flavor.
- Old Bay: Perfect for a classic seafood taste.
- Smoky Chipotle: Use smoked paprika and a pinch of chipotle powder for a smoky, warm heat.
- Make it a Meal:
- Shrimp Tacos: Serve the cooked shrimp in warm tortillas with a quick slaw and avocado.
- Shrimp & Rice Bowls: Serve over fluffy rice or quinoa with steamed or roasted veggies. A great quick weeknight meal air fryer salmon rice salad concept, but with shrimp!
- Shrimp Salad: Let the cooked shrimp cool, then toss with mixed greens, your favorite veggies, and a light vinaigrette.
- Shrimp Scampi Style: After air frying, toss the shrimp with a simple sauce of melted butter, lemon juice, more garlic, and fresh parsley, and serve over pasta.
- Add a Dipping Sauce: Serve with cocktail sauce, garlic aioli, or a creamy yogurt-dill sauce.
Storing & Reheating Your Quick-Cooked Shrimp
This Air Fryer Shrimp recipe is best enjoyed fresh, but leftovers are still great!
- Storage: Store leftover cooked shrimp in an airtight container in the refrigerator for up to 2-3 days.
- Reheating: Reheat shrimp very gently to avoid making them tough and rubbery.
- Air Fryer (Best): Reheat at a lower temperature, around 300-325°F (150-160°C), for just 2-3 minutes until warmed through.
- Skillet: Reheat briefly in a lightly oiled skillet over low heat.
- Avoid the microwave if possible for the best texture.
- Using Leftovers Cold: Cold cooked shrimp are delicious tossed into salads or wraps for a quick and easy lunch.
Frequently Asked Questions (FAQ) – Air Fryer Shrimp Recipe
Your common questions about this speedy and healthy seafood recipe:
- Can I cook frozen shrimp directly in the air fryer?
Yes, you can cook raw, frozen shrimp in the air fryer. You’ll likely need to increase the cooking time. A good method is to air fry at a slightly lower temp (e.g., 350°F) for 3-5 minutes to thaw them, then drain any water, toss with oil and seasonings, and air fry at 400°F for another 5-7 minutes until cooked through. - How do I prevent the shrimp from sticking to the air fryer basket?
The recipe calls for spraying the basket with nonstick cooking spray. Tossing the shrimp in olive oil also helps significantly. Ensure your air fryer basket is clean before starting. - What size shrimp is best for the air fryer?
Large or jumbo shrimp (16-25 count per pound) are ideal as they are meaty and less likely to overcook as quickly as smaller shrimp. If you use smaller shrimp for your Air Fryer Shrimp recipe, reduce the cooking time and watch them closely. - Can I use pre-cooked shrimp in this recipe?
You can, but it’s not ideal as it’s very easy to overcook them. If using pre-cooked shrimp, you would only need to toss them with the seasonings and air fry for just 1-2 minutes at a lower temperature (around 350°F) simply to warm them through. - Is this recipe keto-friendly?
Yes, as written, this Air Fryer Shrimp recipe is very keto-friendly and low-carb, making it a fantastic choice for those following a ketogenic lifestyle.
This Perfect Air Fryer Shrimp recipe is a true game-changer for anyone looking for a quick dinner on busy weeknights. It’s an easy 10 minute air fryer shrimp for dinner that proves how to cook perfect juicy shrimp in an air fryer is simple, healthy, and incredibly delicious. This quick low carb keto friendly air fryer shrimp recipe is bound to become a staple in your meal rotation.
I am so excited for you to try this recipe and discover how easy and flavorful air fryer shrimp can be! If you make this Air Fryer Shrimp, please come back and share your delicious success in the comments below! What’s your favorite way to serve them? Happy air frying!
9. Mediterranean Steak Bowl Recipe
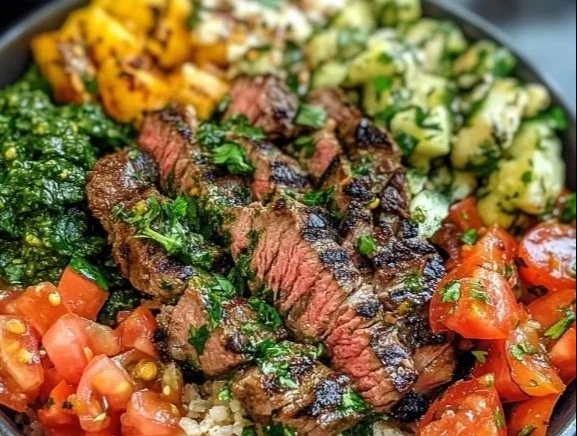
There’s something inherently delightful about a bowl that brings a symphony of flavors and vibrant colors, especially when it comes to the Mediterranean Steak Bowl. This dish is not only a feast for the eyes but also a celebration of fresh ingredients and hearty textures that come together in a wholesome meal. Imagine juicy, marinated steak paired with a medley of crunchy vegetables, creamy tzatziki, and bright grains—all served up in one delicious bowl. It’s the kind of dish that awakens your senses and transports you straight to the sun-soaked coasts of the Mediterranean!
The Heart of the Mediterranean Steak Bowl
When I’m crafting a dish, I want it to be more than just filling; I want it to leave a memorable impression. This Mediterranean Steak Bowl does not fall short. Here’s why I believe this recipe deserves a spot on your dinner table:
- Flavor Explosion: The marinated steak is enhanced with garlic, lemon, and herbs, making each bite irresistible and bursting with freshness.
- Nutrient-Packed: With a robust base of grains and a kaleidoscope of veggies, this bowl is as nutritious as it is delicious, making it a perfectly balanced meal.
- Versatile Ingredients: You can easily swap out ingredients based on what you have on hand or your dietary preferences, ensuring that every bowl can be a little different each time!
- Make Ahead Magic: Many components can be prepared in advance, making it a perfect choice for meal prepping or busy weeknights.
- A Crowd-Pleaser: Whether you’re cooking for family or friends, this bowl is sure to impress and satisfy even the pickiest of eaters.
Gather Around the Ingredients
Before we dive into the kitchen, let’s get all our beautiful ingredients lined up. Each one has its role in creating the magic that is our Mediterranean Steak Bowl!
- 1 lb sirloin steak (about 1-inch thick): A great cut that’s both flavorful and tender, perfect for marinating and searing to juicy perfection.
- 3 tbsp olive oil: This golden liquid brings richness and is essential for both the marinade and the vinaigrette.
- 2 garlic cloves (minced): A staple ingredient in Mediterranean cuisine, it adds aromatic depth and a subtle kick.
- 1 tbsp lemon juice (fresh): Brightens all flavors, giving a lovely zing that transforms the entire dish.
- 1 tsp dried oregano: A fragrant herb that’s practically synonymous with Mediterranean cooking—gotta love that earthy aroma!
- 1 tsp dried thyme: Another herbal companion that provides a warm, woodsy flavor.
- ½ tsp salt: Enhances all the other flavors to shine.
- ¼ tsp black pepper: For a little bit of heat and warmth.
- 2 cups cooked grains (brown rice, quinoa, or cauliflower rice): A hearty base that brings substance; I especially love the nutty flavor of quinoa here!
- 1 cup roasted chickpeas (optional for paleo or keto): Add these for some crispy texture; they’ll delight your taste buds with their crunch!
- 1 cup cherry tomatoes (halved): Juicy little gems that add bursts of sweetness and color.
- 1 cucumber (diced): Refreshing and crunchy, perfect for balancing the richness of the steak.
- ½ red onion (thinly sliced): Adds a sharpness that cuts through the other flavors beautifully.
- ½ cup kalamata olives (pitted): Their briny taste brings a delightful contrast.
- ⅓ cup feta cheese (crumbled; optional for dairy-free): A creamy, tangy addition that elevates the whole dish.
- ¼ cup fresh herbs (parsley or dill, chopped): Adds freshness and vibrancy that wakes up all the flavors.
- 1 cup Greek yogurt (plain; coconut yogurt for dairy-free): Creates a luscious, creamy tzatziki; the secret sauce here!
- ½ cucumber (grated, squeezed dry): Adds crunch and needed for that tzatziki.
- 1 garlic clove (minced): Yes, another one! This enhances the tzatziki with more aromatic character.
- 1 tbsp fresh dill (chopped): Perfect for that authentic tzatziki flavor.
- Salt & pepper (to taste): Essential for seasoning to your liking.
- 3 tbsp olive oil: Another drizzle when mixing the vinaigrette.
- 2 tbsp lemon juice (fresh): Because we can never have enough brightness!
- 1 tsp honey: Optional but adds a touch of sweetness to balance the acidity (omit for Whole30).
- ½ tsp dried oregano: Adds a nice herbal touch to the vinaigrette as well.
- Salt & pepper (to taste): Always taste as you go!
Let’s Get Cooking
Now that we have all our ingredients prepped and ready to go, it’s time to bring this flavorful Mediterranean Steak Bowl to life! Follow these simple steps:
-
Marinate the Steak: In a mixing bowl, combine the olive oil, minced garlic, lemon juice, dried oregano, thyme, salt, and black pepper. Add the steak to the bowl, ensuring it’s well coated. Let it marinate for at least 30 minutes and up to 4 hours for the best flavor.
-
Prepare the Tzatziki: While the steak is marinating, mix the Greek yogurt, grated cucumber, minced garlic, fresh dill, lemon juice, salt, and black pepper in a separate bowl. Make sure to chill it in the fridge to allow the flavors to meld.
-
Whisk the Vinaigrette: In another small bowl, whisk together the olive oil, fresh lemon juice, honey (if using), minced garlic, dried oregano, salt, and pepper until well combined.
-
Sear the Steak: Heat a skillet over medium-high heat. Once hot, sear the marinated steak for about 4–5 minutes on each side, or until it’s beautifully browned and reaches your desired doneness. Don’t forget to let it rest for a few minutes before slicing it thinly.
-
Assemble the Bowl: Begin by layering the cooked grains at the bottom of your serving bowls. Top with the sliced steak, cherry tomatoes, diced cucumber, red onion, kalamata olives, and any other appealing toppings you might like. Drizzle generously with the tzatziki and vinaigrette to tie everything together.
My Favorite Tricks
As with any recipe, a few expert tips can elevate your Mediterranean Steak Bowl to new heights. Here are my top suggestions to ensure everything comes out perfectly:
- Don’t Rush the Marinade: The longer you marinate the steak, the deeper the flavor. If time allows, opt for the full 4 hours.
- Perfectly Cooked Steak: Invest in a meat thermometer. For medium-rare, you’re looking for an internal temperature of 135°F. Resting it afterward helps retain the juices.
- Chill Your Tzatziki: This not only helps the flavors marry but also gives the yogurt a thicker texture. It’s a necessary step!
- Experiment with Grains: Quinoa adds distinct nutty flavors, while cauliflower rice offers a low-carb twist. Don’t shy away from mixing them up!
- Make Extra: Everything is super delicious, why not make more? Extra tzatziki and vinaigrette can easily be stored for future meals.
Creative Twists to Try
One of the best parts about cooking is experimenting! Here are a few inspiring ideas on how to mix up your Mediterranean Steak Bowl:
- Add Different Proteins: Swap the steak for grilled chicken, shrimp, or even roasted vegetables for a vegetarian version. There’s no wrong choice here!
- Grains Galore: Try couscous, farro, or even a spicy lentil base to change the texture and taste.
- Seasonal Vegetables: Use whatever veggies are in season—add bell peppers, zucchini, or even grilled eggplant for a twist.
- Different Cheese Options: Swap feta for goat cheese or leave it out altogether if you’re keeping things dairy-free.
- Spicy Kick: Add a drizzle of a spicy dressing or sprinkle in some crushed red pepper flakes to heat things up!
The Art of Presentation
Serving your Mediterranean Steak Bowl is all about the visual appeal! To truly impress, layer your ingredients artfully in each bowl. Start with a bed of your grains; they create a hearty foundation. Use bright cherry tomatoes and cucumbers to add pops of color, with the darker earthiness of olives and red onion providing contrast. Finally, finish it off with a generous dollop of tzatziki, cascading down the sides, and perhaps a sprinkling of fresh herbs for that gourmet look. Your guests (or family) won’t be able to resist digging in!
Helpful Tips for Storing Leftovers
Let’s be honest, this dish is so good that it’s hard to have leftovers. But if you do, you’ll want to keep them fresh! Here’s how to properly store your Mediterranean Steak Bowl:
- Refrigeration: Store components separately in airtight containers for up to three days. Keep the tzatziki in its own container to preserve its creaminess.
- Freezing Tips: While the grains and chickpeas freeze well, avoid freezing the tzatziki, onions, and fresh veggies as they don’t hold up as well.
- Reheating Guidance: For reheating, simply place the grains and steak in the microwave or on the stove until warmed through. The tzatziki can stay cold, adding that refreshing touch!
Common Queries Answered
If you’re wondering about some common questions as you embark on your culinary adventure, here you go:
- Can I use a different type of steak? Absolutely! Cuts like flank or ribeye work beautifully. Just remember to adjust the cooking time based on thickness.
- Is it okay to prepare this in advance? Yes, you can prep the tzatziki, grains, and even marinate the steak the night before for maximum flavor!
- How spicy is this dish? The base recipe is mild, but feel free to add extras like jalapeños or hot sauce for some heat.
- What’s a good substitute for Greek yogurt in the tzatziki? You can use dairy-free yogurt like coconut yogurt or even tahini for a rich, creamy alternative.
Give this Mediterranean Steak Bowl a whirl! Its delightful blend of flavors and textures is bound to become a staple in your kitchen. So gather your ingredients, channel your inner chef, and enjoy this fantastic meal that’s not just nourishing, but also bursting with vibrant, mouthwatering goodness. Happy cooking!
Mediterranean Steak Bowl
Ingredients
Method
-
In a mixing bowl, combine olive oil, minced garlic, lemon juice, dried oregano, thyme, salt, and black pepper. Add the steak, ensuring it’s well coated. Let it marinate for at least 30 minutes and up to 4 hours.
-
Mix Greek yogurt, grated cucumber, minced garlic, fresh dill, lemon juice, salt, and black pepper in a separate bowl. Chill in the fridge.
-
In a small bowl, whisk together olive oil, fresh lemon juice, honey, minced garlic, dried oregano, salt, and pepper until combined.
-
Heat a skillet over medium-high heat. Sear the marinated steak for 4-5 minutes on each side until browned and cooked to desired doneness. Let it rest before slicing.
-
Layer cooked grains at the bottom of serving bowls. Top with sliced steak, cherry tomatoes, diced cucumber, red onion, kalamata olives, and any other preferred toppings. Drizzle with tzatziki and vinaigrette.
Notes
10. Garlic Butter Chicken Bites
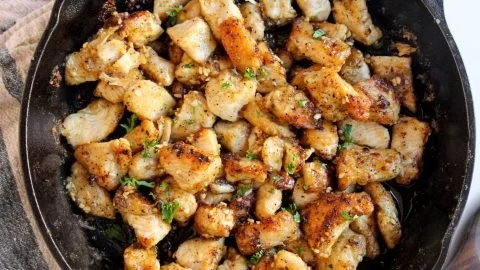
There’s something wonderfully comforting about Garlic Butter Chicken Bites that keeps me coming back for more. The moment I sear the cubed chicken in that luscious butter, the kitchen fills with an aromatic warmth that beckons everyone to gather around. Each bite is a succulent explosion of garlicky goodness, and I guarantee you’ll find this dish disappearing faster than you can say, “Dinner is ready!” Perfect for a weeknight meal or a tasty treat at gatherings, these delightful morsels are sure to become a cherished part of your kitchen repertoire.
Why Garlic Butter Chicken Bites Deserves a Spot in Your Kitchen
- Quick and Easy: You can whip up this flavorful recipe in under 30 minutes. Perfect for those busy weeknights when you want something delicious without spending hours in the kitchen!
- Flavors Galore: The combination of garlic and butter transforms simple chicken into an indulgent dish. You’ll be amazed at how just a few ingredients can create a symphony of flavors!
- Versatile: Whether you’re serving it over a bed of rice, tossing it in a salad, or enjoying it straight from the skillet, these chicken bites are incredibly adaptable to your meal needs.
- Kid-Friendly: With their buttery, garlicky coating, these bites appeal to kids and adults alike! You may find them asking for seconds—totally guilt-free!
- Meal Prep Friendly: These chicken bites are not just delightful for dinner; they make for fantastic leftovers or meal prep options throughout the week. Just pop them in the fridge or freezer, and they’re ready when you are!
Gathering Your Ingredients
To bring this delicious dish to life, here’s what you’ll need:
- 1 1/2 pounds boneless skinless chicken breast (cut into 1-inch pieces): The star of the dish! Boneless, skinless chicken breast will give you tender bites that soak up the flavor beautifully.
- 5 tablespoons vegan butter (divided): This is where the magic happens. Rich and creamy, melt-in-your-mouth butter elevates the dish, giving it that glorious richness. If you’re following a Whole30 diet, you can opt for ghee or another compliant replacement.
- 1/4 cup arrowroot or potato starch: This helps to create a crispy coating on the chicken. If you’re checking carbs, arrowroot is a great option for both Keto and Paleo diets.
- 1 tablespoon Trader Joe’s 21 Seasoning Salute or Mrs. Dash: This blend adds depth and provides a wonderful herbaceous note. A dash (or a tablespoon) of these seasonings goes a long way!
- 1 1/2 teaspoons garlic salt: Enhanced garlic flavor gets right into the chicken, ensuring every bite sings with essence.
- 1/2 teaspoon black pepper: A pinch of black pepper adds just the right amount of warmth and a hint of spice to balance the richness.
- 2 tablespoons fresh minced garlic: Fresh garlic provides that irresistible aroma and flavor that makes this dish special.
Let’s Get Cooking
Ready to dive into creating these scrumptious Garlic Butter Chicken Bites? Let’s break down the steps to bring this dish from your kitchen counter to your dinner table:
- Prepare the Chicken: In a large bowl or reusable zip-top bag, combine the cubed chicken with arrowroot or potato starch and all of the seasonings. Give it a thorough toss until the chicken is well-coated. The starch will create a crispier bite while helping the spices adhere beautifully.
- Heat the Pan: In a large sauté pan, melt 3 tablespoons of vegan butter over medium-high heat until glistening and bubbling. Timing is key here; you want it hot enough to get that golden sear without burning.
- Sear the Chicken: Once the butter is hot, add the chicken in a single layer, giving it space to breathe. Don’t overcrowd the pan, or you’ll end up steaming rather than searing. Let it cook undisturbed for about 5 minutes until brown and crispy on one side.
- Add the Flavor: Once the chicken is mostly browned, pour in the remaining 2 tablespoons of vegan butter and sprinkle the minced garlic. Sauté for an additional 2-3 minutes until the garlic is lightly browned and fragrant, and the chicken is cooked through—there shouldn’t be any pink inside!
- Celebrate Your Creation: And voilà! Do a happy dance because you’ve just created a mouthwatering dish in no time. Serve your Garlic Butter Chicken Bites warm and enjoy every delightful bite.
- Quick Tip for Busy Nights: If you’re short on time, pair your chicken bites with steam-in-the-bag rice or cauliflower rice and some green beans. Pop them in the microwave while you’re cooking the chicken, and you’ll have a complete meal in a flash!
- Leftover Storage: If you find yourself with chicken left over (though I doubt it!), freeze the chicken in a sealed container for up to 3 months.
My Favorite Tricks for Perfection
- Even Cooking: Ensure your chicken pieces are cut evenly to ensure they cook uniformly. A consistent size helps them brown perfectly.
- Keep it Hot: Don’t add too many chicken pieces at once. It lowers the temperature of the pan, which can lead to steaming instead of that perfect golden brown crust.
- Let it Rest: After cooking, let your chicken sit for a minute before serving. This allows the juices to redistribute, leading to more tender bites.
Creative Twists to Try
Dare to switch things up? Here are some fun variations to elevate your Garlic Butter Chicken Bites:
- Spicy Kick: Add a pinch of red pepper flakes to the seasonings for a spicy twist that will awaken your taste buds!
- Citrusy Freshness: Squeeze some lemon juice over the chicken right before serving for a touch of brightness.
- Herbal Infusion: Swap out the seasoning mix for fresh or dried herbs like thyme, rosemary, or even a sprinkle of Italian seasoning for a different profile.
- Tapas Style: Use smaller cubes of chicken and serve them on toothpicks as a party appetizer. Perfect for gatherings!
Bringing It to the Table
When it’s time to serve up your Garlic Butter Chicken Bites, think about the presentation! Arrange them on a platter and sprinkle with freshly chopped parsley for a pop of color. Pair them with something light like a crisp green salad drizzled with a zesty vinaigrette or serve over creamy mashed potatoes to soak up every ounce of garlicky goodness. If you’re feeling indulgent, why not add a side of crusty garlic bread? This pairs beautifully, allowing you to savor every last drop of that buttery garlic sauce.
Keep It Fresh
As much as you might want to devour these bites in one go, it’s great to know how to keep the leftovers fresh:
- Store any uneaten Garlic Butter Chicken Bites in an airtight container in the fridge for up to 4 days.
- If you want to store them longer, freeze your chicken in a sealed container or a zip-top bag for up to 3 months. Just remember to properly label your containers so you can know what deliciousness is inside!
- To reheat, simply warm in a skillet over medium heat until heated through, or pop them in the microwave for quick convenience!
Your Questions Answered
- Can I use frozen chicken? Absolutely! Just be sure to thaw it completely before cooking to ensure even cooking and browning.
- Is it possible to make this dish dairy-free? Yes! Utilize a plant-based butter alternative, and you’re all set for a delectable dairy-free version.
- What else can I use this recipe for? These chicken bites are incredibly versatile! Toss them into salads, mix them into pasta, or even serve them atop a creamy risotto.
- Can I double the recipe? Yes! Just be mindful of how much chicken you’re cooking at once so that it sears well in the pan.
Garlic Butter Chicken Bites are more than just a meal; they’re a sense of home, family, and warmth. I hope you give this recipe a try and discover just how easy and delicious it is! Get ready for a culinary experience that will make your taste buds leap for joy. Bon appétit!
Garlic Butter Chicken Bites
Ingredients
Method
-
In a large bowl or reusable zip-top bag, combine the cubed chicken with arrowroot or potato starch and all of the seasonings. Toss until well-coated.
-
In a large sauté pan, melt 3 tablespoons of vegan butter over medium-high heat until glistening and bubbling.
-
Add the chicken in a single layer, cooking undisturbed for about 5 minutes until brown and crispy on one side.
-
Pour in the remaining 2 tablespoons of vegan butter and sprinkle the minced garlic. Sauté for an additional 2-3 minutes until garlic is lightly browned and chicken is cooked through.
-
Serve your Garlic Butter Chicken Bites warm and enjoy.