Best 10 Valentine’s Day Cookie Recipes For Sweet Celebrations
Valentine's Day is the perfect occasion for me to unleash my creativity in the kitchen and whip up some delightful treats! If you're looking to impress that special someone or simply satisfy your sweet tooth, I've gathered a list of my absolute favorite cookie recipes that will make your celebration even more memorable. From decadent…
Valentine's Day is the perfect occasion for me to unleash my creativity in the kitchen and whip up some delightful treats! If you're looking to impress that special someone or simply satisfy your sweet tooth, I've gathered a list of my absolute favorite cookie recipes that will make your celebration even more memorable. From decadent Valentine Ganache Cookies to playful One in a Melon cookies, each recipe is designed to bring joy and sweetness to your day. Get ready to discover mouthwatering flavors that are sure to become staples in your Valentine's traditions!
1. Valentine Ganache Cookies Recipe

There’s something undeniably magical about cookies, especially when they’re adorned with silky ganache and the promise of indulgence. As Valentine’s Day approaches, these Valentine Ganache Cookies are the perfect treat to share with those you love—or keep all to yourself! Their alluring aroma wafting through your kitchen will make your heart soar, and each bite unveils a luscious layer of chocolatey goodness that’s simply irresistible. Let’s dive into this delightful recipe that will not only sweeten your day but also create a moment of joy for everyone around you.
Why Valentine Ganache Cookies are a Must-Make
When it comes to baking treats that bring smiles, these Valentine Ganache Cookies truly shine. Here’s why this recipe deserves a special place in your heart (and kitchen):
- Decadent Flavor: With a rich chocolate cookie base complemented by creamy ganache, each bite is a symphony of flavors that dance on your palate.
- Perfect for Any Occasion: While they’re obviously fantastic for Valentine’s Day, they’re celebratory enough for birthdays, anniversaries, or simply a cozy treat during a movie night.
- Customizable Presentation: You can dress them up with fun toppings—think sprinkles, freeze-dried raspberries, or even a drizzle of melted white chocolate for an extra touch of love.
- Easy to Make: Whether you’re a seasoned baker or a novice in the kitchen, the steps are straightforward and rewarding, making it hard to go wrong.
- Perfect for Sharing: There’s something heartwarming about gifting homemade cookies to friends and family, spreading joy one delicious bite at a time.
Your Shopping List
Before you get lost in the sweet anticipation, let’s gather the essentials for these delectable treats. Here’s what you’ll need to create your Valentine Ganache Cookies:
- ½ cup (113 g) unsalted butter, softened: This creates a rich, buttery flavor and tender texture in your cookies.
- ½ cup (100 g) granulated sugar: For that perfect sweetness that balances the chocolaty notes.
- ½ cup (100 g) brown sugar: Adds moisture and a lovely caramel undertone.
- 1 large egg: Provides structure and richness to the cookie dough.
- 1 teaspoon vanilla extract: A classic addition that enhances all the delightful flavors.
- 1 cup (125 g) all-purpose flour: The essential building block for your cookies.
- ½ cup (45 g) unsweetened cocoa powder: This is where the chocolate magic happens!
- ½ teaspoon baking soda: Helps the cookies rise and become fluffy.
- ¼ teaspoon salt: Balances the sweetness and highlights the chocolate.
- ½ teaspoon espresso powder (optional): This little gem intensifies the chocolate flavor.
- ½ cup (120 ml) heavy cream: For that velvety ganache that brings the cookies to life.
- ¾ cup (130 g) dark or white chocolate chips, finely chopped: Choose your favorite for a personal touch!
- 1 tablespoon (14 g) butter (optional): Makes the ganache extra smooth and glossy.
- Freeze-dried raspberries, chocolate squares, heart sprinkles, melted white chocolate for drizzling: Customize and decorate to your heart’s content!
Crafting Your Perfect Valentine Ganache Cookies Recipe
Now that you have all your ingredients laid out, let’s get started! Follow these simple steps to bring your cookies to life:
- In a large mixing bowl, cream the softened butter with the granulated sugar and brown sugar until the mixture is light and fluffy. The textures should come together beautifully; it’s truly a delightful sight!
- Beat in the egg and vanilla extract, mixing well until fully combined, feeling the warm, sweet aroma fill your kitchen.
- In another bowl, combine the flour, cocoa powder, baking soda, salt, and espresso powder (if using). Gradually add this dry mixture to the wet ingredients, stirring until just combined. The dough will start to come together into a beautiful chocolatey mass—it’s hard to resist tasting it at this point!
- Preheat your oven to 350°F (175°C) and line a baking sheet with parchment paper.
- Scoop tablespoon-sized amounts of dough onto the prepared sheet, spacing them about 2 inches apart. Bake for 10-12 minutes, until the edges are set but the centers are still soft. Your kitchen will be filled with a heavenly scent that you won’t forget!
- Allow the cookies to cool completely on a wire rack. Meanwhile, let’s prepare that luscious ganache!
- In a small saucepan, heat the heavy cream until it just begins to simmer. Remove from heat and stir in the chopped chocolate and butter (if using) until everything is melted and silky smooth—this is pure magic!
- Once the cookies are cool, spoon a generous dollop of the ganache over the center of each cookie, allowing it to spill enticingly to the edges. Top with freeze-dried raspberries or sprinkles for a festive touch if desired!
- Let the ganache set for a few minutes, and then prepare for the sharing (or savouring!).
Helpful Hints for the Best Cookies
- Don’t Overmix: When combining the dry ingredients with the wet, mix just until combined. Overmixing can create tough cookies—nobody wants that!
- Chill the Dough: If you find that your dough is too soft to scoop easily, pop it in the fridge for about 30 minutes to make it easier to handle.
- Switch Up Chocolate Types: You can mix and match between dark, milk, or white chocolate for the ganache, tailoring it to your preference and adding a unique twist.
- Use Quality Ingredients: Since this recipe revolves around chocolate, using high-quality cocoa powder and chocolate can make a significant difference in flavor.
- Experiment with Flavors: Add a dash of peppermint extract or some orange zest to the batter for a flavor twist that could surprise and delight your taste buds.
Creative Twists on the Classic Recipe
Feeling adventurous? Here are a few variations you might want to try:
- Nutty Delight: Fold in some chopped nuts like walnuts or pecans to the dough for added crunch and flavor contrast.
- Fruit Infusion: Swap in some mini chocolate chips or butterscotch chips for an unexpected twist.
- Spicy Affair: Add a pinch of cayenne pepper or cinnamon to the dough for a warm, spiced note that pairs beautifully with chocolate.
- Chocolate Dipped: Instead of a ganache topping, dip half of each cookie in melted chocolate for an extra luscious experience!
- Flavored Ganache: Infuse the heavy cream with peppermint or orange zest while heating for a festive twist to the ganache.
Ways to Enjoy These Lovable Treats
Presentation matters, especially for a treat as special as these Valentine Ganache Cookies! Arrange them on a decorative platter, perhaps with a sprinkling of powdered sugar for a whimsical touch, or serve them warm with a scoop of vanilla ice cream or whipped cream on the side. Imagine the joy of taking a bite, the decadent ganache oozing out, while a hot cup of coffee or cocoa complements each mouthful. For those extra-special moments, these cookies also make for charming gifts. Just package them in a cute box tied with a ribbon—who could resist such a sweet surprise?
Keep It Fresh
Storing your Valentine Ganache Cookies is straightforward. Keep them in an airtight container at room temperature for up to a week—if they even last that long! If you want to enjoy them later, they freeze beautifully. Just make sure to layer them between parchment paper to avoid sticking and place them in a freezer-safe bag. When you’re ready to enjoy a treat, let them thaw at room temperature or gently warm them up in the microwave for a few seconds. You’ll be instantly transported back to the baking day!
Got Questions?
Here are a few common questions surrounding these delightful cookies:
- Can I use different types of chocolate for the ganache? Absolutely! Feel free to use dark, milk, or white chocolate depending on your taste preference.
- What if I don’t have unsalted butter? You can use salted butter, but just reduce the salt in the recipe a pinch.
- How can I make these cookies gluten-free? Substitute the all-purpose flour with a gluten-free flour blend designed for baking, and they should turn out wonderfully!
- What should I do if my cookies spread too much while baking? You may need to chill the dough before scooping if you find that the dough is very soft.
From one cookie lover to another, these Valentine Ganache Cookies are sure to sprinkle a little joy into your life. With every ingredient combined, every delightful layer of taste blended together, they create an experience that’s hard to beat. So gather your loved ones, or treat yourself, and embark on this delightful baking expedition. Happy baking, and may your cookies turn out perfectly!
Valentine Ganache Cookies
Ingredients
Method
-
Cream the softened butter with the granulated sugar and brown sugar until light and fluffy.
-
Beat in the egg and vanilla extract until fully combined.
-
In another bowl, combine the flour, cocoa powder, baking soda, salt, and espresso powder (if using). Gradually add this dry mixture to the wet ingredients, stirring until just combined.
-
Preheat your oven to 350°F (175°C) and line a baking sheet with parchment paper.
-
Scoop tablespoon-sized amounts of dough onto the prepared sheet, spacing them about 2 inches apart.
-
Bake for 10-12 minutes, until the edges are set but centers are soft.
-
Allow cookies to cool on a wire rack.
-
In a small saucepan, heat the heavy cream until it begins to simmer.
-
Remove from heat and stir in the chopped chocolate and butter (if using) until melted and smooth.
-
Spoon ganache over the cooled cookies and top with decorative toppings if desired.
-
Let ganache set for a few minutes before serving.
Notes
2. Valentine’s Day Red Velvet Cookies

There’s something truly magical about baking on Valentine’s Day, especially when it involves the rich, velvety allure of red velvet cookies. Picture this: warm, freshly baked cookies emerging from the oven, their bright red hue glistening temptingly as they cool down. These delightful treats are not just a feast for the eyes; they’re a heartwarming gift perfect for sharing with your loved ones. Whether you’re planning a romantic dinner or a fun get-together with friends, these cookies will have everyone reaching for seconds.
Why Valentine’s Day Red Velvet Cookies are a Must-Bake
- Visual Appeal: They boast a stunning red color that instantly captures attention and sets the stage for love and celebration.
- Aromatic Delight: The sweet aroma of baking cookies filled with cocoa and vanilla wafts through your kitchen, creating a cozy, inviting atmosphere.
- Soft and Chewy: With the perfect balance of softness and chewiness, you won’t be able to resist indulging in more than one (or two!).
- Versatile: These cookies are perfect as gifts, party favors, or simply enjoyed with a glass of milk or hot cocoa.
- Customizable: The addition of white chocolate chips brings a delightful creaminess, but the recipe leaves room for you to get creative!
Gathering Your Essentials
To whip up a batch of these enchanting cookies, let’s gather everything you need. Each ingredient brings its own charm to the table:
- 1 3/4 cups all-purpose flour: This is the foundation of your cookies, providing the structure they need.
- 1/4 cup unsweetened cocoa powder: It adds depth and that delightful chocolate flavor we all love.
- 1/2 teaspoon baking soda: This little helper gives your cookies that essential lift.
- 1/4 teaspoon salt: Just a pinch enhances all the flavors, balancing sweetness beautifully.
- 1/2 cup unsalted butter, softened: Butter is the soul of rich and flavorful cookies; its creaminess makes everything come together.
- 3/4 cup light brown sugar, packed: For the perfect amount of sweetness and chewiness, brown sugar is the star here.
- 1/4 cup granulated sugar: This sugar adds a bit of crispness to the cookie edges.
- 1 large egg: It acts as a binder, giving the cookies structure while adding richness.
- 1 tablespoon milk: A little splash of milk ensures the dough has just the right moisture.
- 2 teaspoons vanilla extract: This is the secret ingredient that infuses warmth and complexity into every bite.
- 2 teaspoons red food coloring: This ingredient makes your cookies irresistibly red, creating that classic look.
- 1 cup white chocolate chips: These dreamy morsels add a luscious creaminess that pairs wonderfully with the cocoa.
Let’s Get Baking!
Now that we have all our ingredients ready, it’s time to bring these cookies to life. Follow these steps, and you’ll be rewarded with a batch of heavenly treats:
- Preheat your oven to 350°F (175°C) and line two baking sheets with parchment paper. This will keep your cookies from sticking and help them bake evenly.
- In a medium bowl, whisk together the flour, cocoa powder, baking soda, and salt until combined. This ensures that your dry ingredients are evenly distributed.
- In a large bowl, cream the softened butter with both sugars until the mixture is smooth and creamy. This step is crucial for achieving that melt-in-your-mouth texture.
- Add the egg, milk, vanilla extract, and red food coloring to the butter mixture. Beat until everything comes together as a beautifully red, luscious batter.
- Gradually add the dry mixture to the wet mixture, stirring gently just until combined. Be careful not to overmix; we want those cookies to stay soft!
- Fold in the white chocolate chips gently, making sure they are evenly dispersed throughout the dough.
- Scoop tablespoon-sized portions of the dough onto the prepared baking sheets, keeping them about 2 inches apart to allow for spreading.
- Bake for 11-12 minutes, until the cookies are set but still soft in the center. They will look a little underdone—that’s perfect!
- Allow the cookies to cool on the baking sheet for 5 minutes before transferring them to a wire rack to cool completely. This helps them firm up while still being delightfully soft in the middle.
Pro Tips for Baking Success
- Use Room Temperature Ingredients: Let your butter and egg sit out for a bit before baking—this helps everything mix together nicely.
- Don’t Skip the Cooling Time: Allowing the cookies to cool on the baking sheet is crucial; this is when they develop their perfect texture.
- Cookie Scoop Magic: If you have a cookie scoop, use it! It ensures uniform cookie sizes, so they bake evenly.
- Keep an Eye on Them: Remember that cookies continue to cook a bit after being removed from the oven, so don’t wait until they look overly baked.
- Experiment with Decor: Consider adding a drizzle of melted dark chocolate on top or sprinkles for added visual flair on special occasions!
Creative Twists to Try
While these red velvet cookies are simply delicious as is, there’s always room for creativity! Here are a few variations you can try:
- Nutty Surprise: Fold in some chopped pecans or walnuts for an added crunch and earthy flavor.
- Frozen Delights: Chill the dough before scooping for a thicker cookie with a chewier texture.
- Spice It Up: Add a pinch of cinnamon or a dash of espresso powder for a different flavor dimension.
- Dark Chocolate Chips: Swap the white chocolate chips for dark chocolate chips for a more intense chocolate experience.
- Cream Cheese Frosting: Top your cookies with a light drizzle of cream cheese frosting for an extra indulgent treat that mirrors classic red velvet cake.
Savoring the Moment
When it comes to serving your Valentine’s Day Red Velvet Cookies, a little presentation goes a long way. Place these gorgeous cookies on a cake stand for a show-stopping display. You could even use parchment paper to create fun little cookie stacks tied together with twine for a sweet gift alternative. Imagine enjoying these with a glass of cold milk or during calming moments with a cup of coffee or tea—you’ll feel the love in every bite.
Keeping Your Cookies Fresh
It’s always a delight to have some cookies on hand for when cravings hit! Store your cooled cookies in an airtight container at room temperature for up to a week. If you want to keep them fresh even longer, freeze them with parchment paper in between layers for up to three months. When you’re ready to enjoy them, simply take a few out and let them come to room temperature, or pop them in the microwave for a few seconds for that fresh-baked warmth.
Your Questions Answered
- Can I use whole wheat flour instead of all-purpose flour?: Yes, but it may alter the texture slightly, making the cookies denser. You might want to try a blend of both!
- What if I don’t have red food coloring?: You can use beet juice or omit it entirely for a chocolate cookie—but you’ll lose that signature red hue.
- How do I know when my cookies are done?: Look for slightly domed tops and edges that look firm but still soft in the center. You can always test one!
- Can I double this recipe?: Absolutely! These cookies are a hit, so feel free to double (or even triple) the batch for sharing with friends.
If you’re looking to infuse some sweetness into your Valentine’s Day celebrations, these Red Velvet Cookies will undoubtedly take center stage. Honestly, there’s nothing more heartwarming than creating something delicious to share with loved ones. So roll up your sleeves and give this delightful recipe a try; I promise you won’t be disappointed! Happy baking!
Red Velvet Cookies
Ingredients
Method
-
Preheat your oven to 350°F (175°C) and line two baking sheets with parchment paper.
-
In a medium bowl, whisk together the flour, cocoa powder, baking soda, and salt until combined.
-
In a large bowl, cream the softened butter with both sugars until smooth and creamy.
-
Add the egg, milk, vanilla extract, and red food coloring to the butter mixture. Beat until combined.
-
Gradually add the dry mixture to the wet mixture, stirring gently until just combined.
-
Fold in the white chocolate chips gently.
-
Scoop tablespoon-sized portions of the dough onto the prepared baking sheets, spaced about 2 inches apart.
-
Bake for 11-12 minutes until the cookies are set but still soft in the center.
-
Allow to cool on the baking sheet for 5 minutes before transferring to a wire rack to cool completely.
Notes
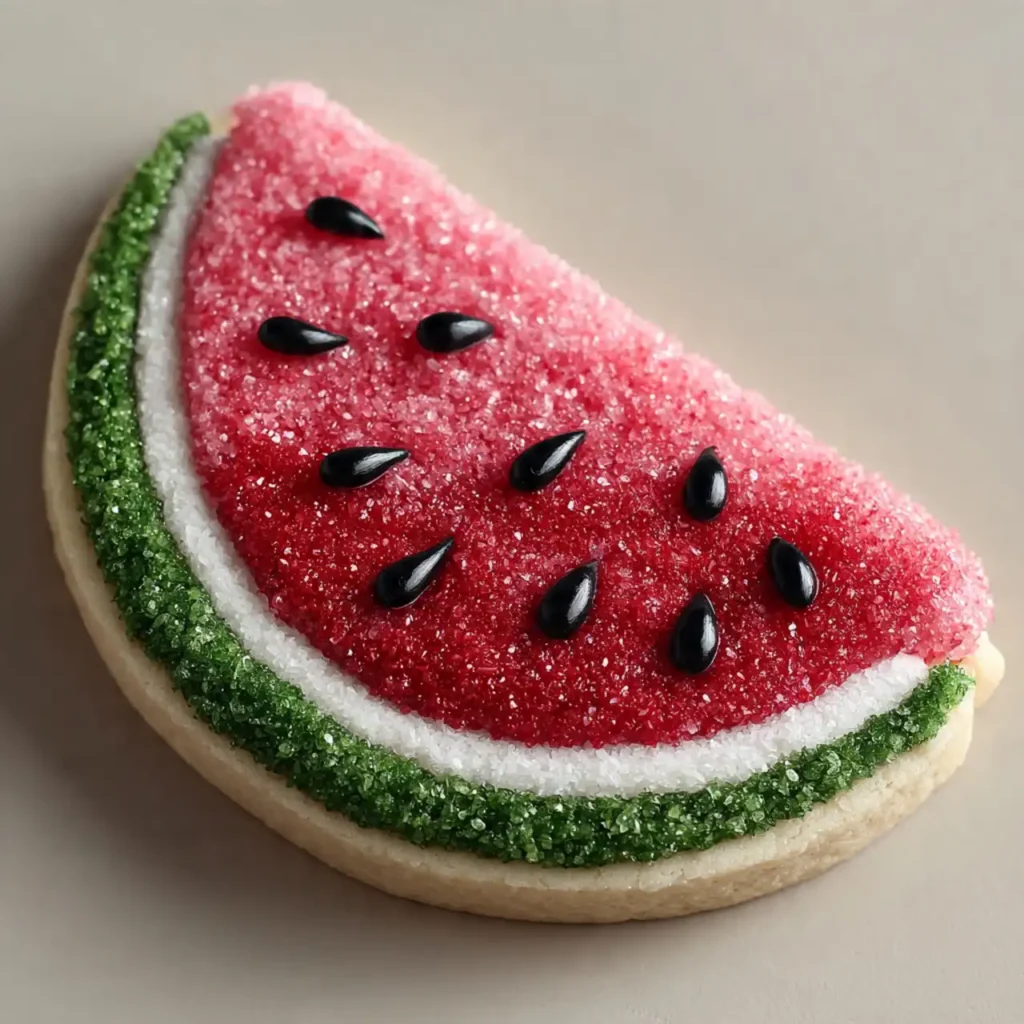
3. One in a Melon’ Cookies: A Sweet Valentine’s Pun: ‘One in a Melon’ Cookies

Sometimes, the best way to say “I love you” is with a little bit of playful charm. While classic hearts and flowers are lovely, there’s a special kind of joy in a treat that’s clever, cute, and completely unexpected. Allow me to introduce you to your new favorite Valentine’s project: these “One in a Melon” Cookies. It’s a cookie that’s as much a delightful pun as it is a delicious dessert, transforming a simple sugar cookie into an adorable, edible slice of watermelon, complete with tiny heart-shaped “seeds.”
This isn’t just about baking; it’s about creating a little piece of edible art. The process is a wonderfully fun and creative journey into the world of royal icing. We start with a classic, no-fail sugar cookie, sturdy enough to hold its shape and provide the perfect canvas. Then, we use a simple but impressive royal icing technique to pipe the green rind, flood the pink “melon,” and add those final, charming details. It’s a project that looks incredibly intricate but is surprisingly meditative and achievable for any enthusiastic baker ready to play with icing.
Why These Cookies are the Sweetest Valentine’s Message
You are going to fall completely in love with this fun, festive, and incredibly creative cookie recipe. It’s a true holiday gem. Here’s why:
- A Fun and Adorable Pun: Telling someone they are “One in a Melon” with a cookie is a unique, charming, and memorable way to show you care.
- Stunning, Professional-Looking Results: The clean lines and vibrant colors of the royal icing give these cookies a beautiful, polished look that is perfect for gifting.
- A Perfect Introduction to Cookie Decorating: The simple steps of outlining, flooding, and adding details make this a fantastic project for anyone looking to try their hand at royal icing.
- Durable for Gifting: Royal icing dries to a hard, candy-like finish, which means these cookies are sturdy and won’t get smudged if you package them in a treat bag or box.
- A Classic, Delicious Sugar Cookie Base: Underneath all that beautiful decoration is a delicious, buttery, and crisp vanilla sugar cookie that is a treat in itself.
Recipe Snapshot
| Prep Time | 1 hour |
| Cook Time | 12 minutes |
| Decorating/Drying Time | ~14 hours |
| Total Time | ~16 hours |
| Servings | 2 dozen cookies |
| Calories | 165 kcal per cookie (estimated) |
| Course | Dessert |
| Cuisine | American |
| Difficulty/Method | Intermediate / Baking & Decorating |
Your Shopping List for This Edible Art
This impressive cookie comes together with classic baking staples and a few key decorating supplies.
→ For the Roll-Out Sugar Cookies
- 1 cup (2 sticks) unsalted butter → Softened to room temperature.
- 1 cup granulated sugar
- 1 large egg → At room temperature.
→ For the Royal Icing & Decorations
- 4 cups confectioners’ sugar → Sifted, to ensure a smooth icing.
- 3 Tbsp meringue powder → An essential ingredient for royal icing that dries hard and is food-safe.
Let’s Get Baking! Your Step-by-Step Guide
Ready to create the most adorable cookies for your Valentine? Let’s get started.
Part 1: The Perfect Cut-Out Cookies
- Make the Dough: In a large bowl, cream the softened butter and granulated sugar until light and fluffy. Beat in the egg and vanilla. In a separate bowl, whisk together the flour, baking powder, and salt. Gradually add the dry ingredients to the wet, mixing on low until just combined.
- Chill the Dough: Divide the dough in half, form into flat disks, wrap in plastic, and chill for at least 1 hour until firm.
- Roll and Cut: Preheat your oven to 375°F (190°C). On a lightly floured surface, roll out one disk of dough to about ¼-inch thickness. Using a large, round cookie cutter, cut out as many circles as you can.
- Shape the “Slices”: Using a ruler and a knife, measure and cut each circle into a large semi-circle, creating the classic watermelon slice shape. Re-roll scraps as needed. Place the shapes on parchment-lined baking sheets.
- Bake and Cool: Bake for 8-10 minutes, or until the edges are just barely golden. Let them cool on the sheets for a few minutes before transferring to a wire rack to cool completely.
Part 2: The Royal Icing
- Make the Icing: In a large bowl, whisk together the confectioners’ sugar and meringue powder. Add the warm water and beat with an electric mixer, starting on low and increasing to high, for about 5-7 minutes, until the icing is very stiff and forms peaks.
- Tint the Colors: Tint about 1 cup of the icing a vibrant watermelon pink using the red food coloring. Tint about ½ cup of the icing green by combining the Kelly Green and Leaf Green colors. Tint a small amount (about ¼ cup) of the icing black.
- Thin to Consistency: For the green and pink icing, you’ll want a “20-second” flood consistency. Add water, a tiny bit at a time, until a ribbon of icing dropped into the bowl disappears in about 20 seconds. For the black icing, you’ll want a slightly thicker “25-second” or piping consistency.
Part 3: Decorating Your “Melons”
- Pipe the Rind: Transfer your green icing to a decorating bag fitted with a small round tip (like a #5). Pipe a thick green line along the curved edge of each cookie to create the watermelon rind. Let this dry and set for about 15-20 minutes.
- Flood the Melon: Transfer your pink icing to a decorating bag. Fill in the area inside the green rind with the pink icing. Use a toothpick or a scribe tool to guide the icing into the corners and pop any air bubbles.
- The Long Dry: This is a crucial step! Let the pink icing dry, completely undisturbed, for at least 8 to 10 hours, or overnight, until it is completely hard to the touch.
- Add the “Seeds”: Prepare a third decorating bag with the black icing and a very small round tip (like a #2). Carefully pipe small, delicate heart shapes onto the dried pink surface to create the adorable “seeds.”
- Final Dry: Let the black icing dry completely, about 4 to 5 hours, before handling or packaging the cookies.
‘One in a Melon’ Watermelon Sugar Cookies
Ingredients
Equipment
Method
-
Prepare cookie dough: Cream butter and sugar. Beat in egg and vanilla. Gradually add whisked dry ingredients (flour, baking powder, salt). Chill dough for at least 1 hour.
-
Preheat oven to 375°F. Roll out dough to ¼ in. thickness. Use a large round cutter to cut circles. Cut each circle into a large semi-circle to create the ‘slice’ shape. Bake on parchment-lined sheets for 8-10 minutes. Cool completely.
-
Make icing: Whisk confectioners’ sugar and meringue powder. Beat in warm water with an electric mixer until stiff peaks form.
-
Divide and tint icing: Tint 1 cup pink (with red), ½ cup green (with Kelly Green + Leaf Green), and ¼ cup black. Thin the pink and green icings to a ’20-second’ flood consistency. Thin the black icing to a ’25-second’ piping consistency.
-
Transfer icings to decorating bags. Using the green icing with a #5 tip, pipe a thick line along the curved edge of each cookie to create the rind. Let dry for 15-20 minutes.
-
Using the pink icing with a #5 tip, fill (flood) the area inside the green rind. Let the pink icing dry completely, about 8 to 10 hours or overnight.
-
Using the black icing with a #2 tip, pipe small heart shapes on the dried pink surface to create ‘seeds’. Let the black icing dry completely, about 4 to 5 hours.
Notes
Drying Time: Do not rush the drying times! Allowing each color of royal icing to dry completely hard is essential for achieving clean, sharp details and preventing colors from bleeding.
Chilling the Dough: Chilling the cookie dough is essential for cut-out cookies that hold their shape and have crisp edges without spreading in the oven.
WiseRecipes’ Top Tips for Cookie Decorating Success
This beautiful technique is all about patience. These tips will help you master it.
- Chill Your Dough Thoroughly. For cut-out cookies that hold their shape and have clean, crisp edges, chilling the dough until it’s firm is a non-negotiable step.
- Master Icing Consistency. The “count” method (e.g., “20-second icing”) is the professional secret to perfect royal icing. It’s the key to an outline that holds and a flood that settles smoothly. If your icing is too thick, add water by the drop. Too thin? Add more sifted powdered sugar.
- Let Each Step Dry Completely. Patience is a virtue in cookie decorating! Letting the green rind dry first creates a “dam” to hold the pink flood. And the pink flood must be rock-hard before you attempt to pipe the black hearts on top, or they will bleed and sink.
- Use a Scribe Tool or Toothpick. A simple toothpick is your best friend when flooding with royal icing. Use it to pop any pesky air bubbles and gently guide the icing into tight corners for a perfect, smooth finish.
- Use Gel Food Coloring. For the most vibrant, intense colors like a deep green and bright pink without thinning out your icing, gel-based food coloring is far superior to the liquid kind.
Keep Them Fresh! Storing Your Works of Art
Once fully dry, these cookies store beautifully, making them a perfect make-ahead gift.
- Storage: Once the royal icing is 100% hard to the touch, you can store the cookies in an airtight container at room temperature. For maximum protection, it’s best to stack them in a single layer or with sheets of parchment paper between the layers. They will stay fresh and crisp for up to two weeks.
FAQs: Your “One in a Melon” Cookie Questions, Answered!
Do I have to use Royal Icing?
For the sharp, clean lines and the hard, durable finish that is perfect for gifting, royal icing is the best choice. A simple buttercream frosting would be delicious but would not dry hard and would be easily smudged.
What if my icing is too thick or thin?
This is the most common royal icing issue! The fix is simple. If it’s too thick, add water literally one drop at a time and stir well. If it’s too thin, add more sifted powdered sugar, one teaspoon at a time, until you reach the right consistency.
Can I make these with a different cookie base?
A classic sugar cookie is ideal because it’s sturdy and provides a neutral, buttery flavor. You could also try this with a simple shortbread cookie, but avoid softer cookies like chocolate chip, as they won’t provide a good, flat canvas for decorating.
Can I freeze these cookies?
Yes, but with care. You can freeze the undecorated, baked cookies very well. Freezing finished royal icing cookies can sometimes cause the colors to bleed or the icing to get a little spotty upon thawing due to condensation. If you do freeze the finished cookies, let them thaw in the open air, not in a sealed container.
Final Thoughts: A Cookie from the Heart
There is nothing more special than a homemade cookie that is a true work of art and carries a sweet, clever message. These “One in a Melon” Cookies are a perfect project for expressing your creativity and affection in a fun and unique way. I hope you have a wonderful time creating these edible valentines. Happy Baking!
4. A Valentine’s Masterpiece: Swirls of Love Cut-Out Cookies

There are some cookies that are so breathtakingly beautiful, they stop you in your tracks. They feel less like a simple dessert and more like a tiny, edible work of art. These Swirls of Love Cut-Out Cookies are exactly that. Imagine a crisp, classic sugar cookie, cut into a romantic shape, and dipped into a stunning, marbled mosaic of pink, purple, and blue royal icing, all finished with a touch of sparkling sugar. This is, without a doubt, the most artistic and impressive cookie you will create for your Valentine.
I’ve always been captivated by the beautiful marbled icing techniques I see in professional bakeries, and I was determined to find an easy, foolproof way to replicate that magic at home. This recipe is the answer. It’s not about intricate, painstaking piping; it’s about a fun, creative, and surprisingly simple dipping technique that yields a unique and stunning result every single time. No two cookies are exactly alike, which is part of their incredible charm.

Why These Marbled Cookies are a True Labor of Love
You are going to fall completely in love with this beautiful and artistic baking project. They are a true expression of affection in every colorful swirl. Here’s why:
- Stunning, Professional-Looking Results: The marbled dipping technique creates a gorgeous, watercolor-like effect that looks incredibly sophisticated and is guaranteed to impress.
- A Fun and Creative Decorating Process: The process of piping the lines of icing and dipping the cookies is a wonderfully artistic and satisfying activity that yields a unique design every time.
- Based on a Classic, Delicious Cookie: Underneath the beautiful decoration is a classic, no-fail roll-out sugar cookie that is sturdy, delicious, and perfect for decorating.
- The Perfect, Show-Stopping Gift: Packaged in a beautiful box with a clear lid, these cookies are a truly stunning and thoughtful homemade gift for your Valentine.
- Endless Color Possibilities: While perfect for Valentine’s Day in shades of pink and purple, you can adapt this technique with any color combination for any holiday or occasion!
Recipe Snapshot
| Prep Time | 1 hour |
| Cook Time | 12 minutes |
| Decorating/Drying Time | 24 hours |
| Total Time | ~26 hours |
| Servings | About 2-3 dozen cookies |
| Calories | 150 kcal per cookie (estimated) |
| Course | Dessert |
| Cuisine | American |
| Difficulty/Method | Intermediate / Baking & Decorating |
Your Shopping List for This Edible Art
This impressive cookie comes together with classic baking staples and a few special decorating items.
→ For the Roll-Out Sugar Cookies (1 Batch)
- 1 cup (2 sticks) unsalted butter → Softened to room temperature.
- 1 cup granulated sugar
- 1 large egg → At room temperature.
→ For the Royal Icing & Decorations
- 4 cups confectioners’ sugar → Sifted.
- 3 Tbsp meringue powder → An essential stabilizer for royal icing that dries hard.
Let’s Get Baking! Your Step-by-Step Guide
Ready to create the most beautiful cookies for your Valentine? Let’s get started.
Part 1: The Perfect Cut-Out Cookies
- Make the Dough: In a large bowl, cream the softened butter and granulated sugar until light and fluffy. Beat in the egg and vanilla. In a separate bowl, whisk together the flour, baking powder, and salt. Gradually add the dry ingredients to the wet, mixing on low until just combined.
- Chill the Dough: Divide the dough in half, form into flat disks, wrap in plastic, and chill for at least 1 hour until firm.
- Roll and Cut: Preheat your oven to 375°F (190°C). On a lightly floured surface, roll out one disk of dough to about ¼-inch thickness. Use your favorite “Love” themed cookie cutters to cut out shapes. Place them on parchment-lined baking sheets.
- Bake and Cool: Bake for 8-10 minutes, or until the edges are just barely golden. Let them cool on the sheets for a few minutes before transferring to a wire rack to cool completely.
Part 2: The Colorful Royal Icing
- Make the Icing: In a large bowl, whisk together the confectioners’ sugar and meringue powder. Add the warm water and beat with an electric mixer on low speed until combined, then on high speed for 5-7 minutes, until the icing is very stiff and forms peaks. This is your base icing.
- Tint the Colors: Divide the icing into five equal portions. Following the color combinations in the ingredients list, tint one portion each dark pink, light pink, blue, and purple. Leave the fifth portion white.
- Thin to “Flood” Consistency: For each color, you’ll want to thin the stiff icing to a “flood” or “15-second” consistency. To do this, add a tiny bit of water (just a half-teaspoon at a time) and stir until, when you drizzle a ribbon of icing across the surface, it disappears back into the bowl in about 15 seconds.
- Prep the Bags: Transfer each of your five colors of thinned royal icing into separate disposable decorating bags.
Part 3: The Marbled Decoration
- Create the Icing Palette: On a large, flat plate, snip the tips off your decorating bags and pipe horizontal lines of each of the five icing colors, alternating them to cover the plate.
- The Dip!: Take one of your completely cooled cookies and hold it by the edges. Gently press the top surface of the cookie flat into the piped icing.
- Lift and Admire: Lift the cookie straight up to reveal the beautiful, marbled pattern. Let any excess icing drip off.
- Add the Sparkle: Immediately transfer the freshly dipped cookie to a cooling grid. While the icing is still wet, sprinkle it with your sparkling sugars and sprinkles, following the lines of color for a beautiful effect.
- Let Them Dry Completely: This is a crucial step! Let the decorated cookies dry, undisturbed, for at least 24 hours, or until the royal icing is completely hard to the touch.
Marbled Royal Icing Sugar Cookies
Ingredients
Equipment
Method
-
Prepare cookie dough: Cream butter and sugar. Beat in egg and vanilla. Gradually add whisked dry ingredients (flour, baking powder, salt). Chill dough for 1 hour.
-
Preheat oven to 375°F. Roll out dough, cut out shapes, and place on parchment-lined baking sheets. Bake for 8-10 minutes until edges are lightly golden. Cool completely.
-
Make icing: Whisk confectioners’ sugar and meringue powder. Beat in warm water with an electric mixer until stiff peaks form.
-
Divide icing into five portions. Tint four portions with your desired colors (dark pink, light pink, blue, purple) and leave one white. Thin each color with a tiny bit of water to a ’15-second’ flood consistency.
-
Transfer each color to a separate decorating bag. On a large, flat plate, pipe alternating horizontal lines of each icing color.
-
Gently dip the top surface of a cooled cookie flat into the piped icing. Lift straight up to reveal a marbled pattern.
-
Immediately transfer the cookie to a cooling grid and top with sparkling sugars and sprinkles while the icing is wet.
-
Let the cookies dry completely in the open air, for at least 24 hours, until the royal icing is hard.
Notes
Drying Time: Do not attempt to stack or package the cookies until the royal icing is 100% hard, which can take up to 24 hours.
Cookie Dough: Chilling the dough is essential for cut-out cookies that hold their shape without spreading.
WiseRecipes’ Top Tips for Marbled Masterpieces
This technique is fun and artistic, and these tips will ensure your success.
- Chill Your Dough. For cut-out cookies that hold their shape perfectly and don’t spread in the oven, chilling the dough both after mixing and even for a few minutes after cutting is the key.
- Master “Flood” Consistency Icing. The “15-second rule” is the professional secret to perfect royal icing for dipping and flooding. It needs to be thin enough to smooth out, but thick enough that it doesn’t just run off the cookie.
- Don’t Swirl the Icing on the Plate. For the cleanest marbled look, pipe straight, distinct lines of color. The magic happens during the dip, which will naturally swirl and blend the colors in a beautiful way.
- Dip with Confidence. Press the cookie down flat into the icing with a gentle, even pressure. Don’t wiggle it around. Lift it straight up for the cleanest result.
- The 24-Hour Dry Time is Real. Don’t try to stack or package these cookies early! Royal icing needs a full day (or at least overnight) in the open air to dry completely hard all the way through. Rushing this will lead to smudges.
Keep Them Fresh! Storing Your Works of Art
Once fully dry, these cookies store beautifully, making them a perfect make-ahead gift.
- Storage: Once the royal icing is 100% hard, you can store the cookies in an airtight container at room temperature. For maximum protection of the delicate designs, it’s best to stack them in a single layer or with sheets of parchment paper between the layers. They will stay fresh for up to two weeks.
FAQs: Your Marbled Cookie Questions, Answered!
Do I have to use Meringue Powder?
For royal icing that dries hard, shiny, and is completely food-safe, meringue powder is the easiest and most reliable option. You can find it in the baking aisle of most craft stores and many supermarkets. Using raw egg whites can carry a risk of salmonella.
Can I make these with a different color palette?
Absolutely! This dipping technique is incredibly versatile. Think red, white, and green for Christmas; pastel colors for Easter; or your favorite team’s colors for a game day party! The possibilities are endless.
Why is my icing not drying hard?
This can happen for a few reasons. The most common is that the icing was thinned out with too much water. It could also be due to very high humidity in your kitchen. Letting a fan blow gently over the cookies can help to speed up the drying process.
Can I freeze these cookies?
Yes, but with caution. You can freeze the undecorated, baked cookies very well. Freezing finished royal icing cookies can sometimes cause the colors to bleed or the icing to get a little spotty upon thawing due to condensation. If you do freeze them, thaw them in an open-air container, not a sealed one.
Final Thoughts: A Cookie from the Heart
There is nothing more special than a homemade cookie that is a true work of art. These “Swirls of Love” Marbled Cookies are a perfect project for expressing your creativity and affection. They are a beautiful and delicious way to say “I love you” to someone special. I hope you have a wonderful time creating these edible masterpieces. Happy Valentine’s Day!
5. A Valentine’s Delight: Red Velvet Spritz Cookies

There’s a special kind of magic that happens when you use a cookie press. It’s a delightful, nostalgic process that transforms a simple dough into an array of beautiful, intricate shapes in seconds. Now, imagine that classic, buttery spritz cookie, but reinvented with the romantic, beloved flavor of red velvet. That, my friends, is the stunning and delicious charm of these Red Velvet Spritz Cookies. They are the perfect, delicate little bite to share with your Valentine.
I absolutely adore making spritz cookies for holidays, and this red velvet version has become my new obsession for Valentine’s Day. The recipe is a dream—the dough, enriched with both butter and cream cheese, is unbelievably tender and flavorful. A touch of cocoa gives it that classic red velvet taste, and the vibrant red color is simply show-stopping. They are not just cookies; they are tiny, edible works of art that are so much fun to make and even more fun to share.

Why These Spritz Cookies are Perfect for Your Valentine
You are going to fall in love with this fun, festive, and incredibly easy cookie recipe. It’s a true holiday gem. Here’s why:
- A Beautiful, Romantic Twist on a Classic: We’ve infused the beloved, buttery spritz cookie with the iconic flavor and vibrant color of red velvet.
- Incredibly Tender, Melt-in-Your-Mouth Texture: The addition of cream cheese to the butter and sugar base creates a wonderfully rich, soft, and tender cookie that is simply divine.
- Fun, Fast, and Easy with a Cookie Press: A cookie press makes quick work of creating dozens of beautiful, uniform cookies in a variety of fun shapes. It’s a fantastic and satisfying baking project!
- Perfectly Dainty and Giftable: These small, delicate cookies are absolutely perfect for packaging in a festive box or tin as a thoughtful, homemade Valentine’s Day gift.
- Endlessly Fun to Decorate: A simple brush of egg white and a shower of festive sprinkles is all you need to turn these beautiful cookies into sparkling little gems.
Recipe Snapshot
| Prep Time | 20 minutes |
| Cook Time | 10 minutes |
| Total Time | 30 minutes |
| Servings | About 8 ½ dozen cookies |
| Calories | 38 kcal per cookie |
| Course | Dessert |
| Cuisine | American |
| Difficulty/Method | Easy / Baking |
Your Shopping List for These Red Velvet Beauties
This impressive cookie comes together with a handful of classic baking staples.
→ For the Cookies
- 1 cup butter & 3 ounces cream cheese → Both must be softened to room temperature for the creamiest, fluffiest dough.
- 1 cup sugar → For the perfect sweetness.
- 1 teaspoon vanilla extract → For classic, warm flavor.
- 1 large egg, separated → The yolk goes in the dough for richness, and the white is used as a “glue” for sprinkles.
- 2 teaspoons red paste food coloring → Gel or paste coloring provides the most vibrant red without thinning the dough.
- ½ teaspoon peppermint extract → Optional, but it adds a lovely, subtle minty note that pairs beautifully with red velvet.
Let’s Get Pressing! Your Step-by-Step Guide
Ready to create the most beautiful and delicate cookies for your Valentine? Let’s get to it!
Part 1: The Tender Red Velvet Dough
- Preheat Oven: Preheat your oven to 350°F (175°C). Do not grease your baking sheets for spritz cookies!
- Cream the Fats and Sugar: In a large bowl, using a hand mixer or a stand mixer, beat the softened butter, cream cheese, and sugar on high speed until the mixture is very light and fluffy. This should take a full 5-7 minutes.
- Combine the Dough: Beat in the egg yolk, vanilla, red food coloring, and peppermint extract (if using). In a separate bowl, whisk together the flour and cocoa powder. With the mixer on low speed, gradually add the flour mixture to the creamed mixture until it’s just combined.
Part 2: Press, Decorate, and Bake
- Press the Cookies: Fill your cookie press with the prepared dough and fit it with your desired disk shape (hearts or flowers are perfect for Valentine’s Day!). Press the cookies about 1 inch apart directly onto ungreased baking sheets.
- Decorate Before Baking: In a small bowl, whisk together the reserved egg white and 1 tablespoon of water. Gently brush this egg wash over the tops of the unbaked cookies. Immediately decorate with your favorite nonpareils or sprinkles.
- Bake to Perfection: Bake for 10-12 minutes, or until the cookies are set and firm, but not browned. The edges may look just slightly darker, but you want to maintain the vibrant red color.
- Cool and Enjoy: Let the cookies cool on the pans for 2 minutes before carefully removing them to wire racks to cool completely. Store in an airtight container and share with someone you love!
Red Velvet Spritz Cookies
Ingredients
Equipment
Method
-
Preheat oven to 350°F. In a large bowl, cream the softened butter, cream cheese, and sugar until light and fluffy, about 5-7 minutes.
-
Beat in the egg yolk, vanilla, food coloring, and optional peppermint extract.
-
In another bowl, whisk together the flour and cocoa. Gradually beat the flour mixture into the creamed mixture until just combined.
-
Using a cookie press fitted with a disk of your choice, press the dough 1 inch apart onto ungreased baking sheets.
-
In a small bowl, mix the reserved egg white and water. Gently brush this mixture over the cookies. Decorate as desired with nonpareils or sprinkles.
-
Bake until the cookies are set, 10-12 minutes. Let them cool on the pans for 2 minutes before removing to wire racks to cool completely.
Notes
Room Temperature Ingredients: For the dough to have the correct consistency for the press, ensure your butter, cream cheese, and egg are at room temperature.
Storage: Store cookies in an airtight container at room temperature for up to one week.
WiseRecipes’ Top Tips for Perfect Spritz Cookies
These simple secrets will ensure your spritz cookie project is a flawless, flavorful triumph.
- Use Room Temperature Ingredients. For the dough to come together smoothly and be the right consistency for the press, your butter, cream cheese, and egg must be at room temperature.
- Do NOT Grease Your Baking Sheets! This is the most important rule for spritz cookies. The cookie press works because the raw dough needs to stick to the cool, clean surface of the pan in order to release from the press. Greasing the pan or using parchment will cause the cookies to pull away with the press.
- Cream for the Full Time. Beating the butter, cream cheese, and sugar for a full 5-7 minutes is the key to a light, tender cookie. This step incorporates air and creates a fluffy texture.
- Chill Your Baking Sheets if Needed. If your kitchen is warm and the dough is having trouble sticking, pop your metal baking sheets in the freezer for about 10 minutes. A cold surface works best.
- Don’t Overbake. Spritz cookies are delicate. You want to bake them just until they are set and firm to the touch. They should not get brown on the edges, as this will dull the beautiful red color.
Keep Them Fresh! Storing Your Cookies
These beautiful cookies store wonderfully, making them a perfect make-ahead treat for gifting.
- Storage: Once completely cooled, you can store the spritz cookies in an airtight container at room temperature. They will stay fresh and crisp for up to a week.
FAQs: Your Red Velvet Spritz Cookie Questions, Answered!
What if I don’t have a cookie press?
While a cookie press is essential for the classic spritz shapes, you can still use this delicious dough! You can treat it like a slice-and-bake cookie. Shape the dough into a log, wrap and chill it until very firm, then slice it into ¼-inch thick rounds and bake. You can also use a piping bag with a large star tip to pipe small rosettes.
Why is my dough not sticking to the baking sheet?
This is the most common spritz cookie problem! It’s almost always because the baking sheet is either greased, lined with parchment, or too warm. Make sure your sheets are cool, clean, and completely ungreased.
Can I add a glaze or frosting after they bake?
Absolutely! These would be delicious with a simple cream cheese glaze (powdered sugar, a little cream cheese, and milk) drizzled over the top after they have cooled.
Can I make the dough ahead of time?
Yes, this dough can be made and stored in the refrigerator, well-wrapped, for up to 3 days. Just let it sit at room temperature for about 20-30 minutes to soften slightly before you try to use it in the cookie press, as it will be very firm straight from the fridge.
Final Thoughts: A Cookie from the Heart
There is something truly special about a homemade cookie, especially one that is as beautiful and delicate as these Red Velvet Spritz Cookies. They are a fun, nostalgic baking project that yields stunning results. They are the perfect, dainty treat to share with someone special and say “I love you” in the most delicious way. I hope they bring a little bit of color and a lot of joy to your Valentine’s Day. Happy Baking!
6. A Perfect Match: Cranberry Nutella Sandwich Cookies for Valentine’s
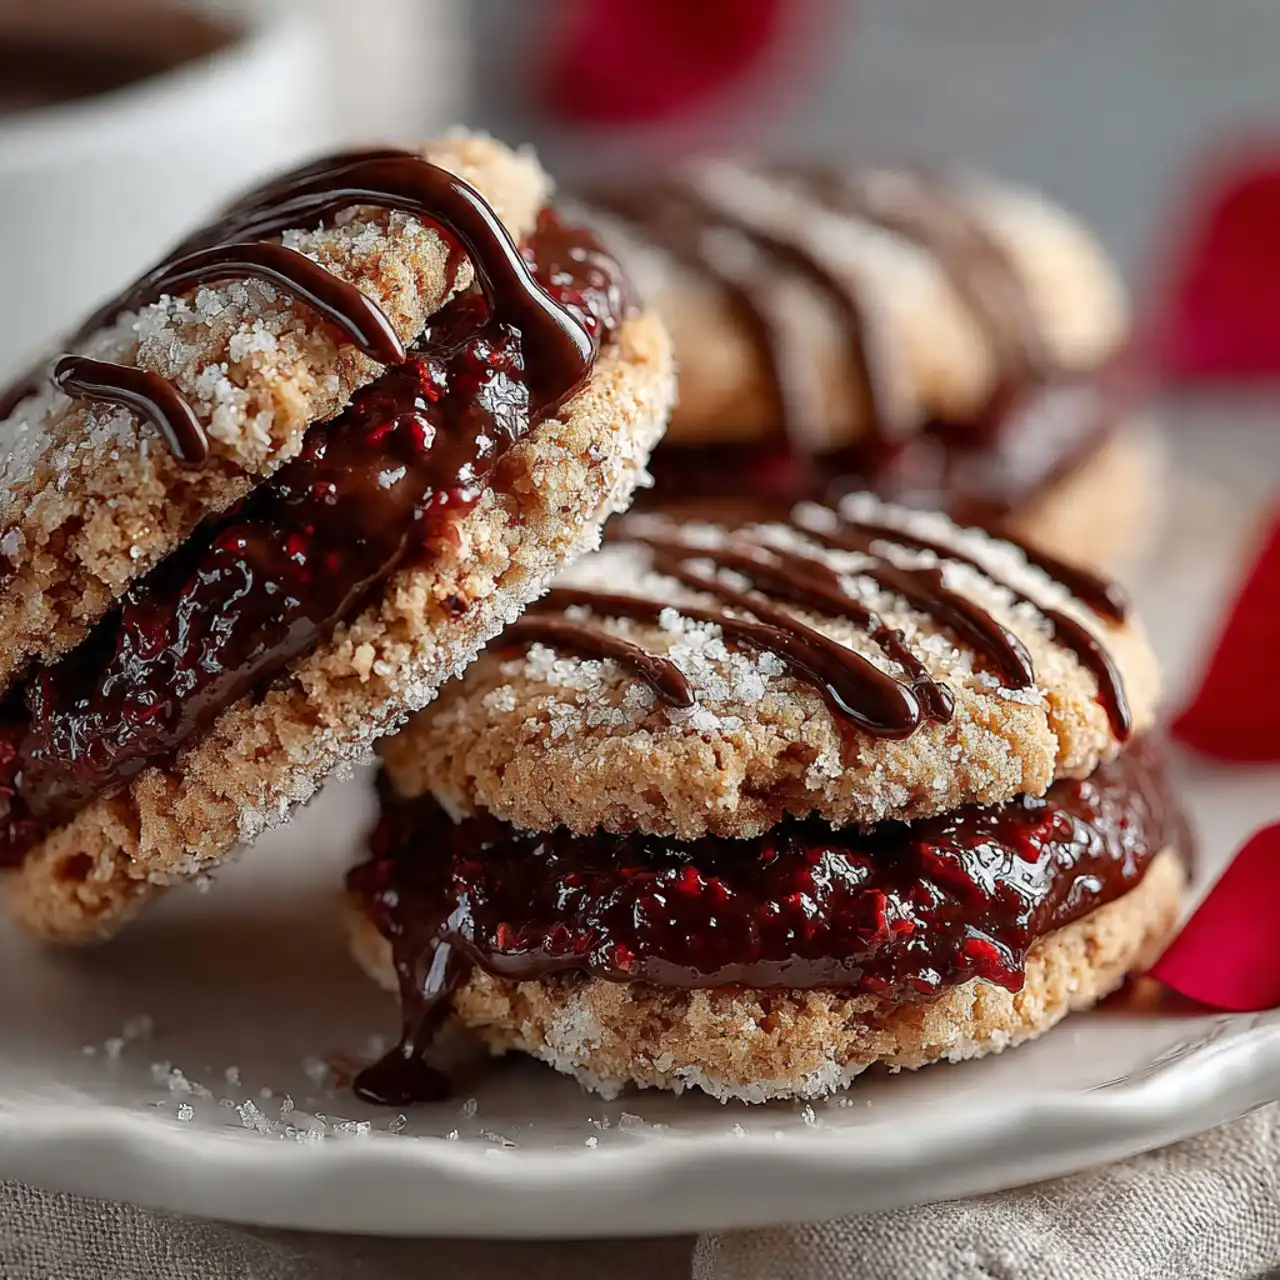
There are some flavor combinations that just feel like they were meant to be. This, right here, is one of them. Forget the usual Valentine’s chocolates and discover a cookie that is sophisticated, surprising, and utterly romantic. We’re talking about a tender, buttery, shortbread-style cookie, studded with chewy, tart bits of dried cranberry, then sandwiched together with a rich, decadent layer of creamy Nutella. It’s a flavor match made in heaven, and it’s the perfect, unique treat for your Valentine.
This recipe was born from a desire to move beyond the standard heart-shaped sugar cookie and create something a little more grown-up and interesting for Valentine’s Day. The cookie itself is a dream—it’s incredibly tender and almost melts in your mouth, thanks to the confectioners’ sugar in the dough. The little jewels of finely chopped cranberry cut through the richness beautifully, and when paired with that beloved chocolate-hazelnut spread… well, it’s just pure magic. It’s an elegant cookie that looks and tastes like it came from a specialty bakery but is secretly so simple to make at home.

Why These Cookies are the Perfect Way to Say “I Love You”
You are going to fall head-over-heels for this unique and delicious cookie. It’s a true expression of affection in every bite. Here’s why:
- A Sophisticated and Unique Flavor Combination: The tart, chewy cranberries, rich Nutella, and buttery cookie create a complex and incredibly delicious flavor profile that is truly special.
- Incredibly Tender, Melt-in-Your-Mouth Texture: The use of confectioners’ sugar in the dough results in a wonderfully soft, tender, shortbread-like cookie that is absolutely divine.
- A Beautiful and Elegant Presentation: The unique diamond shape and the beautiful contrast of the pale cookie, red cranberries, and dark Nutella make for a stunning cookie that’s perfect for gifting.
- A Perfect Make-Ahead Treat: The dough requires chilling, and the finished cookies store beautifully, making this a great, low-stress baking project to prepare in advance.
- It’s Filled with Nutella! Need I say more? The beloved, creamy, chocolate-hazelnut spread makes these sandwich cookies completely irresistible.
Recipe Snapshot
| Prep Time | 25 minutes (+ chilling) |
| Cook Time | 20 minutes |
| Total Time | 1 hour 15 minutes |
| Servings | 16 sandwich cookies |
| Calories | 284 kcal per cookie |
| Course | Dessert |
| Cuisine | American |
| Difficulty/Method | Easy / Baking |
Your Shopping List for These Romantic Cookies
This impressive cookie comes together with a handful of simple, high-quality baking staples.
→ For the Cookies and Filling
- 1 cup unsalted butter → It is essential that this is softened to room temperature for a light and fluffy dough.
- 1 cup confectioners’ sugar → The secret to a super tender, melt-in-your-mouth cookie crumb.
- 3 teaspoons vanilla extract → For a classic, warm flavor that complements all the other ingredients.
Let’s Get Baking! Your Step-by-Step Guide
Ready to create the most delicious and unique cookies for your Valentine? Let’s get to it!
Part 1: The Tender Cranberry Cookie Dough
- Cream the Butter and Sugar: In a large bowl, using a hand mixer or a stand mixer, beat the softened butter and the confectioners’ sugar on high speed until the mixture is very light and fluffy. This should take a full 5-7 minutes and is key to a tender cookie! Beat in the vanilla.
- Combine the Dough: In a separate bowl, whisk together the flour and salt. With the mixer on low speed, gradually add the flour mixture to the creamed butter until it’s just combined. Use a spatula to stir in the finely chopped cranberries.
- Divide and Chill: Divide the dough in half. Shape each half into a flat disk, wrap it tightly in plastic wrap, and refrigerate for at least 30 minutes, or until it’s firm enough to roll.
Part 2: Cut, Bake, and Assemble
- Preheat and Prep: Preheat your oven to 325°F (160°C). Line two large baking sheets with parchment paper.
- Roll and Cut: On a lightly floured surface, roll one disk of the chilled dough out to a ¼-inch thickness. Using a floured 2-inch diamond-shaped cookie cutter, cut out your shapes. Place the cookies about 2 inches apart on the prepared baking sheets.
- Bake to Perfection: Gently brush the tops of the cookies with a little milk. Bake for 18-20 minutes, or until the edges are just beginning to turn a pale golden brown. Let them cool on the baking sheets for a few minutes before transferring them to wire racks to cool completely.
- Assemble the Sandwiches: Spread a generous layer of Nutella over the flat bottoms of half of the cooled cookies. Gently press a second cookie on top to create a sandwich. Let them set for a little while before storing.
Cranberry Nutella Sandwich Cookies
Ingredients
Equipment
Method
-
In a large bowl, cream the softened butter and confectioners’ sugar on high speed until light and fluffy, 5-7 minutes. Beat in the vanilla.
-
In another bowl, whisk together the flour and salt. With the mixer on low, gradually beat the flour mixture into the creamed mixture until just combined. Stir in the finely chopped cranberries.
-
Divide the dough in half, shape each half into a disk, wrap in plastic, and refrigerate for at least 30 minutes until firm.
-
Preheat oven to 325°F. On a lightly floured surface, roll one portion of dough to 1/4-inch thickness. Cut with a floured 2-inch diamond-shaped cookie cutter.
-
Place cookies 2 inches apart on parchment-lined baking sheets. Brush the tops with milk.
-
Bake until the edges just begin to brown, 18-20 minutes. Let cool on the pan for a few minutes before transferring to wire racks to cool completely.
-
Spread Nutella over the flat bottoms of half the cookies and top with the remaining cookies to form sandwiches.
Notes
Chill the Dough: Don’t skip the refrigeration step. It makes the dough much easier to roll and cut, and prevents the cookies from spreading too much.
Cool Completely: Ensure the cookies are 100% cool before filling with Nutella to prevent it from melting and oozing out.
WiseRecipes’ Top Tips for Perfect Sandwich Cookies
These simple secrets will ensure your Valentine’s treats are a flawless, flavorful triumph.
- Really Cream That Butter and Sugar! The recipe calls for 5-7 minutes of creaming for a reason. This step incorporates a lot of air into the mixture, which is the secret to a super light and tender, melt-in-your-mouth final cookie.
- The Chill Time is Key. Don’t skip chilling the dough! This firms up the butter, which makes the dough much easier to roll out and cut, and it also prevents the cookies from spreading too much in the oven, so they keep their beautiful shape.
- Finely Chop the Cranberries. Taking the time to chop the dried cranberries into small, confetti-like pieces ensures that you get a little bit of tartness in every bite and makes the cookies easier to cut out neatly.
- Don’t Overbake. These are delicate, buttery cookies. You want to pull them from the oven the moment the edges are just starting to show a hint of pale golden color. They will continue to set on the hot baking sheet as they cool.
- Cool Completely Before Filling. This is non-negotiable! If you try to spread Nutella on a warm cookie, it will melt into a messy puddle. Patience is key for a perfect sandwich.
Keep Them Fresh! Storing Your Cookies
These cookies store beautifully, making them a perfect make-ahead treat for gifting.
- Storage: Once assembled, you can store the sandwich cookies in an airtight container at room temperature. They will stay fresh and delicious for up to a week. The cookies will soften slightly over time as they absorb moisture from the filling, which is absolutely delicious!
FAQs: Your Sandwich Cookie Questions, Answered!
What if I don’t have a diamond-shaped cookie cutter?
No problem at all! A classic heart-shaped cutter would be perfect for Valentine’s Day. A simple round or fluted-edge cutter would also be beautiful for these elegant cookies.
Can I use a different filling instead of Nutella?
Of course! These cookies would be fantastic with a simple raspberry jam, a cream cheese frosting, or even a rich chocolate ganache as a filling.
Can I make the dough ahead of time?
Yes, this dough is perfect for making ahead. You can keep the wrapped dough disks in the refrigerator for up to 3 days before rolling and baking. You can also freeze the dough for up to 3 months.
Can I add nuts to this recipe?
Absolutely! Finely chopped pecans or walnuts would be a fantastic addition. I would recommend adding about ½ cup of finely chopped, toasted nuts to the dough at the same time you add the cranberries.
Final Thoughts: A Cookie Made with Love
There is nothing more special than a homemade cookie, baked with care for someone you love. These Cranberry Nutella Sandwich Cookies are a perfect example of a treat that is both unique and deeply satisfying. The surprising combination of flavors is a true delight. I hope they bring a little bit of sweetness and a whole lot of love to your Valentine’s Day celebration. Happy Baking!
7. The Ultimate Heart Cookies (Perfect Valentine’s Day Treat!)

Imagine the perfect Valentine’s Day cookie: a buttery, tender sugar cookie cut into a classic heart shape, baked to golden perfection, and topped with a thick, luscious swirl of tangy cream cheese buttercream in festive shades of pink and red. That, my friends, is the timeless, heartwarming magic of these Classic Heart Cookies. This is, without a doubt, the most beloved and essential cookie you will bake to share the love this Valentine’s Day.
I promise you, there is no greater feeling than presenting a platter of these beautiful, heartfelt cookies. The tangy, rich cream cheese frosting is the perfect counterpart to the sweet, buttery cookie base. They are a true classic, a stunning addition to any Valentine’s party, a perfect project for baking with kids, and the most delicious way to say “I love you.”
Get ready to master the art of the perfect cut-out cookie and create a batch of stunning, delicious, and completely irresistible heart cookies that will be the star of your Valentine’s celebration.

Why These are the Only Heart Cookies You’ll Ever Need
You are going to fall head over heels for this classic and foolproof recipe. It’s a true Valentine’s Day staple. Here’s why:
- The Perfect No-Spread Sugar Cookie Dough: This dough is specifically designed to hold its shape, so your hearts will come out of the oven with beautifully crisp, defined edges.
- Incredibly Rich and Tangy Cream Cheese Frosting: This isn’t just any frosting! The cream cheese buttercream is less sweet than traditional buttercream and has a wonderful tang that perfectly complements the buttery cookie.
- A Fun and Festive Decorating Project: Swirling on the pink, red, and white frosting and finishing with a flourish of sprinkles is a wonderfully creative and fun activity for the whole family.
- Classic Buttery, Tender Texture: The cookies are the perfect balance of soft and sturdy—tender to the bite but firm enough for decorating and gifting.
- Perfect for Gifting and Parties: A box of these beautiful, homemade cookies is the ultimate heartfelt gift for Valentine’s Day, and they are always the first to disappear from a party platter.
Recipe Snapshot
| Prep Time | 30 minutes |
| Chill Time | 1 hour 10 minutes |
| Cook Time | 10 minutes |
| Total Time | 1 hour 50 minutes |
| Servings | 4 dozen cookies |
| Calories | 153 kcal per cookie |
| Course | Dessert |
| Cuisine | American |
| Difficulty/Method | Easy / Baking |
Your Shopping List for These Sweethearts
This classic recipe uses simple, high-quality baking staples to create its magic.

→ For the No-Spread Sugar Cookies
- 3 cups all-purpose flour → Spooned and leveled for the perfect dough consistency.
- 1 tsp baking powder & ½ tsp kosher salt → For a slight lift and balanced flavor.
- 1 cup (2 sticks) butter → Softened to room temperature. This is key for a creamy dough.
- 1 cup granulated sugar → For the classic sweet flavor.
- 1 large egg → Must be at room temperature to emulsify properly.
- 1 Tbsp milk & 1 tsp pure vanilla extract → For moisture and classic, warm flavor.
→ For the Cream Cheese Buttercream
- 1 (8-oz.) block cream cheese & ½ cup (1 stick) butter → Both must be fully softened to room temperature for a lump-free frosting.
- 4 cups powdered sugar → For a sweet, smooth, and sturdy frosting.
- 1 tsp pure vanilla extract & ¼ tsp kosher salt → To perfectly flavor and balance the frosting.
- Pink and red food coloring & sprinkles → For bringing your Valentine’s vision to life!
Let’s Get Baking! Your Step-by-Step Guide
Ready to bake some love? Let’s get started on these classic heart cookies.
Part 1: The Perfect Cut-Out Cookie Dough
- Combine Dry Ingredients: In a large bowl, whisk together the flour, baking powder, and salt.
- Cream Butter and Sugar: In a separate large bowl using a hand mixer, beat the softened butter and granulated sugar together on medium-high speed until the mixture is light, fluffy, and pale in color.
- Add Wet Ingredients: Beat in the room temperature egg, milk, and vanilla until just combined.
- Finish the Dough: Gradually add the flour mixture to the wet ingredients, mixing on low speed until the dough is totally combined. Do not overmix.
- Chill the Dough: Divide the dough in half, shape each half into a flattened disc, and wrap tightly in plastic wrap. Refrigerate for at least 1 hour. This step is crucial!
Part 2: Cut, Chill, and Bake the Hearts
- Preheat and Prep: When you’re ready to bake, preheat your oven to 350°F (175°C). Line two large baking sheets with parchment paper.
- Roll and Cut: On a lightly floured work surface, roll out one disc of chilled dough until it’s about 1/8-inch thick. Use a 2 1/2-inch heart-shaped cookie cutter to cut out your shapes. Transfer the hearts to the prepared baking sheets.
- The Freezer Flash!: This is the secret tip! Place the entire baking sheet of cut-out cookies into the freezer for 10 minutes. This quick chill helps the cookies hold their sharp, beautiful heart shape perfectly while baking.
- Bake to Perfection: Bake for 8 to 10 minutes, or until the edges are just barely starting to turn a light golden brown. Let the cookies cool on the baking sheet for a few minutes before transferring them to a wire rack to cool completely.
Part 3: The Creamy Frosting & Decoration
- Make the Frosting: In a large bowl using a hand mixer, beat the softened cream cheese and butter together until completely smooth and free of lumps. Gradually beat in the powdered sugar, then add the vanilla and salt. Beat until the frosting is light, fluffy, and combined.
- Color the Frosting: Divide the frosting into three bowls. Leave one white, then add pink food coloring to the second bowl and red food coloring to the third. Stir each until you reach your desired shades.
- Decorate!: Using a small offset spatula or a butter knife, spread the different colored frostings onto the completely cooled heart cookies. Immediately top with your favorite Valentine’s sprinkles and let the frosting set.

Buttery Cut-Out Heart Cookies with Cream Cheese Frosting
Ingredients
Equipment
Method
-
Make the cookies: In a large bowl, whisk together flour, baking powder, and salt. In another bowl, beat butter and sugar until fluffy. Beat in the egg, milk, and vanilla. Gradually add the flour mixture until just combined.
-
Shape the dough into 2 flattened discs, wrap in plastic, and refrigerate for at least 1 hour.
-
Preheat oven to 350ºF. On a floured surface, roll out dough to 1/8” thick. Cut out shapes with a heart-shaped cookie cutter and transfer to parchment-lined baking sheets.
-
Freeze the cut-out cookies on the baking sheets for 10 minutes to help them hold their shape.
-
Bake until the edges are lightly golden, 8 to 10 minutes. Let cool completely on a wire rack.
-
Make the frosting: In a large bowl, beat softened cream cheese and butter until smooth. Gradually add powdered sugar, then beat in vanilla and salt until combined and fluffy.
-
Divide the frosting into 3 bowls. Tint one pink and one red with food coloring. Frost the cooled cookies and top with sprinkles.
Notes
Room Temperature Ingredients: For the smoothest dough and frosting, ensure your butter, egg, and cream cheese are all at room temperature.
Storage: Due to the cream cheese frosting, cookies must be stored in an airtight container in the refrigerator for up to 5 days.
WiseRecipes’ Top Tips for Perfect Heart Cookies
These are my essential secrets for foolproof, beautiful cut-out cookies every time.
- The Dough Chill is Non-Negotiable. Chilling the dough for at least an hour is crucial. It solidifies the butter, which makes the dough much easier to roll out and prevents the cookies from spreading into blobs in the oven.
- The Freezer Flash is Your Secret Weapon. The 10-minute freeze just before baking is a game-changing trick for cut-out cookies. It ensures your hearts will have super sharp, defined edges and won’t spread.
- Don’t Overbake. The key to a tender sugar cookie is to pull it from the oven when the edges are just beginning to turn golden. They will continue to set on the hot baking sheet, and this will keep the centers perfectly soft.
- Truly Softened Butter and Cream Cheese. For the smoothest, creamiest frosting with absolutely no lumps, your butter and cream cheese must be fully at room temperature.
- Spoon and Level Your Flour. For the most accurate flour measurement (and the best cookie texture), use a spoon to fill your measuring cup, then level it off with a straight edge. Don’t just scoop the cup into the flour bag!
Keep Them Fresh! Storing Your Valentine’s Treats
These cookies are perfect for making ahead for Valentine’s Day gifting.
- Storage: Because of the cream cheese frosting, these cookies must be stored in the refrigerator. Place them in a single layer in an airtight container or stack them carefully with layers of parchment paper in between. They will stay fresh for up to 5 days.
- Serving: For the best flavor and texture, let the cookies sit at room temperature for about 15-20 minutes before serving.
FAQs: Your Heart Cookie Questions, Answered!
Can I make the dough ahead of time?
Yes, absolutely! The cookie dough can be made and kept in the refrigerator for up to 3 days. You can also freeze the dough discs for up to 3 months. Just let it thaw in the fridge before rolling.
Can I freeze the decorated cookies?
Yes, these freeze beautifully. Place the frosted cookies on a baking sheet in the freezer until the frosting is solid. Then, you can stack them in a freezer-safe container with parchment paper between the layers. They will keep for up to 3 months.
My frosting is too soft/stiff. How do I fix it?
It’s an easy fix! If your frosting is too soft, gradually beat in a little more powdered sugar until it reaches the right consistency. If it’s too stiff, beat in a tiny splash of milk or cream (just a teaspoon at a time) until it’s perfectly smooth and spreadable.
Can I use this recipe for other holidays?
Of course! This is a fantastic, versatile cut-out cookie recipe. Use a tree-shaped cutter for Christmas, a pumpkin for Halloween, or a flower for spring. Just change up your frosting colors and sprinkles to match the occasion!
Final Thoughts: A Sweet Treat from the Heart
There is nothing more classic or heartfelt than a homemade sugar cookie, especially one shaped like a heart. These cookies are a pure and simple expression of love and care. They are a delightful project, a delicious treat, and the perfect way to share a little sweetness with the people you love this Valentine’s Day. Happy Baking!
8. Red Velvet Cookies with Easy Cream Cheese Frosting

There’s something undeniably enchanting about the deep, rich hue of red velvet cookies, and when you add a luscious layer of cream cheese frosting on top, it’s like inviting a piece of magic to your kitchen. These cookies are not just a treat; they embody a festive spirit that warms the heart and titillates the taste buds. Picture this: a tender, velvety bite that melts in your mouth, with a hint of chocolate and the tang of cream cheese dancing together in perfect harmony. Whether you’re celebrating a special occasion or simply treating yourself on a cozy afternoon, these cookies are sure to delight.
The Allure of Red Velvet Cookies with Easy Cream Cheese Frosting
Why should these velvety delights hold a special place in your heart? Let me share a few reasons why this recipe deserves a spot in your kitchen:
- A Showstopper for Any Occasion: Their striking color and delightful flavor make these cookies perfect for celebrations, holidays, or simply as a sweet surprise for loved ones.
- Simplicity Meets Elegance: With straightforward ingredients and easy instructions, you’ll impress your friends and family without spending hours in the kitchen.
- Irresistible Flavor Profile: The subtle cocoa powder combined with a sweet, tangy cream cheese frosting creates a wonderful symphony of flavors that isn’t too rich or overpowering.
- Versatile for Personalization: Feel free to add your own twist with mix-ins or toppings, adapting these cookies to suit your taste perfectly.
Gathering Your Ingredients
Before we roll up our sleeves and dive into baking, let’s gather everything we need. Here’s a list of the ingredients that’ll make these red velvet cookies shine:
- 2 cups all-purpose flour (240g): The foundation of our cookies, giving them structure and chewiness.
- 2 tablespoons unsweetened cocoa powder (15g): Adds a hint of chocolate flavor that complements the red velvet beautifully.
- 1 teaspoon baking soda (5g): This will help our cookies rise to a perfectly tender texture.
- 1/2 teaspoon fine sea salt (3g): Just a pinch to enhance flavors and balance the sweetness.
- 1/2 cup unsalted butter, room temperature (113g): The rich base that ensures buttery flavor and a soft, flaky texture.
- 3/4 cup granulated sugar (150g): Sweetness is key, providing that lovely sugary warmth.
- 1 large egg, room temperature: The binding agent that brings all the ingredients together for a cohesive dough.
- 2 teaspoons pure vanilla extract (10ml): A must for elevating the flavor and imparting a comforting aroma.
- 1 teaspoon distilled white vinegar (5ml): This clever addition reacts with the baking soda, lending moisture and that signature red velvet flavor.
- 1 1/2 tablespoons red gel food coloring (22ml): This is where the magic happens! The gel ensures a vibrant red without adding too much liquid.
- Optional: 1/2 cup white chocolate chips (85g): For those moments when you want an extra touch of sweetness and creaminess.
- Optional: Valentine’s sprinkles: Because let’s be honest, everything is better with a sprinkle of joy!
For the Cream Cheese Frosting:
- 4 ounces cream cheese, softened (113g): The star of the frosting show, providing richness and tang.
- 2 tablespoons unsalted butter, softened (28g): Adds an extra layer of creaminess to the frosting.
- 1 cup powdered sugar, sifted if clumpy (120g): Ensures that our frosting is the perfect balance of sweetness and smoothness.
- 1/2 teaspoon vanilla extract (2.5ml): For that wonderful aroma and taste that complements the cream cheese.
- Pinch of salt: A little salt goes a long way in enhancing the flavors.
Let’s Bake!
Now that we’ve gathered our ingredients, let’s get to the fun part—baking these delightful cookies! Follow these simple steps to create a batch that will be the talk of your kitchen (and beyond):
- Preheat your oven to 350°F (175°C). Line two baking sheets with parchment paper, making prep a breeze.
- In a medium bowl, whisk together the flour, cocoa powder, baking soda, and salt until well combined. This blend creates the perfect cookie foundation!
- In a large bowl, beat the room-temperature butter and granulated sugar together until light and fluffy—about 2 minutes using a hand mixer on medium speed. This step brings air into the mixture, ensuring a tender cookie.
- Gradually beat in the egg, vanilla extract, and vinegar until smooth, scraping down the sides as needed for even incorporation.
- Add the vibrant red gel food coloring and mix until the batter is a bright, beautiful red. Trust me; this step will excite you!
- Carefully fold in the dry ingredients from the medium bowl to the wet ingredients. Remember, gentle mixing is key—overmixing could lead to tough cookies!
- If you’re using white chocolate chips, now’s the time to fold them in. Who says we can’t have a little more sweetness?
- Scoop the dough into balls about 1 1/2 tablespoons in size and place them on the prepared baking sheets, spacing them around 2 inches apart.
- Bake in the preheated oven for 10-12 minutes. The edges should be set while the centers remain soft for that glorious, chewy texture. If you want perfectly round cookies, use a round cutter to shape them immediately after baking.
- Allow the cookies to cool on the baking pan for about 5 minutes before transferring them to a wire rack to cool completely.
- Now for the cream cheese frosting! Beat the softened cream cheese and butter together until smooth. Gradually add the powdered sugar, vanilla, and a pinch of salt, beating until fluffy—this should take about a minute. If it’s too stiff, add a teaspoon of milk for a softer consistency.
- Finally, spread or pipe the frosting onto the cooled cookies and decorate with sprinkles, if desired.
Tricks of the Trade
Here are some expert tips to ensure your red velvet cookies turn out perfectly every time:
- Room Temperature Ingredients: Make sure your butter and egg are at room temperature. This helps create a creamier batter and better texture in the cookies.
- Gel Food Coloring: Using gel food coloring instead of liquid will give you that vibrant hue without altering the batter’s consistency.
- Don’t Overmix: Mixing the dry and wet ingredients until just combined will yield lighter cookies. Overmixing can develop the gluten in the flour, leading to denser cookies.
- Cooling Time: Letting the cookies cool a bit before frosting helps prevent the cream cheese from melting and becoming runny. We want a luscious yet sturdy frosting!
- Frosting Variations: If you want a zesty kick, add a splash of lemon juice or zest into your frosting to brighten the flavor profile.
Adding Your Personal Touch
If you’re feeling adventurous and want to switch things up, here are some variations to consider:
- Add Spices: A dash of cinnamon or nutmeg can bring a warm, cozy flavor to your cookies.
- Nuts and Seeds: Walnuts or pecans chopped and folded into the dough add great texture and crunch.
- Chocolate Ganache Topping: Instead of cream cheese frosting, drizzle a rich chocolate ganache for a chocoholic twist.
- Mint Flavor: Adding a few drops of mint extract to your frosting creates a lovely minty bite that’s sure to impress!
- Red Velvet Sandwich Cookies: Pipe frosting between two cookies for a delightful twist and creamy bite!
Delightfully Displaying Your Cookies
When it comes to serving your red velvet cookies, presentation is key. Arrange them on a beautiful platter or a tiered cake stand to add elegance to your table. Pair these cookies with a piping hot cup of coffee or a soothing herbal tea, allowing the flavors to meld in your mouth. If you’re celebrating, add a few festive decorations or placeholders with sweet messages for your guests. And for an extra touch, consider serving them alongside some luscious strawberries or raspberries to complement the richness of the cookies!
Keeping Those Cookies Fresh
Wondering how to store your delightful cookies? Here’s how to keep them fresh and delicious for days to come:
- Room Temperature Storage: Store your cookies in an airtight container at room temperature. They’ll stay fresh for about 3-4 days. Just be mindful not to stack them if they’re frosted, as they can stick together!
- Refrigeration: If you prefer a chilled treat, pop the cookies in the fridge. They’ll last about a week but note that the cream cheese might firm up a bit.
- Freezing: You can freeze the cookies for up to three months. Place them in a zip-top freezer bag or airtight container, removing as much air as possible before sealing. Frost them once completely thawed for the best texture.
- Reheating Tips: If you want to enjoy a freshly baked taste after freezing, simply thaw, then warm them in the oven for a few minutes at a low temperature.
Your Questions Answered
As you embark on your cookie-baking adventure, you might have some questions. Here are a few commonly asked ones:
- Can I use liquid food coloring instead? It’s best to use gel food coloring as it provides a deeper color without changing the batter’s moisture level.
- What can I do if my cream cheese frosting is too runny? If your frosting is too runny, simply add more powdered sugar—a teaspoon at a time—until you reach the desired consistency.
- Can I make the dough ahead of time? Absolutely! You can prepare the cookie dough, wrap it tightly, and refrigerate it for up to 2 days before baking. Let it sit at room temperature for a few minutes before scooping.
- How can I get the cookies to be softer? Underbake slightly, keeping in mind that they’ll continue to cook a little on the baking sheet after being removed from the oven.
Baking these red velvet cookies with easy cream cheese frosting is not just about creating a sweet treat; it’s about crafting delicious memories laden with joy. The process, the aroma wafting through your kitchen, and the sheer delight when you take that first bite are what make this recipe truly special. So gather your ingredients, put on your favorite apron, and let’s create some magic together. I can’t wait for you to try these cookies—trust me, they will become a cherished favorite in your baking repertoire!
Red Velvet Cookies with Easy Cream Cheese Frosting
Ingredients
Method
-
Preheat your oven to 350°F (175°C) and line two baking sheets with parchment paper.
-
In a medium bowl, whisk together the flour, cocoa powder, baking soda, and salt until well combined.
-
In a large bowl, beat the room-temperature butter and granulated sugar together until light and fluffy—about 2 minutes.
-
Gradually beat in the egg, vanilla extract, and vinegar until smooth, scraping down the sides as needed.
-
Add the gel food coloring and mix until the batter is vibrant red.
-
Carefully fold in the dry ingredients.
-
If using, fold in the white chocolate chips.
-
Scoop the dough into balls about 1 1/2 tablespoons in size and place them on the baking sheets, spacing them 2 inches apart.
-
Bake for 10-12 minutes until the edges are set and the centers remain soft.
-
Allow the cookies to cool on the baking pan for about 5 minutes before transferring to a wire rack.
-
Beat the softened cream cheese and butter together until smooth.
-
Gradually add the powdered sugar, vanilla, and a pinch of salt, beating until fluffy.
-
Spread or pipe the frosting onto cooled cookies and decorate with sprinkles if desired.
Notes
9. Epic Valentines Oreo Bark Recipe Quick Festive Treat
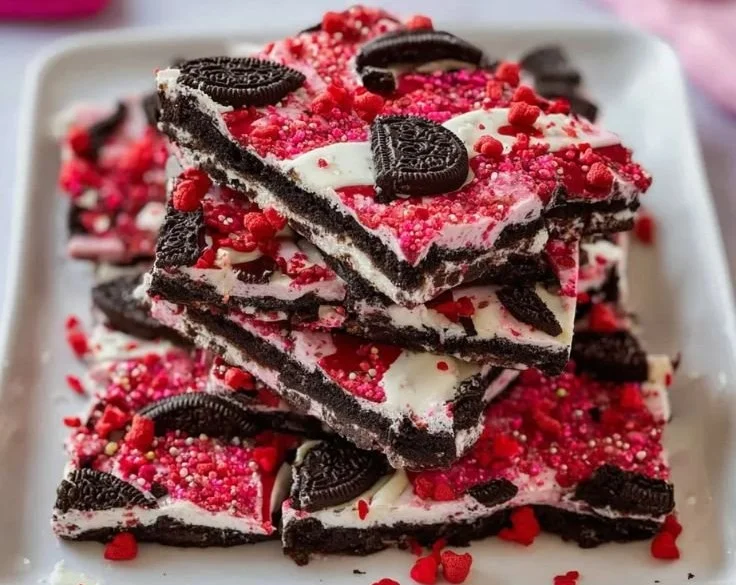
There’s something so enchanting about crafting a delightful treat for a festive occasion, and this Epic Valentines Oreo Bark is the perfect way to spread the love. It’s not just a treat; it’s an experience—one that fills your kitchen with the irresistible aroma of melted chocolate and dancing sprinkles, while the brilliant colors evoke joy and excitement. There’s a magical quality in sharing a sweet indulgence with those you hold dear, and this quick festive bark is just the ticket.
Why This Recipe is a Delightful Treat
- Simplicity Meets Elegance: With minimal culinary skills required, this bark looks glamorous enough to woo anyone while being fabulously easy to whip up.
- Festive Flair: The vibrant reds and pinks create a dazzling display that’s sure to catch the eye—perfect for parties, gatherings, or simply for making any day feel special.
- Customizable Goodness: You can easily adapt this recipe to suit your taste—whether you’re a classic chocolate lover or daring to try new flavor combinations.
- Crowd-Pleaser: Who doesn’t love Oreos and chocolate? This bark is a guaranteed hit with kids and adults alike, making it an ideal treat for any gathering.
- Quick and Easy: Perfect for those last-minute treats or when you want to show someone you care without spending hours in the kitchen.
Gathering Your Ingredients
To create this fabulous treat, you’ll want to have the following ingredients on hand. Each one plays a crucial role in crafting your delicious bark:
- 24 Oreo cookies, crushed: These are the heart of the recipe, bringing a sweet crunch and classic flavor that perfectly complements the chocolate.
- 2 cups of white chocolate chips: A creamy, luscious base that acts as a canvas for your toppings, melting beautifully and setting to form that gorgeous bark.
- 1 cup of pink or red candy melts: These add a splash of color and extra sweetness, bringing visual appeal and flavor to your bark.
- Heart-shaped sprinkles: The finishing touch! These cute sprinkles not only elevate the look but also embody the spirit of Valentine’s Day, making every bite a celebration.
Putting It All Together
Now that you have everything ready, let’s unveil the steps to crafting your Epic Valentines Oreo Bark. Trust me; the process is as fun as the final treat!
-
Crush the Oreos: Start by placing the Oreo cookies in a zip-top bag and using a rolling pin to break them into a mixture of chunks and fine crumbs. This texture adds interest to your bark.
-
Melt the White Chocolate: In a microwave-safe bowl, melt the white chocolate chips. Do this in 30-second intervals, stirring between each until you achieve a smooth consistency. The aroma will be heavenly!
-
Prepare Your Baking Sheet: Line a baking sheet with parchment paper, ensuring it extends beyond the edges for easy removal later. Pour the melted white chocolate onto the parchment, spreading it evenly to about 1/4-inch thick.
-
Layer on the Oreos: Sprinkle half of the crushed Oreos over the melted chocolate, pressing them gently into the layer for secure adherence.
-
Melt the Candy Melts: In a separate bowl, melt the pink or red candy melts. Once melted, drizzle them over the white chocolate mixture. Use a toothpick to swirl the two chocolates together, creating a mesmerizing marbled effect.
-
Finish with the Remaining Toppings: Sprinkle the rest of the Oreo crumbs on top, adding heart-shaped sprinkles for a festive touch.
-
Set the Bark: Place the baking sheet in the refrigerator for about 30 minutes, or until the layer is set firm.
-
Break and Serve: Once set, break the bark into irregular pieces. Serve these delightful bites and watch the smiles spread!
Pro Tips for Perfection
-
Use Quality Chocolate: Good quality chocolate makes a world of difference. I always suggest using real chocolate versus chips to achieve that silky smooth texture.
-
Stir Thoroughly: When melting your chocolate, be patient and stir thoroughly to avoid burning. A gentle hand will yield the best results!
-
Get Creative with Toppings: Consider adding nuts, dried fruits, or different colored sprinkles. Change it up based on the theme or occasion!
-
Let It Cool Gradually: If you have the time, let the bark set at room temperature before refrigerating to avoid condensation forming when it cools too quickly.
-
Size it Up: If you’re making this for a crowd, doubling the recipe is an excellent idea, just make sure you have enough space in your fridge!
Creative Twists to Try
While this recipe is a winner as is, why not mix it up a little? Here are some fun variations you can try:
-
Minty Fresh: Add some crushed mint Oreos instead of the regular ones for a refreshing mint flavor. You could also use peppermint extract in the white chocolate for a lovely twist.
-
Nutty Delight: Fold in some chopped nuts like almonds or hazelnuts for added crunch and depth.
-
Fruitful Options: Incorporate dried fruits like cranberries or cherries to introduce a sweet-tart contrast that ties beautifully with the chocolate.
-
Flavored Chocolate: Use dark chocolate instead of white for a richer flavor, or try using butterscotch chips for an unexpected twist.
-
Holiday-Themed: Change the sprinkles to fit other holidays, like orange for Halloween or green and gold for St. Patrick’s Day!
Presenting Your Treats
The best part of any dessert is how you present it! Serve your Epic Valentines Oreo Bark on a pretty platter—perhaps some rustic wood or vibrant color to contrast against the pinks and whites of the bark. You could also wrap pieces in cellophane with a cute ribbon to share with friends and loved ones. Each bite is a delightful surprise, leaving everyone with a touch of sweetness reminiscent of your warm-hearted gesture.
Keeping Your Bark Fresh
For those times when you nibble a bit too much (who can resist?), storing your bark is key to keeping it fresh and delicious:
-
Refrigeration: Keep the bark in an airtight container in the fridge for up to two weeks. This ensures it stays deliciously crunchy and avoids moisture.
-
Freezing: If you want to save some for later, you can freeze it! Just ensure each piece is separated by parchment paper in an airtight container. It can last up to three months in the freezer—great for unexpected guests!
-
Thawing Tips: When you’re ready to enjoy it again, just pull it from the fridge or freezer and let it sit at room temperature for a few minutes before enjoying for that fresh crunch.
Your Questions Answered
-
Can I use regular chocolate chips instead of white chocolate?
Absolutely! Just remember, the flavor profile will change, but it will still be delicious. Dark or milk chocolate would be fantastic choices! -
Do I need to refrigerate the bark?
It’s best to refrigerate it to ensure it sets properly. Plus, it tastes great chilled! -
What if I can’t find candy melts?
No worries! You can use more chocolate chips instead, just add a bit of shortening or coconut oil to help it drizzle better. -
Can I make this ahead of time?
Yes! This bark keeps well. You can make it a few days in advance, making it a great go-to for gatherings.
Crafting this Epic Valentines Oreo Bark is not just about satisfying a sweet tooth; it embodies the joy of creating and sharing something special with others. The vibrant colors and delectable flavors make it a treat that dazzles the senses, perfect for Valentine’s Day or any occasion that calls for a sweet touch. So, gather your ingredients, put on your favorite playlist, and indulge in this delightful treat that’s guaranteed to create lasting memories. Happy baking!
Epic Valentines Oreo Bark
Ingredients
Method
-
Crush the Oreos by placing them in a zip-top bag and using a rolling pin to break into a mixture of chunks and fine crumbs.
-
In a microwave-safe bowl, melt the white chocolate chips in 30-second intervals, stirring until smooth.
-
Line a baking sheet with parchment paper, extending beyond the edges for easy removal. Pour the melted white chocolate onto the parchment, spreading it to about 1/4-inch thick.
-
Sprinkle half of the crushed Oreos over the melted chocolate, pressing them gently into the layer.
-
Melt the pink or red candy melts in a separate bowl and drizzle them over the white chocolate mixture. Use a toothpick to swirl the two chocolates together.
-
Top with the remaining Oreo crumbs and heart-shaped sprinkles.
-
Place the baking sheet in the refrigerator for about 30 minutes, or until firm.
-
Once set, break the bark into irregular pieces and serve.
Notes
10. Chocolate Heart Thumbprint Cookies

Ah, the aromatic allure of freshly baked cookies wafting through the house! There’s something utterly nostalgic and heartwarming about creating a dessert that not only tastes divine but also looks like a love letter. Enter the enchanting world of Chocolate Heart Thumbprint Cookies—little pillows of chocolatey goodness, intricately designed to hold a delectable surprise in each thumbprint. Whether you’re whipping these up for a special occasion or simply to savor with your loved ones, these cookies are sure to melt hearts and warm bellies alike!
Why Chocolate Heart Thumbprint Cookies Are So Special
You might be wondering why these cookies deserve a spot in your baking repertoire. Let me share the magic behind these sweet delights:
- Whimsical Design: The classic thumbprint allows for a personal touch in every cookie. Each one is unique, with your thumbprint as the charming signature!
- Decadent Decadence: With a rich chocolate base and a gooey center, these cookies strike the perfect balance between soft and chewy, transporting you to chocolate heaven with each bite.
- Perfect for Sharing: Whether you’re hosting a gathering or simply surprising your family, these cookies are perfect for love notes, thank-you gifts, or spreading joy among friends.
- Endless Customization: You can easily adapt the recipe to fit any flavor you desire by simply changing the filling or toppings. It’s like a canvas for your creativity!
- Easy to Make: The simple steps involved mean even novice bakers can produce a batch that looks and tastes delightful. No fancy techniques are required—just a little love and patience!
Gathering Your Ingredients
A delectable batch of Chocolate Heart Thumbprint Cookies starts with wonderful ingredients! Here’s what you’ll need to turn your kitchen into a cozy baking haven:
- 1 cup unsalted butter, softened: This brings richness and moisture to your cookies, helping to create that perfect melt-in-your-mouth texture.
- 1 cup granulated sugar: Sweetens the dough and contributes to its delightful crispness on the edges.
- 1 cup brown sugar, packed: Adds a warm, caramel flavor that deepens the taste and helps to keep the cookies soft.
- 2 large eggs: These are essential for binding everything together and adding a lovely richness to the mixture.
- 1 teaspoon vanilla extract: A definite must-have; it brings a warm, inviting aroma and flavor that beautifully enhances the chocolate.
- 3 cups all-purpose flour: The foundation of the cookie, providing structure while allowing the soft and chewy qualities to shine.
- 1/2 cup cocoa powder: The star of this recipe, delivering that abundant chocolate flavor we crave!
- 1 teaspoon baking soda: This little powerhouse gives the cookies the lift they need to bake up fluffy.
- 1/2 teaspoon salt: A touch of salt helps balance the sweetness, enhancing the complex flavors present in the cookies.
- Chocolate ganache or chocolate chips for filling: The luscious gooey center that is the ultimate treat with every bite.
- Heart sprinkles for decoration: To elevate your cookies, sprinkle these on top for a lovely pop of color and a sweet final touch.
Let’s Get Cooking!
Are you ready to embark on this delightful baking adventure? The steps are straightforward, and I promise you will be rewarded with an irresistible treat. Let’s dive into the creation process:
- Preheat the oven to 350°F (175°C). Grease or line a baking sheet with parchment paper to prevent any sticking.
- In a large bowl, cream together the softened butter, granulated sugar, and brown sugar until light and fluffy. This process incorporates air, making the cookies tender.
- Beat in the eggs, one at a time, ensuring each is fully combined, then stir in the vanilla extract for that warm, comforting aroma.
- In another bowl, whisk together the flour, cocoa powder, baking soda, and salt. Gradually add this dry mixture to the butter mixture, mixing until just combined. Be gentle—overmixing can lead to tough cookies.
- Scoop out tablespoon-sized balls of dough and place them on the prepared baking sheet. With your thumb, delicately make an indentation in the center of each cookie, the perfect little nest for chocolate.
- Fill each indentation with chocolate ganache or drop a few chocolate chips in. Consider this the cookie’s treasure!
- Bake for 10-12 minutes, or until the edges are firm but the centers remain soft. Keep an eye on them; there’s nothing like a perfectly baked cookie!
- Allow the cookies to cool on the baking sheet for a few moments. This helps them to set before transferring them to a wire rack to cool completely.
- Once cool, if you’d like, decorate with heart sprinkles for that extra touch of love.
Tips for Success
Baking can be as much about technique as it is about love and care. Here are some expert tips to help you nail these cookies every time:
- Room Temperature Ingredients: Ensure you start with room temperature butter and eggs for an easier mixing process and a better end result.
- Chill the Dough: If you find your dough is too soft to work with, pop it in the refrigerator for about 30 minutes. This will make the dough easier to handle.
- Watch the Time: Different ovens can vary, so check on your cookies a minute or two early to avoid overbaking.
- Experiment Wisely: Don’t hesitate to try different fillings, like raspberry jam or caramel, to create a twist on the classic recipe!
- Avoid Overmixing: Mix until the ingredients are just combined to keep your cookies soft and tender.
Creative Twists to Make It Your Own
The beauty of Thumbprint Cookies is the versatility they offer. Here are a few delightful variations to consider:
- Nutty Delight: Add chopped nuts to the dough or sprinkle them on top of your chocolate filling for a delightful crunch.
- Flavor Infusions: Incorporate different extracts, such as almond or orange, into the dough for a refreshing flavor twist.
- Holiday Themes: Swap heart sprinkles for festive-themed ones during holidays like Christmas or Valentine’s Day to create seasonal cookies.
- Dried Fruits: Incorporate finely chopped dried fruits or citrus zest for a fruity surprise.
- Enhance the Chocolate: Use white chocolate chips for a decadent contrast or flavor them with espresso powder for a mocha twist.
How to Present Your Delicious Cookies
The way you present your Chocolate Heart Thumbprint Cookies can elevate them from delightful to stunning! Here are some charming suggestions:
- Cookie Platters: Arrange your cookies on a platter lined with a pretty lace doily, allowing their beauty to shine through.
- Gift Boxes: Package them up in cute boxes tied with a ribbon as wonderful gifts for friends, neighbors, or loved ones.
- Pair with Beverages: Serve them alongside a warm cup of milk or a rich espresso to highlight their chocolatey charms.
- Stacked High: Create a beautiful display by stacking the cookies and topping them with a sprinkle of powdered sugar for an elegant touch.
Keep Your Cookies Fresh
You’ve made these delightful cookies, and the last thing you want is for them to lose their deliciousness! Here’s how to keep them fresh:
- Room Temperature Storage: Store cookies in an airtight container at room temperature for up to a week.
- Freezing for Later: If you need to store them longer, freeze the cookies by placing them in a single layer on a baking sheet until solid, then transfer them to a freezer-safe bag. They can last up to three months!
- Reheating: When you’re ready to indulge, simply warm them up in the microwave for 10-15 seconds for that fresh-from-the-oven taste.
Your Questions Answered
Here are some common inquiries that I’ve encountered regarding these delightful cookies:
- Can I use salted butter? Absolutely! Just reduce the amount of added salt in the recipe for a balanced flavor.
- What if I don’t have cocoa powder? You can substitute with carob flour for a similar chocolate-like flavor, but keep in mind the end result will be different.
- Can I make a gluten-free version? Yes! Use gluten-free all-purpose flour as a substitute, and ensure your other ingredients are gluten-free.
- How do I get the thumbprint to hold its shape? Make your indentation gently but firmly, and bake at the recommended temperature. If they flatten out, simply reshape after baking while they’re still warm.
Whether you’re looking to treat yourself or spread joy to others, these Chocolate Heart Thumbprint Cookies are an irresistible creation. Each bite is a tiny piece of happiness! I can’t wait for you to try this recipe and experience the magic for yourself. Get your apron on, gather your ingredients, and let’s bring some joy into your kitchen!
Chocolate Heart Thumbprint Cookies
Ingredients
Method
-
Preheat the oven to 350°F (175°C) and prepare a baking sheet with parchment paper.
-
In a large bowl, cream the softened butter, granulated sugar, and brown sugar until light and fluffy.
-
Beat in the eggs one at a time, followed by the vanilla extract.
-
In another bowl, whisk together the flour, cocoa powder, baking soda, and salt. Gradually mix into the butter mixture until just combined.
-
Scoop tablespoon-sized balls of dough onto the baking sheet. Make an indentation in the center of each cookie using your thumb.
-
Fill the indentations with chocolate ganache or chocolate chips.
-
Bake for 10-12 minutes. The edges should be firm while the centers remain soft.
-
Allow to cool on the baking sheet for a few moments before transferring them to a wire rack.
-
Decorate with heart sprinkles after cooling if desired.