
My Ultimate Baked Buffalo Cauliflower Wings (Vegan & So Flavorful!)
Oh, my friends, who here isn’t utterly charmed by the magic of a plate of perfectly crispy, spicy wings? That satisfying crunch, that zesty kick, that irresistible coating… pure comfort food bliss! But what if I told you that you could achieve all that incredible goodness with a vegan twist, using humble cauliflower, and baking…
Oh, my friends, who here isn’t utterly charmed by the magic of a plate of perfectly crispy, spicy wings? That satisfying crunch, that zesty kick, that irresistible coating… pure comfort food bliss! But what if I told you that you could achieve all that incredible goodness with a vegan twist, using humble cauliflower, and baking them to golden, crispy perfection? Today at WiseRecipes, I’m beyond excited to share a recipe that perfectly embodies that spirit: these incredible Buffalo Cauliflower Wings! Seriously, prepare your taste buds for pure joy – tender florets, baked until crispy on the outside, and tossed in a bold, spicy, and utterly addictive buffalo sauce. It’s a flavor fiesta, and it is pure joy in every single bite!
I just adore a recipe that feels incredibly impressive and indulgent but is secretly super simple and healthy. This recipe is exactly that! It’s a fantastic way to transform simple cauliflower into a powerhouse appetizer, a fun side dish, or even a light meal that keeps everyone fueled and happy, without needing any meat or dairy. Forget complicated deep-frying; we’re talking about ridiculously flavorful and satisfying bites that come together with just 15 minutes of active prep and 25 minutes in the oven. This isn’t just a “good for vegan” appetizer; it’s genuinely great appetizer, period. In just about 40 minutes from start to finish, you can have 4 amazing servings of these Buffalo Cauliflower Wings ready to devour. Trust me, once you try this incredible combination, you’ll be making them again and again!
Why These Crispy Baked Buffalo Cauliflower Wings Will Be Your New Favorite!
This isn’t just another veggie recipe; it’s a vibrant, healthy, and incredibly satisfying culinary delight. Here’s why I’m absolutely smitten with it:
- Unbelievable Crispy Texture (Baked, Not Fried!): This is the magic! We achieve a genuinely crispy, golden-brown crust without a single drop of deep-frying. It’s all thanks to a clever batter, the use of baking racks, and your hot oven.
- Tender on the Inside, Zesty on the Outside: Each cauliflower floret remains tender and sweet on the inside, providing the perfect contrast to the spicy, tangy, and crispy buffalo coating.
- Bold & Spicy Buffalo Flavor: Our homemade buffalo sauce hits all the right notes! Frank’s RedHot, melted coconut oil, white vinegar, and a touch of spices combine to create that classic, irresistible buffalo kick.
- Vegan & Healthy Goodness: This recipe is naturally vegan and packed with the goodness of cauliflower, making it a fantastic, guilt-free option for everyone, whether plant-based or just looking for a delicious healthy snack.
- Easy & Quick to Make: With just 15 minutes of hands-on prep, this recipe is a true champion for busy schedules. Most of the time is spent letting your oven do the work.
Your Shopping List for Wing Nirvana: Gather What You’ll Need
Creating these incredible Buffalo Cauliflower Wings uses simple ingredients that deliver big flavor. Here’s what you’ll want to grab to get started!

→ For the Crispy Cauliflower Wings
- 1 medium head cauliflower: Our star veggie!
- 1 ½ cups all-purpose flour, divided: For dredging and batter.
- 1 tablespoon garlic powder: Adds savory depth to the batter.
- 1 tablespoon smoked paprika: Highly recommended! Adds a beautiful smoky flavor and color. (Can substitute standard paprika).
- ¼ cup cornstarch: Our secret for extra crispness in the batter!
- 1 teaspoon kosher salt: Seasons the batter perfectly.
- 1 ½ cups soda water (club soda): The fizz helps create a light, crispy batter!
→ For the Zesty Buffalo Sauce
- ½ cup Frank’s Red Hot sauce: The classic choice for authentic buffalo flavor!
- ¼ cup melted coconut oil: Adds richness and helps the sauce cling.
- 1 teaspoon white vinegar: Enhances the tang.
- ¼ teaspoon garlic powder: For aromatic depth.
- ¼ teaspoon onion powder: For savory richness.
- 1 teaspoon sugar: Balances the heat and tang.
→ For Serving (Optional, but Highly Recommended!)
- Vegan Ranch, Ranch or Blue Cheese Dip: The perfect cool, creamy counterpoint to the spicy wings!
Let’s Bake! Crafting Your Perfect Buffalo Cauliflower Wings, Step-by-Step
This recipe is designed for ease, with most of the cooking happening hands-off in your oven. A clever batter and baking racks are key!
Part 1: Prepping Cauliflower & Making the Batter
- Preheat Oven & Prep Pans: First things first! Preheat your oven to 425°F (220°C). Place parchment paper on two baking sheets, then place two oven-safe baking racks on top of the parchment paper. This setup allows air to circulate for extra crispness and catches any drips!
- Cut Cauliflower: Cut the 1 medium head cauliflower into bite-size florets. Aim for roughly similar sizes for even cooking.
- Make the Batter: In a large bowl, whisk together 1 cup of the all-purpose flour, 1 tablespoon garlic powder, 1 tablespoon smoked paprika, ¼ cup cornstarch, and 1 teaspoon kosher salt. Pour in 1 ½ cups of soda water (club soda) and stir until a smooth, slightly thick batter forms.
- Set Up Dredging Station: Add the remaining ½ cup of all-purpose flour to a separate shallow bowl.
Part 2: Breading, Baking & Saucing Our Delicious Wings!
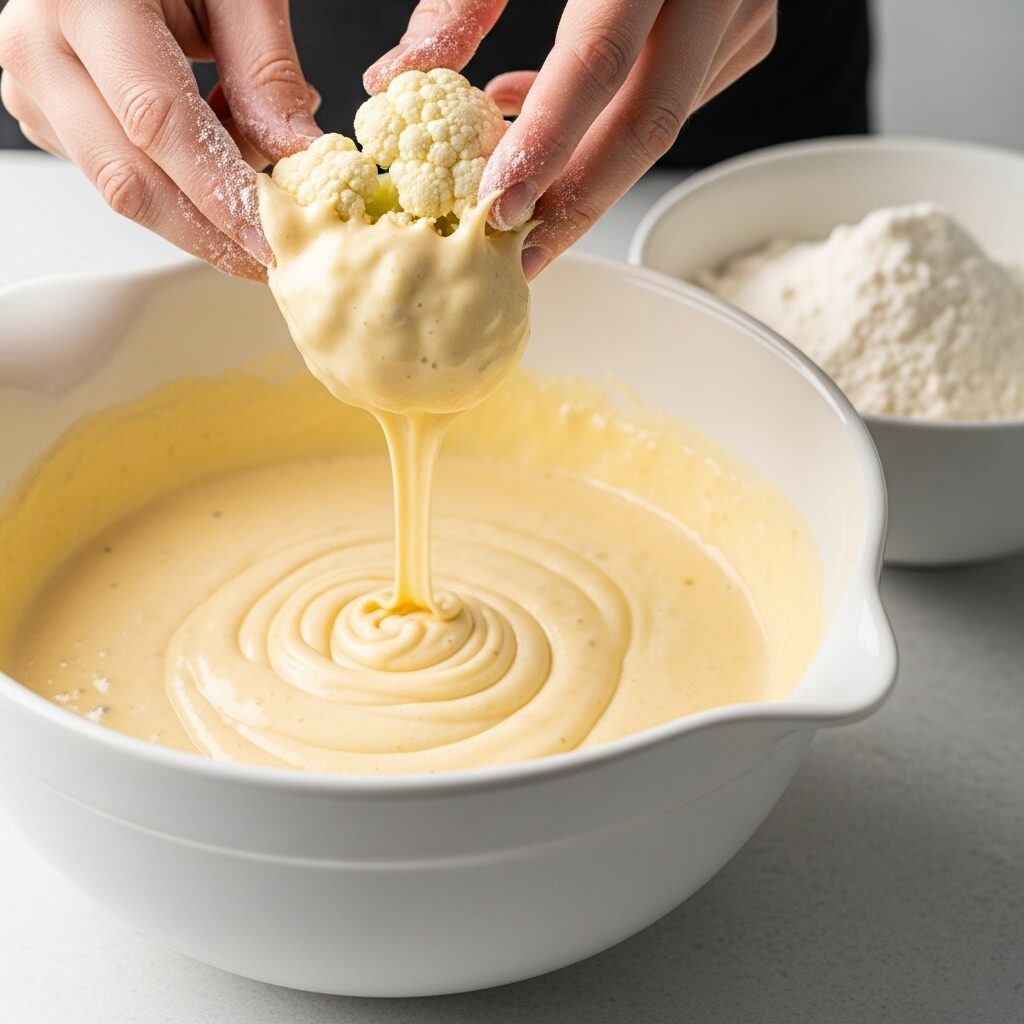
- Dredge & Dip Cauliflower: Take each cauliflower floret. First, dredge it in the separate bowl of dry flour, shaking off any excess. Then, dip it into the smooth batter, making sure it’s fully coated.
- Place on Racks: Carefully place each battered floret on top of the prepared baking racks, leaving a little space between them. Don’t worry if some batter drips below onto the parchment paper – that’s why it’s there!
- Bake for Crispness: Once all the florets are covered and arranged on the racks, place the baking sheets with racks on top into the preheated oven. Bake for 15 minutes.
- Rotate & Finish Bake: After 15 minutes, rotate the baking sheets (top to bottom, front to back) and bake for 10 more minutes, or until the cauliflower wings are beautifully crispy and golden brown.
- Make the Buffalo Sauce: Meanwhile, while the cauliflower bakes, make the sauce! Place the ½ cup Frank’s Red Hot sauce, ¼ cup melted coconut oil, 1 teaspoon white vinegar, ¼ teaspoon garlic powder, ¼ teaspoon onion powder, and 1 teaspoon sugar into a small saucepan. Heat over medium-low heat and whisk until the sauce is smooth and warm, about 1 to 2 minutes. Remove from heat.
- Sauce the Wings: When the cauliflower wings are done, remove them from the oven and let them cool for a few minutes. Then, slide a spatula under them or use your fingers to carefully remove them from the baking racks – some of the bottom breading might come off, but that’s okay (you won’t notice once they’re sauced!). Transfer the crispy florets to a large bowl. Pour the warm buffalo sauce over the wings and turn them gently with a spatula until they are fully and evenly covered in that delicious, spicy sauce.
- Serve & Enjoy! Transfer the sauced Buffalo Cauliflower Wings to a serving platter. Serve immediately with a side of vegan ranch, ranch, or blue cheese dip. Prepare for rave reviews!

WiseRecipes’ Top Tips for Cauliflower Wing Perfection!
These healthy, crispy wings are a breeze to make, but these WiseRecipes insights will help you achieve Buffalo Cauliflower Wings mastery every single time!
- Cut Florets Evenly: Aim to cut your cauliflower florets into roughly similar, bite-sized pieces. This ensures they cook evenly and become tender-crisp at the same time.
- Baking Racks are Your Secret Weapon: Don’t skip placing the cauliflower on baking racks set over baking sheets! This allows air to circulate all around the florets, which is crucial for getting them super crispy all over, similar to frying.
- Soda Water for Crispy Batter: The carbonation in soda water (club soda) creates a lighter, crispier batter that adheres beautifully to the cauliflower. Use it cold for best results!
- Smoked Paprika for Depth: While standard paprika works, smoked paprika is highly recommended here. It adds a wonderful depth of smoky flavor that truly elevates these “wings” and makes them taste more robust.
- Cool Slightly Before Saucing: Letting the cauliflower wings cool for a few minutes after baking helps the crispy coating firm up. This prevents it from breaking down too much when tossed in the sauce, maintaining that fantastic texture.
- Spatula or Fingers for Removal: Don’t worry if a little bit of the bottom coating sticks to the rack when you remove the wings. This is normal! Use a sturdy spatula or your fingers to gently lift them.
Creative Twists: Delicious Ways to Customize Your Crispy Cauliflower Bites!
These Buffalo Cauliflower Wings are already fantastic, but they’re also a wonderful canvas for your culinary creativity! Here are some ideas I love to play with:
- Spicier Kick: For more heat, add an extra dash of Frank’s RedHot to the sauce, or a pinch of cayenne pepper to the batter. You can also add a finely minced fresh jalapeño to the sauce.
- Garlic Parmesan Cauliflower: Instead of buffalo sauce, toss the baked cauliflower wings with melted butter, extra garlic powder, and a generous amount of grated Parmesan cheese (or vegan Parmesan!).
- Asian Sesame Cauliflower: Toss the baked wings in a sauce made from soy sauce, toasted sesame oil, rice vinegar, honey/maple syrup, and a pinch of ginger. Garnish with sesame seeds.
- Herbaceous Boost: A sprinkle of fresh chopped chives or cilantro over the finished wings would add a lovely fresh flavor.
- Dipping Sauce Variety: Beyond ranch or blue cheese, try serving these with a sriracha mayo, a creamy cashew dip (for vegan!), or even a sweet chili sauce.
- Different Coating: For an extra thick crust, you can do a double dredge and dip before placing on the rack.
Keep It Delicious! Storing Your Buffalo Cauliflower Wings
You’ve created something truly special, so let’s make sure it stays fresh and delicious!
- Refrigerator Storage: Once completely cooled, store any leftover Buffalo Cauliflower Wings in an airtight container in the refrigerator for up to 3-4 days. They’re great for quick snacks or light lunches.
- Reheating Tips: To best revive that crispy exterior, I highly recommend reheating them in a toaster oven, a regular oven (around 175°C / 350°F) for 8-12 minutes, or an air fryer for about 5-7 minutes until warmed through and crisp. Microwaving is an option, but they will lose their crispness.
- Freezing Cooked Wings: These wings freeze surprisingly well! Once completely cooled and sauced, arrange them in a single layer on a baking sheet and freeze until solid. Then, transfer them to a freezer-safe bag or container. Freeze for up to 1-2 months.
- Reheating from Frozen: To reheat from frozen, place the wings on a baking sheet and bake in a preheated oven (around 190°C / 375°F) for about 20-25 minutes, or air fry at 375°F for 10-15 minutes, until heated through and crisp.
- Make-Ahead Prep (Unsauced): You can bake the cauliflower wings (without saucing them) ahead of time. Let them cool completely, then store in the fridge. Reheat until crispy, then toss with freshly warmed buffalo sauce just before serving.
My Ultimate Baked Buffalo Cauliflower Wings
Ingredients
Equipment
Method
- Preheat the oven to 425 degrees Fahrenheit (220C). Cut the cauliflower into bite-size florets.
- Mix 1 cup of the flour with garlic powder, smoked paprika, cornstarch, and kosher salt. Pour in the soda water and stir until a smooth batter forms.
- Add the remaining ½ cup flour to a separate bowl.
- Place parchment paper on two baking sheets and place two baking racks on top. Dredge each floret in flour, then dip it into the batter. Place each floret on top of the racks (batter will drip below, which is ok).
- Once all the florets are covered, place the baking sheets with racks on top in the oven. Bake for 15 minutes, then rotate the sheets and bake for 10 more minutes until crispy.
- Meanwhile, make the sauce: Place the ingredients for the buffalo sauce into a small saucepan. Heat over medium-low heat and whisk until smooth (1 to 2 minutes). Remove from heat.
- When the cauliflower wings are done, cool for a few minutes. Slide a spatula under them or use your fingers to remove them from the baking racks (some breading may come off, which is okay).
- Then, in a large bowl, pour the buffalo sauce over wings and turn gently with a spatula until they are fully covered. Serve immediately with dip.
Notes
FAQs: Your Top Buffalo Cauliflower Wing Questions, Answered!
Q: Why do you use soda water (club soda) in the batter?
A: The carbonation in soda water helps to create a lighter, crispier, and more airy batter compared to using regular water. The bubbles contribute to a delicate crunch when baked, giving these cauliflower wings a fantastic texture!
Q: Can I use different types of flour in the batter?
A: This recipe uses all-purpose flour for a classic result. You could experiment with a gluten-free all-purpose flour blend for a gluten-free version. Whole wheat flour might result in a denser batter.
Q: My cauliflower wings aren’t very crispy. What went wrong?
A: This could be due to a few reasons: the oven wasn’t hot enough, the baking sheets were overcrowded (leading to steaming instead of crisping), the batter was too thick/thin, or they weren’t baked long enough. Ensure even spacing on racks and bake until truly golden.
Q: What is Frank’s RedHot sauce? Can I use another hot sauce?
A: Frank’s RedHot is a classic cayenne pepper sauce known for its balanced heat and tangy flavor, which is a staple for authentic buffalo sauce. You can substitute it with another cayenne pepper-based hot sauce, but the flavor profile might vary slightly.
Q: Can I deep fry these cauliflower wings instead of baking?
A: While designed for baking, you could deep-fry them. Heat vegetable oil to 350-375°F (175-190°C). Fry in batches for 3-5 minutes until golden and crispy. Drain well, then toss with sauce. However, baking is a healthier and less messy option!
And there you have it, my friends—your guide to crafting the most delightful, impressive, and truly satisfying Buffalo Cauliflower Wings! This WiseRecipes creation is more than just an appetizer; it’s a testament to how simple ingredients, when treated with a little love and smart steps, can come together to create something truly extraordinary. It’s a vibrant, exciting meal that you’ll genuinely look forward to eating, day after day.
I am genuinely so excited for you to try these and experience the delicious magic yourself. Please, please come back and let me know in the comments below what your favorite part of these crispy veggie wings was, or any fun twists you tried! Happy cooking from WiseRecipes!