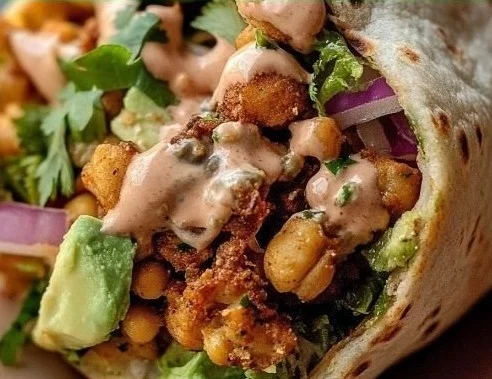
Cheesy Garlic Chicken Wraps
A Tiny Family Memory The first time I made Cheesy Garlic Chicken Wraps for my family, the kitchen smelled like a little garlic festival and everyone crowded the counter like it was a magic trick. I learned the idea from an online recipe and then made it my own over a few rushed weeknights and…
A Tiny Family Memory
The first time I made Cheesy Garlic Chicken Wraps for my family, the kitchen smelled like a little garlic festival and everyone crowded the counter like it was a magic trick. I learned the idea from an online recipe and then made it my own over a few rushed weeknights and a lazy Sunday afternoon. If you want to peek at one of the originals that inspired me, I once followed a version on cheesy garlic chicken wraps before tweaking the fillings and technique until it felt like mine. This dish is simple, fast, comforting, and ridiculous in the best way when the cheese pulls like a cartoon.
What I Keep on Hand
I always keep a mental checklist for weeknight rescues: about 2 cups cooked chicken, shredded, and a cup of shredded cheese — cheddar or mozzarella, depending on mood. I like having 4 large flour tortillas ready in the pantry so you can assemble a quick dinner. For the garlicky base I use 2 cloves garlic, minced, mixed with a quarter cup of cream cheese and a quarter cup of sour cream, plus 1 teaspoon garlic powder to boost the flavor. Salt and pepper to taste, and a handful of fresh parsley for garnish finishes everything. That little stash makes this recipe one of the easiest things to whip up when time is short.
Stirring, Rolling, and Skillet Sizzling
I do the filling right in a mixing bowl because fewer dishes means a happier me at the end of the night. In a mixing bowl, combine cooked chicken, minced garlic, cream cheese, sour cream, garlic powder, salt, and pepper. Once it is all combined and a bit creamy, I lay out the flour tortillas and divide the chicken mixture evenly among them. Sprinkle shredded cheese on top of the chicken mixture. Roll each tortilla tightly to enclose the filling.
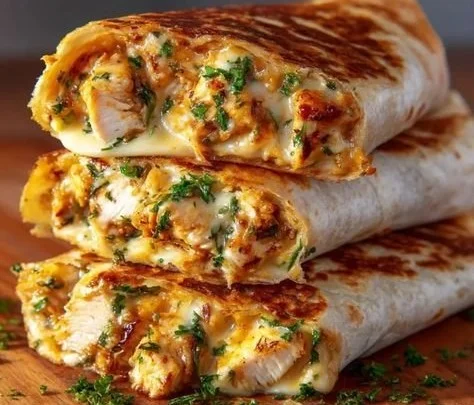
The skillet step is short but transformative. Heat a skillet over medium heat and place the wraps seam side down. Cook for 3-4 minutes until golden brown, then flip and cook the other side. That sizzle, the smell of toasting tortilla and melting cheese, is the moment you know dinner is turning into something special. Remove from the skillet, slice in half, and garnish with fresh parsley. Enjoy your cheesy garlic chicken wraps!
One tip I always share is to warm the tortillas briefly before filling them; it prevents cracking and makes rolling much easier. Also, press the seam side down on the skillet for the first minute to seal everything shut so the filling does not escape when you flip. If you’re using leftover rotisserie chicken, shred it while it’s still slightly warm so it mixes into the creamier filling more easily.
How to Tell They’re Perfect
You can judge these wraps by sight, smell, and a little texture test. The tortilla should be an even golden brown with tiny blistered spots, and you should see a little ooze of melted cheese at the seam when you cut one open. The aroma of garlic should be present but not overpowering, and the filling should be warm all the way through. If you poke the center and it gives a molten, cheesy feel rather than cold lumps of cream cheese, you are in business. If you want a more objective check, the internal temperature of the filling (if you care) should be hot to the touch — about the same judging you’d use for a warm sandwich.
Little Changes I Like
I tinker with this a lot because it’s forgiving. Sometimes I toss in a few spoonfuls of salsa for a tangy kick, other times I grate a blend of cheddar and mozzarella for a richer melt. If you are short on time or want a slightly healthier twist, shredded rotisserie chicken is my go-to because it is already seasoned and juicy. For a completely different texture, try this take on the idea using skewers as inspiration — I once adapted the flavors into air fryer garlic parmesan chicken skewers for a party and everyone loved the garlic hit.
If you prefer the chicken baked with garlic before shredding, you can follow techniques similar to a baked garlic parmesan approach; that pre-roasting adds deeper roasted garlic notes and is great for making a batch ahead of time and shredding when cool. I often refer to a trusted method for that when I want a heartier, more caramelized base: baked garlic parmesan chicken gave me a few ideas one winter.
For those who adore ooey, melty cheese, another variation I tried is essentially the same recipe but with extra cheese and a softer tortilla. If you are curious how indulgent this can get, there is even a decadent version that embraces the goo completely at ooey gooey cheesy garlic chicken wraps. It is not for every night, but it is perfect for movie night.
How to Make It Work for Leftovers and Busy Days
Because life is messy, I often make a double batch and wrap the extras individually in foil. To store leftovers, put cool wraps in an airtight container in the refrigerator for up to three days. Reheat them in a skillet over low-medium heat, keeping them covered for a minute or two so the filling warms without burning the tortilla. You can also reheat in a preheated oven at 350 degrees Fahrenheit for 8 to 10 minutes. If you must microwave, do a short blast on medium power and then crisp them in a hot skillet for 30 seconds per side. For freezing, wrap each one tightly and freeze for up to one month; thaw in the fridge before reheating. I usually mention these storage notes when packing lunches or making ahead for game day because the wraps travel well and taste almost as good the next day.
I have three quick practical tips I always use: keep the filling slightly under-seasoned before adding cheese, because the cheese will add salt; press the seam on the skillet early so the wrap stays closed; and warm tortillas for ten seconds in the microwave wrapped in a damp cloth to make them flexible.
Conclusion
If you want a few more ideas or a slightly different technique to compare, I like to look at another perspective like this Cheesy Chicken Wraps | Spicedblog for inspiration. And if you enjoy following a tested recipe closely before improvising, this version on Cheesy Garlic Chicken Wraps – Cooked & Loved has a nice, comforting baseline to start from.
Cheesy Garlic Chicken Wraps
Ingredients
Method
- In a mixing bowl, combine cooked chicken, minced garlic, cream cheese, sour cream, garlic powder, salt, and pepper. Mix until creamy.
- Lay out the flour tortillas and divide the chicken mixture evenly among them.
- Sprinkle shredded cheese on top of the chicken mixture.
- Roll each tortilla tightly to enclose the filling.
- Heat a skillet over medium heat and place the wraps seam side down.
- Cook for 3-4 minutes until golden brown, then flip and cook the other side.
- Remove from the skillet, slice in half, and garnish with fresh parsley.