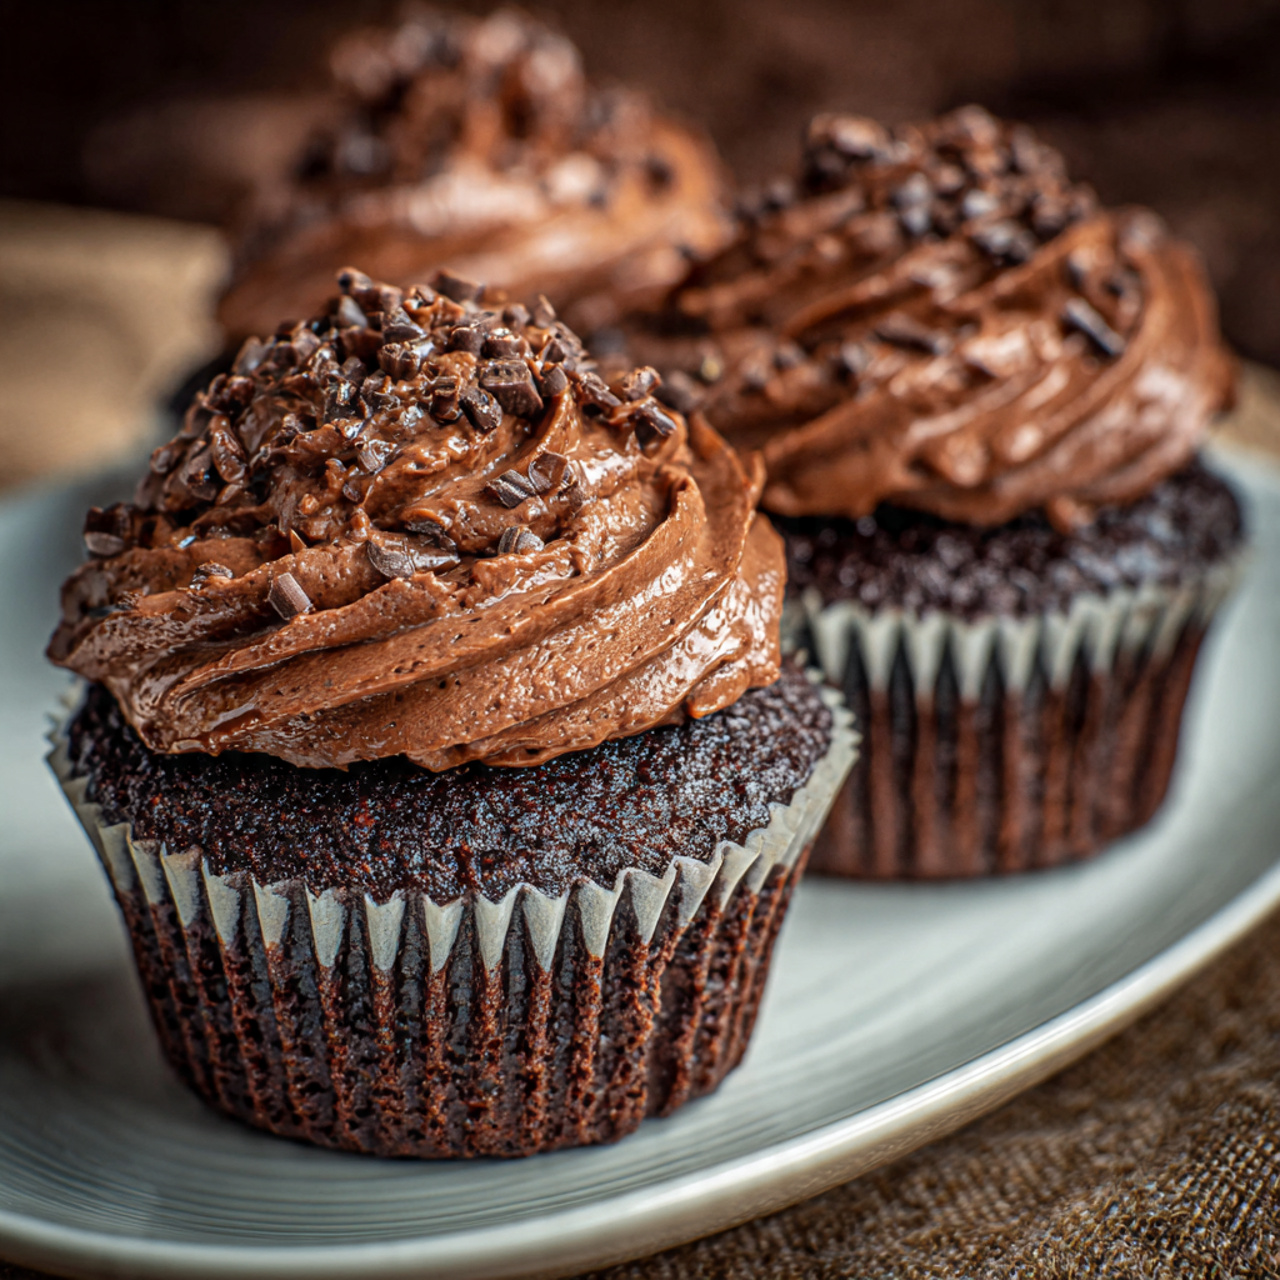
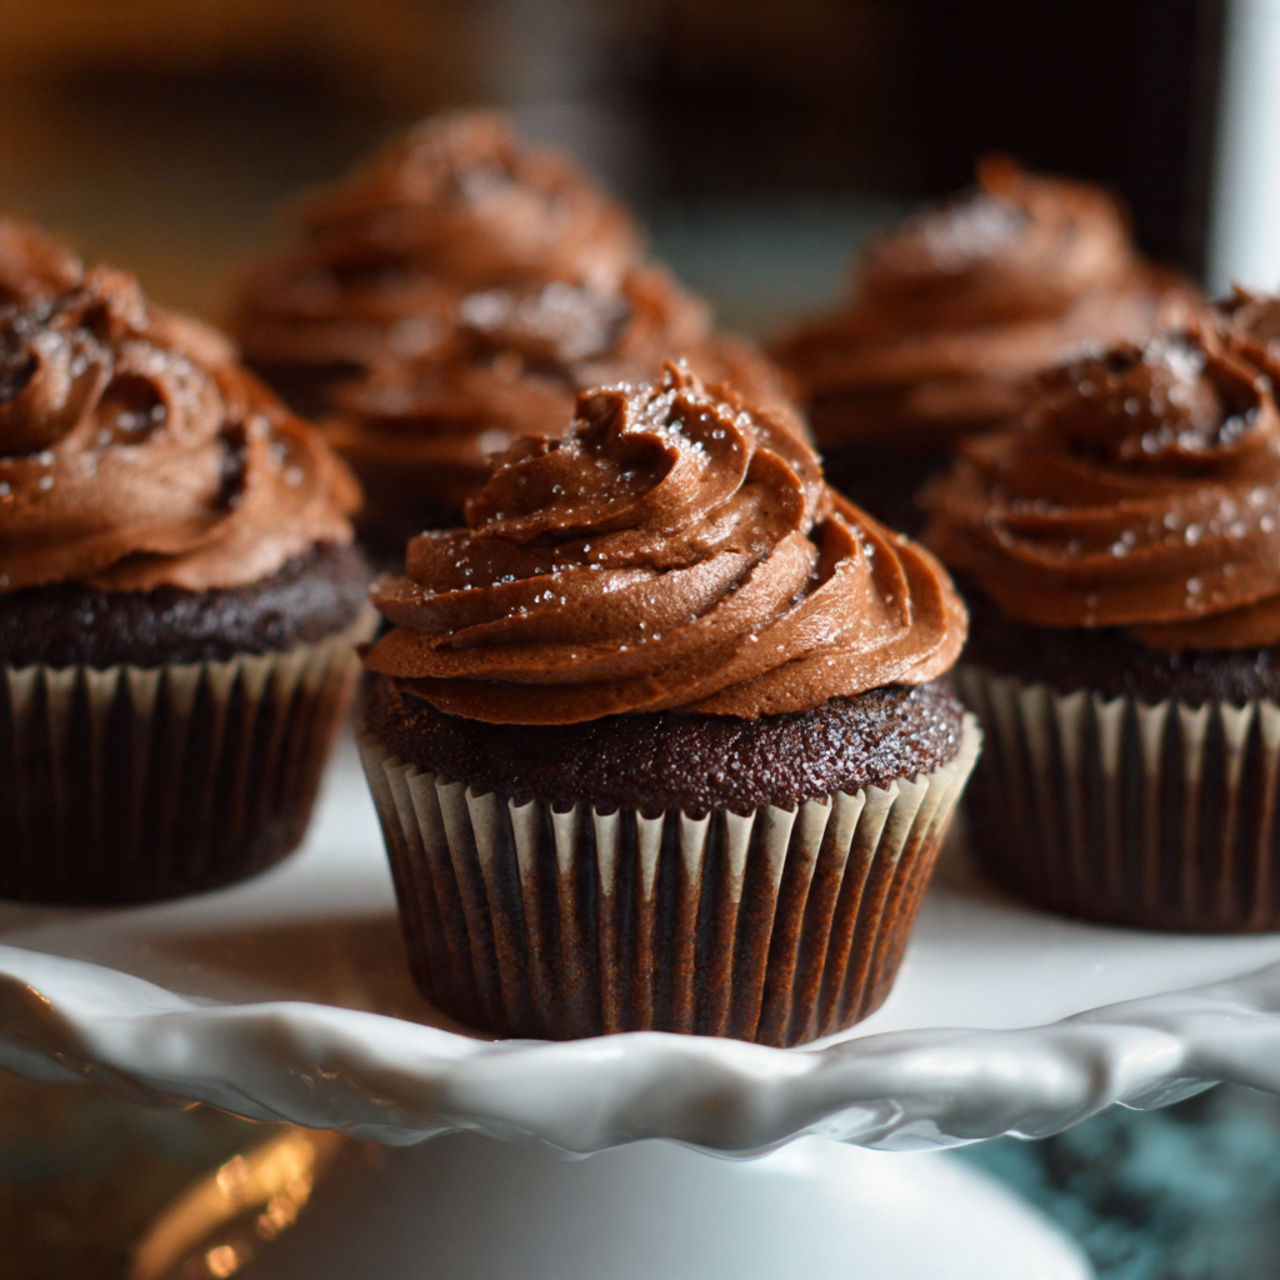
The Ultimate Chocolate Creme Cupcakes (Hostess Copycat!)
Imagine unwrapping that iconic, foil-wrapped treat from your childhood lunchbox. Now, imagine a version that’s a thousand times better: an impossibly moist, deeply chocolatey cupcake, a cloud of fluffy, marshmallow-like meringue topping, and a crisp, real chocolate ganache shell that cracks perfectly with every bite. That, my friends, is the homemade magic of these Chocolate…
Imagine unwrapping that iconic, foil-wrapped treat from your childhood lunchbox. Now, imagine a version that’s a thousand times better: an impossibly moist, deeply chocolatey cupcake, a cloud of fluffy, marshmallow-like meringue topping, and a crisp, real chocolate ganache shell that cracks perfectly with every bite. That, my friends, is the homemade magic of these Chocolate Creme Cupcakes.
I promise you, there is no greater baking triumph than biting into one of these and realizing how much better the homemade version is. They are a true labor of love that is worth every single step. From the signature white icing loops to the hidden cloud of meringue, these cupcakes are a show-stopper for birthday parties, special occasions, or just a wonderfully nostalgic weekend project.
Get ready to create a masterpiece that will transport you right back to childhood, but with a delicious, grown-up twist.

Why These Are the Best Homemade Cream-Filled Cupcakes!
You are going to be so incredibly proud of these stunning cupcakes. They are a true baking project that yields spectacular results. Here’s why you have to try them:
- A Gourmet Nod to a Classic: This recipe captures all the nostalgic fun of a Hostess cupcake but elevates it with a richer chocolate cake, a real meringue filling, and a decadent ganache glaze.
- Incredibly Moist Chocolate Cupcakes: The classic boiled cocoa and buttermilk method creates a cupcake crumb that is exceptionally moist, tender, and deeply flavorful.
- Light and Fluffy Meringue Topping: Instead of a dense, overly sweet filling, this recipe uses a light, airy, and stable Swiss meringue that tastes like a marshmallow cloud.
- Stunningly Beautiful Results: The glossy ganache shell, the mounded cream, and the signature white icing loops make these cupcakes look like they came from a professional bakery.
- A Fun and Rewarding Project: From whipping the meringue to dipping the cupcakes in ganache, this is a wonderfully satisfying recipe that makes you feel like a true pastry chef.
Recipe Snapshot
| Prep Time | 1 hour 15 minutes |
| Cook Time | 20 minutes |
| Cooling/Setting | 1 hour 25 minutes |
| Total Time | 3 hours |
| Servings | 24 cupcakes |
| Calories | ~450 kcal per cupcake |
| Course | Dessert |
| Cuisine | American |
| Difficulty/Method | Intermediate / Baking |
Your Shopping List for These Iconic Cupcakes
This recipe uses classic baking staples to create its signature three-part magic.

→ For the Moist Chocolate Cupcakes
- 2 sticks salted butter → The rich base of our cake.
- 4 heaping tablespoons unsweetened cocoa powder → For a deep, robust chocolate flavor.
- 1 cup boiling water → The secret to blooming the cocoa for an intense flavor.
- 2 cups all-purpose flour & 2 cups sugar → The essential structure and sweetness.
- ¼ tsp. kosher salt → To balance the sweetness.
- 2 large eggs & ½ cup buttermilk → Both at room temperature, for a tender, moist crumb.
- 1 tsp. vanilla extract & 1 tsp. baking soda → For flavor and lift.
→ For the Filling, Glaze, and Drizzle
- 4 large egg whites → The base of our light and fluffy Swiss meringue.
- ⅔ cup granulated sugar & ¼ tsp. cream of tartar → To stabilize and sweeten the meringue.
- 1 ½ tsp. vanilla extract, divided → For flavor in both the meringue and the glaze.
- 8 oz. semisweet chocolate, chopped → Use a good quality chocolate for the best-tasting ganache.
- 2 Tbsp. salted butter → Adds shine and richness to the glaze.
- 1 cup heavy cream → To create the luscious, pourable ganache.
- 1 cup powdered sugar → For the classic white icing loops.
Let’s Bake! Your Step-by-Step Cupcake Guide
Ready to tackle this fun baking project? We’ll break it down by component. Let’s go!
Part 1: The Moist Chocolate Cupcakes
- Preheat and Prep: Preheat your oven to 350°F. Line two 12-cup muffin pans with paper liners.
- Make the Boiled Cocoa Mixture: In a medium saucepan, melt the 2 sticks of butter over medium heat. Stir in the cocoa powder. Pour in the boiling water, stir, and let it boil for 15 seconds. Remove from the heat and set aside.
- Combine Dry and Wet Ingredients: In a large bowl, stir together the flour, sugar, and salt. In a separate small bowl, whisk together the eggs, buttermilk, vanilla, and baking soda.
- Mix the Batter: Pour the hot cocoa mixture over the flour mixture and stir until it’s about halfway combined. Then, pour in the egg mixture and stir until the batter just comes together. Be careful not to overmix.
- Bake and Cool: Fill the muffin cups two-thirds full. Bake for about 20 minutes, or until a toothpick inserted into the center comes out clean. Let the cupcakes cool in the pans for 5 minutes before transferring them to a wire rack to cool completely. This is crucial!
Part 2: The Fluffy Meringue Filling
- Heat the Egg Whites: In a large, heatproof metal bowl (like the bowl of your stand mixer), whisk together the granulated sugar, cream of tartar, and egg whites. Place this bowl over a saucepan of simmering water, making sure the bottom of the bowl does not touch the water.
- Dissolve the Sugar: Heat the mixture, whisking constantly, until it’s warm to the touch and the sugar has completely dissolved. You can test this by rubbing a small amount between your fingers; it should feel smooth, not gritty. This takes 2-3 minutes.
- Whip to Stiff Peaks: Remove the bowl from the heat. Using an electric mixer on medium-high speed, beat the mixture until it is cool to the touch and forms stiff, glossy peaks. This will take 4-6 minutes. Beat in ½ teaspoon of vanilla extract.
- Top the Cupcakes: Scoop a heaping 2 tablespoons of the finished meringue on top of each completely cooled cupcake and use a small spatula to shape it into a neat mound.

Part 3: The Ganache Glaze and Final Touches
- Melt the Ganache: Place the chopped chocolate and 2 tablespoons of butter in a medium heatproof bowl. Heat the heavy cream in a small saucepan until it’s steaming and bubbling around the edges. Pour the hot cream over the chocolate and butter. Let it stand, untouched, for 5 minutes.
- Stir Until Smooth: After 5 minutes, stir the mixture gently until the ganache is completely smooth, glossy, and uniform.
- Dip the Cupcakes: Working with one cupcake at a time, hold it by the base and dip the meringue top directly into the ganache. Swirl it gently to coat the meringue completely. Lift it out and let any excess glaze drip off before setting it back on the wire rack.
- Pipe the Loops: In a small bowl, stir the powdered sugar with about 2 teaspoons of hot water until you have a thick but pipeable icing. Transfer it to a small resealable plastic bag and snip off a tiny corner. Pipe the signature loops back and forth across the top of each cupcake.
- Set and Serve: Let the cupcakes stand for at least 1 hour for the glaze and icing to firm up before serving.
Homemade Chocolate Creme Cupcakes (Hostess Copycat)
Ingredients
Equipment
Method
- Preheat the oven to 350˚F. Line two 12-cup muffin pans with liners. In a saucepan, melt 2 sticks of butter, stir in cocoa powder, then pour in boiling water. Let boil for 15 seconds, then remove from heat.
- In a large bowl, stir together flour, sugar and salt. In a small bowl, whisk eggs, buttermilk, vanilla and baking soda. Pour the hot cocoa mixture over the flour mixture and stir until halfway combined. Pour in the egg mixture and stir until the batter just comes together.
- Fill muffin cups two-thirds full and bake for about 20 minutes, until a toothpick comes out clean. Let cool in pans for 5 minutes, then move to a wire rack to cool completely.
- In a large heatproof bowl, whisk granulated sugar, cream of tartar and egg whites. Place over a pan of simmering water (don’t let the bowl touch the water) and heat, stirring, until the sugar is dissolved, 2-3 minutes.
- Remove from heat and beat with a mixer on medium-high speed until the meringue is cool and forms stiff, glossy peaks, 4-6 minutes. Beat in the vanilla.
- Scoop about 2 heaping tablespoons of meringue on top of each cooled cupcake and spread into a mound.
- Place chopped chocolate and 2 Tbsp. butter in a heatproof bowl. Heat heavy cream in a saucepan until steaming. Pour over the chocolate, let stand 5 minutes, then stir until smooth.
- One at a time, dip the meringue top of each cupcake into the glaze until completely coated. Let any excess drip off and set on a rack.
- Stir the powdered sugar with 2 teaspoons hot water until thick and smooth. Transfer to a small plastic bag, snip off a corner, and pipe loops over each cupcake. Let set for at least 1 hour.
Notes
WiseRecipes’ Top Tips for Cupcake Perfection
These are the little details that make this recipe a show-stopper every time.
- Cool the Cupcakes Completely. This is the most important rule of this recipe! If you put the meringue on a warm cupcake, it will melt and slide right off. Be patient and let them cool to room temperature.
- Ensure Sugar is Dissolved in Meringue. Before you start whipping your meringue, make sure the sugar is fully dissolved in the warm egg whites. Any undissolved sugar will result in a gritty meringue. The mixture should feel perfectly smooth between your fingertips.
- Let the Ganache Cool Slightly. After you stir the ganache until smooth, let it sit for 5-10 minutes. If it’s too hot, it will be very thin and might melt the meringue as you dip. You want it to be fluid, but not piping hot.
- The Dip and Swirl. When dipping the cupcakes, do it with confidence. Submerge the meringue straight down into the ganache, give it a gentle swirl to ensure it’s fully coated, then lift it straight up and let the excess drip back into the bowl.
- The Drizzle Consistency is Key. For the white icing loops, you want a consistency that’s thick enough to hold its shape but thin enough to pipe easily. If it’s too thick, add water a few drops at a time. If it’s too thin, add more powdered sugar.
Keep Them Fresh! Storing Your Masterpieces
These cupcakes are a wonderful treat to have on hand. Here’s how to store them.
- Room Temperature vs. Refrigerator: Because of the meringue and ganache, these cupcakes are best stored in an airtight container in the refrigerator. They will keep well for up to 4 days. Let them sit at room temperature for about 15-20 minutes before serving for the best texture.
- Freezing: You can freeze the finished cupcakes! Place them on a baking sheet in the freezer until the ganache is solid, then wrap them individually in plastic wrap and place them in a freezer-safe container for up to 2 months. Thaw in the refrigerator.
FAQs: Your Chocolate Creme Cupcake Questions, Answered!
Why do you heat the egg whites and sugar for the filling?
This method creates a Swiss meringue. Heating the egg whites and sugar together not only dissolves the sugar for a smooth texture but also gently cooks the egg whites, making them safe to eat and creating a much more stable, glossy, and marshmallow-like meringue compared to a simple uncooked one.
Can I use a different filling?
You can, but this specific meringue is what gives the cupcake its classic, light-as-air texture. A buttercream would be much heavier and sweeter. If you’re short on time, a store-bought marshmallow fluff could be used, but the homemade meringue is truly worth the effort.
My ganache is too thick/thin. How can I fix it?
If your ganache is too thick to dip, gently reheat it over a double boiler or in the microwave in very short bursts, stirring well. You can also stir in another tablespoon of warm heavy cream to loosen it. If it’s too thin, let it cool and sit at room temperature for a bit longer; it will naturally thicken as it cools.
Can I fill the cupcakes instead of mounding the meringue on top?
Absolutely! For a true “filled” cupcake, you can use an apple corer or a small knife to remove the center of each cooled cupcake. Pipe the meringue into the hole, and then proceed with dipping the flat top in the ganache.
Final Thoughts: A Bite of Delicious Nostalgia
There is nothing more delightful than taking a beloved childhood memory and recreating it in your own kitchen, only better. These Chocolate Creme Cupcakes are a joyful celebration of that idea. They are a fun, rewarding project that results in a truly special and delicious treat for sharing. I hope they bring a big smile to your face. Happy baking!