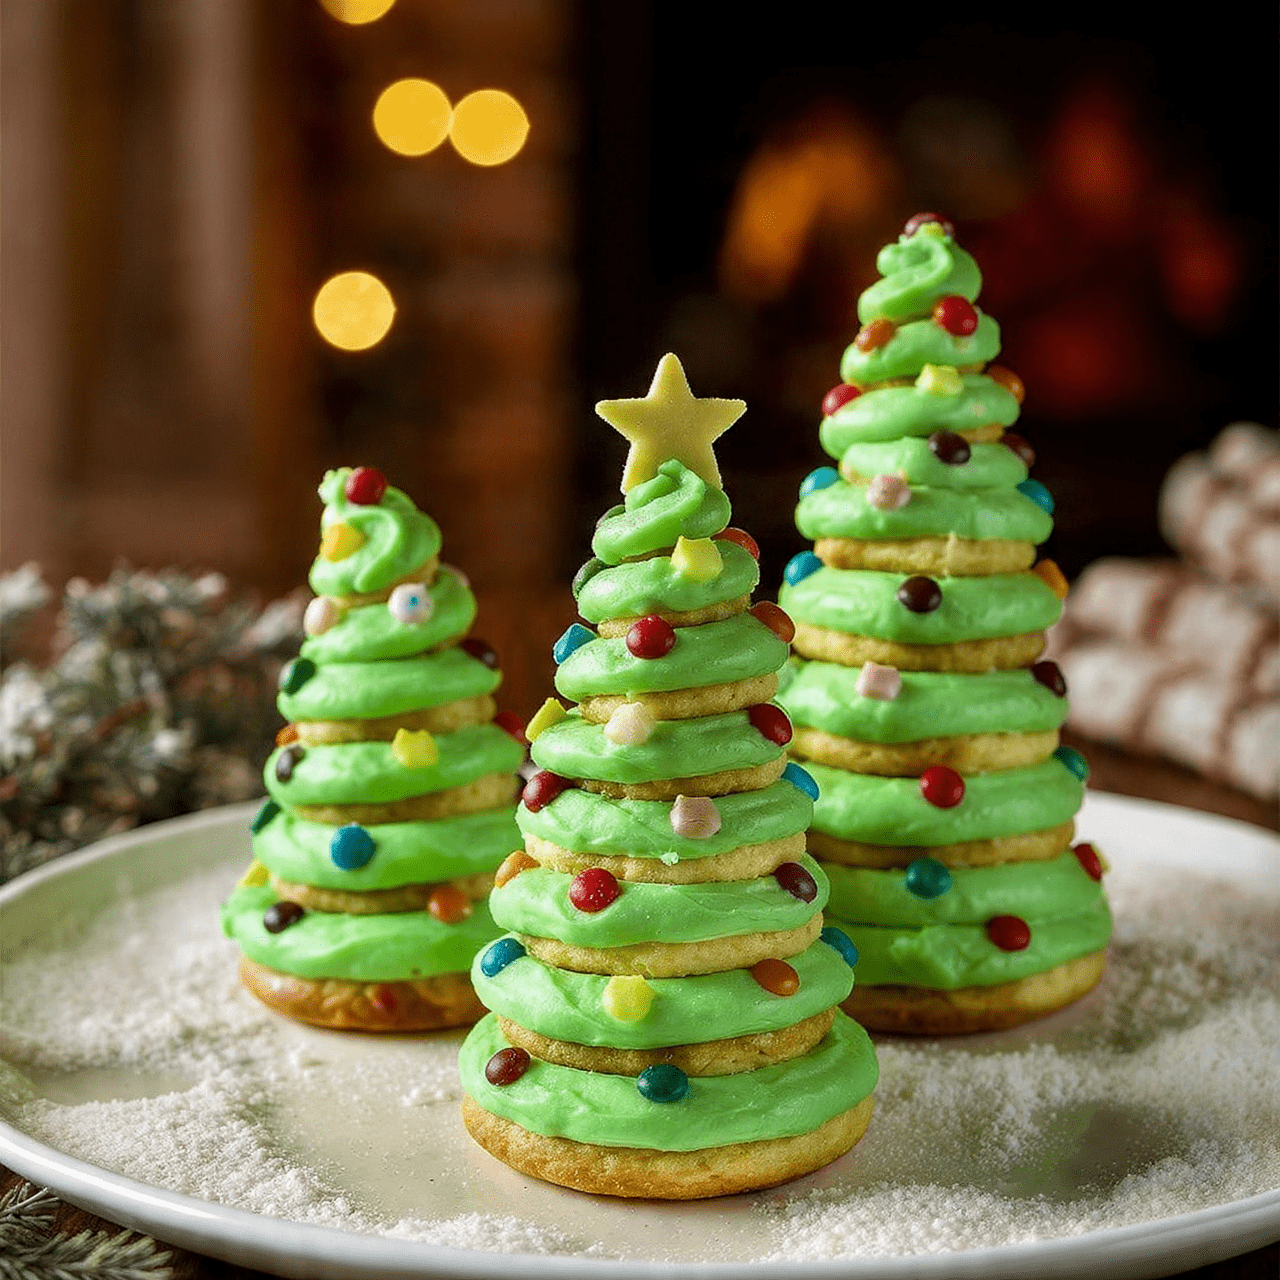
The Ultimate Christmas Tree Cookie Stacks (Easy Holiday Treat!)
Imagine the most adorable, edible Christmas forest, where tiered sugar cookies stack up to form whimsical little trees, decorated with festive frosting and sparkling sprinkles. That, my friends, is the pure, unadulterated joy of these Christmas Tree Cookie Stacks. This is, without a doubt, the most fun and festive holiday baking project you will tackle…
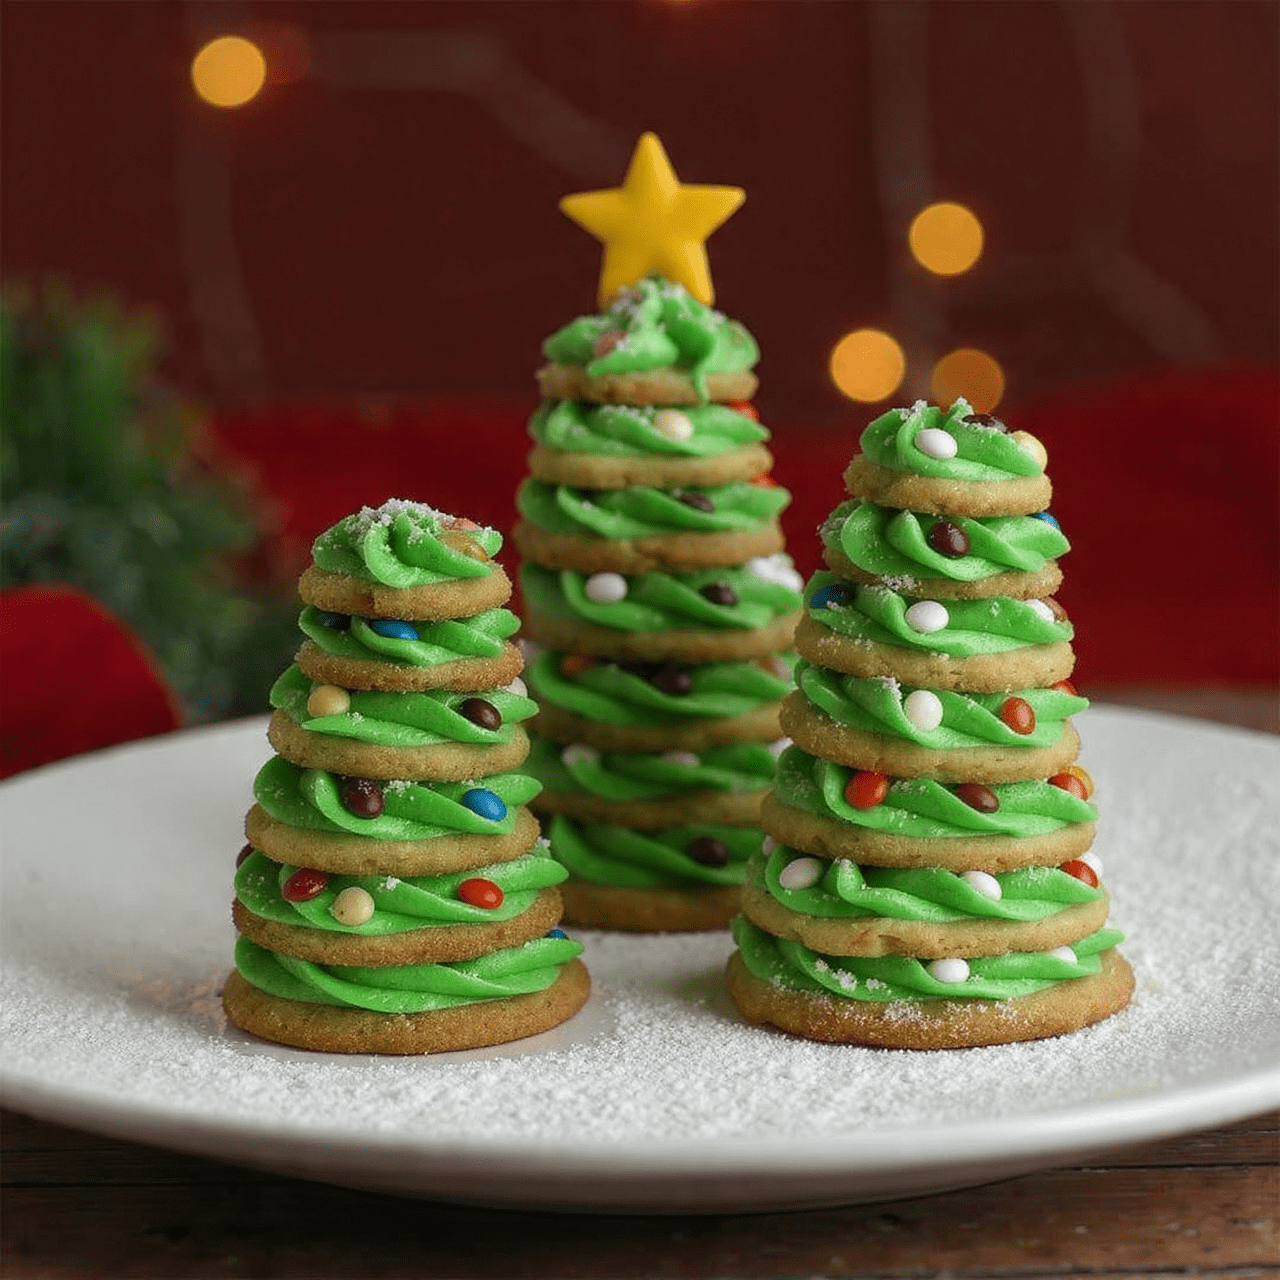
Imagine the most adorable, edible Christmas forest, where tiered sugar cookies stack up to form whimsical little trees, decorated with festive frosting and sparkling sprinkles. That, my friends, is the pure, unadulterated joy of these Christmas Tree Cookie Stacks. This is, without a doubt, the most fun and festive holiday baking project you will tackle this season.
I promise you, there is no greater holiday delight than watching these little trees come to life. The process of piping the green frosting “boughs” and decorating each tree is a fantastic activity to do with kids. The end result is a delicious, buttery sugar cookie in every bite, held together with sweet vanilla buttercream. They are a true centerpiece for any cookie platter.
Get ready to create the cutest, most charming holiday treats, a recipe that’s destined to become a beloved Christmas tradition for its fun factor and delicious results.

Why These Cookie Stacks are a Holiday Must-Bake
You are going to have so much fun making (and eating!) these adorable little trees. They are the perfect holiday project. Here’s why:
- Incredibly Fun and Festive: These little stacked trees are bursting with Christmas charm and are a guaranteed show-stopper on any holiday dessert table.
- Super Easy with a Smart Shortcut: Using store-bought sugar cookie dough saves a ton of time and makes this a simple, accessible project for bakers of all skill levels.
- A Perfect Holiday Activity for Kids: From rolling the dough balls to decorating the finished trees, this is a fantastic and memorable recipe to make with children.
- No Special Cookie Cutters Needed: The clever tiered effect is created simply by baking three different sizes of round cookies. It’s genius!
- Deliciously Sweet and Buttery: At the end of the day, it’s a delicious stack of buttery sugar cookies and sweet vanilla frosting—a classic and beloved flavor combination.
Recipe Snapshot
| Prep Time | 20 minutes |
| Cook Time | 10 minutes |
| Total Time | 30 minutes |
| Servings | 8 cookie trees |
| Calories | 388 kcal per tree (estimated) |
| Course | Dessert |
| Cuisine | American |
| Difficulty/Method | Easy / Baking |
Your Shopping List for This Festive Project
This recipe uses simple, easy-to-find ingredients to create its holiday magic.

→ For the Cookies & Frosting
- 1 tube sugar cookie dough → The ultimate time-saver! Any brand of refrigerated sugar cookie dough will work.
- ½ cup butter → Softened to room temperature for a perfectly fluffy buttercream.
- 2 cups powdered sugar → The sweet, fine base for our frosting.
- 1 tsp vanilla extract → For classic, warm flavor in the frosting.
- 2 Tbsp heavy cream → To make the frosting smooth and pipeable.
- Green food coloring → Gel food coloring will give you the most vibrant Christmas tree green.
- ½ tsp salt → A crucial ingredient to balance the sweetness of the frosting.
→ For the Decorations
- Christmas nonpareils → These tiny, colorful balls look just like ornaments!
- Yellow mini M&M’s or sprinkle stars → The perfect “star” to top your edible trees.
Let’s Get Stacking! Your Step-by-Step Guide
Ready to build the cutest little cookie forest? It’s easier than you think!
Part 1: Bake the Graduated Cookies
- Preheat and Prep: Preheat your oven to 350°F (175°C) and line a medium baking sheet with parchment paper.
- Size Your Cookies: For each tree, you will need three different-sized balls of cookie dough. Use measuring spoons for consistency! For each of the 8 trees, make one ball of dough that is 3 teaspoons (1 tablespoon), one that is 2 teaspoons, and one that is 1 teaspoon.
- Bake in Stages: Place all the dough balls on the prepared baking sheet. Bake for 5 minutes. At the 5-minute mark, carefully open the oven and use a small spatula to remove the smallest (1 tsp) cookies, as they will be done. Close the oven and bake the remaining cookies for another 3-4 minutes, until the edges are lightly golden.
- Cool Completely: Transfer all the cookies to a wire rack to cool completely before you even think about frosting them.
Part 2: Whip Up the Festive Frosting
- Beat the Butter: In a large bowl, using a hand mixer, beat the softened butter until it’s light and fluffy.
- Add Sugar and Liquids: Add the powdered sugar and beat on low until it’s incorporated. Then, add the vanilla, heavy cream, green food coloring, and salt.
- Whip Until Fluffy: Beat the mixture on medium-high speed until it’s smooth, fluffy, and combined. Add more drops of green food coloring until you reach your desired shade of Christmas tree green.
- Prep for Piping: Transfer the frosting to a piping bag fitted with a medium star tip.
Part 3: Assemble Your Cookie Trees
- The First Layer: Place one of the largest cookies on your work surface. Pipe a decorative circle of frosting around the edge.
- Stack and Repeat: Gently place a medium-sized cookie on top of the frosting. Pipe another circle of frosting on top of that. Place the smallest cookie on top.
- The Final Touches: Pipe a small, pointy star of frosting on the very top of the smallest cookie. While the frosting is still wet, decorate your tree with the Christmas nonpareil “ornaments.”
- Add the Star: Gently press a yellow mini M&M or a sprinkle star onto the top point of frosting. Repeat to create all 8 trees, and serve!
Easy Christmas Tree Cookie Stacks
Ingredients
Equipment
Method
- Preheat oven to 350° and line a cookie sheet with parchment paper. For each of the 8 trees, make three dough balls measuring 1 teaspoon, 2 teaspoons, and 3 teaspoons (1 Tbsp).
- Place balls on the baking sheet. Bake for 5 minutes, then remove the smallest (1 tsp) cookies. Continue baking the remaining cookies for 3-4 minutes more until edges are lightly golden. Let all cookies cool completely on a wire rack.
- In a large bowl using a hand mixer, beat softened butter until fluffy. Add powdered sugar and beat until combined.
- Add vanilla, heavy cream, green food coloring, and salt. Beat until combined and fluffy. Add more food coloring until your desired green is reached. Transfer frosting to a piping bag with a medium star tip.
- To assemble, place the largest cookie down and pipe a circle of frosting on top. Top with the medium cookie, and pipe another circle of frosting. Top with the smallest cookie.
- Pipe a small point of frosting on the smallest cookie. Decorate with sprinkles and top the point with a sprinkle star or a small yellow M&M. Repeat for all trees.
Notes
WiseRecipes’ Top Tips for Perfect Trees
These simple tricks will help make your cookie stacks a huge success.
- Use Measuring Spoons for Dough. For the stacked tree effect to really work, you need three distinct cookie sizes. Using 1 teaspoon, 2 teaspoons, and 1 tablespoon as your measures is the foolproof way to get consistent results.
- Don’t Overbake the Cookies. Sugar cookies can go from perfect to overdone in a flash. Pull them from the oven when the edges are just barely starting to turn golden. They will continue to set on the hot baking sheet.
- Let Cookies Cool Completely. This is non-negotiable! If you try to pipe frosting onto even a slightly warm cookie, it will melt into a sad, green puddle. Patience is key.
- Achieving the Right Frosting Consistency. If your frosting is too stiff to pipe, add a tiny splash more of heavy cream. If it’s too soft, add a bit more powdered sugar. The perfect consistency should hold its shape from the star tip beautifully.
- Make It an Assembly Line. If you’re making these with kids, set up an assembly line! One person can be the “stacker,” another can be the “piper,” and another can be the official “decorator.” It makes for fun and efficient holiday magic!
Keep It Fresh! Storing Your Cookie Stacks
These adorable trees can be made ahead of your holiday festivities.
- Storage: Store the finished cookie stacks in a single layer in an airtight container at room temperature for up to 3 days. If you need to stack them in the container, place a layer of parchment paper between them to protect the frosting.
- Make-Ahead: You can bake the cookies up to 2 days in advance and store them in an airtight container. The buttercream can also be made a day ahead and stored in an airtight container in the fridge (just let it come to room temperature and re-whip it before piping). Assemble the trees the day you plan to serve them for the best results.
FAQs: Your Christmas Tree Cookie Questions, Answered!
Can I make my own sugar cookie dough?
Absolutely! If you have a favorite cut-out sugar cookie recipe, it will work perfectly. Just make sure it’s a dough that doesn’t spread too much, so your cookies hold their round shape.
Do I really need a piping bag and tip?
For the classic “tree branch” look, a piping bag with a star tip is highly recommended. However, if you don’t have one, you can spoon the frosting into a zip-top bag, snip the corner, and pipe simple round dollops of frosting instead. They’ll still look festive and delicious!
My cookies all spread into the same size! What happened?
This can happen if the cookie dough is too warm and soft when it goes into the oven. Try chilling your dough balls on the baking sheet in the refrigerator for 15-20 minutes before baking to help them hold their shape better.
What are some other fun decoration ideas?
So many possibilities! You could use a dusting of powdered sugar to look like snow, use different colored “ornament” sprinkles, or even use a silver or gold sprinkle for the star on top.
Final Thoughts: Your Most Adorable Holiday Bake
There is nothing quite like a recipe that brings out the pure, simple joy of the Christmas season. These Christmas Tree Cookie Stacks are the embodiment of holiday fun. They are a delightful project, a delicious treat, and a beautiful centerpiece all in one. I hope they bring smiles and a little bit of sweet magic to your holiday celebrations. Happy Baking!