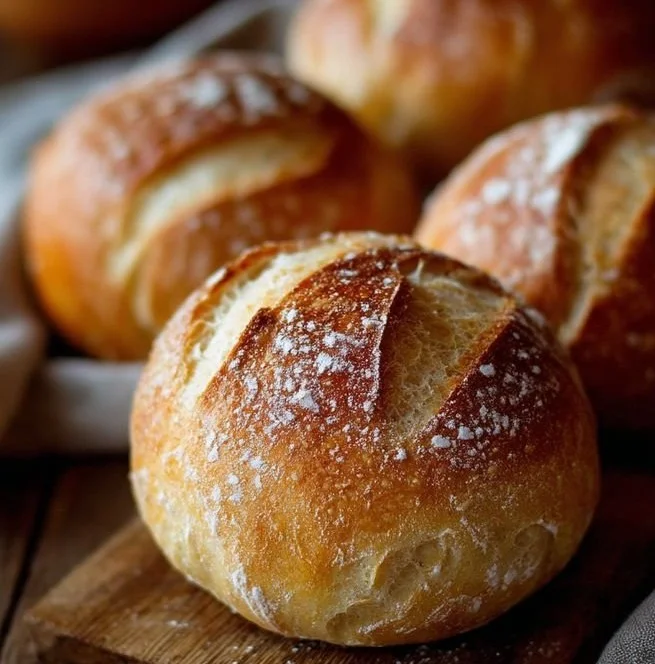
Crusty French Bread Rolls
There’s something undeniably enchanting about the smell of fresh bread wafting through your home. Imagine the moment when you tear into a crusty French bread roll, letting that crackly exterior give way to a soft, pillowy inside. It’s an experience that brings warmth and comfort, a nostalgic whisper of bakeries lining the streets of Paris….
There’s something undeniably enchanting about the smell of fresh bread wafting through your home. Imagine the moment when you tear into a crusty French bread roll, letting that crackly exterior give way to a soft, pillowy inside. It’s an experience that brings warmth and comfort, a nostalgic whisper of bakeries lining the streets of Paris. Make room in your kitchen, because we’re about to create those delightful crusty French bread rolls that will elevate any meal or stand alone as a lovely snack.
This Recipe is a Winner
Here’s why these crusty French bread rolls deserve a special spot in your recipe collection:
- Artisanal Touch: They have the charm of freshly baked goods from your local bakery but require just a fraction of the effort.
- Versatile Uses: Perfect for dinner gatherings, casual picnics, or simply enjoying with a pat of butter, these rolls can be served with nearly any meal.
- Wonderful Aroma: The moment they come out of the oven, your kitchen will be filled with the warm, inviting scent of baked bread—who can resist that?
- Impressive Presentation: With their beautiful golden-brown tops and rustic slashes, these rolls look as good as they taste.
- Customizable: The basic recipe allows for an abundance of variations—an inviting canvas for your culinary creativity!
Gather Your Ingredients
Let’s get everything we need to make these tasty rolls. Here’s your shopping list:
- 4 cups all-purpose flour: This versatile flour creates the perfect structure and chewiness in our rolls.
- 1 ½ cups warm water: The warmth activates the yeast, encouraging it to create those delightful bubbles that help the dough rise.
- 2 teaspoons salt: Salt enhances flavor and strengthens the dough’s structure while controlling yeast activity.
- 1 teaspoon sugar: This little bit of sweetness nourishes the yeast, making it happy and ensuring a good rise.
- 2 ¼ teaspoons active dry yeast: This is the star of the show! It’s what makes our rolls light and airy.
Crafting Your Perfect Crusty French Bread Rolls
Now that we have our ingredients ready, let’s get started in the kitchen. I promise, you’re going to love how easy this process is!
- In a small bowl, dissolve the yeast and sugar in warm water. Let it sit until frothy—about 5-10 minutes. This step is crucial, as it gets the yeast all pumped up and ready to work.
- While you wait, combine the flour and salt in a mixing bowl. I always find this step comforting, the soft flour whispering promises of baked goodness in my ears.
- Once your yeast mixture is frothy, add it to the flour and salt mixture. Stir until a rough dough forms, and don’t be afraid to get your hands in there!
- Knead the dough on a floured surface for about 10 minutes until it’s smooth and elastic. Feel the dough transform under your hands; this is where the magic happens!
- Place the dough into a greased bowl, cover it with a clean kitchen towel, and let it rise in a warm spot for about 1 hour or until it has doubled in size. This is the perfect time to take a break, maybe enjoy a cup of tea or coffee.
- Preheat your oven to 450°F (230°C). This high temperature will give your rolls that perfect crust.
- After the dough has risen, punch it down gently to release some of that air, which will enhance the flavor. Divide the dough into equal portions and shape them into rolls.
- Arrange the rolls on a baking sheet lined with parchment paper and let them rise for another 30 minutes.
- Right before baking, make slashes on the top of each roll to allow steam to escape—this will make the insides airy and light!
- Bake in your preheated oven for about 20-25 minutes until golden brown and calling out for attention.
- Let them cool slightly before serving. The hardest part will be waiting, but trust me, that first bite will be worth it!
Pro Tips for Perfection
- Kneading Technique: Knead the dough until it passes the “windowpane test”—a small piece of dough should stretch without breaking. This helps develop the gluten and creates a better structure.
- Temperature Check: Make sure your water is warm, not hot. Too hot can kill the yeast, and too cold won’t activate it adequately. Aim for about 100°F to 110°F.
- Humidity Helps: If your kitchen is particularly dry, you can place a pan of water in the oven while baking to create a bit of steam, which helps develop that perfect crust.
Experiment with Flavors
Feeling a little adventurous? Here are some tasty variations to try with your crusty rolls:
- Herbed Infusion: Add dried herbs like rosemary or thyme to the flour mixture for a fragrant twist.
- Garlic Rolls: Before shaping the rolls, mix in some finely minced garlic and a sprinkle of Parmesan cheese for a savory treat.
- Whole Wheat Option: Substitute half of the all-purpose flour for whole wheat flour for a nuttier flavor and heartier texture.
Bringing It to the Table
Now that your rolls are baked to golden perfection, it’s time to enjoy them! Serve these delightful crusty French bread rolls warm, with generous pats of butter melting into their fluffy interiors. Pair them alongside a rich soup, like a creamy tomato bisque or a fragrant minestrone, where they can absorb all those fantastic flavors. You could also enjoy them simply with a drizzle of olive oil and a sprinkle of sea salt for a delightful starter.
Keeping It Fresh
Let’s talk storage. If you’re lucky enough to have leftovers (which isn’t always the case), here’s how to keep your crusty French bread rolls fresh:
- Counter Storage: Keep them in a bread box or a paper bag at room temperature for up to 2 days.
- Freezing Tips: To store for longer, wrap each roll in plastic wrap and then in aluminum foil. They’ll last for about 3 months in the freezer! When ready to eat, simply reheat them in a preheated oven at 350°F (175°C) for about 10 minutes.
- Reheating: If they lose a bit of their crispness, a quick blast in the oven can revive that golden crust.
Your Questions Answered
-
Can I use instant yeast instead of active dry yeast?
Yes! Instant yeast can be used at the same quantity and doesn’t need to be dissolved beforehand, making the process a bit quicker. -
Why did my rolls come out dense?
This could be due to over-kneading or not allowing them to rise sufficiently. Always keep an eye on the dough’s texture and volume! -
Can I double the recipe?
Absolutely! Just make sure you have a large enough mixing bowl and baking sheet to accommodate the extra dough and rolls.
It’s hard to beat the satisfaction of tearing into a warm, crusty roll fresh from the oven. Whether you’re enjoying them with a meal or simply snacking, these beautiful creations are all about love, patience, and a bit of flour and water. So roll up your sleeves, gather your ingredients, and let the delightful aroma of fresh bread fill your home. I can’t wait for you to taste the magic!
Crusty French Bread Rolls
Ingredients
Method
- In a small bowl, dissolve the yeast and sugar in warm water. Let it sit until frothy, about 5-10 minutes.
- Combine the flour and salt in a mixing bowl.
- Once the yeast mixture is frothy, add it to the flour and salt mixture. Stir until a rough dough forms.
- Knead the dough on a floured surface for about 10 minutes until it is smooth and elastic.
- Place the dough into a greased bowl, cover it, and let it rise in a warm spot for about 1 hour or until it has doubled in size.
- Punch down the dough gently to release some air. Divide it into equal portions and shape them into rolls.
- Preheat your oven to 450°F (230°C).
- Arrange the rolls on a baking sheet lined with parchment paper and let them rise for another 30 minutes.
- Make slashes on the top of each roll to allow steam to escape.
- Bake for about 20-25 minutes until golden brown.
- Let them cool slightly before serving.