Dig In! My Ultimate Dirt Pudding No-Churn Ice Cream (Gooey, Creamy & So Fun!)
Oh, my friends, who here isn’t utterly charmed by a dessert that combines classic nostalgic fun with pure, creamy indulgence? Today at WiseRecipes, I’m beyond excited to share a recipe that perfectly embodies that spirit: this incredible Dirt Pudding No-Churn Ice Cream! Seriously, prepare your taste buds for pure bliss – a rich, velvety chocolate…
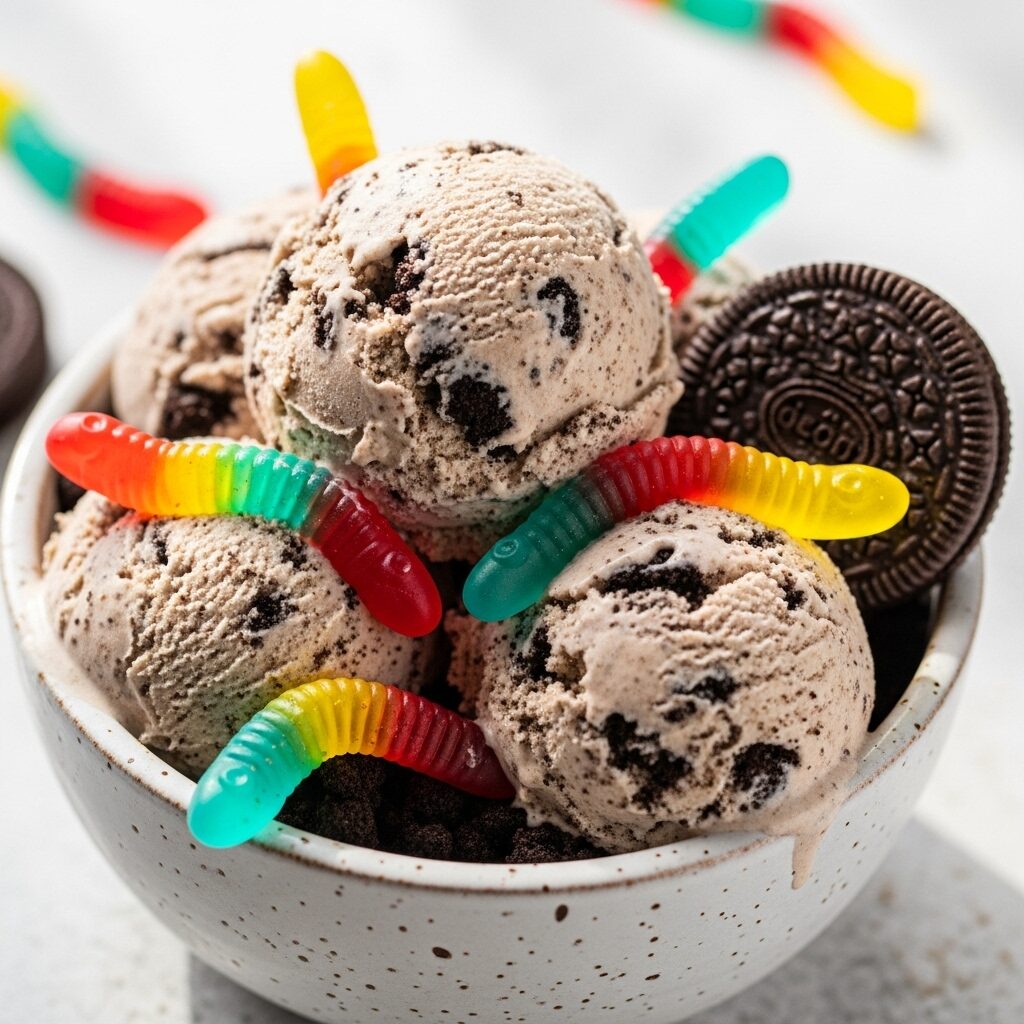
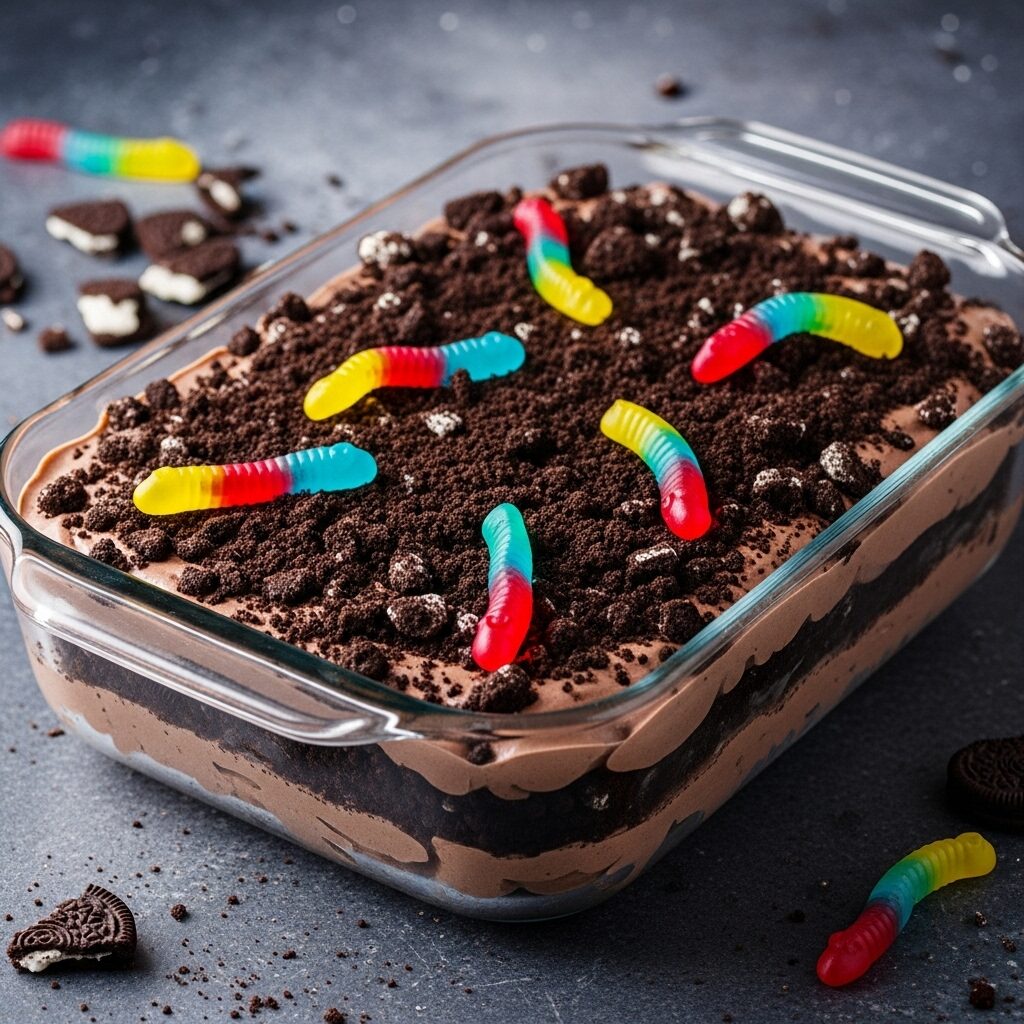
Oh, my friends, who here isn’t utterly charmed by a dessert that combines classic nostalgic fun with pure, creamy indulgence? Today at WiseRecipes, I’m beyond excited to share a recipe that perfectly embodies that spirit: this incredible Dirt Pudding No-Churn Ice Cream! Seriously, prepare your taste buds for pure bliss – a rich, velvety chocolate ice cream, studded with crunchy cookie “dirt,” and adorned with playful gummy worms. It’s like digging into a delicious, chocolatey garden, and it is pure joy in every single spoonful!
I just adore a recipe that feels incredibly special and playful but is secretly super simple and practically hands-off. This no-churn ice cream is exactly that! It’s a fantastic way to transform simple pantry staples into a powerhouse dessert that will have everyone reaching for more, without needing a fancy ice cream maker or hours of churning. Forget complicated techniques; we’re talking about ridiculously flavorful and satisfying ice cream that comes together with just 20 minutes of active prep and a few hours in the freezer. This isn’t just a dessert; it’s a mood-lifter, a fantastic party treat, and honestly, a guaranteed hit every single time. This Dirt Pudding No-Churn Ice Cream recipe yields a generous 12 servings, making it perfect for family gatherings, birthday parties, or any time you crave amazing, effortless flavor. Trust me, once you try this incredible combination, you’ll be making it again and again!

Why This [EASY!] Dirt Pudding No-Churn Ice Cream Will Be Your New Favorite!
This isn’t just another dessert recipe; it’s a fun, creamy, and incredibly satisfying culinary delight. Here’s why I’m absolutely smitten with it:
- No-Churn, No Fuss: This is the magic! You don’t need an ice cream maker for this recipe. Just mix, fold, freeze, and you’ve got incredibly creamy, scoopable ice cream with minimal effort.
- Classic Dirt Pudding Fun: We’re taking the beloved nostalgic flavors of chocolate cookie “dirt” and gummy worms and combining them with creamy ice cream for an elevated, irresistible treat that’s still wonderfully playful.
- Rich, Creamy, & Chocolatey: A luscious base of cold milk, sweetened condensed milk, and heavy cream creates an unbelievably smooth and creamy texture, while instant chocolate pudding delivers deep, satisfying chocolate flavor.
- Kid-Friendly & Engaging: Kids absolutely adore the “dirt” and “worms” concept! It’s fun to decorate, fun to eat, and a fantastic way to involve little ones in the kitchen.
- Perfect for Make-Ahead: This dessert is designed to be made ahead! Simply prepare, freeze, and then pull it out of the freezer when you’re ready to serve. Perfect for entertaining or busy days.
Your Shopping List for Dirt Pudding Bliss: Gather What You’ll Need
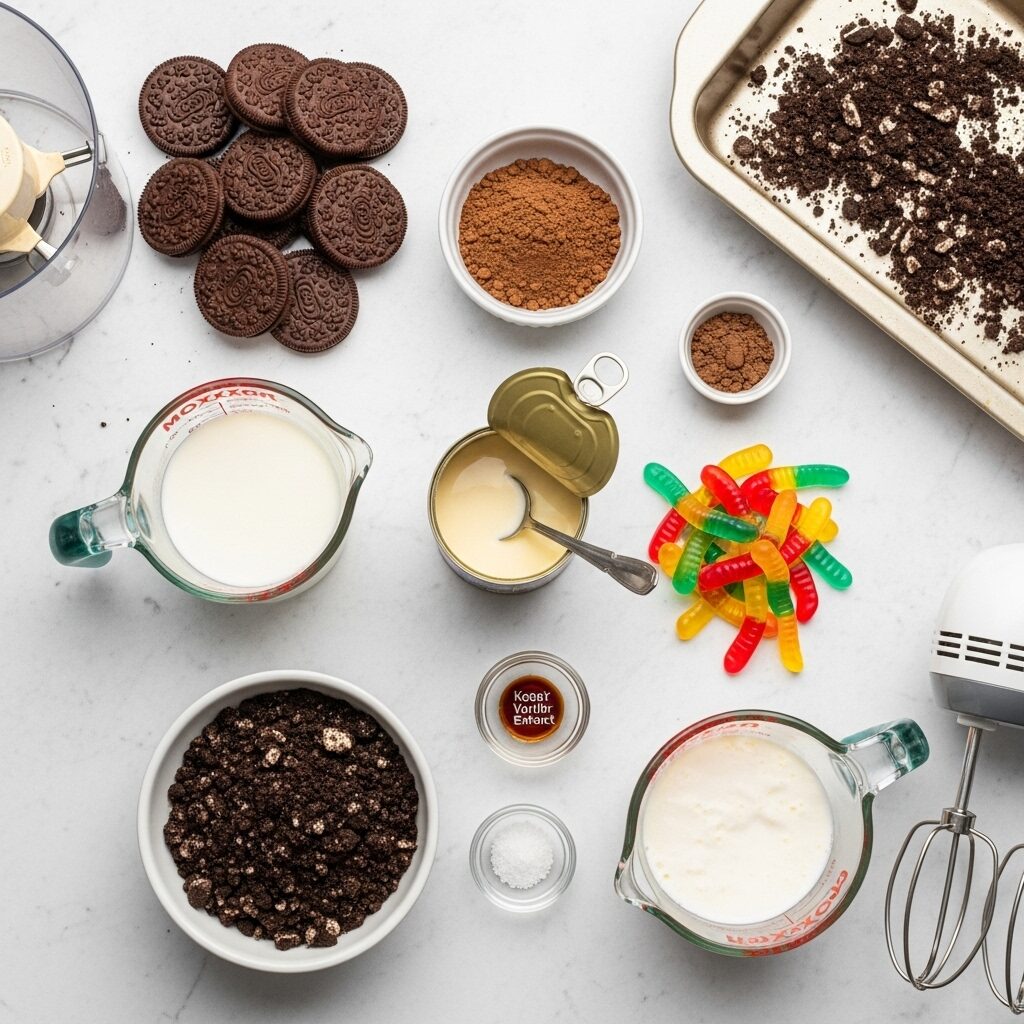
Creating this incredible Dirt Pudding No-Churn Ice Cream uses a blend of classic pantry staples and fun additions. Here’s what you’ll want to grab to get started!
→ For the Decadent Cookie “Dirt” Layers
- 25 chocolate sandwich cookies: Such as Oreos! Our crunchy, chocolatey “dirt.”
→ For the Creamy No-Churn Ice Cream Base
- One 3.9-ounce box instant chocolate pudding: Our secret for intense chocolate flavor and creamy texture.
- 2 cups cold milk: To prepare the instant pudding.
- One 14-ounce can sweetened condensed milk: The key to our no-churn magic, adding sweetness and creaminess.
- 2 teaspoons pure vanilla extract or paste: Enhances all the sweet chocolatey flavors.
- ¼ teaspoon kosher salt: Balances sweetness and enhances flavor.
- 2 cups cold heavy cream: Our base for whipped cream, creating that luscious, airy texture.
→ For Garnish (The Ultimate Fun!)
- Gummy worms: For that iconic “worms in dirt” look!
Let’s Freeze! Crafting Your Perfect Dirt Pudding No-Churn Ice Cream, Step-by-Step
This recipe is genuinely easy, with just a few simple steps. Your freezer does all the rest of the hard work!
Part 1: Preparing Our Cookie “Dirt” & Chocolate Pudding
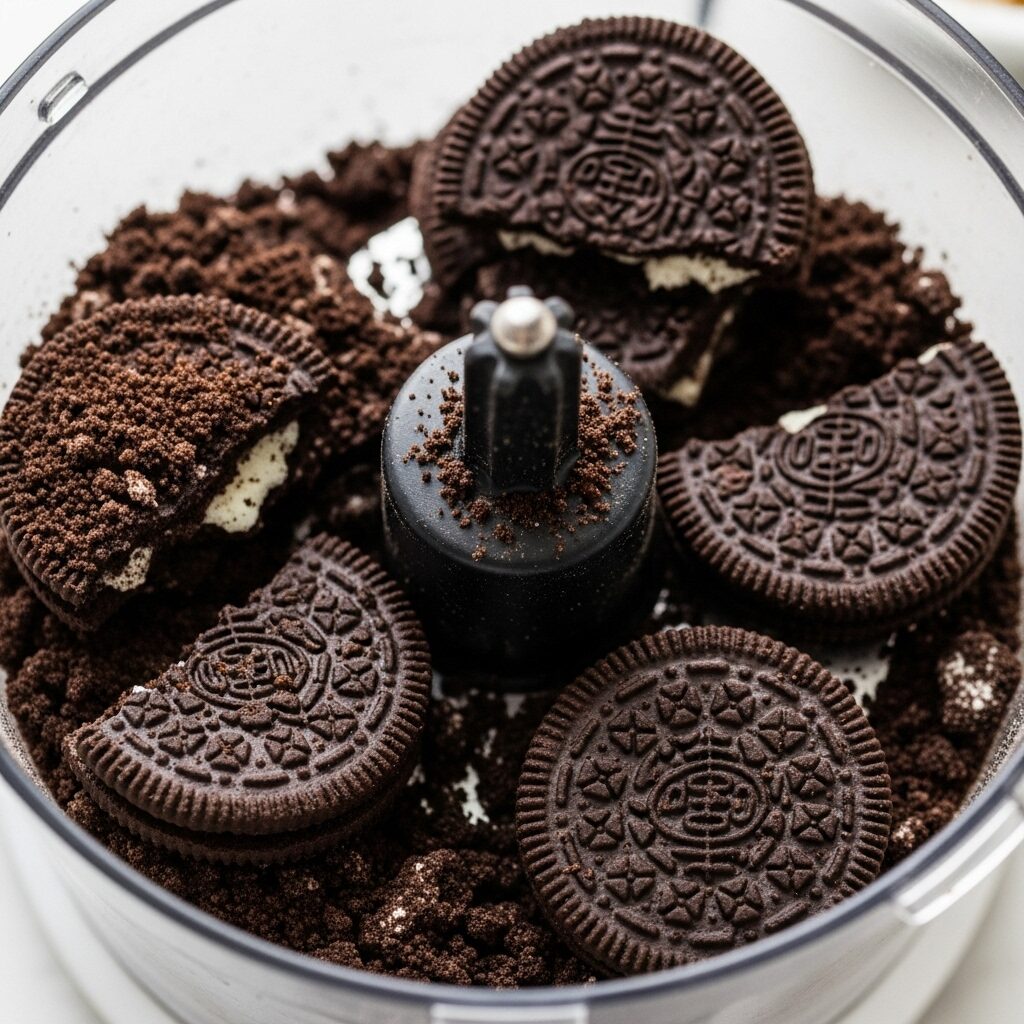
- Crush Cookies: Take your 25 chocolate sandwich cookies. Break them in half and pulse them in a food processor until they are finely ground, resembling dark, rich “dirt.”
- Layer First Crumbs: Spread 1 cup of the crushed cookie crumbs evenly in the bottom of a 9-by-13-inch baking dish. Reserve the remaining cookie crumbs for the top.
- Make Instant Pudding: In a medium bowl, combine the entire 3.9-ounce box of instant chocolate pudding mix and 2 cups of cold milk. Whisk vigorously for about 2 minutes until the mixture thickens and resembles classic pudding. Set aside.
Part 2: Making No-Churn Ice Cream Base & Assembling!
- Whisk Condensed Milk Base: In a large, wide bowl, whisk together the 14-ounce can of sweetened condensed milk, 2 teaspoons pure vanilla extract (or paste), and ¼ teaspoon kosher salt until well combined.
- Whip Heavy Cream: In another large bowl, use an electric mixer to whip the 2 cups of cold heavy cream until firm peaks form, about 2 minutes. (Be careful not to over-whip into butter!)
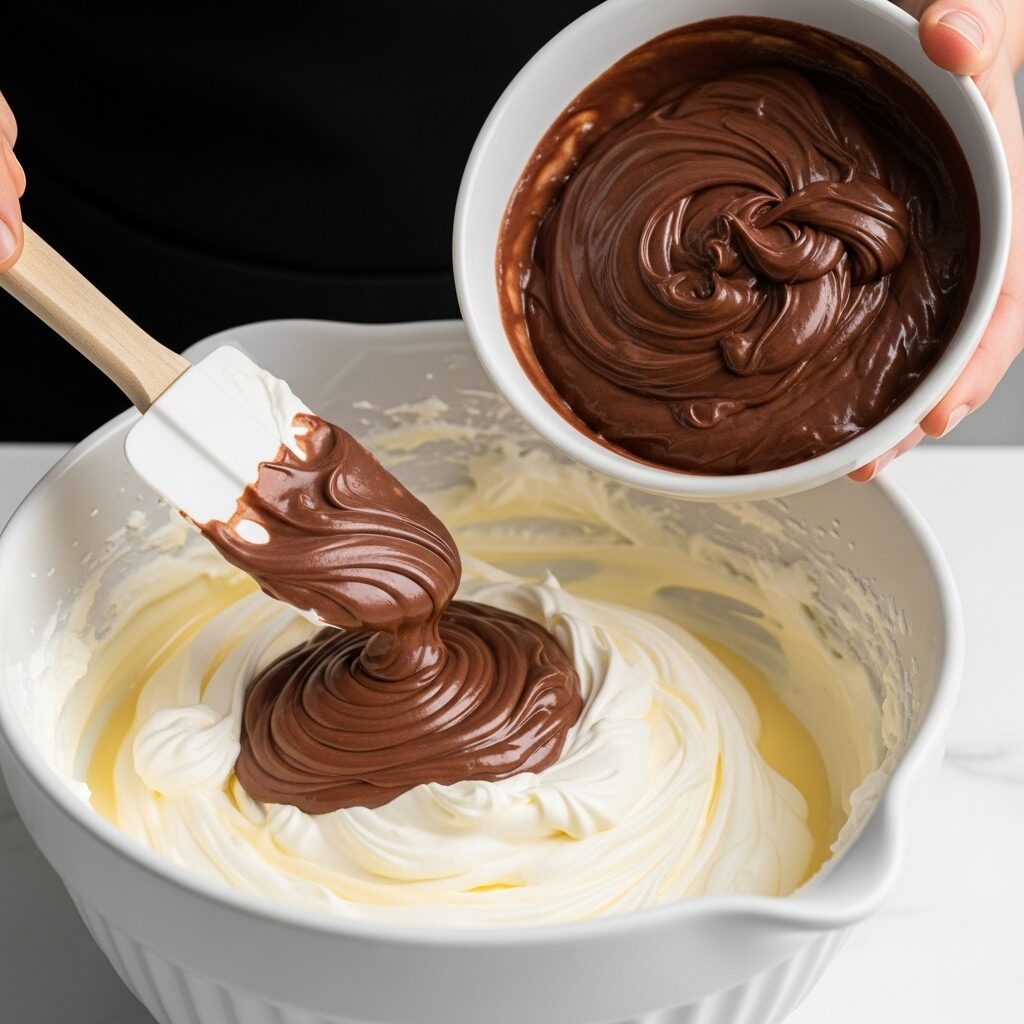
- Fold Cream into Condensed Milk: Gently fold 1 cup of the whipped cream into the condensed milk mixture. This lightens it. Then, add the remaining whipped cream and fold gently until just combined.
- Fold in Pudding: Carefully add the prepared chocolate pudding mixture to the bowl with the whipped cream mixture. Fold gently until everything is mostly combined, leaving a few thin vanilla and chocolate streaks – this creates a lovely marbled effect!
- Layer & Top: Transfer half of the ice cream mixture into the baking dish, spreading it evenly over the cookie crumb base. Smooth the top with a rubber spatula. Sprinkle the remaining crushed cookie crumbs evenly on top of the ice cream mixture.
- Freeze Until Firm: Cover the baking dish tightly with plastic wrap and transfer it to the freezer. Freeze until the ice cream is thoroughly firm, at least 6 hours, or ideally overnight.
Part 3: Garnish & Serve Your Fun Dessert!
- Garnish & Serve: Once the Dirt Pudding No-Churn Ice Cream is firm, remove it from the freezer. Garnish generously with gummy worms! You can poke small holes in the top with a chopstick or skewer and place some worms partially in them so they look like they’re playfully coming out of the “soil.” Slice into generous squares and serve immediately! Prepare for squeals of delight!
WiseRecipes’ Top Tips for Dirt Pudding Ice Cream Mastery!
This fun dessert is incredibly easy, but these WiseRecipes insights will help you achieve Dirt Pudding No-Churn Ice Cream perfection every single time!
- Finely Ground Cookies: When pulsing the chocolate sandwich cookies in the food processor, aim for a finely ground texture. This creates a more authentic “dirt” look and a pleasant, uniform crunch.
- Cold Ingredients are CRUCIAL: For both the instant pudding and especially the heavy cream, ensure they are very cold before you start. Cold heavy cream whips up best to firm peaks, which is essential for creamy no-churn ice cream.
- Don’t Over-Whip the Cream: Whip the heavy cream just until firm peaks form. Over-whipping can lead to a grainy texture in your ice cream.
- Gentle Folding is Key: When combining the whipped cream with the condensed milk and then the pudding, use a gentle folding technique with a rubber spatula. This preserves the air in the whipped cream, which gives the ice cream its light, airy texture.
- Freeze Until FIRM: Patience is key! Don’t try to scoop the ice cream too early. Freezing for at least 6 hours (or overnight) ensures it’s perfectly firm and scoopable.
- The Salt is Secret: A tiny pinch of kosher salt in the condensed milk mixture is crucial. It perfectly balances the sweetness and enhances all the chocolate flavors, making them even richer.
Creative Twists: Delicious Ways to Customize Your Fun Ice Cream!
This Dirt Pudding No-Churn Ice Cream is already fantastic, but it’s also a wonderful canvas for your culinary creativity! Here are some ideas I love to play with:
- Different Cookie “Dirt”: Instead of chocolate sandwich cookies, try crushed graham crackers, chocolate wafer cookies, or even a mix of crushed brownies for a different “dirt” flavor.
- Cream Cheese Layer: For an extra tangy, creamy layer, beat 4 oz of softened cream cheese with 1/4 cup powdered sugar and a splash of milk. Spread this layer in the middle of the ice cream mix before adding the top crumbs.
- Fruity Fun: Add a layer of fresh berries (like raspberries or chopped strawberries) in the middle of the ice cream mixture for a refreshing fruit twist.
- Nutty Crunch: Fold in ½ cup of chopped toasted walnuts, pecans, or crushed pretzels into the ice cream mixture for extra texture and flavor.
- Coffee Kick: For a mocha twist, add 1-2 teaspoons of instant espresso powder to the instant chocolate pudding mix.
- Spiced Fall Twist: Add ½ teaspoon of pumpkin pie spice to the instant chocolate pudding mix for a fun fall-themed dirt ice cream!
Ultimate Dirt Pudding No-Churn Ice Cream
Ingredients
Equipment
Method
- Break the sandwich cookies in half and pulse them in a food processor until finely ground. Spread 1 cup of the cookie crumbs in the bottom of a 9-by-13-inch baking dish. Reserve remaining crumbs for the top.
- Combine the instant pudding mix and milk in a medium bowl and whisk until the mixture thickens. Set aside.
- Whisk the condensed milk, vanilla, and salt in a large wide bowl until combined.
- Whip the heavy cream in another large bowl with an electric mixer until firm peaks form (about 2 minutes). Fold 1 cup of whipped cream into condensed milk mixture. Add remaining whipped cream and fold gently to combine.
- Add the pudding mixture to the bowl and fold into the whipped cream mixture until mostly combined but with thin vanilla and chocolate streaks.
- Transfer the mixture to the baking dish with the crumbs and smooth the top with a rubber spatula. Sprinkle the remaining crumbs evenly on top.
- Cover and freeze until firm, at least 6 hours.
- Garnish the frozen pudding with gummy worms. You can poke holes with a chopstick or skewer in the top and place some worms partially in them so they look like they’re coming out of the “soil.” Serve immediately.
Notes
Keep It Delicious! Storing Your Perfect No-Churn Ice Cream
You’ve created something truly special, so let’s make sure it stays fresh and delicious!
- Freezer Storage: Once completely firm, store your Dirt Pudding No-Churn Ice Cream (covered tightly with plastic wrap and then foil, or in an airtight freezer-safe container) in the freezer. It will keep beautifully for up to 2-3 weeks.
- Serving Tips: For easier scooping, let the ice cream sit at room temperature for 5-10 minutes before serving. This allows it to soften slightly to a perfect scoopable consistency.
- Refreshing Reheat? (Not really!): This is an ice cream, so no reheating needed! Just scoop and enjoy!
- Freezing Components (Not Recommended): While you can store the crushed cookies and prepared pudding separately for a short time, it’s best to assemble and freeze the ice cream all at once for optimal texture.
- Kid-Friendly Meal Prep: This is fantastic for making ahead for parties or just having a fun dessert ready for the kids. The chilling time is all hands-off!
FAQs: Your Top Dirt Pudding No-Churn Ice Cream Questions, Answered!
Q: Can I use a different flavor of instant pudding?
A: Yes, absolutely! While chocolate pudding is classic for “dirt” flavor, you could experiment with vanilla, butterscotch, or even banana instant pudding for a different flavor profile. The key is to use instant pudding.
Q: My heavy cream isn’t whipping to firm peaks. What went wrong?
A: This usually happens if the heavy cream wasn’t very cold, or if there was any grease in your mixing bowl or on your whisk. Ensure your cream is straight from the fridge, and your equipment is impeccably clean and cold. Over-whipping can also lead to it separating.
Q: What kind of chocolate sandwich cookies should I use?
A: Classic chocolate sandwich cookies (like Oreos) are perfect for this recipe due to their rich chocolate flavor and dark color. You can use any brand you like.
Q: Can I make this a gluten-free dessert?
A: Yes, absolutely! You would need to use gluten-free chocolate sandwich cookies (many brands are available now, like Kinnikinnick Foods or Glutino). All other ingredients in this recipe (pudding mix, milk, condensed milk, vanilla, salt, heavy cream, gummy worms) are typically naturally gluten-free, but always check labels!
Q: How can I make this even more chocolatey?
A: For an extra chocolate boost, you could add ½ cup of mini chocolate chips to the ice cream mixture when you fold in the pudding. You could also drizzle a little chocolate syrup over each serving!
And there you have it, my friends—your guide to crafting the most delightful, impressive, and truly satisfying Dirt Pudding No-Churn Ice Cream! This WiseRecipes creation is more than just a dessert; it’s a testament to how simple ingredients, when treated with a little love and smart steps, can come together to create something truly extraordinary. It’s a vibrant, exciting meal that you’ll genuinely look forward to eating, day after day.
I am genuinely so excited for you to try these and experience the delicious magic yourself. Please, please come back and let me know in the comments below what your favorite part of this fun, gooey ice cream was, or any fun twists you tried! Happy cooking from WiseRecipes!