How to Make a Charcuterie Board (The Ultimate Easy Guide!)
There’s a certain kind of magic that happens when a magnificent charcuterie board enters a room. It’s more than just an appetizer; it’s a centerpiece, a conversation starter, and a work of art that invites everyone to gather and graze. But I know what you’re thinking, because I used to think it too. You see…
There’s a certain kind of magic that happens when a magnificent charcuterie board enters a room. It’s more than just an appetizer; it’s a centerpiece, a conversation starter, and a work of art that invites everyone to gather and graze. But I know what you’re thinking, because I used to think it too. You see those stunning, abundant boards all over Pinterest and Instagram and think, “I could never make that look so good.” I’m here to let you in on a little secret: you absolutely can. Building a beautiful charcuterie board is an art, not a science, and it’s one of the easiest, most rewarding, and most impressive things you can do as a host. This is your ultimate guide to creating a show-stopping board with minimal effort and absolutely no cooking required. We’ll walk through a simple, step-by-step formula that takes all the guesswork out of the process, from choosing the perfect ingredients to arranging them like a pro. This is how you create that “wow” factor for your next gathering, especially for a festive occasion like New Year’s Eve, where elegant, easy snacking is king.

Why a Charcuterie Board is Your Ultimate Party Trick!
- Effortlessly Impressive: A well-made charcuterie board looks incredibly sophisticated and abundant, making you look like a hosting superstar with very little actual cooking involved.
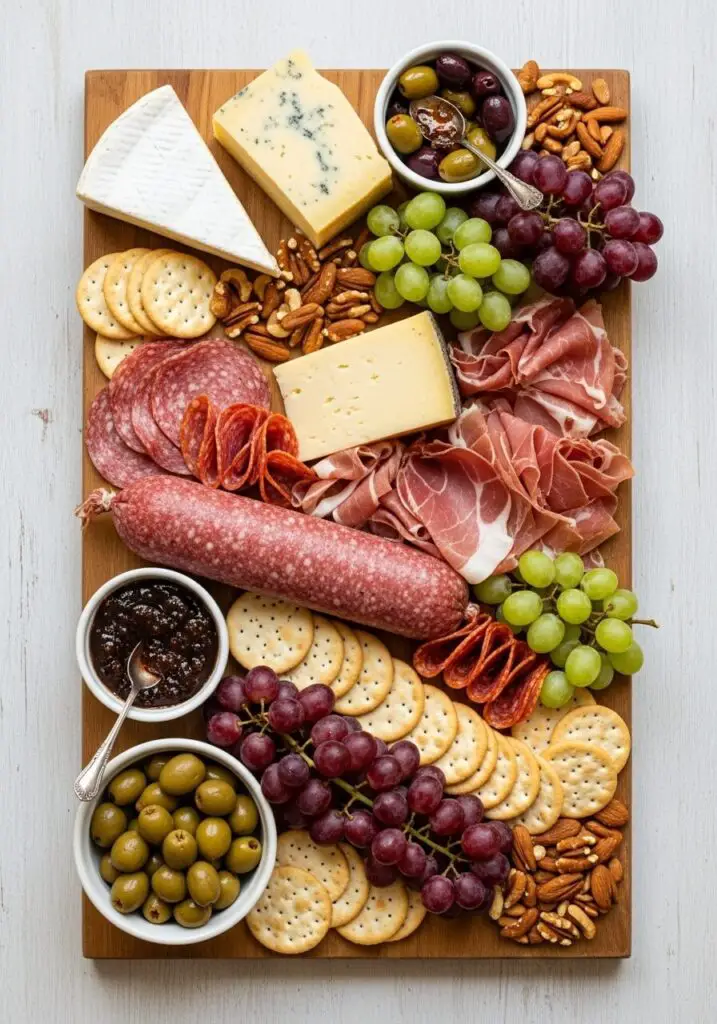
- Something for Everyone: With a variety of cheeses, meats, crackers, fruits, and nuts, there’s a perfect bite for every single one of your guests, no matter their preference.
- Perfectly Designed for Grazing: It’s the ultimate interactive food experience, encouraging guests to mingle, chat, and create their own perfect flavor combinations as they graze.
- Endlessly Customizable: The beauty of a charcuterie board is that there are no hard and fast rules. You can customize it to any season, theme, or dietary preference.
- Make-Ahead Friendly: You can do most of the prep work ahead of time, leaving you with just a fun, creative assembly project right before your guests arrive.
Recipe Snapshot
| Prep Time | 30 minutes (Arranging time) |
| Cook Time | 0 minutes |
| Total Time | 30 minutes |
| Servings | 8 servings (easily scalable) |
| Calories | 343 kcal per serving |
| Course | Appetizer, Snack |
| Cuisine | American, International |
| Method | No-Cook, Assembly |
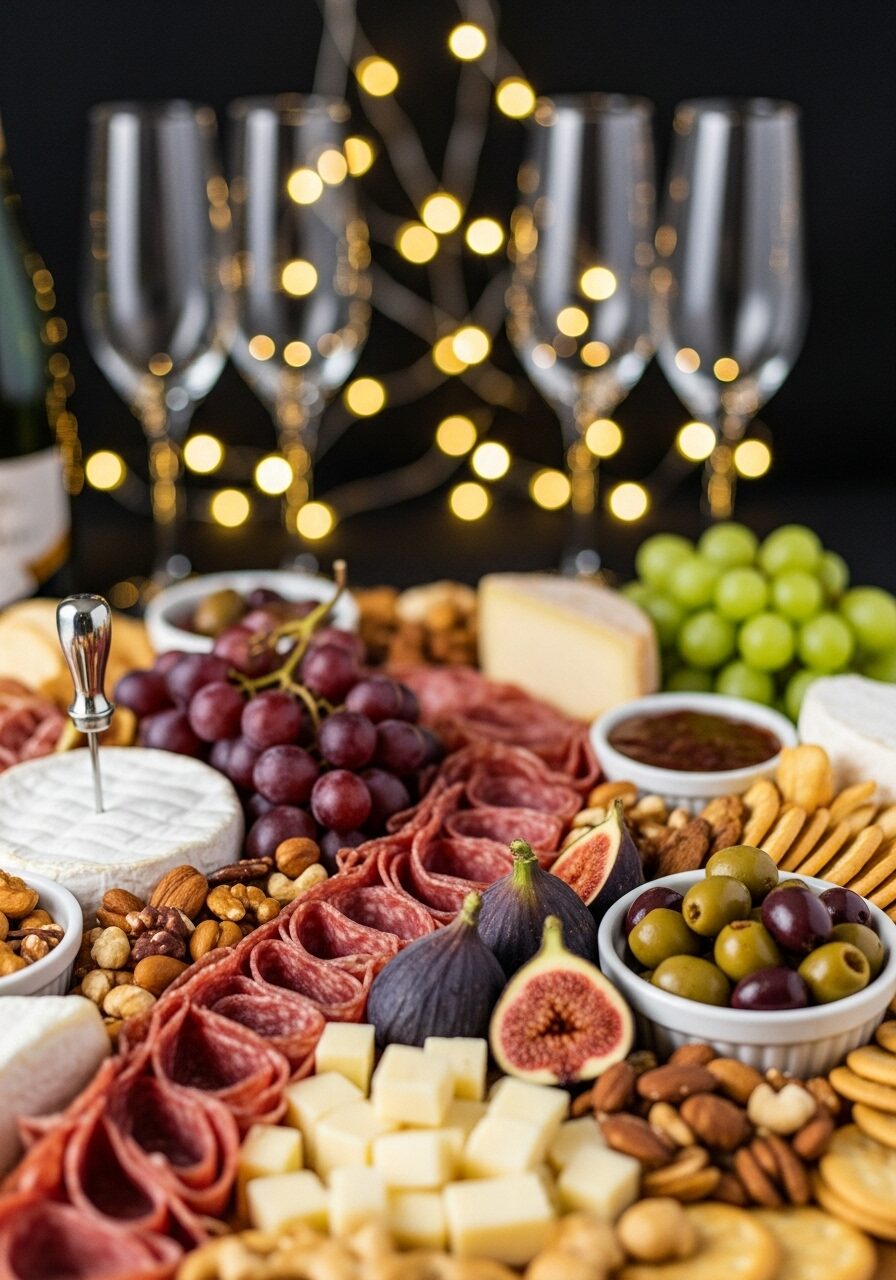
The Anatomy of a Perfect Board: Your Shopping List
Think of this as your blueprint. The key is to choose a variety of items from each category to create a balance of flavors and textures.
→ The Cheeses (The Stars of the Show)
- Choose a Variety: A good rule of thumb is to have 2-3 different cheeses. Try to pick from different categories: a soft cheese (like Brie or Camembert), a hard or aged cheese (like an aged cheddar or Manchego), and something crumbly or tangy (like a goat cheese or feta).
→ The Cured Meats (The Savory Foundation)
- A Savory Selection: Aim for 2-3 types of cured meats. A classic trio includes a hard salami, delicate, paper-thin prosciutto, and something with a bit of spice like pepperoni or soppressata.
→ The Dips & Spreads (The Creamy Elements)
- Add Some Scoops: 2-3 small bowls of dips or spreads add wonderful texture and flavor. Think fig jam, whipped feta, a grainy mustard, or a savory hummus.
→ The Crackers & Bread (The Vehicles)
- A Crunchy Assortment: Offer a variety of shapes and textures. Include some simple, sturdy artisan crackers, some long and elegant breadsticks, and maybe some sliced, toasted mini baguettes.
→ The Fruits & Nuts (The Sweet & Crunchy Accents)
- Fresh and Dried Fruits: Fresh fruit like grapes, figs, or berries adds a juicy, sweet element. Dried apricots or dates are also fantastic.
- A Nutty Crunch: A handful of nuts adds a wonderful crunchy texture. Almonds, pistachios, and candied pecans are all great choices.
→ The Briny Bites (The Tangy Extras)
- A Pop of Acidity: A small bowl of assorted olives, tiny sour pickles (cornichons), or marinated artichoke hearts provides a much-needed tangy, briny contrast to all the rich meats and cheeses.
Let’s Build It! Assembling Your Masterpiece, Step-by-Step
This is the fun part! There’s no right or wrong way, but this simple, 5-step formula is my foolproof method for creating a stunning board every single time.
Phase 1: Place Your Anchors (The Bowls)
Start with a large platter, cutting board, or piece of slate. The first things to go on the board are your bowls.
- Arrange the Bowls. Place your 2-3 small bowls for dips, jams, and olives on the board first. Don’t line them up! Arrange them in a non-symmetrical pattern, like a triangle, to create visual interest and structure.

Phase 2: Place the Stars (The Cheeses)
Next, we add the largest items: the cheeses.
- Arrange the Cheeses. Place your chunks of cheese around the bowls, spacing them apart from each other. This creates different zones on the board for your guests to explore.
Phase 3: Create the Ribbons (The Meats)
Now we add the savory meats, creating movement and texture.
- Arrange the Cured Meats. Don’t just lay the meat flat! Create texture by folding salami slices into quarters to look like “salami flowers,” loosely draping prosciutto into ribbons, or rolling up other meats. Tuck them in next to the cheeses and bowls. A “salami river” snaking through the middle of the board is a classic, show-stopping technique!
Phase 4: Fan the Foundation (The Crackers)
The crackers are the vehicles for all the deliciousness.
- Arrange the Crackers and Bread. Fan out your crackers in a few different spots on the board, usually snuggled up against a cheese or a bowl. This ensures that no matter where a guest is standing, a cracker is always within easy reach.

Phase 5: Fill in the Blanks (The Jewels)
This is the final, magical step that makes your board look abundant and luxurious.
- Fill Every Gap. Use your fruits (like big bunches of grapes) to fill in any large remaining gaps. Then, take your nuts, berries, and any other small items and use them to fill in every last nook and cranny. The goal is to have no empty space visible on the board!
WiseRecipes’ Top Tips for a Show-Stopping Board!
- The “Salami River” is Your Friend: This is a simple but brilliant trick. Fold your salami slices in half, and then in half again, and line them up, overlapping, in a long, winding “river” that snakes across your board. It creates incredible visual appeal.
- Variety is the Spice of Life: The best boards have a wide variety of flavors, colors, and textures. Think soft, hard, creamy, crunchy, salty, sweet, and tangy.
- Let the Cheese Breathe: For the best flavor, take your cheese out of the refrigerator about 30 minutes before serving to let it come to room temperature.
- Create Height and Dimension: Use small bowls and stack some of your items to create different heights and levels on the board, which makes it much more visually interesting.
- When in Doubt, Think in Threes: A simple rule for balance is the “rule of threes” (or any odd number). Aim for 3 cheeses, 3 meats, and 3 types of crackers. It’s a great starting point for a visually pleasing board.
Creative Twists: Themed Charcuterie Board Ideas!
- Italian Antipasto Board: Focus on Italian meats and cheeses like prosciutto, soppressata, mozzarella balls, Parmesan, and add marinated artichokes and roasted red peppers.
- Spanish Tapas Board: Feature Spanish ingredients like chorizo, Manchego cheese, Marcona almonds, and quince paste (membrillo).
- Brunch Board: Build a board with mini pancakes or waffles, sausage, fresh berries, yogurt, and small bowls of syrup and jam.
- Dessert Board: A sweet take with different kinds of chocolate, cookies, fresh fruit, marshmallows, and sweet dips like caramel or chocolate hazelnut spread.
- Holiday Board: Add festive touches like rosemary sprigs to look like mini wreaths, pomegranate seeds for a jewel-like color, and a baked brie topped with cranberry sauce.
- Mediterranean Board: Load it up with feta, hummus, pita bread, cucumbers, tomatoes, and lots of olives.
Easy Charcuterie Board (for NYE)
Ingredients
Equipment
Method
- On a large platter or board, arrange the small bowls for your dips, jams, and olives. Space them apart from each other to create structure.
- Arrange the different cheeses around the bowls, also spacing them apart to create different zones on the board.
- Arrange the cured meats around the bowls and cheese. Fold, roll, or create ‘rivers’ with the meats to add texture and visual appeal.
- Arrange the crackers and bread in the larger gaps, fanning them out so they are easy to grab. Place them in a few different spots on the board.
- Use the fruit (like bunches of grapes) to fill any large remaining gaps. Use the nuts and smaller berries to fill in every last nook and cranny until the board looks full and abundant.
Notes
Keep It Fresh! Prepping and Storing Your Board
A little prep work can make assembly a breeze, but timing is key for a fresh and delicious board.
Make-Ahead Prep
You can do most of your prep work a few hours in advance. Slice your cheeses and meats, wash your fruits, and portion out your dips and nuts. Store everything in separate airtight containers in the refrigerator. Then, do the final arrangement on the board up to an hour before guests arrive.
Storing Leftovers
Charcuterie boards are best served fresh. If you do have leftovers, it’s best to disassemble the board. Remove the crackers and nuts and store them in an airtight container at room temperature to keep them from getting soggy. Wrap the leftover cheeses and meats tightly and store them in the fridge for up to a day or two.
FAQs: Your Charcuterie Board Questions, Answered!
How much cheese and meat should I plan for per person?
A good general rule for an appetizer portion is to plan for about 2 ounces of cheese and 2 ounces of cured meat per person. If the charcuterie board is the main meal, you’ll want to double that to about 4 ounces of each per person.
What kind of board should I use?
You don’t need a special board! Any large wooden cutting board, a piece of slate, a marble pastry slab, or even a large, flat platter will work beautifully. You can even use parchment paper laid directly on your table for a rustic, “graze table” look.
How do I make my board look abundant and not sparse?
The trick is to fill every single empty space! After you’ve placed your main items, use the smaller items like nuts, berries, and pomegranate seeds to fill in all the little nooks and crannies. A full, overflowing board always looks more impressive.
Can I make a beautiful charcuterie board on a budget?
Absolutely! You don’t need the most expensive imported items. Focus on a few key, high-quality items and fill in the rest with more affordable bulk items like in-season fruits, standard nuts, and your favorite crackers. Even a simple board with one great cheese, one type of salami, and some grapes can be beautiful.
A charcuterie board is more than just food; it’s an invitation to connect, to share, and to celebrate. It’s a creative outlet that allows you to play with flavors and colors, and the end result is a stunning, delicious centerpiece that brings everyone together. I hope this guide inspires you to cast aside any intimidation and build the beautiful board of your dreams for your next celebration. Happy New Year!