Easy Cherry Pie Bars: A Simple Cherry Dessert to Savor
How I stumbled into my favorite cherry shortcut I remember the first time I baked these bars: it was a rainy Saturday and I needed something quick that still felt like a treat. I didn’t want to fuss with a full pie crust or wrestle with fresh cherries, but I did want that sweet-tart cherry…
How I stumbled into my favorite cherry shortcut
I remember the first time I baked these bars: it was a rainy Saturday and I needed something quick that still felt like a treat. I didn’t want to fuss with a full pie crust or wrestle with fresh cherries, but I did want that sweet-tart cherry hit and a buttery base that melts in your mouth. These Easy Cherry Pie Bars: A Simple Cherry Dessert to Savor became my go-to because they are simple, forgiving, and somehow always disappear by the next day. If you liked the idea of small handheld sweets after trying recipes like the Boston Cream Pie Cookies, you will probably love how effortless these are too — they give you that cozy, nostalgic dessert without the ceremony. Boston Cream Pie Cookies
The ingredient lineup that fits in one chat with a friend
I never liked long shopping lists, so this one is perfect. For the dough you need 1 cup softened butter and 1 cup sugar; two large eggs at room temperature help bind everything and add richness, so let them sit out a bit before you start. For flavor there’s 1 teaspoon almond extract and 1 teaspoon vanilla extract, which together give a warm, slightly nutty perfume that pairs beautifully with cherry. The dry ingredients are 2 1/2 cups all-purpose flour and 1/2 teaspoon salt. The star is a 1 (21 oz) can premium cherry pie filling — it keeps things easy and reliably bright red and glossy. For the glaze I mix 1 cup confectioners’ sugar with 1 teaspoon almond extract and 1/2 teaspoon vanilla, adding milk as needed to reach drizzle consistency.
I sometimes think of a double-cherry almond slab pie I bookmarked once when building this recipe; it’s a different format, but the flavors are close cousins and remind me how much I like cherry and almond together. If you want that deeper almond note try comparing ideas from a similar recipe like Double Cherry Almond Slab Pie.
Making it come together (and a few tricks I swear by)
Start by preheating your oven to 350°F (175°C). The little things, like a fully heated oven, matter here because you want a steady bake. I cream the 1 cup softened butter and 1 cup sugar until light and fluffy; it takes a few good minutes with a mixer and you can smell the butter lighten in color and the kitchen starts smelling sweet. Then I add the two large eggs, room temp, along with 1 teaspoon almond extract and 1 teaspoon vanilla extract and beat until glossy. This is the moment it all turns silky and cohesive.
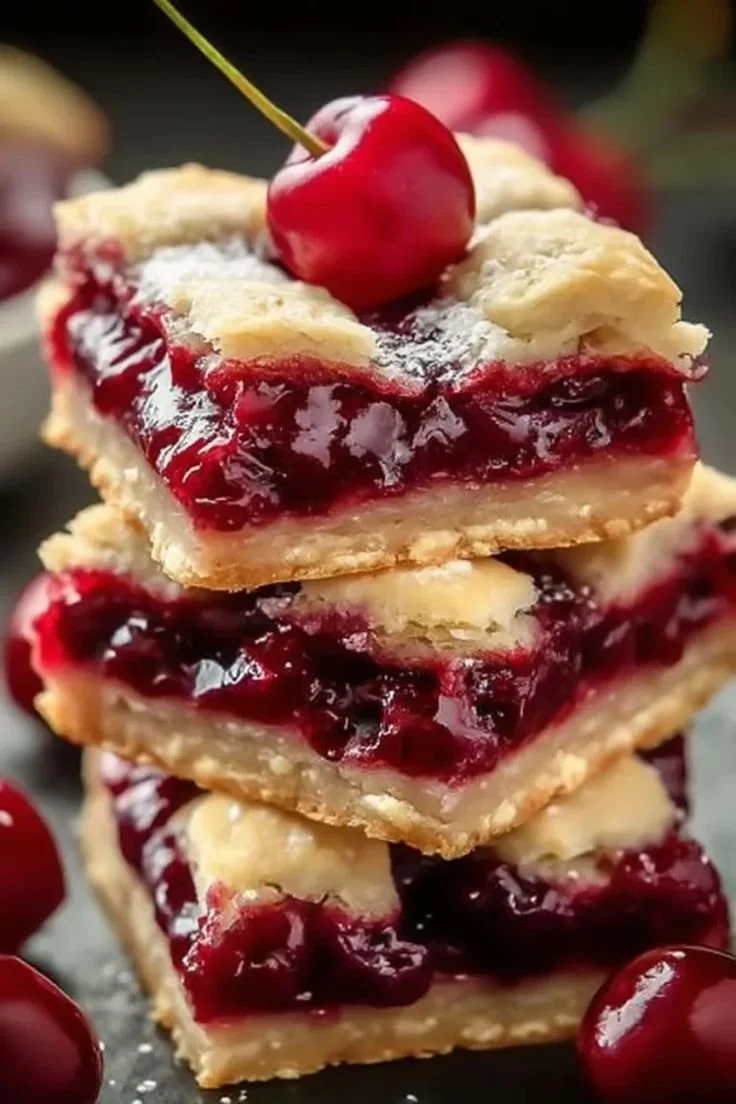
Next, mix in the 2 1/2 cups all-purpose flour and 1/2 teaspoon salt. The dough will be a bit crumbly but comes together when you press it. I press half the dough in pan, making an even layer in a greased 9×13 or similar pan. Pressing evenly gives you that crisp but tender bottom. Spread the cherry filling evenly over that layer and take a moment to admire how shiny and jewel-like the cherries look. Dollop the remaining dough on top; I find that breaking it into pieces and placing them across the cherries gives a rustic, patchwork look that bakes into little golden islands.
Bake 35–40 minutes until the top is golden and you see the cherry filling bubbling gently at the edges. Cool the bars completely before doing anything else so the filling sets and the bars cut cleanly. While they cool I whisk together 1 cup confectioners’ sugar, 1 teaspoon almond extract, 1/2 teaspoon vanilla, and enough milk to make a drizzle. Then I drizzle glaze and serve.
A few tips I use: always let the eggs come to room temperature, that prevents the batter from looking curdled; if your butter is too soft the dough will spread too much, so aim for softened but not melting; and if the cherry filling looks like it will bubble over, place the pan on a rimmed baking sheet to catch any drips.
How to tell when they are done and what to serve them with
You will know the bars are done when the top is a light golden brown and you can hear a faint crackling of the filling as it settles. The edges should pull away slightly from the pan and a toothpick pushed into the dough (not the cherry) should come out with moist crumbs rather than raw batter. If you gently nudge the pan and see cherry bubbling at the seams, that is usually a good sign that the filling is heated through and the bars are set.
I love to serve these warm with a scoop of vanilla ice cream so you get hot and cold and a little extra creaminess. They are also wonderful with a cup of strong coffee in the morning, or a dollop of whipped cream and a few toasted almond flakes when guests arrive. For a simpler approach, I let them cool fully, drizzle the glaze and cut into squares for a portable treat that travels well to potlucks.
Little variations and what to do when plans change
If you feel like tinkering, there are a few simple variations that keep the core idea intact. Swap the almond extract for lemon zest and a little lemon juice in the glaze for a brighter citrus version. Stir in a half cup of chopped toasted almonds into the dough for crunch. If you prefer fresh cherries, pit and cook them down with a bit of sugar and cornstarch until thickened, then use that instead of the canned filling. Another nice switch is to mix some cream cheese into the top dollops for a cream-cheesier, cloud-like finish.
Sometimes the top browns too quickly for my liking; when that happens I tent the pan loosely with foil about 20 minutes into baking to give the filling time to warm without burning the dough. If the filling seems too thin, chill the filled pan for 10 minutes before dolloping and baking; that gives the top dough a chance to firm and stay distinct.
Making extras and keeping leftovers honest
I often make these a day ahead for small gatherings because they actually taste better after the flavors have relaxed. To store leftovers, keep the bars in an airtight container at room temperature for up to two days. If the weather is warm or you added a cream cheese variation, refrigerate and bring to room temperature before serving. They freeze nicely too: wrap individual squares well and freeze up to three months; thaw in the refrigerator overnight and warm briefly in a low oven if you want that fresh-from-the-bakery feel.
A couple more practical tips from the trenches: slice these with a knife dipped in hot water and dried between cuts for clean edges, and if you want perfectly even squares, chill the whole pan until firm before slicing.
Conclusion
If you want a simple walk-through or a slightly different take, I like cross-referencing recipes that inspired this one; for another easy cherry idea that’s similar in spirit, check out this version of cherry pie bars for extra tips and photos at Cherry Pie Bars – The Country Cook.
These bars have become one of my comfort desserts: they smell like butter and almonds as they bake, they look vibrant and cheerful with that glossy cherry layer, and they are forgiving enough that even if your day has been rushed, you can still pull off something that feels homemade and special.

Easy Cherry Pie Bars
Ingredients
Method
- Preheat your oven to 350°F (175°C).
- Cream together the softened butter and sugar until light and fluffy.
- Add the eggs, almond extract, and vanilla extract, beating until glossy.
- Mix in the all-purpose flour and salt until the dough is crumbly.
- Press half of the dough into a greased 9x13 inch pan.
- Spread the cherry filling evenly over the pressed dough.
- Dollop the remaining dough on top in pieces for a rustic look.
- Bake for 35–40 minutes until the top is golden and the filling is bubbling gently.
- Cool completely before cutting.
- Whisk together the confectioners’ sugar, almond extract, vanilla extract, and milk until smooth.
- Drizzle the glaze over the cooled bars before serving.