Easy Frankenstein Crispy Rice Treats
A Halloween Classic I Can’t Resist The first time I made Easy Frankenstein Crispy Rice Treats, my kitchen smelled like warm marshmallows and childhood. There is something about the way melted marshmallow steam rises and the sugary scent fills the room that always transports me back to late-night baking with my mom. If you like…
A Halloween Classic I Can’t Resist
The first time I made Easy Frankenstein Crispy Rice Treats, my kitchen smelled like warm marshmallows and childhood. There is something about the way melted marshmallow steam rises and the sugary scent fills the room that always transports me back to late-night baking with my mom. If you like playful holiday treats that are as fun to decorate as they are to eat, this is the one to try. If you want to see another take on a similar theme, I once followed a Frankenstein Crispy Rice Treats inspiration and then made the recipe my own.
The Small List of Ingredients That Do the Work
You only need a handful of things: nonstick cooking spray, 3 tablespoons unsalted butter, 4 cups mini marshmallows, a 1/4 teaspoon of green food coloring, 6 cups crisp rice cereal (such as Rice Krispies), a (12-ounce) bag of semisweet chocolate chips, black icing for decorating, and candy decorations like candy eyes, sprinkles, and a few mini marshmallows to act as bolts. That simplicity is the charm—nothing fancy, but it all comes together into something whimsical. I always make sure my Dutch oven or large pot is clean and ready before I start; melting in the right vessel makes the texture perfect.
How I Make Them (and the exact method)
I usually start by coating a 9-by-13-inch baking dish with nonstick spray so everything comes out cleanly. Then I melt the butter in a Dutch oven or large pot over low heat and add the marshmallows along with that quarter teaspoon of green food coloring. Stirring for about three minutes, you can tell when the marshmallows are completely melted because the mixture becomes glossy and smooth and the green deepens to a playful shade. At this point I fold in the 6 cups of crisp rice cereal until it is all evenly coated, then I transfer the mixture to the prepared baking dish. I spray my hands with nonstick spray and pat the mixture into an even layer—this keeps the treats from sticking and gives you tidy edges. I always pop the dish into the refrigerator until firm, about an hour; it makes the later steps so much easier.
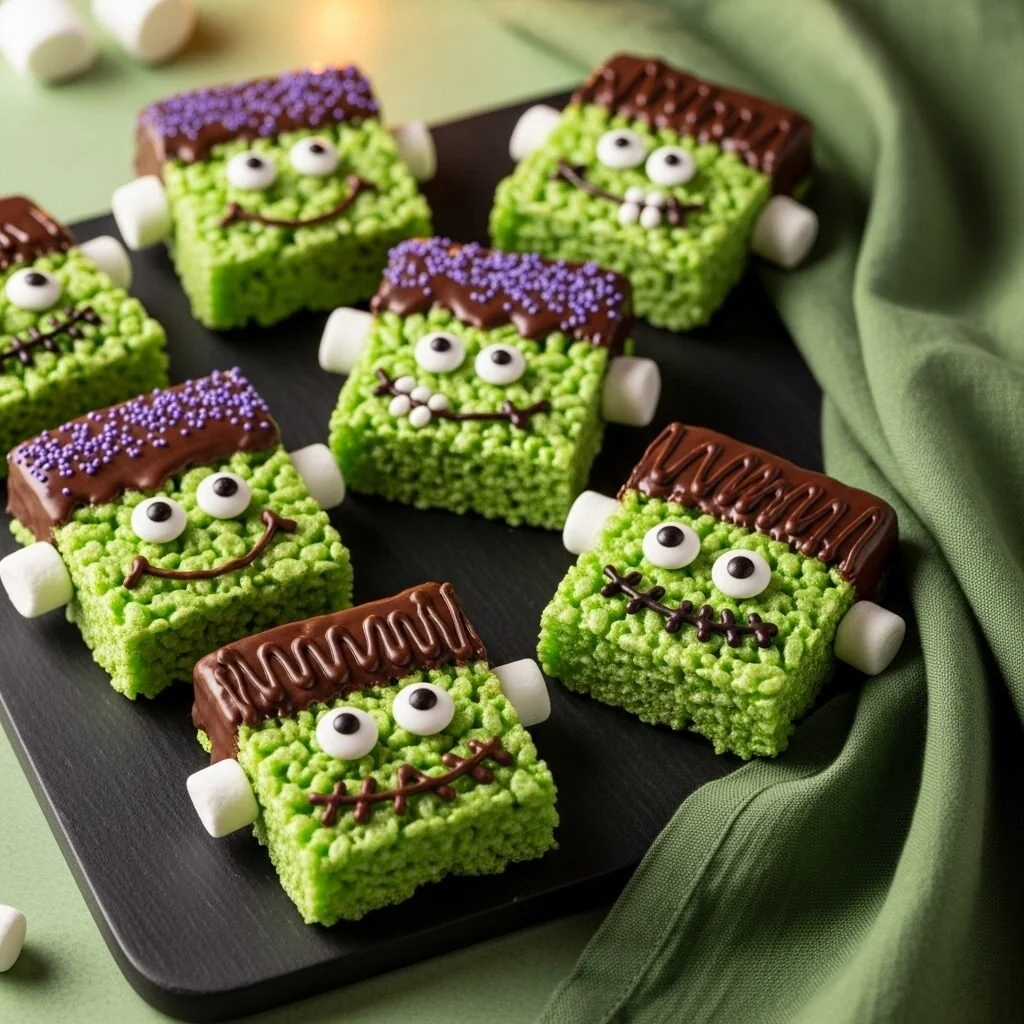
When they are firm, I flip the baking dish onto a cutting board and gently tap to release the slab. Trimming the edges gives clean lines; then I cut the slab in half lengthwise into two long rectangles, and cut each rectangle into five equal pieces so each is about two inches wide. This makes ten Frankenstein faces, just enough for a small party. I line a rimmed baking sheet with wax paper and melt the chocolate chips in the microwave until smooth—stop and stir every 20 seconds so you don’t overheat them.
Now for the fun part: dipping. I dip one edge of each rectangle into the melted chocolate to create the hair pattern. Because the chocolate sets quickly, I work in small batches and use a fork to lift the treats and let the excess drip back into the bowl. Then I use black icing to attach candy eyes, draw scars, mouths, and stitches, and I stick mini marshmallows on the sides of each treat for neck bolts. Drawing with icing is forgiving—you can always add a little more chocolate or use a toothpick to tidy lines. Serve these immediately if you want soft chocolate, or store them in a cool, dry place for later.
Little Tricks I Swear By
One tip I learned the hard way: when melting marshmallows, low and steady heat is your friend. High heat will scorch and make the mixture grainy. Another is to spray your hands with nonstick cooking spray before patting the cereal mixture into the pan; you get smooth, even slabs without losing any of the crunch. If your chocolate seems too thick after melting, add a teaspoon of neutral oil to loosen it up. I also find that chilling the slab for the full hour makes cutting less messy and the dipped edge neater. If you want cleaner lines when you cut, a long sharp knife warmed under hot water and dried will slide through like butter.
When is the treat done right? The marshmallow-cereal balance should be such that the treat holds together without being gummy. When you bite into one, you should hear a little crispness from the cereal and feel that soft, marshmallow chew. The chocolate hair should set firm but not crack in big chunks—smooth and glossy is ideal.
Variations, Pairings, and a Little Memory
I play with variations depending on who I’m making them for. For a kid-friendly bowl, swap semisweet chips for milk chocolate or even white chocolate tinted with a tiny bit of green for a weirdly cute monochrome monster. If you want a fancier adult version, sprinkle crushed peppermint or toasted nuts over the warm chocolate for texture. Another variation is to fold in a half cup of mini chocolate chips into the cereal mix before pressing it into the pan for extra pockets of chocolate in each bite.
These treats pair beautifully with simple things: a glass of cold milk for the kids, or for adults, a cup of strong coffee or a mug of spiced hot chocolate to echo the marshmallow notes. I remember making these for the first time at a sleepover; we decorated faces with whatever we had—sprinkles became scars, and a lone gummy worm made a surprisingly dramatic eye. Those bites were messy and perfect.
If you have leftovers, store them in an airtight container in a cool, dry place. They will stay fresh for several days; refrigeration is optional but can help if your kitchen is warm. I sometimes make them a day ahead and keep them sealed—just don’t forget to bring them to room temperature before serving so the chocolate and marshmallow flavor shines.
If you enjoy experimenting, consider a savory-sweet twist: add a pinch of sea salt to the melted chocolate before dipping, or sprinkle flaky salt on top once the chocolate is almost set. For a tropical spin, replace some of the cereal with toasted coconut flakes.
Conclusion
If you want another inspiration or a slightly different visual on Frankenstein treats, this version from Frankenstein Rice Krispie Treats | 365 Days of Baking and More is a great place to peek for ideas. Making Easy Frankenstein Crispy Rice Treats became my go-to Halloween project because it is quick, forgiving, and endlessly customizable—plus, watching kids’ faces light up when they see their little monsters is the best part of the whole process.
Easy Frankenstein Crispy Rice Treats
Ingredients
Method
- Coat a 9-by-13-inch baking dish with nonstick spray.
- Melt butter in a Dutch oven or large pot over low heat.
- Add mini marshmallows and green food coloring, stirring for about three minutes until melted and glossy.
- Fold in the crisp rice cereal until evenly coated.
- Transfer the mixture to the prepared baking dish and pat down into an even layer using nonstick spray on your hands.
- Refrigerate until firm, about one hour.
- Flip the baking dish onto a cutting board, trim edges, and cut into ten equal pieces.
- Melt chocolate chips in the microwave until smooth, stirring every 20 seconds to prevent overheating.
- Dip one edge of each rectangle into the melted chocolate to create hair.
- Use black icing to attach candy eyes and add details like scars and mouths.
- Stick mini marshmallows on the sides for neck bolts.
- Serve immediately for soft chocolate or store in an airtight container in a cool, dry place.