+10 Easy Healthy Breakfast Recipes for Busy Mornings
Mornings can be a whirlwind, and I know how challenging it can be to find time for a healthy breakfast amid the chaos. That's why I'm excited to share my collection of easy and nutritious recipes that will fuel your day without stealing precious minutes from your busy schedule. From fluffy protein pancakes that'll satisfy…
Mornings can be a whirlwind, and I know how challenging it can be to find time for a healthy breakfast amid the chaos. That's why I'm excited to share my collection of easy and nutritious recipes that will fuel your day without stealing precious minutes from your busy schedule. From fluffy protein pancakes that'll satisfy your sweet tooth to vibrant smoothie bowls packed with goodness, these recipes are not only delightful but also quick to whip up. Get ready to discover my favorite breakfast ideas that make juggling a hectic morning a breeze, helping you start your day energized and nourished!
1. Easy Baked Protein Pancake Bowls (A Healthy Breakfast Boost)
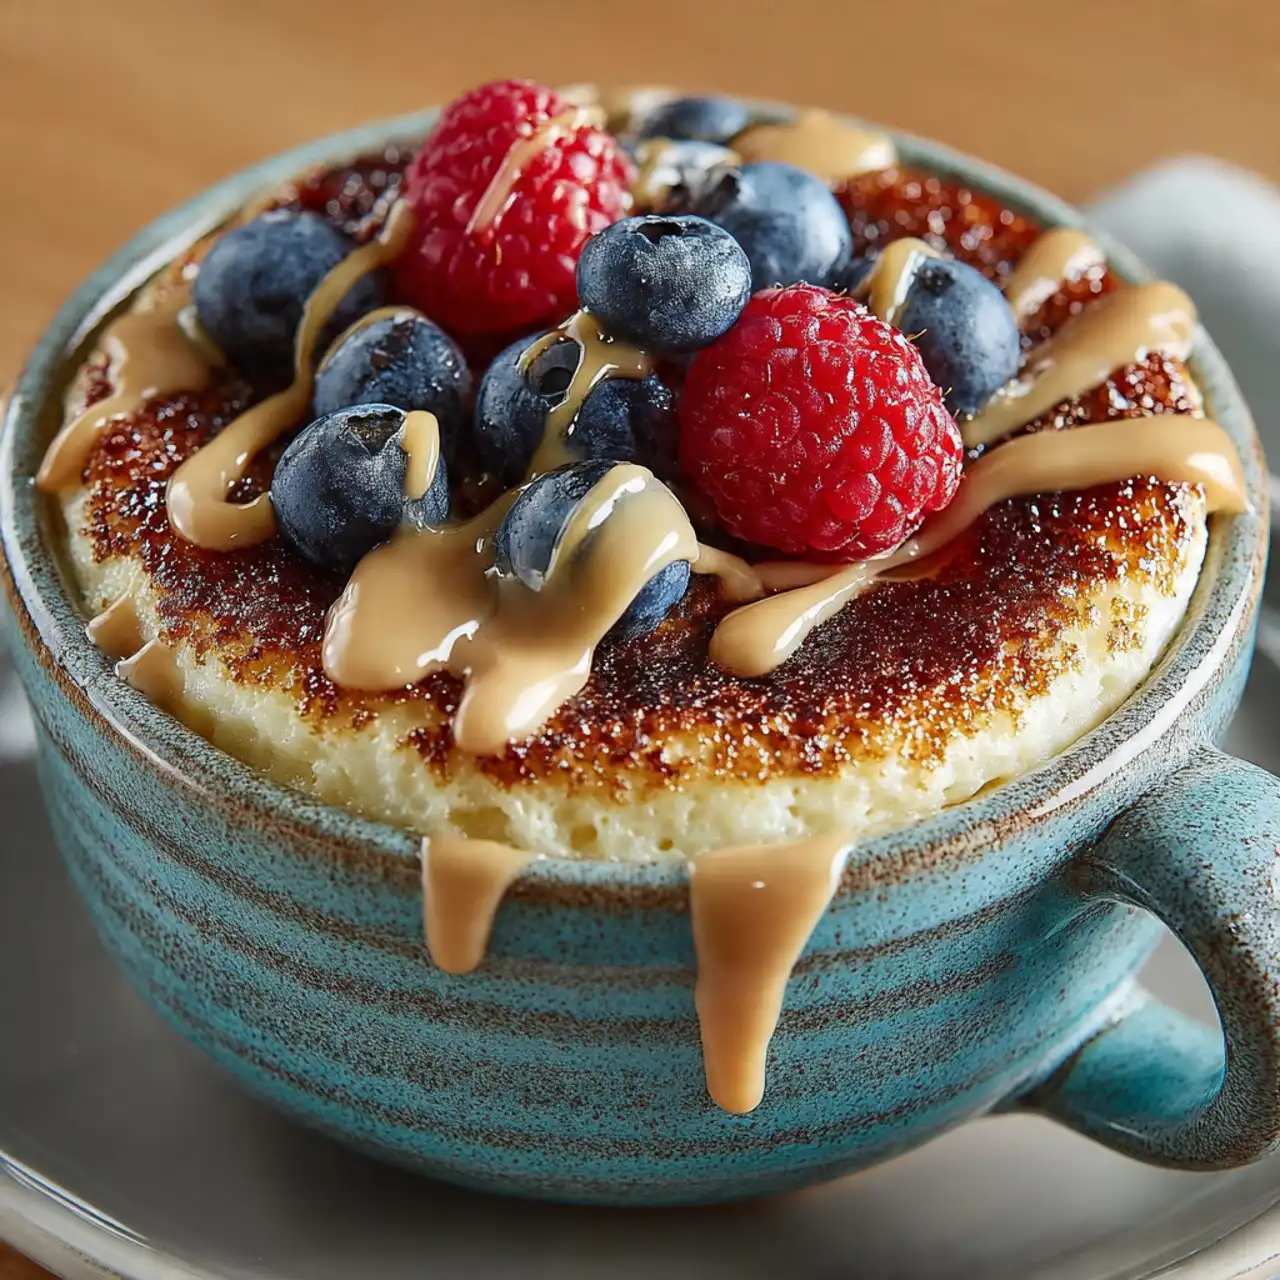
There are mornings that call for something truly warm, cozy, and comforting—something that feels like a treat. But often, those cravings are at odds with our health goals. We want a personal-sized breakfast cake, but we need the fuel of a high-protein meal. What if I told you that you could have both, baked in a single bowl, in under 30 minutes?

Why This Baked Pancake Bowl is a Morning Game-Changer
You are going to be amazed at how simple and satisfying this single-serving breakfast is. Here’s why it’s a must-make recipe:
- Massive Protein Punch: With an incredible 31 grams of protein, this pancake bowl is a powerhouse breakfast that will keep you full, focused, and satisfied all morning long.
- Single-Serving Perfection: This recipe is perfectly portioned for one, eliminating guesswork and making it an ideal, easy breakfast for anyone.
- No Flipping, No Fuss: The entire process happens in one bowl! You mix and bake in the same dish, meaning cleanup is an absolute breeze and the process is foolproof.
- Like a Healthy Breakfast Cake: The texture is the best part. It’s not a flat pancake; it bakes up into a fluffy, moist, cake-like creation that feels incredibly indulgent.
- Completely Customizable: The simple batter is a perfect canvas for your favorite mix-ins and toppings, from berries and chocolate chips to nut butter and yogurt.
Recipe Snapshot
| Prep Time | 10 minutes |
| Cook Time | 22 minutes |
| Cooling Time | 5 minutes |
| Total Time | 37 minutes |
| Servings | 1 bowl |
| Calories | 320 kcal per serving |
| Course | Breakfast |
| Cuisine | American |
| Difficulty/Method | Easy / Baking |
Your Shopping List for This Cozy Breakfast Bowl
This recipe uses a handful of simple, high-protein ingredients to create a truly spectacular meal.
→ For the Batter
- 1 large egg → Provides the structure, moisture, and a protein boost. For a vegan option, use a flax egg.
- 50 g high-protein yogurt → Greek yogurt or Icelandic skyr are perfect for adding creaminess and a lot of protein.
- 70 ml milk → Any kind works! Dairy, soy, or almond milk all provide the necessary liquid for the batter.
- 35 g all-purpose flour → This acts as the base. You can easily substitute with oat, spelt, or a gluten-free blend.
- 25 g protein powder → Vanilla or white chocolate flavors work beautifully here and are key to the high protein content.
- 5 g sweetener of choice (about 1 tsp) → This is optional, depending on the sweetness of your protein powder and your personal taste.
- 1/2 tsp baking powder → The magic ingredient that helps the pancake bowl rise and get fluffy.
→ Topping Suggestions
- Fresh berries → Blueberries or raspberries are fantastic mixed in or piled on top.
- Chocolate chips → A few dark chocolate chips make it feel extra decadent.
- Nut butter → A generous drizzle of peanut or almond butter adds healthy fats and even more protein.
Let’s Bake! Your Step-by-Step Guide
This is one of the easiest “from scratch” breakfasts you’ll ever make. Let’s do it!
Part 1: The One-Bowl Batter
- Preheat and Prep: First things first, preheat your oven to 180°C (356°F). Grab an oven-safe bowl or large ramekin (it should hold at least 650ml or about 2.5 cups to allow room for rising).
- Mix Everything Together: In your chosen bowl, add all the batter ingredients: the egg, yogurt, milk, flour, protein powder, sweetener (if you’re using it), and baking powder.
- Stir Until Smooth: Using a small whisk or a fork, stir everything together directly in the bowl until the batter is smooth and there are no lumps of flour or protein powder.
- Add Your Mix-ins: If you’re adding toppings directly into the batter, like fresh berries or chocolate chips, gently fold them in now.
Part 2: Bake, Cool, and Enjoy!
- Bake to Golden Perfection: Carefully place the bowl in the preheated oven. Bake for 20-22 minutes. You’ll know it’s done when the top is lightly golden brown and a toothpick inserted into the center comes out clean.
- Let It Cool (This is Important!): Let the pancake bowl cool on a wire rack for 5-10 minutes. This step is crucial, as it allows the custardy center to set and firm up properly.
- Garnish and Devour: Enjoy your baked protein pancake bowl plain, straight from the ramekin, or go all out with toppings like a drizzle of peanut butter, more fresh berries, or a dollop of yogurt.
Baked Protein Pancake Bowl
Ingredients
Equipment
Method
-
Preheat the oven to 180°C (356°F).
-
In an oven-safe bowl or ramekin (at least 650ml capacity), combine the egg, high-protein yogurt, milk, flour, protein powder, sweetener (if using), and baking powder.
-
Stir with a fork or small whisk directly in the bowl until the batter is smooth.
-
If desired, gently stir in your favorite mix-ins such as berries or chocolate chips.
-
Carefully place the bowl in the preheated oven. Bake for 20-22 minutes, or until the top is lightly golden and a toothpick inserted into the center comes out clean.
-
Let the pancake bowl cool for at least 5 minutes to allow the center to set and firm up.
-
Enjoy your Baked Protein Pancake Bowl plain, or add extra toppings like peanut butter, syrup, or yogurt.
Notes
Vegan Option: To make this vegan, use a flax egg, dairy-free yogurt, plant-based milk, and a vegan protein powder.
WiseRecipes’ Top Tips for the Perfect Pancake Bowl
Follow these simple pointers for a flawless, fluffy result every single time.
- Don’t Overmix the Batter. Just like with regular pancakes, you want to mix only until the ingredients are combined and smooth. Overmixing can develop the gluten and result in a dense or tough texture.
- Choose the Right Size Bowl. It’s important to use a bowl that’s large enough. A capacity of at least 650ml (about 2.5 cups) gives the pancake enough room to rise and puff up without overflowing.
- Don’t Skip the Cooling Time. I know it’s tempting to dig in straight from the oven, but that 5-minute rest is essential. It allows the center to finish cooking with residual heat and firm up, giving you that perfect cakey texture.
- Know Your Protein Powder. Different protein powders (whey vs. plant-based) can have different absorbencies. If you find your batter is too thick, add an extra splash of milk. If it’s too thin, add a little more flour or protein powder.
- Meal Prep Like a Pro. You can bake several of these at once in individual ramekins. Let them cool completely, then cover and store in the fridge. They make an amazing grab-and-go breakfast that can be enjoyed cold or quickly reheated in the microwave.
Keep It Fresh! Storing Your Pancake Bowls
These bowls are perfect for making ahead of time. Here’s how to store them.
- Refrigerator: Once completely cool, you can cover the bowl and store it in the fridge for up to 5 days. Enjoy it cold or reheat in the microwave for 30-60 seconds.
- Freezing: Let the pancake bowl cool completely, then you can either freeze it directly in its oven-safe container (if it’s freezer-safe) or pop it out and wrap it well. Freeze for up to 1 month. Thaw in the fridge overnight.
FAQs: Your Baked Pancake Bowl Questions
Can I make this vegan and dairy-free?
Yes, absolutely! The recipe is very adaptable. Use a flax egg (1 tbsp ground flaxseed + 3 tbsp water), a dairy-free yogurt alternative, your favorite plant-based milk (like soy or almond), and a vegan protein powder.
Can I make this without protein powder?
You can! If you omit the protein powder, you’ll need to adjust the flour and milk. Reduce the flour by about 15g and you may need a little less milk. Start with about 50ml and add more if needed. Note that this will significantly lower the protein content of the final dish.
My pancake bowl came out dense and gummy. What happened?
This is usually caused by one of two things: overmixing the batter, which makes it tough, or not letting it cool long enough. The cooling period is when the center firms up from custardy to cakey. Make sure you give it at least 5 minutes to rest after baking.
Can I use different types of flour?
Definitely. This recipe is very flexible. Whole wheat, spelt, or buckwheat flour would add a nuttier, heartier texture. For a gluten-free version, a good quality all-purpose GF flour blend or oat flour would work beautifully.
Final Thoughts: Your Personal Breakfast Cake
This Baked Protein Pancake Bowl is more than just a breakfast; it’s a warm, comforting, and nourishing way to start your day. It’s proof that you can have your “cake” and get your protein in, too. It’s the perfect, simple recipe to add to your rotation for a breakfast that feels special any day of the week. Enjoy every spoonful!
2. Fluffy Chocolate Protein Pancakes (Healthy Breakfast Idea)
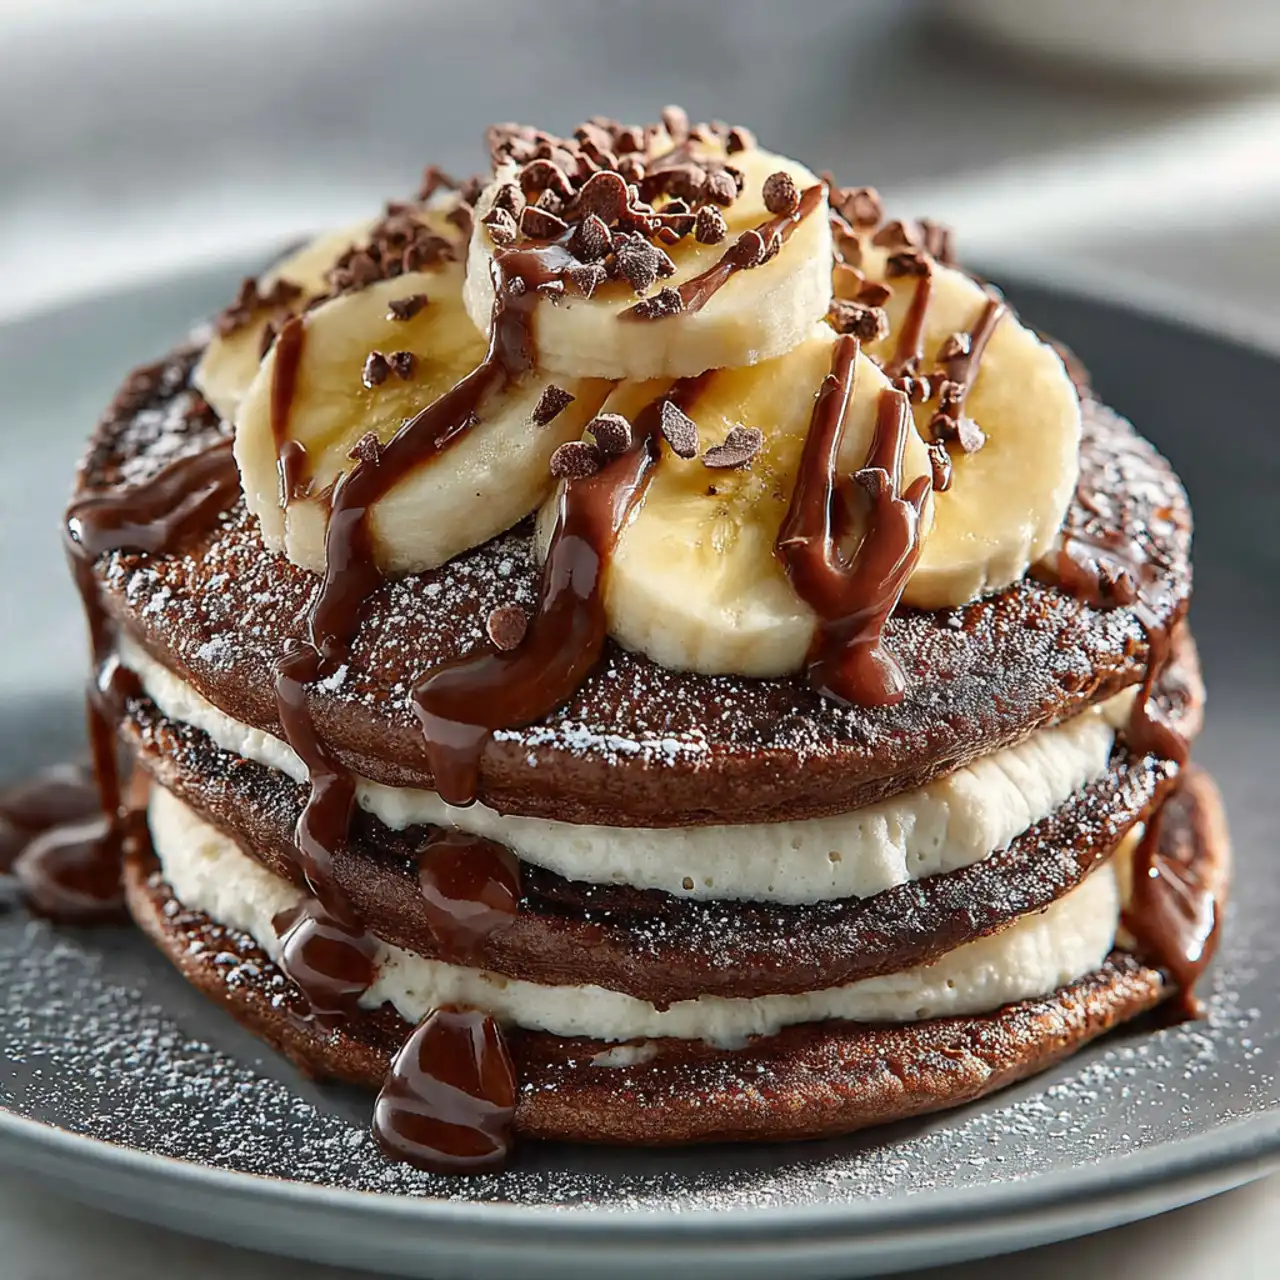
Let’s have a frank conversation about protein pancakes. Too often, they promise a healthy, muscle-building breakfast but deliver a plate of dry, rubbery discs that taste more like cardboard than a treat. I’ve been there, and I was determined to create a recipe that breaks the mold. This, my friends, is that recipe. These are the rich, fluffy, genuinely delicious chocolate protein pancakes you’ve been searching for.
This isn’t just another pancake recipe with some protein powder thrown in. It’s a thoughtfully crafted formula for success. The magic happens in the blender, where ripe bananas, rolled oats, and eggs combine to create a naturally sweet and wonderfully textured base. The cocoa and chocolate protein powder then transform it into a deeply flavorful, double-chocolate dream.

Why These Protein Pancakes Are a Morning Win
You are going to be so impressed by the amazing texture and flavor of these pancakes. They are a true game-changer. Here’s why you’ll love them:
- Packed with Protein: With a substantial 16 grams of protein per serving, these pancakes are designed to keep you full, satisfied, and energized for hours.
- Incredibly Fluffy Texture: Say goodbye to dense, chewy protein pancakes. The combination of blended oats and eggs creates a surprisingly light and fluffy result.
- Made in a Blender in Minutes: The entire batter comes together in a high-speed blender. This means a perfectly smooth consistency and the easiest cleanup imaginable.
- Rich, Decadent Chocolate Flavor: With both cocoa powder and chocolate protein powder, these pancakes deliver a deep, satisfying chocolate taste that feels like a treat.
- No Added Sugar & Gluten-Free Friendly: These pancakes are naturally sweetened with ripe bananas and can be made completely gluten-free by using certified GF oats.
Recipe Snapshot
| Prep Time | 10 minutes |
| Cook Time | 7 minutes |
| Total Time | 17 minutes |
| Servings | 4 pancakes |
| Calories | 225 kcal per serving |
| Course | Breakfast, Snack |
| Cuisine | American, Healthy |
| Difficulty/Method | Easy / Blender |
Your Shopping List for These Power Pancakes
This recipe uses a handful of simple, wholesome ingredients to create a powerhouse breakfastz
→ For the Pancake Batter
- 4 large eggs → The protein-rich base that helps bind and create a fluffy texture.
- 2 ripe bananas → Our natural sweetener! The riper they are (with lots of brown spots), the sweeter your pancakes will be.
- 3/4 cup rolled oats → These act as our flour, providing fiber and a wonderful texture. Use certified gluten-free if needed.
- 3 tbsp chocolate protein powder → Use your favorite brand—whey, casein, or a plant-based blend will work.
- 3 tbsp unsweetened cocoa powder → For that deep, rich, authentic chocolate flavor.
- 1 tsp cinnamon → A touch of warm spice that beautifully complements the chocolate and banana.
- Non-stick spray or oil → For the skillet to ensure a perfect flip every time.
→ Optional (but delicious!) Toppings
- Sliced bananas
- Dark chocolate drizzle
- Cacao nibs for crunch
Let’s Blend! Your Step-by-Step Guide
This process is so simple and fast, you’ll have a stack of warm pancakes in no time.
Part 1: The Blender Batter
- Blend the Base: In a high-speed blender, add the eggs, ripe bananas, and rolled oats. Secure the lid and blend on a low-to-medium speed for 15–30 seconds, until the mixture is smooth.
- Add the Powders: Add the chocolate protein powder, unsweetened cocoa powder, and cinnamon to the blender. Blend again for another 30–45 seconds until the batter is completely smooth, scraping down the sides if necessary.
Part 2: Cook to Fluffy Perfection
- Preheat the Skillet: Preheat a large non-stick skillet or griddle over medium heat. Once hot, coat it with non-stick spray or a light layer of oil.
- Cook the Pancakes: Pour about 1/3 cup of batter per pancake onto the hot skillet. Cook for about 5 minutes on the first side. You’ll see bubbles forming on the surface and the edges will look set.
- Flip and Finish: Carefully flip the pancakes and cook for another 2 minutes on the second side, until cooked through.
- Serve and Enjoy: Serve the pancakes immediately, warm from the skillet, with your favorite toppings like banana slices, a drizzle of melted dark chocolate, or a sprinkle of cacao nibs.
Fluffy Chocolate Protein Pancakes
Ingredients
Equipment
Method
-
Add eggs, bananas, and rolled oats to a high-speed blender. Blend on low for 15–30 seconds until smooth.
-
Add chocolate protein powder, cocoa powder, and cinnamon. Blend again for 30–45 seconds until the batter is fully smooth, scraping down the sides if needed.
-
Preheat a non-stick skillet or griddle over medium heat and spray with oil.
-
Pour 1/3 cup of batter per pancake onto the skillet. Cook for about 5 minutes, until bubbles form on the surface and the edges look set.
-
Flip carefully and cook for another 2 minutes on the other side.
-
Serve immediately with toppings like banana slices, chocolate drizzle, or cacao nibs.
Notes
Storage: Freeze leftover pancakes with a layer of parchment paper between each one for up to 3 months. Reheat in a toaster or microwave.
WiseRecipes’ Top Tips for the Best Protein Pancakes
Follow these simple rules for a perfect, fluffy stack every single time.
- Use Very Ripe Bananas. This is key for sweetness and moisture. Look for bananas that are heavily speckled with brown spots. They provide all the sweetness you need without any added sugar.
- Let the Batter Rest for a Minute. After blending, let the batter sit for a minute or two. This allows the oats to absorb some of the liquid, which helps thicken the batter and results in a fluffier pancake.
- Medium Heat is Your Best Friend. Cooking these pancakes over medium heat is crucial. Too high, and the outside will burn before the inside is cooked. Too low, and they won’t get fluffy. Medium heat allows them to cook through evenly.
- Don’t Overcrowd the Pan. Give your pancakes enough space on the skillet to spread. Cooking too many at once will trap steam and prevent them from getting a nice golden crust.
- Choose a Protein Powder You Love. Since it’s a key ingredient, the flavor of your protein powder will come through. Use a high-quality chocolate protein powder that you enjoy the taste of on its own.
Keep Them Fresh! Storing & Reheating
These pancakes are fantastic for meal prep. Here’s how to store them.
- Refrigerator: Store leftover cooled pancakes in an airtight container in the fridge for up to 3 days.
- Freezing: This is the best way to store them long-term! Once completely cool, stack the pancakes with a small piece of parchment paper between each layer to prevent sticking. Place the stack in a freezer-safe bag and freeze for up to 3 months.
- Reheating: You can reheat the pancakes from frozen or refrigerated in a toaster, microwave, or a warm skillet until heated through.
FAQs: Your Protein Pancake Questions, Answered
Can I make these without a blender?
You can try, but a blender is highly recommended. The blender is what turns the rolled oats into a fine “flour” and creates a smooth batter. If you don’t have one, you could try using oat flour instead of rolled oats and whisking everything very vigorously by hand, but the texture might not be as smooth.
What kind of protein powder should I use?
Most types will work well here. Whey, casein, or a plant-based protein blend in a chocolate flavor are all great options. Just be aware that some plant-based powders can be more absorbent, so you might need to add a splash more liquid if your batter seems too thick.
Can I make these without bananas?
The bananas provide both sweetness and moisture. You could try substituting them with about 1/2 cup of pumpkin purée or unsweetened applesauce, but you may need to add a separate sweetener like maple syrup or stevia, and the texture will be slightly different.
My pancakes are falling apart when I flip them. Why?
This usually means one of two things: the heat is too low and they haven’t set enough, or you’re trying to flip them too soon. Wait until you see bubbles across the surface and the edges look dry and firm before you attempt to flip.
Final Thoughts: A Breakfast That Does It All
It’s a rare and wonderful thing to find a recipe that tastes like an indulgence but works hard for your body. These Fluffy Chocolate Protein Pancakes are exactly that. They are the perfect, satisfying answer to your breakfast cravings and fitness goals, all blended up into one easy and delicious package. I hope you love them! Happy cooking.
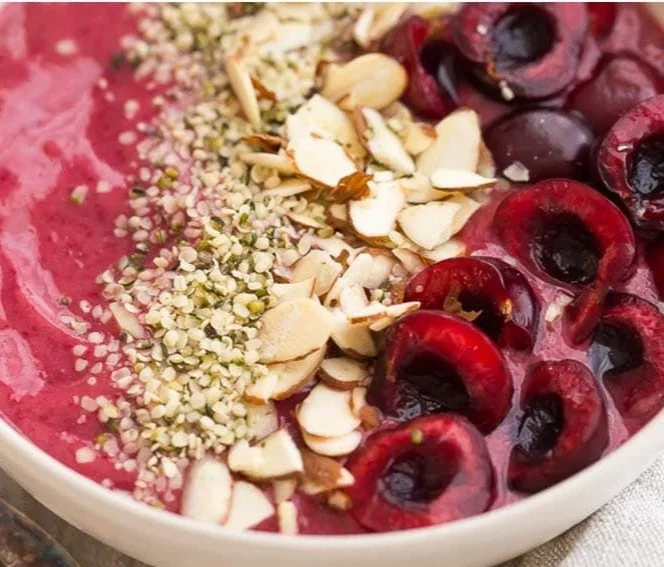
3. The Ultimate No-Bake Berry Cheesecake Bowls (Healthy Breakfast Bowls!)
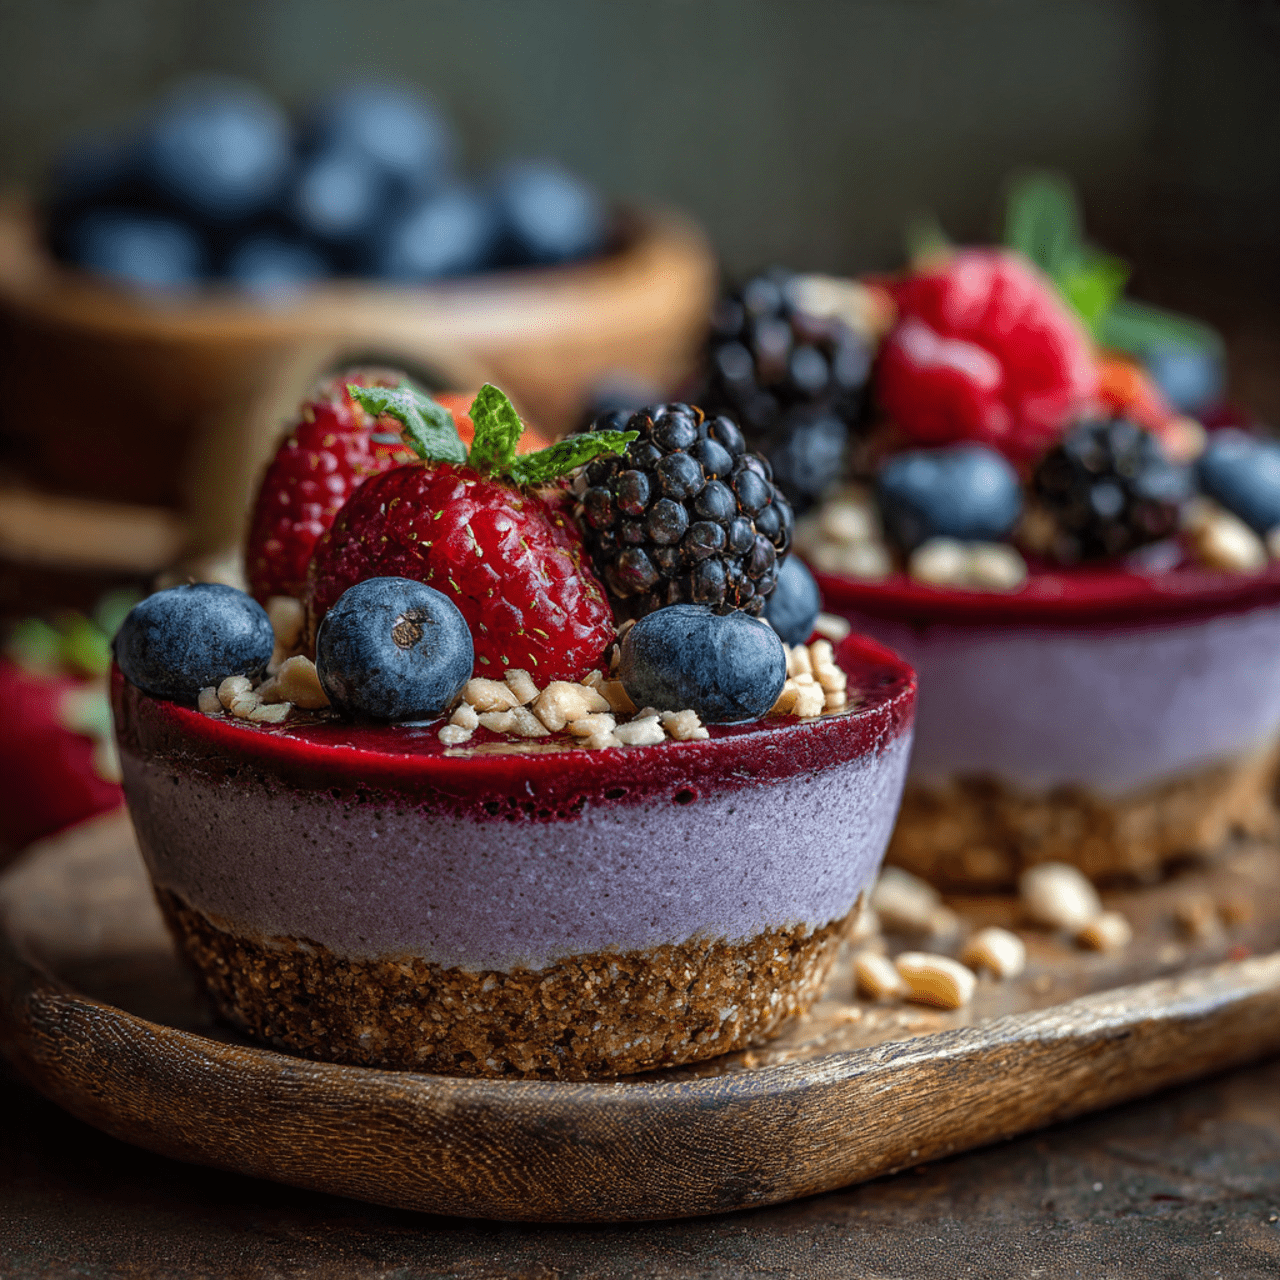
Let’s be honest: having dessert for breakfast is the ultimate dream. But what if I told you that you could indulge in a creamy, decadent cheesecake experience that is actually fueling your body with whole foods, healthy fats, and fruit? That is the genius of these No-Bake Berry Cheesecake Bowls. These aren’t just desserts in disguise; they are nutrient-dense healthy breakfast bowls that will completely revolutionize your morning routine.
I promise you, the first time you taste that cashew cream filling, you won’t believe it’s not cheese. Combined with the warm, homemade berry compote, it feels like a luxury hotel brunch item. Whether you are meal-prepping for a busy week or hosting a special vegan-friendly brunch, these bowls are a show-stopper. They are luscious, vibrant, and proof that healthy eating can feel incredibly indulgent.
Get ready to treat yourself to a breakfast that tastes like a cheat day but fuels you like a superfood meal.

Why These Cheesecake Bowls Will Be Your New Morning Obsession
You are going to be completely blown away by the texture and flavor of this plant-based recipe. It is a standout breakfast for so many reasons:
- Nutrient-Dense Energy: Unlike sugary cereals, this bowl is packed with healthy fats from cashews and almonds, plus fiber from the dates and berries. It provides sustained energy that keeps you full for hours.
- Dairy-Free & Vegan: This recipe achieves a perfect cheesecake texture without a drop of dairy, making it perfect for those with lactose intolerance or anyone following a plant-based diet.
- No-Bake Simplicity: Keep the oven off! The crust comes together in a food processor and the filling in a blender. It’s a cool, refreshing kitchen project.
- The Homemade Compote: While fresh fruit is great, taking 10 minutes to simmer the berries creates a thick, jammy sauce that bleeds into the white cream filling beautifully.
- Meal Prep Friendly: These bowls store wonderfully in the fridge. In fact, they get even better as the crust firms up and the filling chills, making them the ultimate grab-and-go breakfast treat.
Recipe Snapshot
| Prep Time | 20 minutes |
| Cook Time | 10 minutes |
| Total Time | 30 minutes |
| Servings | 4 bowls |
| Calories | ~410 kcal per bowl* |
| Course | Breakfast, Snack |
| Cuisine | Vegan / Health Food |
| Difficulty/Method | Easy / Blending |
*Nutrition is an estimate based on ingredients.
Your Shopping List for Plant-Based Perfection
This recipe uses whole, raw ingredients to create a magical texture. Here is what you need:
→ For the Date-Nut Crust
- ¼ cup raw almonds → Provides a great crunch and structure for the base.
- ¼ cup Medjool dates → Pitted. These act as the sticky glue that holds the crust together and adds natural caramel sweetness.
- Pinch of salt → Essential to pop the flavors of the nuts.
→ For the Creamy Cashew Filling
- 1 ½ cups raw cashews → Soaked. This is the most important ingredient! When blended, they turn into a neutral, ultra-creamy base.
- ¼ cup plain coconut milk yogurt → Adds probiotics and a slight tang that mimics cream cheese.
- 3 tablespoons maple syrup → For refined-sugar-free sweetness.
- 1 tablespoon lemon juice → The acidity creates that signature “cheesecake” tang.
- ½ cup water → To help the blender create a smooth vortex.
→ For the Berry Compote
- ¾ cup fresh blackberries & ¾ cup fresh blueberries → The combination of tart and sweet berries is perfect.
- 3 tablespoons coconut sugar → A lower-glycemic sweetener with a lovely brown sugar flavor.
- 2 tablespoons water → To help break down the fruit.
Let’s Make Breakfast! Your Step-by-Step Guide
Ready to create the most decadent healthy breakfast ever? Let’s get blending.
Part 1: The Crust and Filling
- Prep the Cashews: Before you start, make sure your cashews have soaked in warm water for at least 30 minutes. Drain and rinse them well.
- Process the Crust: In a food processor, combine the raw almonds, pitted dates, and a pinch of salt. Pulse until the almonds are broken down and the mixture looks like coarse, wet sand. If you pinch it, it should stick together. Pour this into a bowl and set aside.
- Blend the “Cheese”: Place the drained cashews, ½ cup water, coconut yogurt, maple syrup, lemon juice, and a pinch of salt into a high-speed blender. Blend on high until the mixture is completely silky smooth. There should be no gritty nut pieces left. Pop the blender container in the fridge to chill while you make the fruit.
Part 2: The Berry Compote
- Simmer the Fruit: In a small saucepan over medium heat, combine the blackberries, blueberries, coconut sugar, and 2 tablespoons of water. Bring it to a boil.
- Reduce: Lower the heat to medium-low and let it simmer for 7 to 10 minutes. Stir occasionally. You want the berries to burst and the liquid to thicken into a syrup. Remove from heat and let it cool slightly.
Part 3: Assemble the Bowls
- Layer the Base: Divide the almond-date crust mixture among 4 small glass serving bowls or jars (about 2 tablespoons per bowl). Use your fingers or the back of a spoon to press it down firmly to create a solid bottom layer.
- Add the Cream: Spoon 5 to 6 tablespoons of the cashew cheesecake filling over the crusts. Tap the jars lightly on the counter to settle the filling and remove air bubbles.
- Top and Chill: Spoon the warm (or cooled) berry compote over the white filling. For the firmest texture, chill the assembled bowls for 30 minutes before serving. Dig in!
No-Bake Berry Cheesecake Bowls
Ingredients
Equipment
Method
-
Place almonds, dates, and a pinch of salt in a food processor. Pulse until the mixture resembles coarse, sticky sand.
-
Divide the crust mixture among 4 small glasses. Press down gently to compact it into a base.
-
Drain and rinse the soaked cashews. Add them to a high-speed blender with the water, coconut yogurt, maple syrup, lemon juice, and salt.
-
Blend on high until completely smooth and creamy. Spoon 5-6 tablespoons of filling into each glass over the crust. Chill while making the topping.
-
In a small pan, combine berries, coconut sugar, and 2 tablespoons water. Bring to a boil, then simmer on medium-low for 7-10 minutes until thickened. Let cool slightly.
-
Spoon the berry topping onto the cheesecake layer. Chill for 30 minutes to firm up before serving.
Notes
Dates: If your dates are dry, soak them in hot water for 5 minutes before processing so the crust sticks together.
Storage: These bowls keep well in the fridge for up to 4 days, making them excellent for meal prep.
WiseRecipes’ Top Tips for Creamy Cashew Bowls
These simple secrets will ensure your vegan cheesecake bowls are velvety and delicious.
- High-Speed Blender is Key. To get that texture that truly mimics dairy cream cheese, you need a powerful blender (like a Vitamix or Ninja). If using a standard blender, soak the cashews overnight instead of just 30 minutes to ensure they are soft enough to pulverize.
- Soft Dates Matter. If your Medjool dates are dry or hard, soak them in hot water for 5 minutes and drain them before processing. This ensures your crust binds together rather than remaining a dry powder.
- Adjust the Tang. The “cheesecake” flavor comes from the lemon juice. Taste your filling before assembling. If you want it tangier, add another teaspoon of lemon juice.
- Chill for Firmness. While you can eat this immediately, the coconut yogurt and cashew fats firm up when cold. A 30-minute chill creates a much more authentic cheesecake mouthfeel.
- Cool the Compote. Don’t spoon boiling hot fruit onto the cold filling, or it might become soupy. Let the berry mixture cool to room temperature (or warm) before topping.
Creative Twists: Make It Your Own
This base recipe is a blank canvas. Try these variations:
- Chocolate Cheesecake: Add 2 tablespoons of cacao powder to the blender for a chocolate version. Skip the berry compote and top with raspberries.
- Key Lime: Swap the lemon juice for lime juice and add lime zest to the filling. Top with coconut flakes instead of berries.
- Peanut Butter Crust: Add a tablespoon of peanut butter to the crust mixture for a nutty, savory twist.
Keep It Fresh! Storing Your Breakfast Bowls
These are amazing for meal prep!
- Refrigerator: Store the fully assembled bowls in airtight jars or containers in the fridge for up to 4 days. The crust will soften slightly as it sits, which is delicious.
- Freezing: You can freeze these! Store them in freezer-safe jars for up to 1 month. Thaw them in the refrigerator overnight before eating. The texture remains surprisingly creamy.
FAQs: Your Cheesecake Bowl Questions, Answered!
Q: Can I use roasted cashews? A: It is best to use raw cashews. Roasted cashews have a distinct nutty flavor and darker color that will make the filling taste like cashew butter rather than neutral “cheesecake.” Q: Is this recipe gluten-free? A: Yes! All the ingredients—nuts, fruit, dates, and yogurt—are naturally gluten-free. Q: Can I use frozen berries for the topping? A: Absolutely. Frozen berries work perfectly for compotes because they release their juices quickly. You may not even need to add the extra water if using frozen fruit. Q: What if I don’t have a food processor for the crust? A: You can chop the nuts and dates very finely with a sharp knife and mix them in a bowl. It will be a bit more rustic and chunky, but still delicious.
Final Thoughts: A Morning Indulgence
Starting your day with something that feels like a treat but nourishes like a meal is the best way to set a positive tone. These No-Bake Berry Cheesecake Bowls prove that healthy breakfast bowls don’t have to be savory or boring. They are lush, vibrant, and deeply satisfying. I hope you enjoy this little slice of breakfast heaven! Happy blending!
4. The Ultimate Mexican Breakfast Bowls with Sweet Potato & Turkey Chorizo (Healthy Breakfast Bowls!)
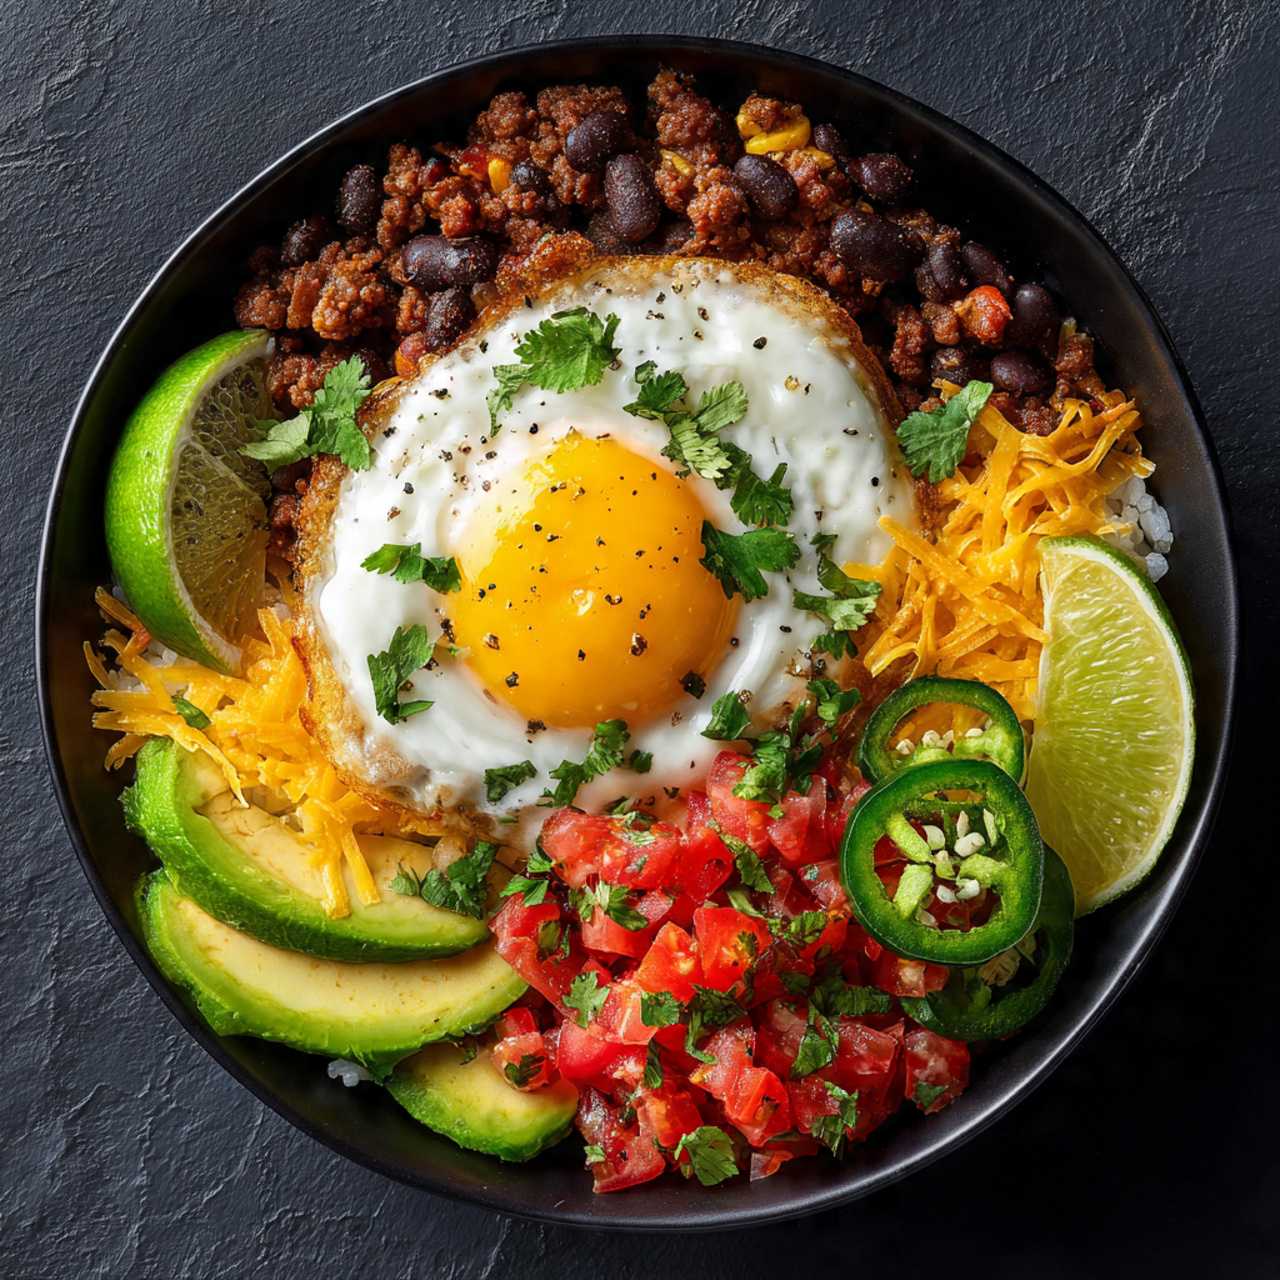
If you are looking to trade your morning toast for something that packs a serious flavor punch, you have arrived at the right place. These Mexican Breakfast Bowls are the definition of a power breakfast. We are talking about tender roasted sweet potatoes, smoky black beans, savory turkey chorizo, and a perfectly cooked egg, all brought together with fresh avocado and zesty cilantro. It is one of the most satisfying healthy breakfast bowls you will ever make.
I promise you, breaking that runny yolk over the warm, spiced beans and potatoes is a moment of pure culinary joy. Whether you are meal-prepping for a busy work week or hosting a festive brunch, this bowl hits every single mark. It’s savory, spicy, fresh, and deeply nourishing.
Get ready to wake up your tastebuds. This is the fiesta your morning routine has been waiting for.

Why These Mexican Bowls Will Be Your New Morning Go-To
You are going to be completely obsessed with the vibrant flavors and staying power of this meal. It is a breakfast standout for so many reasons:
- A Flavor Explosion: This isn’t a bland health bowl. Between the cumin-spiced beans, the chili-roasted potatoes, and the savory chorizo, every bite is packed with bold Mexican-inspired flavors.
- High Protein & Fiber: With eggs, turkey chorizo, and black beans, this bowl is a protein powerhouse that will keep you fueled all morning long.
- Smart Swaps: Using sweet potatoes instead of white potatoes adds a complex carbohydrate that burns slower, and turkey chorizo lightens up the dish without sacrificing that signature spice.
- Meal Prep Friendly: The roasted veggie base and the bean mixture store beautifully, allowing you to assemble healthy breakfast bowls in just minutes throughout the week.
- Totally Customizable: Want it vegan? Use soy chorizo. Don’t like runny eggs? Scramble them! This recipe is a flexible template for whatever you love.
Recipe Snapshot
| Prep Time | 15 minutes |
| Cook Time | 20 minutes |
| Total Time | 35 minutes |
| Servings | 4 bowls |
| Calories | 442 kcal per bowl |
| Course | Breakfast, Brunch |
| Cuisine | Mexican-Inspired |
| Difficulty/Method | Easy / Roasting & Stovetop |
Your Shopping List for a Fiesta Breakfast
This recipe combines fresh produce with pantry staples to create a vibrant, colorful meal.
→ The Roasted Base
- 1 large sweet potato (or yam) → Diced into ½-inch cubes. Sweet potatoes add a lovely sweetness that balances the spicy chorizo.
- ½ onion → Diced, to roast alongside the potatoes for savory depth.
- 2 tablespoons olive oil → For roasting.
- Seasonings: Generous pinches of salt, pepper, and chili powder.
→ The Protein & Beans
- 2 cups Turkey Chorizo → A lean, flavorful alternative to pork chorizo. You can also use vegan chorizo or soyrizo for a plant-based option!
- 1 ½ cups cooked black beans → One 14-ounce can, drained and rinsed.
- Bean Seasoning: 1 teaspoon cumin, extra chili powder, and a pinch of salt.
- 4 Eggs → Cooked to your preference (fried, poached, or scrambled).
→ The Fresh Garnishes
- Avocado → Essential for that creamy, cooling contrast.
- Fresh herbs → Cilantro and scallions add a burst of freshness.
- Toppings → Hot sauce, sour cream (or Greek yogurt), and diced tomatoes or sautéed peppers if you have them!
Let’s Cook! Your Step-by-Step Guide
Ready to spice up your morning? Let’s get these bowls built.
Part 1: Roast the Sweet Potatoes
- Preheat and Prep: Preheat your oven to 400°F. Line a baking sheet with parchment paper for easy cleanup.
- Season and Roast: Place the diced sweet potatoes and onions on the baking sheet. Drizzle with olive oil and season generously with salt, pepper, and chili powder. Toss to coat evenly. Roast for about 20 minutes, flipping halfway through, until the potatoes are tender and caramelized on the edges. (Note: You can also sear them in a skillet over medium heat for 10-15 minutes if you prefer not to use the oven).
Part 2: Cook the Proteins
- Cook the Chorizo: While the potatoes roast, heat a skillet over medium heat with a little oil. Add the turkey chorizo (removed from casing if necessary) and cook, breaking it up into crumbles, until browned and cooked through. Remove from the pan and set aside.
- Simmer the Beans: In the same skillet (flavor bonus!), add the black beans. Season them with cumin, chili powder, and a pinch of salt. Stir and heat until they are warm and fragrant.
Part 3: The Eggs and Assembly
- Cook the Eggs: Prepare your eggs exactly how you like them. I recommend sunny-side up or over-easy so the runny yolk creates a rich sauce for the bowl, but scrambled is delicious too!
- Assemble the Bowls: Divide the roasted sweet potato mixture among 4 bowls. Add a portion of the turkey chorizo and the seasoned black beans to each.
- Top and Serve: Top each bowl with a cooked egg, slices of fresh avocado, chopped cilantro, and scallions. Finish with a dollop of sour cream and a few dashes of your favorite hot sauce.
Mexican Breakfast Bowls
Ingredients
Equipment
Method
-
Preheat oven to 400°F. Toss diced onion and sweet potato with olive oil. Season generously with salt, pepper, and chili powder.
-
Roast on a parchment-lined baking sheet for about 20 minutes until tender. (Alternatively, sear in a skillet over medium heat for 10-15 minutes).
-
If using chorizo, cook it in a skillet with a little oil until browned, cooked through, and broken into crumbles.
-
Heat the black beans in a pan or microwave. Season with the cumin, chili powder, and a pinch of salt.
-
Prepare the eggs to your liking – scrambled, sunny side up, or poached work best.
-
Divide the roasted sweet potatoes, chorizo, and seasoned black beans among 4 bowls.
-
Top each bowl with an egg, avocado slices, cilantro, and scallions. Serve with hot sauce and a dollop of sour cream.
Notes
Make Ahead: The roasted potatoes and chorizo/bean mixture can be prepped days in advance for quick assembly.
Vegan Option: Use vegan chorizo (soyrizo) and omit the egg/sour cream for a delicious plant-based version.
WiseRecipes’ Top Tips for Perfect Breakfast Bowls
These simple secrets will ensure your bowl is flavorful and satisfying every time.
- Dice Potatoes Uniformly. Cut your sweet potatoes into even ½-inch cubes. This ensures they roast at the same rate, so you don’t end up with some mushy and some crunchy pieces.
- Season the Beans! Don’t just heat up plain beans. Taking a minute to season them with cumin and chili powder transforms them from a bland filler into a flavorful component of the dish.
- Customize the Chorizo. Turkey chorizo is delicious, but if you want a vegetarian version, soy chorizo (“Soyrizo”) is incredibly flavorful and works perfectly in this recipe.
- The Runny Yolk Sauce. If you enjoy runny eggs, they act as a natural, rich sauce for the potatoes and beans. If you prefer hard-cooked eggs, consider adding a little extra salsa or sour cream to bring the bowl together.
- Freshness is Key. Don’t skimp on the fresh toppings! The cool avocado, crisp scallions, and herbal cilantro provide a necessary contrast to the hot, savory, spiced cooked elements.
Keep It Fresh! Meal Prep & Storage
This recipe is a meal prepper’s dream.
- Refrigerator: Store the roasted sweet potatoes, cooked chorizo, and seasoned beans in separate airtight containers in the fridge for up to 4-5 days.
- Reheating: To serve, simply reheat the potato, bean, and meat mixture in the microwave or a skillet. Cook a fresh egg and slice a fresh avocado right before eating for the best texture.
- Freezing: The cooked chorizo and bean mixture freezes well for up to 2 months. Sweet potatoes can become a bit soft after freezing, so they are best fresh or refrigerated.
FAQs: Your Mexican Breakfast Bowl Questions, Answered!
Q: Is this spicy? A: It has a kick! Chorizo is naturally spiced, and we add chili powder. To make it milder, use a mild sausage or just season ground turkey yourself with cumin and paprika, and skip the hot sauce. Q: Can I use regular potatoes? A: Absolutely. Russet or Yukon Gold potatoes work great. They may take slightly longer to roast than sweet potatoes, so keep an eye on them. Q: Can I make this vegan? A: Yes! Use vegan chorizo (soyrizo) or spiced lentils instead of turkey, swap the egg for a tofu scramble, and use a dairy-free sour cream or extra avocado. Q: What other veggies can I add? A: Sautéed bell peppers, zucchini, or spinach are fantastic additions. You can roast the peppers right alongside the sweet potatoes!
Final Thoughts: Start Your Day with a Fiesta
There is nothing better than a breakfast that wakes you up with bold flavors and vibrant colors. These Mexican Breakfast Bowls are proof that healthy eating doesn’t have to be boring. They are nourishing, satisfying, and packed with the kind of energy you need to tackle your day. I hope this recipe spices up your morning routine! Happy cooking!
5. The Ultimate Healthy Breakfast Bowl with Crispy Sesame Feta
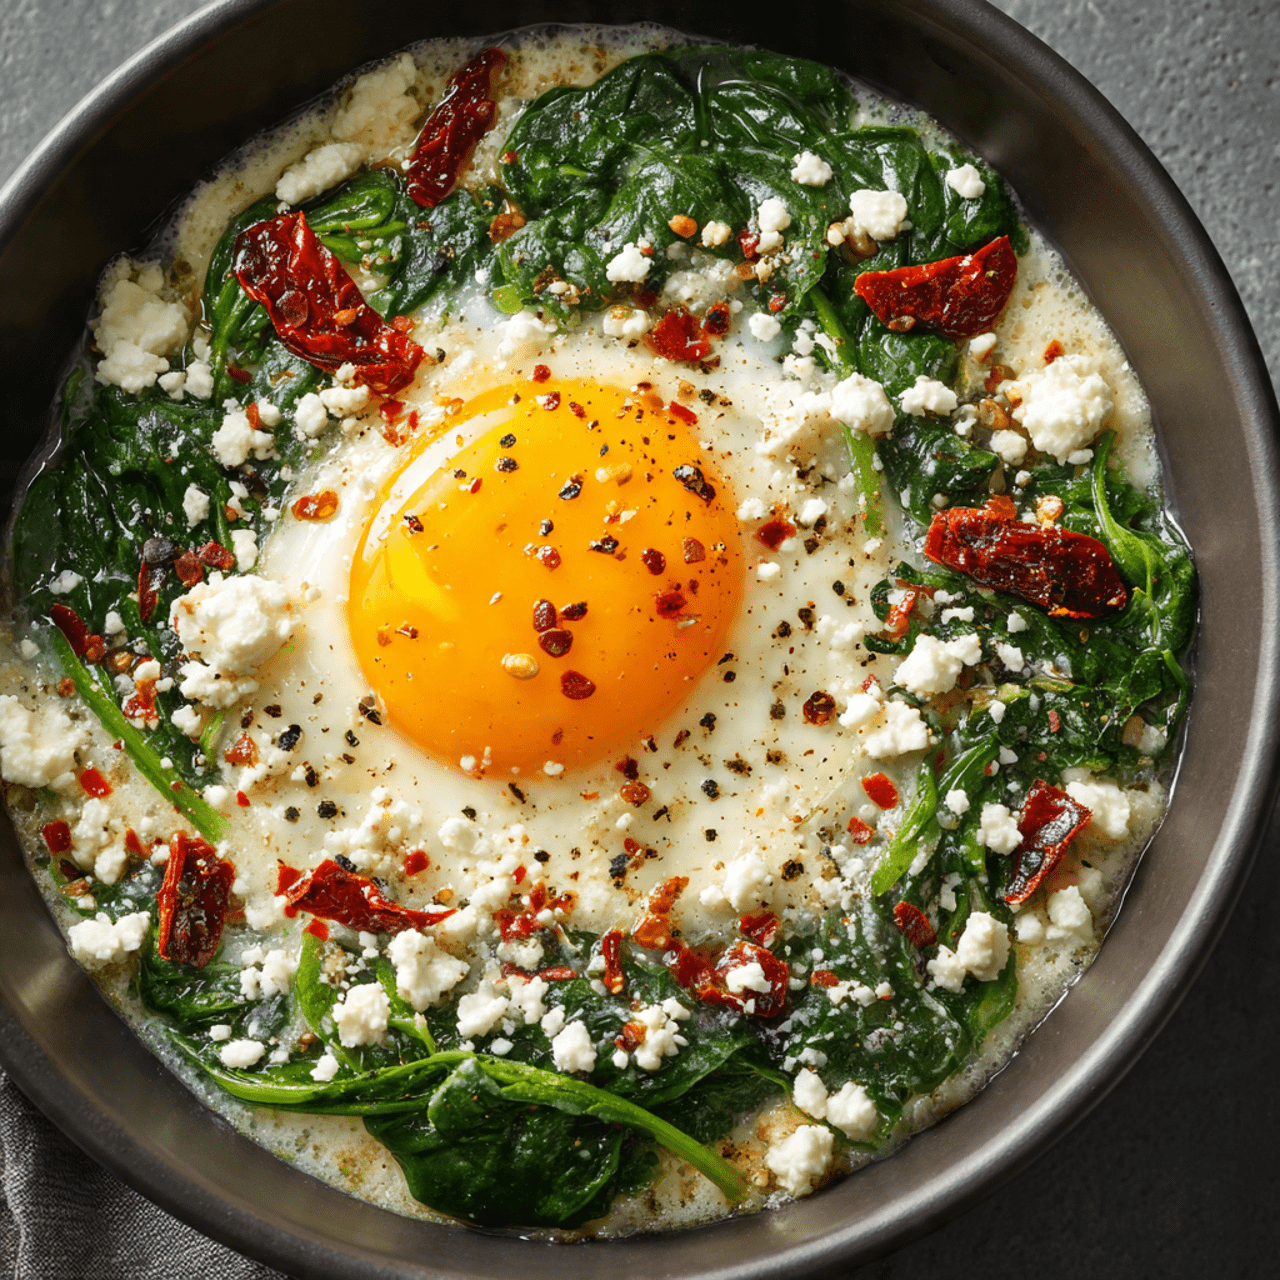
If you are tired of starting your day with a sugar rush from pastries or the monotony of plain oatmeal, I have a revelation for you. Imagine a breakfast that feels like a five-star brunch at a trendy Mediterranean cafe but is actually a nutrient-dense powerhouse made right in your own kitchen. Meet the Breakfast Bowl with Egg, Spinach & Feta. But wait—this isn’t just any feta. We are taking a block of salty, tangy feta cheese, coating it in nutty sesame seeds, and pan-searing it until it is golden, crispy, and warm.
I promise you, the moment you break that yolk and let it run over the warm quinoa and crispy cheese, you will never look at breakfast the same way again. It is high-protein, packed with fiber, and deeply satisfying. It fuels you for the long haul without that mid-morning crash. It’s elegant, it’s rustic, and it is exactly what your morning routine has been missing.

Get ready to elevate your morning with a bowl that is as good for your body as it is for your soul.
Why This Will Be Your New Favorite Healthy Breakfast Bowl
You are going to be completely obsessed with the sophisticated flavors and satisfying textures of this dish. It is a standout recipe for so many reasons:
- The “Fried Cheese” Factor: Let’s be honest—crispy cheese makes everything better. By crusting the feta in sesame seeds, we add a massive layer of nutty flavor and a texture that mimics a crouton, but it’s packed with protein and calcium.
- Sustained Energy: Unlike sugary cereals, the combination of quinoa (a complete protein) and eggs ensures you stay full and focused until lunch. It’s the ultimate fuel.
- Texture Heaven: You get the pop of the quinoa, the soft wilt of the spinach, the juicy snap of the tomatoes, and the crunch of the sesame seeds. Every bite is interesting.
- Mediterranean Diet Friendly: Rich in healthy fats from olive oil and seeds, and heavy on the veggies and grains, this fits perfectly into a heart-healthy lifestyle.
- Meal Prep Potential: While the eggs and cheese are best fresh, the quinoa base and spinach can be prepped ahead, making assembly a breeze on busy mornings.
Recipe Snapshot
| Active Time | 20 minutes |
| Total Time | 30 minutes |
| Servings | 4 servings |
| Calories | 373 kcal per bowl |
| Course | Breakfast, Brunch |
| Cuisine | Mediterranean / American |
| Method | Stovetop |
Your Shopping List for Savory Success
This recipe relies on fresh, high-quality ingredients to make the simple flavors shine.

→ The Stars of the Bowl
- 1 (5-ounce) block feta cheese → Crucial Tip: You must buy the block, not the crumbles! You need a solid piece to slice, bread, and fry.
- ¼ cup sesame seeds → These provide the “crust” for the cheese. You can use white, black, or a mix for visual flair.
- 5 large eggs → One is used for the egg wash to coat the cheese, and the other four are fried for serving.
- 2 cups cooked quinoa → Red, white, or tri-color all work perfectly. Make sure it’s hot!
→ The Fresh Greens & Garnish
- 1 (5-ounce) package baby spinach → This wilts down quickly and absorbs the lemon flavor beautifully.
- 1 cup cherry tomatoes → Halved. They add a burst of acidity and sweetness.
- 1 lemon → You will use both the zest and the juice to brighten up the heavy flavors of the cheese and egg.
- 2 tablespoons extra-virgin olive oil → Divided, for frying the eggs and the cheese.
- Salt and ground black pepper → To season every layer.
Let’s Cook! Your Step-by-Step Guide
Ready to make the most impressive breakfast bowl of your life? It’s all about timing. Let’s get started!
Part 1: Prep the Sesame Feta (The Secret Weapon)
This step requires a quick freeze, so start here!
- Set up the Station: In a small bowl, beat 1 egg. Spread your sesame seeds out on a small plate.
- Coat the Cheese: Pat your block of feta dry with a paper towel. Dip the entire block into the beaten egg, letting the excess drip off.
- Crust It: Immediately place the egg-coated feta onto the plate of sesame seeds. Gently turn and press the cheese into the seeds until it is fully coated on all sides.
- Freeze: Transfer the coated feta to a clean plate and pop it in the freezer for at least 10 minutes (up to 30). Note: This is essential! Freezing ensures the cheese holds its shape when it hits the hot pan, rather than melting into a puddle.
Part 2: Fry the Eggs and Wilt the Spinach
- Cook the Eggs: While the feta freezes, heat 1 tablespoon of olive oil in a large nonstick skillet over medium-high heat. Crack the remaining 4 eggs into the pan. Cook them sunny-side up (or to your liking) until the whites are set but the yolks are still runny, about 2 to 4 minutes. Season with a pinch of salt and pepper. Transfer them to a plate and cover loosely with foil to keep warm.
- Wilt the Greens: In the same skillet (don’t wash it yet!), add the baby spinach and the lemon juice. Cook over medium heat, tossing constantly, just until the spinach is wilted and bright green. This takes about 2 minutes. Remove the spinach and set it aside with the eggs.
Part 3: Fry the Feta & Assemble
- Sear the Cheese: Wipe out the skillet if needed and add the remaining 1 tablespoon of olive oil over medium heat. Take your feta out of the freezer. Place the block in the hot oil. Cook until the sesame seeds are golden brown and toasted, about 2 to 3 minutes per side. Watch it closely so the seeds don’t burn!
- Cut and Divide: Transfer the golden, crispy feta to a cutting board. Carefully cut it into bite-sized cubes.
- Assemble the Bowls: Divide the hot quinoa among 4 bowls. Top each bowl with a portion of the wilted spinach, the halved cherry tomatoes, and a perfectly fried egg. Scatter the warm, crispy feta cubes over the top.
- Garnish: Finish with a sprinkle of fresh lemon zest and a final crack of black pepper. Serve immediately while everything is warm and the yolks are runny!
Breakfast Bowl with Egg, Spinach & Feta
Ingredients
Equipment
Method
-
Pat the feta block dry. Beat 1 egg in a small bowl. Spread sesame seeds on a plate.
-
Dip the feta in the egg, then dredge in sesame seeds to coat fully. Place on a plate and freeze for 10-30 minutes.
-
Heat 1 tbsp oil in a large nonstick skillet over medium-high heat. Crack in 4 eggs and cook until whites are set but yolks are runny (2-4 mins). Season with salt and pepper. Remove and keep warm.
-
In the same skillet, add spinach and lemon juice. Cook over medium heat until wilted (about 2 mins). Remove and set aside.
-
Add remaining 1 tbsp oil to the skillet over medium heat. Add the chilled feta block. Cook 2-3 minutes per side until golden brown. Transfer to a board and cut into bite-size cubes.
-
Divide hot quinoa among 4 bowls. Top with an egg, spinach, tomatoes, and the crispy feta cubes. Garnish with lemon zest.
Notes
Block Feta Only: You must use a block of feta, not crumbles, to achieve the fried crust effect.
Runny Yolk: A runny yolk acts as a rich sauce for the quinoa and spinach, tying the bowl together.
WiseRecipes’ Top Tips for Feta Perfection
Fried cheese can be tricky, but these tips will ensure you get that perfect crispy crust without a melty mess.
- Don’t Skip the Freeze. I cannot stress this enough. Feta is a soft cheese. If you skip the 10-minute freezer time, the cheese will likely melt too fast in the pan before the sesame seeds have a chance to brown. The cold temperature buys you cooking time.
- Use a Nonstick Pan. Sesame seeds love to stick. Using a good nonstick skillet ensures that your beautiful crust stays on the cheese, not on the bottom of your pan.
- Pat the Feta Dry. Before dipping in the egg, make sure your feta block is dry. If it’s wet from the brine, the egg wash won’t stick, and your crust will fall off.
- Time Your Quinoa. To keep this recipe fast, have your quinoa cooked before you start the eggs. Quinoa is great for meal prep—you can make a big batch on Sunday and use it for these bowls all week.
- The Yolk is the Sauce. Since there isn’t a heavy dressing on this bowl, the runny egg yolk acts as a rich, creamy sauce that binds the quinoa and spinach together. Don’t overcook those eggs!
Creative Twists: Customize Your Bowl
One of the best things about healthy breakfast bowls is their versatility. Here are some ways to make it your own:
- Swap the Grain: Don’t love quinoa? This is excellent with farro, brown rice, or even cauliflower rice for a lower-carb option.
- Add Creaminess: A few slices of avocado would be a heavenly addition to the texture profile of this bowl.
- Change the Greens: If you prefer kale or Swiss chard, simply sauté them a little longer than the spinach until they are tender.
- Spice it Up: Add a pinch of red pepper flakes to the spinach while it cooks, or drizzle the final bowl with a little chili crisp or hot sauce.
Keep It Fresh! Storing Your Ingredients
While the assembled bowl is best eaten fresh, you can prep components ahead of time.
Refrigerator Storage
Store the cooked quinoa and the spinach in airtight containers in the fridge for up to 4 days. The fried feta is best eaten fresh, but if you have leftovers, store them separately and re-crisp them in a toaster oven or dry pan before serving.
Freezing
Cooked quinoa freezes beautifully. You can freeze individual portions of quinoa in bags for up to 3 months. Do not freeze the cooked eggs or the fresh tomatoes.
FAQs: Your Breakfast Bowl Questions, Answered!
Q: Can I use crumbled feta instead of a block? A: Unfortunately, no. Crumbled feta cannot be breaded and fried in the same way. If you only have crumbles, skip the frying step and just sprinkle them fresh over the bowl. Q: Is there an egg substitute for the coating? A: If you have an egg allergy but still want the crust, you can dip the feta in a little bit of milk or a cornstarch slurry to help the seeds adhere. Q: Can I make this vegan? A: To make this vegan, you’d need to swap the eggs for a tofu scramble or roasted chickpeas, and use a vegan feta alternative (though most vegan fetas won’t fry well, so just crumble it fresh). Q: My sesame seeds are burning! What do I do? A: Turn your heat down to medium or medium-low. Sesame seeds are delicate. You want a gentle sizzle, not a high-heat sear.
Final Thoughts: A Breakfast Worth Waking Up For
There is something incredibly empowering about starting your day with a meal that is colorful, nutritious, and gourmet. This Breakfast Bowl with Egg, Spinach & Feta proves that “healthy” doesn’t have to mean “boring.” It’s a feast of textures—crispy, creamy, fluffy, and fresh. I hope this recipe brings a little bit of Mediterranean sunshine to your morning table. Enjoy every savory bite!
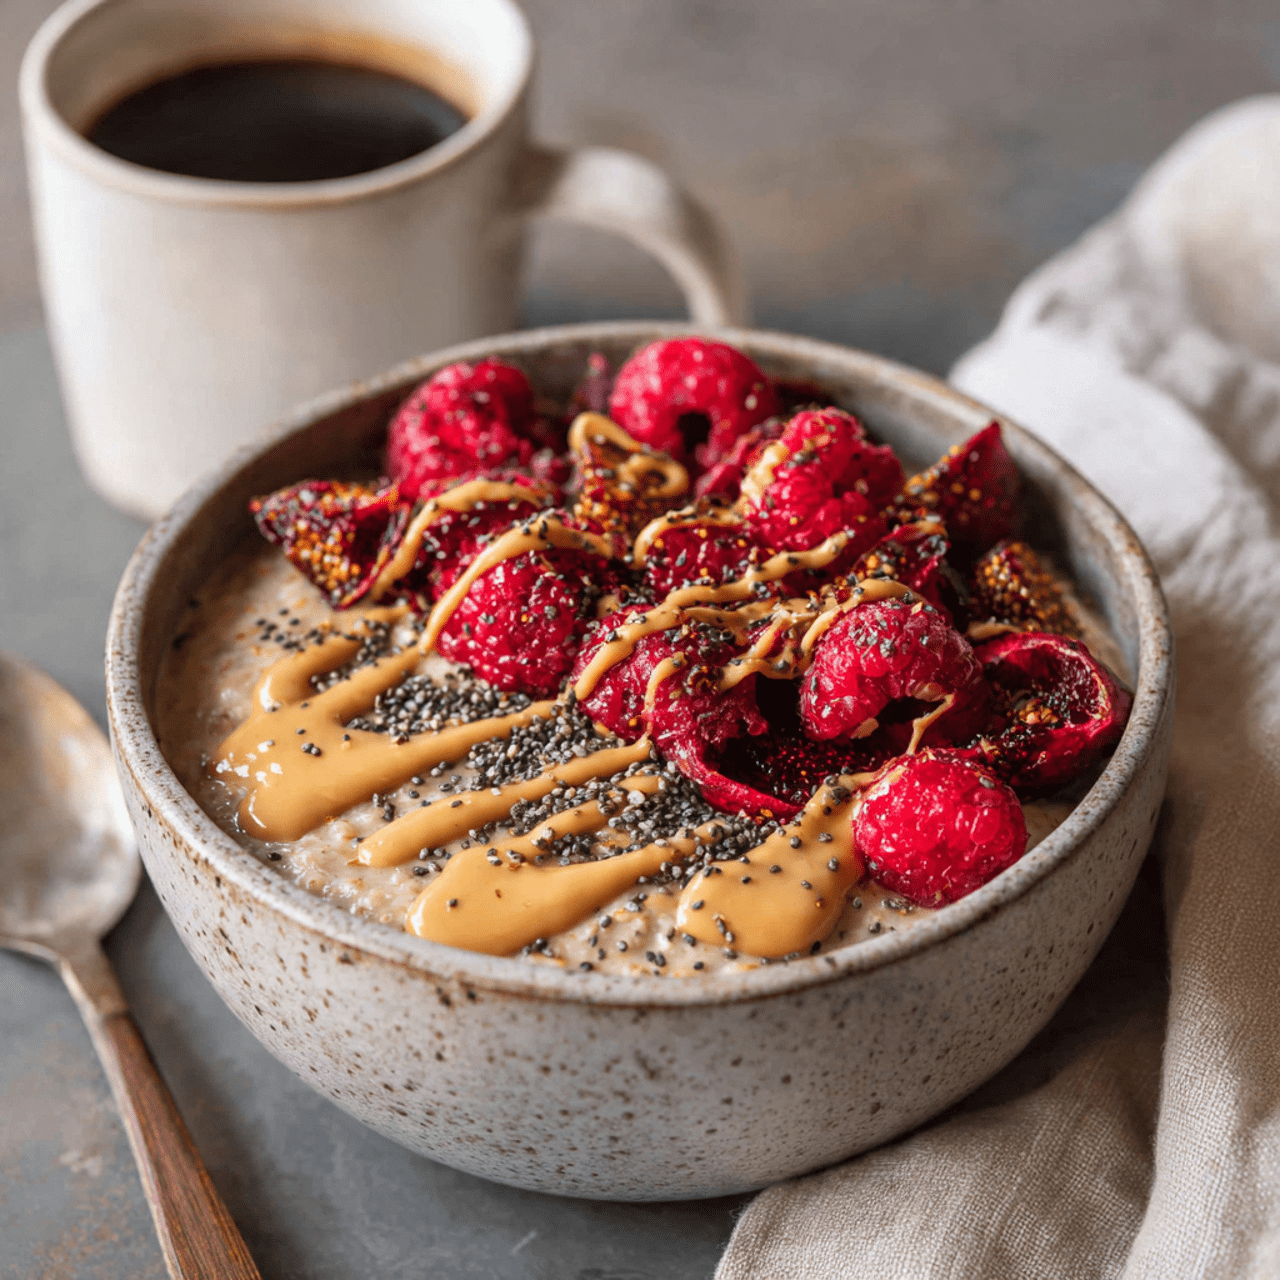
6. The Ultimate Coffee Oatmeal Bowl (Healthy Breakfast Bowls!)

We all have those mornings. You know the ones—where you need your caffeine fix and a nutritious meal, but you barely have time for one, let alone both. Enter the genius solution you didn’t know you needed: Coffee Oatmeal. If you are looking for unique, energizing healthy breakfast bowls, this recipe is about to become your new morning ritual. It combines your morning cup of joe directly with your hearty oats for a two-in-one power breakfast that is as efficient as it is delicious.
I promise you, the first bite might surprise you, but by the second bite, you’ll be hooked. The way the melting peanut butter swirls into the hot, coffee-infused oats is pure comfort. Plus, the addition of chia seeds adds a great texture and a boost of omega-3s to keep you full until lunch. It’s warm, it’s caffeinated, and it’s ready in just 7 minutes.
Get ready to streamline your morning routine with a bowl that wakes you up in more ways than one. This is the ultimate breakfast for coffee lovers.

Why This Coffee Oatmeal is a Morning Game-Changer
You are going to fall in love with the efficiency and flavor of this buzz-worthy breakfast. It is a standout recipe for so many reasons:
- Two-in-One Breakfast: It combines your caffeine kick and your meal into one bowl, saving you time and dishwashing on busy mornings.
- Complex, Gourmet Flavor: The bitterness of coffee pairs beautifully with sweet maple syrup, earthy figs, and salty peanut butter. It’s a sophisticated step up from plain oatmeal.
- Ready in 7 Minutes: This is a stovetop recipe that cooks incredibly fast. You can have a hot, nutritious meal ready faster than the drive-thru line.
- Packed with Fiber and Protein: Between the oats, chia seeds, and peanut butter, this bowl is loaded with nutrients that provide sustained energy, not just a caffeine spike.
- Perfect Use for Leftover Coffee: Don’t pour that last cup of coffee down the drain! This recipe is the perfect way to use up whatever is left in the pot.
Recipe Snapshot
| Prep Time | 2 minutes |
| Cook Time | 5 minutes |
| Total Time | 7 minutes |
| Servings | 1 serving |
| Calories | ~430 kcal per bowl* |
| Course | Breakfast |
| Cuisine | American / Fusion |
| Difficulty/Method | Easy / Stovetop |
*Nutrition information is an estimate based on standard ingredients.
Your Shopping List for Caffeinated Oats
This recipe uses pantry staples and your morning brew to create something special.

→ For the Oatmeal Base
- ⅔ cup strong brewed coffee → The stronger the better! You want the coffee flavor to shine through the oats. Espresso works too (diluted with water).
- ⅓ cup milk → Dairy or non-dairy (almond, oat, soy) all work great to add creaminess.
- ½ cup old-fashioned oats → Rolled oats provide the best chewy texture. Quick oats will work but will be mushier.
- 2 tsp maple syrup → To balance the bitterness of the coffee. Honey or agave also work.
→ For the Toppings
- ¼ cup frozen berries → Raspberries or blueberries are my favorites. The heat from the oats thaws them perfectly, creating a jammy texture.
- 1 ½ tsp chia seeds → For crunch and nutrition.
- 2-3 dried figs, chopped → These add a wonderful, chewy, honey-like sweetness that pairs perfectly with coffee.
- 1-2 Tbsp peanut butter → Or almond butter. The creamy fat balances the coffee acidity.
Let’s Cook! Your Step-by-Step Guide
Ready to wake up? Let’s get this coffee-infused breakfast on the stove.
Part 1: Simmer the Oats
- Combine Liquids: In a small saucepan over medium heat, combine the strong brewed coffee and the milk.
- Add Oats and Sweetener: Stir in the old-fashioned oats and the maple syrup.
- Cook: Bring the mixture to a gentle boil, then immediately reduce the heat to low. Let it simmer for 4-5 minutes, stirring occasionally. You want the oats to absorb the liquid and become creamy. If you like thicker oatmeal, cook a minute longer; for looser oatmeal, add a splash more milk.
Part 2: Top and Serve
- Assemble: Pour the hot oatmeal into a serving bowl.
- Add Toppings: Immediately top with the frozen berries (the heat will thaw them), a sprinkle of chia seeds, the chopped dried figs, and a generous dollop of peanut butter.
- Enjoy: Stir it all together and enjoy warm!
Coffee Oatmeal with Fruit and Figs
Ingredients
Equipment
Method
-
Heat the coffee and milk in a small saucepan over medium heat.
-
Add in the oats and maple syrup. Bring to a gentle boil.
-
Reduce the heat to low and allow to simmer for 4-5 minutes, stirring occasionally, until the oats are creamy and have absorbed most of the liquid.
-
Pour the oatmeal into a bowl.
-
Top with frozen berries, chia seeds, chopped dried figs, and a drizzle of peanut butter. Serve warm.
Notes
Berry Tip: Using frozen berries on hot oatmeal creates a delicious, natural fruit syrup as they thaw.
Overnight Option: Combine all ingredients (except toppings) in a jar and refrigerate overnight for a cold version ready in the morning.
WiseRecipes’ Top Tips for the Best Coffee Oatmeal
These simple secrets will ensure your breakfast bowl is balanced and delicious.
- Use Strong Coffee. Because the oats are starchy and absorbent, mild coffee will get lost. Use a dark roast or a strong brew so you actually taste the coffee flavor.
- Don’t Boil the Milk Too High. Keep an eye on the pan when bringing it to a boil. Milk can bubble over very quickly! As soon as you see bubbles, turn the heat down.
- Adjust Sweetness to Your Coffee. If your coffee is very bitter or acidic, you might need an extra teaspoon of maple syrup. Taste the oatmeal before you pour it into the bowl.
- The “Jammy” Berry Trick. Putting frozen berries directly onto hot oatmeal is a fantastic hack. As they thaw, they release their juices into the oats, creating a natural fruit syrup that swirls into the coffee flavor.
- Texture Matters. Chopped dried figs add a chewy texture that mimics the oats. If you don’t have figs, chopped dates or raisins are excellent substitutes that provide that same sticky sweetness.
Creative Twists: Customize Your Bowl
Coffee pairs well with many flavors. Try these variations:
- Mocha Bowl: Stir in a teaspoon of cocoa powder while the oats are cooking for a chocolate-coffee delight.
- Vanilla Latte: Add a splash of vanilla extract and use vanilla almond milk for a sweeter, aromatic bowl.
- Protein Boost: Whisk an egg white into the cooking oats during the last minute (whisk constantly!) or stir in a scoop of protein powder for a post-workout meal.
Keep It Fresh! Meal Prep & Storage
This recipe works surprisingly well for meal prep.
- Overnight Coffee Oats: Instead of cooking, combine the coffee, milk, oats, chia seeds, and maple syrup in a jar. Shake and refrigerate overnight. In the morning, top with fruit and nut butter and eat cold!
- Reheating: If you cook a large batch, store leftovers in the fridge for up to 3 days. Reheat in the microwave with a splash of extra milk to loosen it up, as the oats will thicken significantly.
FAQs: Your Coffee Oatmeal Questions, Answered!
Q: Does this have as much caffeine as a cup of coffee? A: It has slightly less, as we are using 2/3 cup of coffee (a standard cup is 8 oz). However, it still provides a decent kick! If you want more buzz, serve it with a small side of espresso. Q: Can I use instant coffee? A: Yes! Dissolve 1-2 teaspoons of instant coffee granules into 2/3 cup of hot water before adding it to the saucepan. Q: Is this safe for kids? A: Because of the caffeine content, this is generally an adults-only breakfast. For kids, you can substitute decaf coffee or use hot cocoa instead. Q: Can I use steel-cut oats? A: You can, but the cooking time will increase to about 20-30 minutes, and you may need more liquid. Adjust accordingly.
Final Thoughts: A Buzz-Worthy Breakfast
There is something so efficient and satisfying about combining your two favorite morning elements into one bowl. This Fruit, Figs, and Peanut Butter Coffee Oatmeal is the ultimate multitasker—it wakes you up, fuels your body, and tastes like a cozy, gourmet treat. I hope this recipe adds a little extra pep to your step tomorrow morning. Happy cooking!
7. The Ultimate Chunky Monkey Quinoa Bowl (A Healthy Breakfast Bowl!)
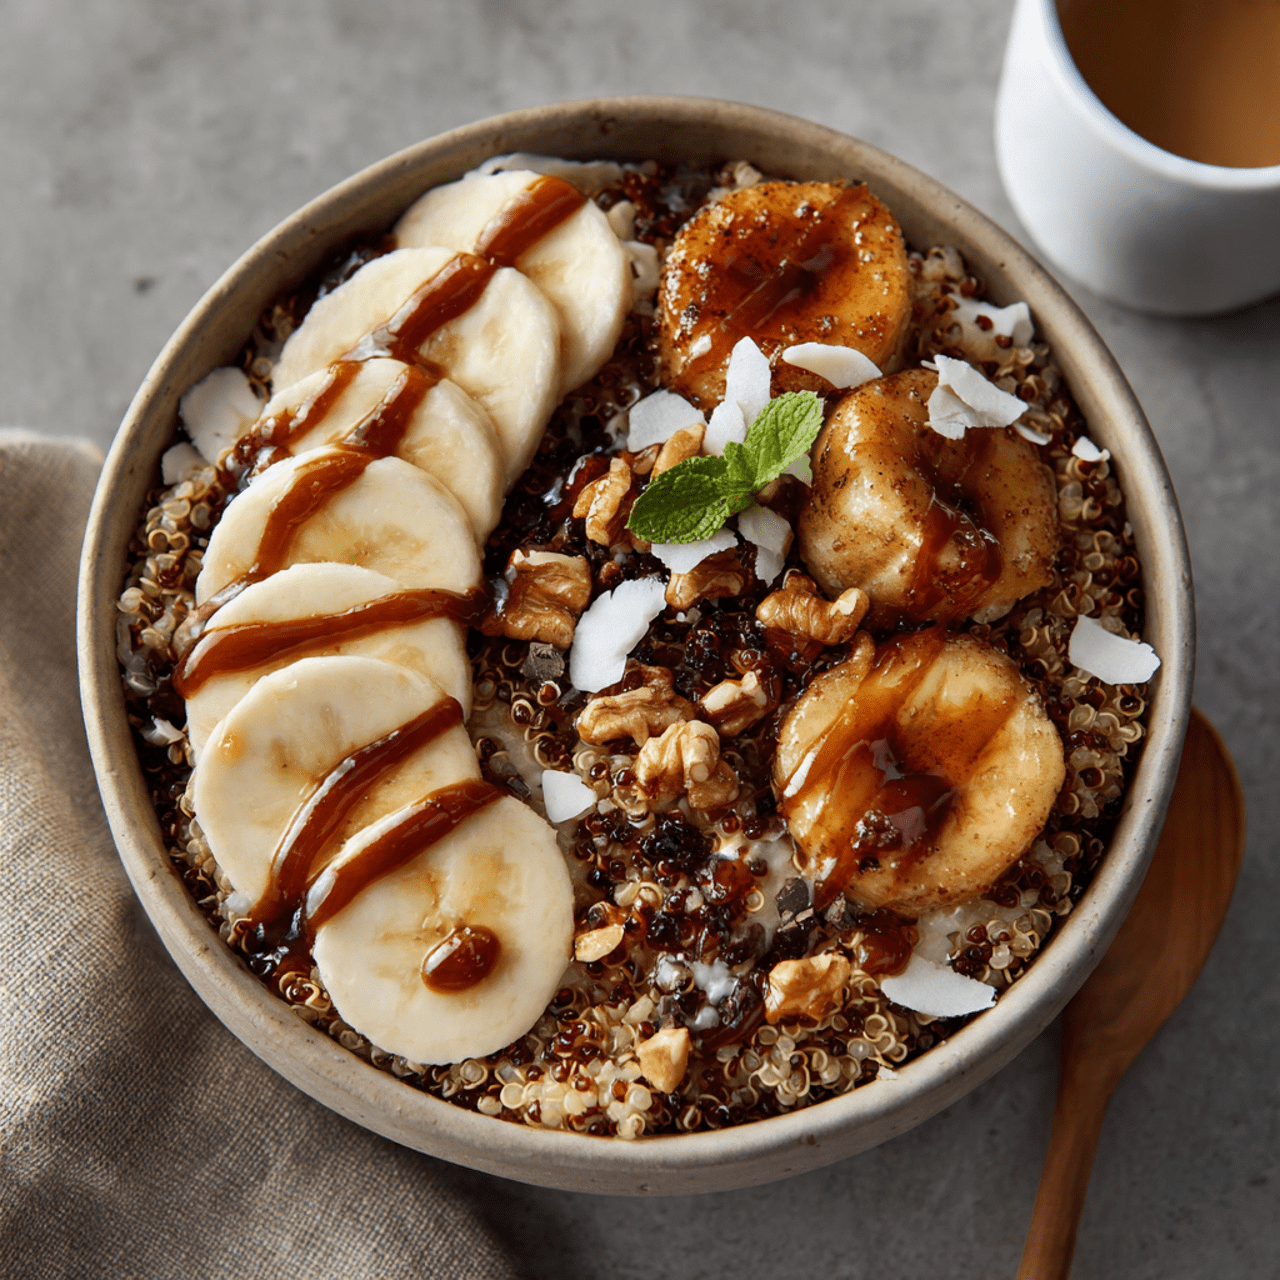
If you have ever wished you could eat dessert for breakfast and actually feel good about it, your wish has just been granted. Meet the Chunky Monkey Quinoa Breakfast Bowl. This isn’t just a bowl of grains; it is a rich, chocolatey, peanut-buttery indulgence that tastes suspiciously like your favorite ice cream flavor, yet it is packed with complete protein and fiber. If you are on the hunt for healthy breakfast bowls that will actually keep you full until lunch, this is the game-changer you need.
I promise you, this bowl is a revelation. It feels decadent and comforting, yet it fuels your body with wholesome, plant-based nutrition. Whether you are making it for a cozy weekend brunch or meal-prepping for a busy work week, this recipe proves that healthy eating does not have to mean sacrificing flavor. It is a warm hug in a bowl that wakes up your tastebuds and your metabolism.

Get ready to transform your morning with a nutritious twist on a classic flavor combination. This is the breakfast that will make you want to jump out of bed.
Why This Will Be Your Favorite Healthy Breakfast Bowl
You are going to be completely obsessed with how delicious and energizing this recipe is. It is a morning must-have for so many reasons:
- Tastes Like Dessert, Fuels Like a Meal: You get all the joy of chocolate and peanut butter, but with the sustained energy of quinoa, which is a complete protein containing all nine essential amino acids.
- Incredibly Nutrient-Dense: Unlike sugary cereals, these healthy breakfast bowls are packed with fiber, iron, magnesium, and healthy fats to keep you satisfied for hours.
- Quick and Easy Stovetop Method: It cooks up in just about 15 minutes, making it a realistic option for weekday mornings.
- Naturally Vegan and Gluten-Free: This recipe is inclusive for almost all dietary needs without requiring any weird substitutions. It is wholesome goodness, plain and simple.
- Endlessly Customizable: The base is delicious, but the toppings are where you can really shine. From crunchy nuts to fresh berries, you can change the texture and flavor profile every single day.
Recipe Snapshot
| Prep Time | 5 minutes |
| Cook Time | 15 minutes |
| Total Time | 20 minutes |
| Servings | 4 people |
| Calories | 292 kcal per serving |
| Course | Breakfast |
| Cuisine | American / Health Food |
| Difficulty/Method | Easy / Stovetop |
Your Shopping List for Chocolatey Goodness
This recipe uses pantry staples to create a luxurious breakfast experience. Here is what you need to gather:

→ The Quinoa Base
- 1 cup uncooked quinoa → Be sure to rinse it well! This removes the natural coating called saponin, ensuring your breakfast doesn’t taste bitter.
- 2 cups water → For cooking the grains.
- ¼ teaspoon sea salt → A pinch of salt is essential to make the chocolate flavor pop.
→ The Chunky Monkey Flavors
- ¾ cup non-dairy milk → Almond, soy, or oat milk all work beautifully to add creaminess.
- 1 large ripe banana → The riper, the better! Brown spots mean more natural sweetness and easier mashing.
- 3-4 tablespoons peanut butter → Creamy is best for mixing, but crunchy adds nice texture.
- 3 tablespoons cocoa powder → Unsweetened cocoa gives that deep, rich chocolate taste.
- 2-3 tablespoons maple syrup → For a touch of natural sweetness. Adjust this based on how sweet your banana is.
Let’s Cook! Your Step-by-Step Guide
Ready to make the most delicious healthy breakfast bowl of your life? Let’s get cooking.
Part 1: Cook the Quinoa
- Rinse and Boil: Place your rinsed quinoa and sea salt into a medium pot with 2 cups of water. Bring it to a boil over high heat.
- Simmer: Once boiling, reduce the heat to low, cover the pot with a tight-fitting lid, and let it simmer. Cook until the water is completely absorbed and the quinoa is fluffy. This usually takes about 15 to 20 minutes.
Part 2: Transform into Chunky Monkey
- Mash the Banana: While the quinoa cooks, peel and mash your ripe banana in a small bowl until it is smooth.
- Stir and Season: Uncover the pot and keep the heat on low. Stir in the non-dairy milk, creamy peanut butter, mashed banana, cocoa powder, and maple syrup.
- Warm and Meld: Stir gently and let the mixture warm through for 1-2 minutes. This helps the flavors meld together and the sauce to thicken slightly. Taste a spoonful—if you want it sweeter, add a splash more maple syrup.
Part 3: Assemble and Serve
- Bowl it Up: Divide the warm, chocolatey quinoa mixture into four bowls.
- Top It Off: This is the fun part! Add your favorite toppings like banana coins, dark chocolate chunks, or a drizzle of extra peanut butter. If you like your bowl milkier, pour a little extra almond milk over the top. Serve immediately and enjoy!
Chunky Monkey Quinoa Breakfast Bowl
Ingredients
Equipment
Method
-
In a medium pot, add the rinsed quinoa and salt to 2 cups of water. Bring to a low boil.
-
Put the lid on top. Cook until the liquid is gone and the quinoa is fluffy. This usually takes about 15-20 minutes.
-
Uncover the pot and turn the heat to low.
-
Stir in the non-dairy milk, peanut butter, mashed banana, cocoa powder, and maple syrup. Warm gently for 1-2 minutes, stirring constantly. Taste and adjust sweetness if needed.
-
Divide into bowls. Add your favorite toppings and a splash of additional milk if desired. Serve immediately.
Notes
Banana Ripeness: Use a banana with brown spots for natural sweetness and easier mashing.
Consistency: If the mixture becomes too thick, stir in extra non-dairy milk until you reach your desired creamy consistency.
WiseRecipes’ Top Tips for the Best Breakfast Bowls
These simple secrets will ensure your quinoa bowls are creamy, flavorful, and perfect every time.
- Rinse Your Quinoa! I cannot stress this enough. Quinoa has a natural coating that can taste soapy or bitter. A thorough rinse in a fine-mesh strainer under cold water guarantees a mild, nutty flavor that pairs perfectly with chocolate.
- Use Very Ripe Bananas. Just like with banana bread, the sweetness of this dish relies heavily on the banana. A spotty, brown banana will mash easily and provide natural sugar, allowing you to use less maple syrup.
- Adjust the Texture. Some people like a thick, oatmeal-like consistency, while others prefer a looser, milkier bowl. Feel free to stir in extra non-dairy milk at the very end to reach your desired consistency.
- Toast the Quinoa. For an extra layer of nutty flavor, toast your dry, rinsed quinoa in the pot with a teaspoon of coconut oil for 2-3 minutes before adding the water. This brings out a wonderful depth of flavor.
- Don’t Boil the Milk. When you add the milk and flavorings in step 2, keep the heat on low. You just want to warm it through. Boiling it vigorously could cause some non-dairy milks to separate.
Creative Twists: Make It Your Own!
This chocolatey base is incredibly versatile. Here are a few ways to switch it up:
- Protein Boost: Whisk a scoop of chocolate or vanilla protein powder into the non-dairy milk before adding it to the quinoa for a post-workout recovery meal.
- Berry Bliss: Top your bowl with fresh raspberries or strawberries. The tart fruit cuts through the richness of the chocolate and peanut butter beautifully.
- Crunch Factor: Add cacao nibs, toasted coconut flakes, or granola on top for a satisfying crunch that contrasts with the soft quinoa.
- Nut-Free: If you have a peanut allergy, swap the peanut butter for sunflower seed butter or tahini. It’s just as creamy and delicious!
Keep It Fresh! Storing Your Quinoa Bowls
This recipe is fantastic for meal prep!
- Refrigerator: Store leftovers in airtight containers in the fridge for up to 4-5 days. The quinoa will absorb more liquid as it sits, so it will thicken up.
- Reheating: To reheat, simply place a portion in a bowl, add a splash of milk to loosen it up, and microwave for 1-2 minutes, stirring halfway through.
- Freezing: You can freeze individual portions for up to 1 month. Thaw in the fridge overnight and reheat with extra milk.
FAQs: Your Chunky Monkey Questions, Answered!
Q: Is quinoa really good for breakfast? A: Absolutely! Quinoa is actually a seed, not a grain, and it is a complete protein. This means it provides sustained energy without the blood sugar crash you might get from sugary cereals or pastries. Q: Can I use instant quinoa? A: Yes, you can! Adjust the cooking time according to the package instructions (usually just 5 minutes), then proceed with stirring in the flavors as directed. Q: Does it taste like beans? A: Not at all. When quinoa is cooked properly and flavored with rich cocoa and peanut butter, it takes on a nutty, comforting flavor profile similar to oatmeal, but with a fun “pop” texture. Q: Can I eat this cold? A: Yes! This makes a delicious cold breakfast pudding. If eating it cold, you might want to stir in a little extra milk or yogurt before serving to make it creamy again.
Final Thoughts: A Morning Treat You Deserve
Starting your day with a meal that feels indulgent but nourishes your body is the ultimate form of self-care. This Chunky Monkey Quinoa Breakfast Bowl proves that healthy breakfast bowls don’t have to be boring. It is rich, satisfying, and packed with the energy you need to tackle your day. I hope this recipe brings a little joy and chocolate to your morning routine. Grab a spoon and dig in!
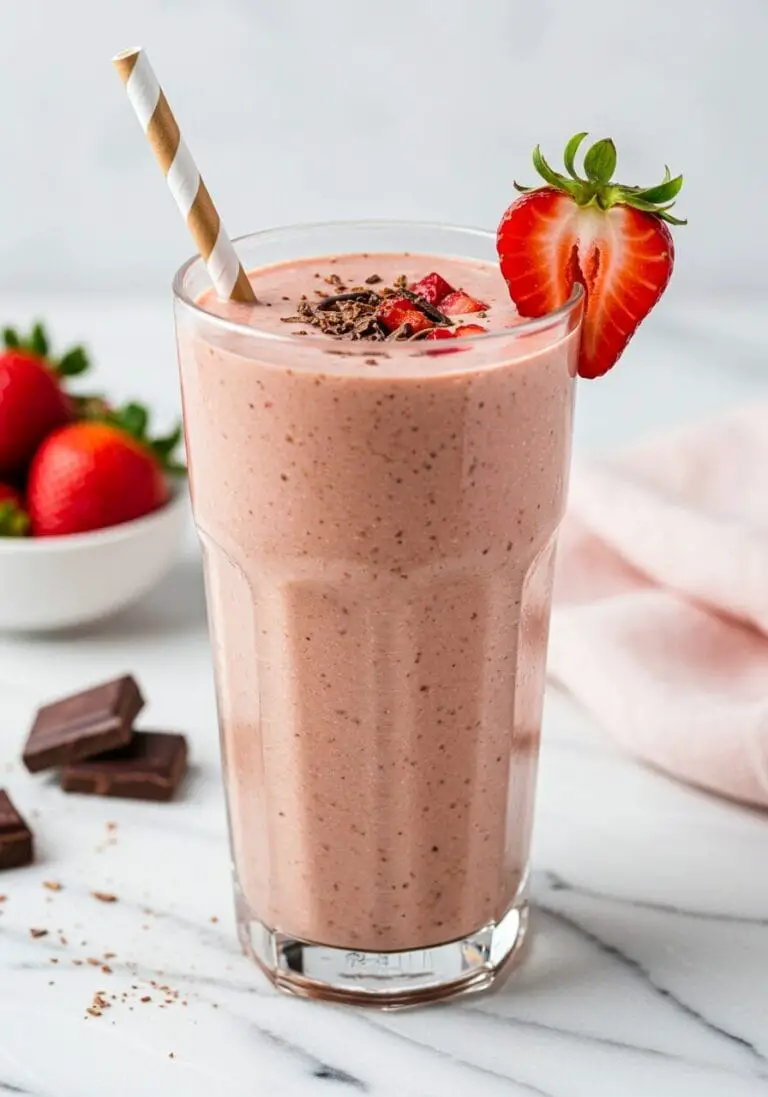
8. The Ultimate Chocolate Peanut Butter Smoothie Bowl (Healthy Breakfast Bowls!)
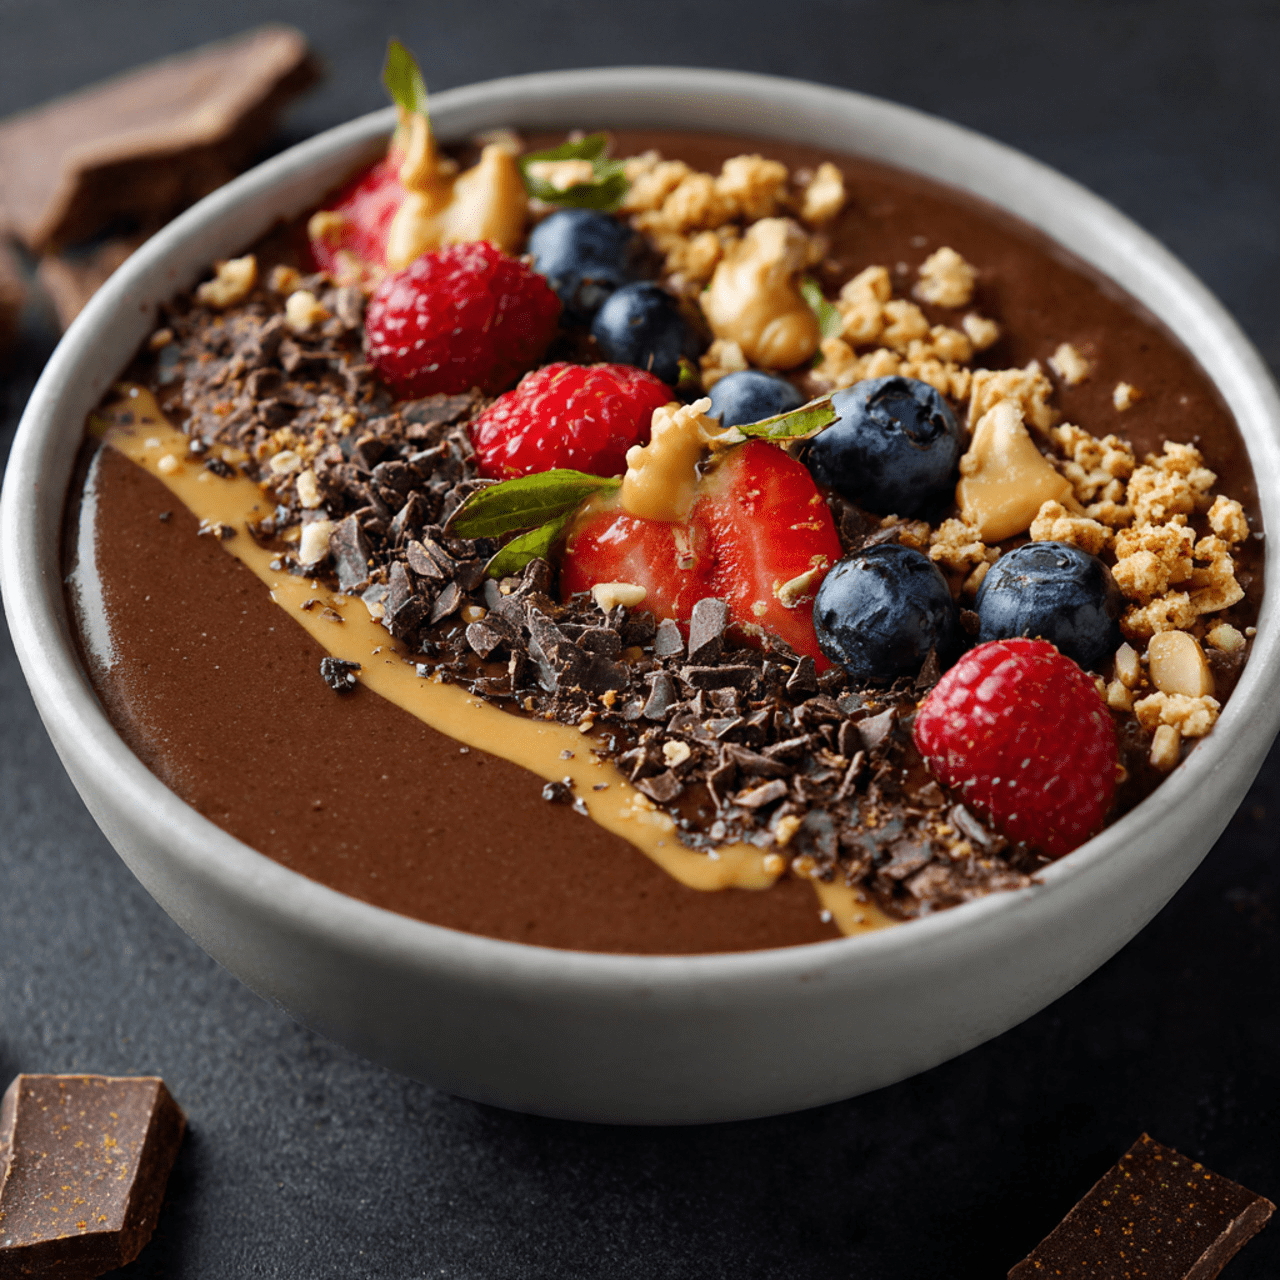
Let’s be honest: waking up and eating something that tastes exactly like a liquid peanut butter cup is the dream. The fact that it is actually good for you? That is the miracle of this Chocolate Peanut Butter Smoothie Bowl. If you are on the hunt for healthy breakfast bowls that feel like a cheat meal but fuel you like a superfood breakfast, you have arrived at the right place. This isn’t just a smoothie poured into a dish; it is a thick, creamy, spoonable indulgence that satisfies those deep chocolate cravings instantly.
I promise you, there is no better motivation to get out of bed than knowing this bowl is two minutes away. It is the perfect vessel for all your favorite crunchy toppings, creating that satisfying contrast between the smooth, cold base and the crisp granola or cacao nibs on top. It feels decadent, but it is packed with fiber, protein, and healthy fats to keep you energized until lunch.
Get ready to turn your blender into a dessert machine (that is secretly healthy). This is the breakfast bowl that will change your mornings forever.

Why This Chocolate Peanut Butter Bowl Will Be Your Morning Obsession
You are going to be completely hooked on how fast and delicious this recipe is. It is a standout breakfast for so many reasons:
- Tastes Like Dessert: It truly tastes like a chocolate peanut butter milkshake, but it is made with wholesome, natural ingredients. It cures the sweet tooth without the sugar crash.
- Ready in 2 Minutes: There is no cooking, no chopping (if you prep ahead), and barely any cleanup. It is the ultimate fast food for healthy eating.
- Incredibly Creamy Texture: By using frozen bananas (and adjusting the liquid), you get a thick, luxurious texture that holds up a mountain of toppings.
- Customizable Nutrition: Whether you want to lower the sugar by adding cauliflower or boost the protein with powder, this base recipe is incredibly forgiving and adaptable.
- Kid-Friendly: Kids think they are eating chocolate ice cream for breakfast. It is a fantastic way to get them to eat fruit and plant-based protein without a fuss.
Recipe Snapshot
| Prep Time | 2 minutes |
| Total Time | 2 minutes |
| Servings | 2 bowls |
| Calories | 271 kcal per bowl |
| Course | Breakfast |
| Cuisine | American |
| Difficulty/Method | Easy / Blending |
Your Shopping List for Chocolatey Bliss
This recipe uses ingredients you likely already have in your cupboard. It is simple, affordable, and delicious.

→ For the Smoothie Base
- 2 Bananas → The riper, the better! Peel, slice, and freeze them beforehand for the thickest, sweetest, ice-cream-like texture.
- 500 ml (2 cups) Almond milk → Or your preferred plant-based milk. Note: Use less liquid for a thicker bowl!
- 6 tablespoons Cocoa powder → Use unsweetened cocoa or cacao powder for that deep, dark chocolate flavor.
- 2 tablespoons Peanut butter → Creamy, natural peanut butter works best for that rich, nutty punch.
→ Optional Add-Ins & Toppings
- Sweetener: Medjool dates or maple syrup if your bananas aren’t super ripe.
- Veggie Boost: Frozen cauliflower rice (you won’t taste it!) to lower sugar.
- Toppings: Carob or cacao nibs, sliced banana, shredded coconut, chia seeds, granola, or an extra drizzle of peanut butter.
Let’s Blend! Your 2-Minute Guide
Ready for the quickest breakfast of your life? Let’s get that blender going.
Part 1: The Blend
- Load the Blender: Place your peeled bananas, cocoa powder, and peanut butter into the blender.
- Add Liquid Wisely: Pour in the almond milk. Pro Tip: If you want a super thick, spoonable bowl, start with 1 cup of milk and only add more if needed to get the blades moving. The full 2 cups will make a thinner, drinkable smoothie.
- Process: Blend on high until the mixture is completely smooth, creamy, and frothy. If using frozen bananas, you may need to stop and scrape down the sides or use a tamper to push the fruit into the blades.

Part 2: Assemble and Serve
- Pour: Divide the smoothie mixture between two bowls.
- Top It Off: This is the best part. Decorate your bowl with slices of fresh banana, a sprinkle of chia seeds, some coconut, and maybe some carob nibs for crunch.
- Enjoy: Eat immediately while it is cold and thick!

Chocolate Peanut Butter Smoothie Bowl
Ingredients
Equipment
Method
-
Place the frozen bananas, cocoa powder, and peanut butter into a blender.
-
Add the almond milk. Note: For a thick smoothie bowl, start with 1 cup (250ml) of milk and only add more if needed. Use the full 2 cups for a drinkable smoothie.
-
Blend on high until completely smooth and creamy.
-
Pour into bowls and top with your favorite garnishes like sliced banana, chia seeds, and coconut. Serve immediately.
Notes
Low Sugar Option: Swap one of the bananas for a cup of frozen cauliflower rice to reduce sugar without sacrificing creaminess.
Flavor Boost: A splash of vanilla extract or a pinch of salt enhances the chocolate flavor significantly.
WiseRecipes’ Top Tips for the Perfect Bowl
These simple secrets will ensure your smoothie bowl is thick, satisfying, and packed with flavor.
- Frozen Bananas are Mandatory. For a bowl consistency that you can eat with a spoon, your bananas must be frozen solid. Fresh bananas will result in a thin liquid soup. Peel and slice them before freezing for easy blending.
- Watch the Liquid Ratio. The recipe calls for 500ml of milk, but for a true “bowl” texture, start with half that amount. You want the motor of your blender to work a little bit! Less liquid equals a thicker, creamier result.
- Add a Pinch of Salt. It sounds odd, but a tiny pinch of sea salt makes the chocolate and peanut butter flavors pop. It adds that “salted caramel” vibe that is so addictive.
- Sneak in Veggies. As the recipe suggests, swapping half a banana for frozen cauliflower florets creates a creamy texture while drastically reducing the sugar. It’s a great trick for a lighter breakfast that still tastes indulgent.
- Flavor Boosters. A splash of vanilla extract adds a bakery-like aroma. If you need more protein, a scoop of chocolate or vanilla protein powder blends in seamlessly.
Creative Twists: Customize Your Bowl
This chocolate base is incredibly versatile. Try these variations:
- Mocha Bowl: Replace half of the almond milk with cold brew coffee for a caffeine kick.
- Berry Chocolate: Add a handful of frozen raspberries or strawberries for a chocolate-covered fruit flavor.
- Double Nutty: Add a tablespoon of hemp seeds or flax seeds into the blend for extra texture and healthy fats.
Keep It Fresh! Storing Your Smoothie
Smoothie bowls are best enjoyed the moment they are made, but here is how to handle leftovers.
- Immediate Serving: Serve immediately. As the frozen fruit melts, the bowl will become thinner.
- Popsicles: If you have leftovers, pour them into popsicle molds! They freeze into delicious chocolate peanut butter fudge pops.
- Freezer Packs: To meal prep, place the sliced bananas, cocoa powder, and peanut butter (if using powdered PB) into freezer bags. In the morning, just dump the bag into the blender and add milk.
FAQs: Your Smoothie Bowl Questions, Answered!
Is this recipe vegan?
Yes! As long as you use plant-based milk (like almond, oat, or soy), this recipe is 100% vegan and dairy-free.
Can I use powdered peanut butter?
Absolutely. Powdered peanut butter (like PB2) is a great way to get the peanut flavor with less fat. Use about 4 tablespoons of powder to replace the 2 tablespoons of traditional butter.
My blender isn’t strong enough. What can I do?
If your blender struggles with frozen fruit, let the frozen bananas sit on the counter for 5-10 minutes to soften slightly before blending. You can also add a little more liquid, but add it slowly to maintain thickness.
Is this healthy?
Yes! It is packed with potassium, fiber, and healthy fats. However, it can be high in natural sugars from the bananas. To reduce sugar, use the cauliflower swap mentioned in the tips.
Final Thoughts: A Breakfast That Feels Like a Treat
There is no reason healthy eating has to be boring or bland. This Chocolate Peanut Butter Smoothie Bowl proves that you can nourish your body while treating your tastebuds to something that feels like a dessert. It is quick, easy, and undeniably delicious. I hope this recipe makes your mornings a little sweeter and a lot healthier. Grab a spoon and dig in!
9. Radiant Peach Turmeric Smoothie Bowl (The Ultimate Healthy Breakfast Bowls!)

There are mornings when you wake up needing more than just caffeine; you need actual sunshine in a bowl. You need something that vibrates with color, wakes up your palate, and makes your body feel instantly revitalized. That is exactly what this Dairy-Free Peach Turmeric Smoothie Bowl delivers. It is a glowing, golden elixir of health that tastes like a creamy, spiced peach pie but acts like a powerful anti-inflammatory tonic.
I promise you, the color alone is enough to boost your mood. But the flavor? It is bright, zesty from the lime, warm from the cinnamon, and deeply satisfying. Whether you are looking for a post-yoga refuel or a light, energized start to a busy workday, this bowl is pure liquid gold.
Get ready to glow from the inside out. This is the vibrant, feel-good breakfast your routine has been missing.

Why This Golden Bowl Will Be Your Morning Glow-Up
You are going to be completely obsessed with how this bowl makes you feel. It is a standout recipe for so many reasons:
- An Anti-Inflammatory Powerhouse: The combination of fresh turmeric root and black pepper is famous for its health benefits, helping to reduce inflammation and boost immunity.
- Naturally Sweet and Creamy: Ripe organic peaches provide all the sweetness you need, while coconut yogurt offers a rich, velvety texture without any dairy.
- Dietary Chameleon: This recipe fits almost any lifestyle. Whether you are Vegan, Paleo, Whole30, or just trying to eat cleaner, this bowl is safe and delicious.
- Ready in Minutes: There is no cooking involved. Just chop, blend, and pour. It is the ultimate fast food for a healthy lifestyle.
- A Feast for the Eyes: The stunning golden-orange hue is beautiful to look at, making your morning routine feel a little more luxurious and special.
Recipe Snapshot
| Prep Time | 5 minutes |
| Cook Time | 0 minutes |
| Total Time | 5 minutes |
| Servings | 2 servings |
| Calories | ~185 kcal per serving |
| Course | Breakfast, Snack |
| Cuisine | Health Food / Fusion |
| Difficulty/Method | Easy / Blending |
Your Shopping List for Liquid Gold
This recipe uses a short list of high-impact ingredients to create a complex flavor profile.

→ For the Smoothie Base
- 1 cup coconut yogurt → Use an unsweetened, dairy-free variety for the cleanest flavor and Whole30 compliance.
- 2 fresh ripe organic peaches → The sweetness of the bowl depends on the ripeness of the fruit!
- 2-inch piece fresh turmeric root → Fresh root has a brighter, more peppery flavor than dried powder.
- 1 teaspoon vanilla extract → Adds a comforting, dessert-like aroma.
- ½ teaspoon ground cinnamon → For warmth and blood sugar regulation.
- 1 teaspoon fresh lime juice → The acidity pops the flavor of the peaches and turmeric.
- Black pepper → A few turns of the grinder. This is crucial! Piperine in pepper increases the absorption of curcumin in turmeric by up to 2000%.
→ For the Toppings (Optional but Recommended)
- Fresh fruit: Diced peaches or strawberries.
- Crunch: Nuts, seeds, or toasted coconut flakes.
- Superfoods: Chia seeds or hemp hearts.
Let’s Blend! Your Step-by-Step Guide
Ready to make the most vibrant breakfast of your life? Let’s get blending.
Part 1: Prep and Blend
- Prep the Turmeric: Peel the fresh turmeric root. You can use a spoon to scrape the skin off easily (be careful, it stains everything yellow!). Roughly chop it.
- Pit the Peaches: Remove the pits from your peaches and slice them into chunks. Leave the skin on for extra fiber and color.
- Load the Blender: Place the coconut yogurt, peach chunks, peeled turmeric, vanilla, cinnamon, lime juice, and a few cracks of black pepper into a high-speed blender or food processor.

Part 2: Smooth and Serve
- Process: Blend on high until the mixture is completely smooth and turns a beautiful, uniform golden-orange color. If it is too thick, you can add a splash of almond milk or coconut water.
- Taste Test: Give it a quick taste. Does it need more lime for zip? More cinnamon? Adjust to your liking.
- Assemble: Pour the smoothie mixture into two bowls. Top generously with diced peaches, chia seeds, coconut flakes, or whatever texture your heart desires. Serve immediately.
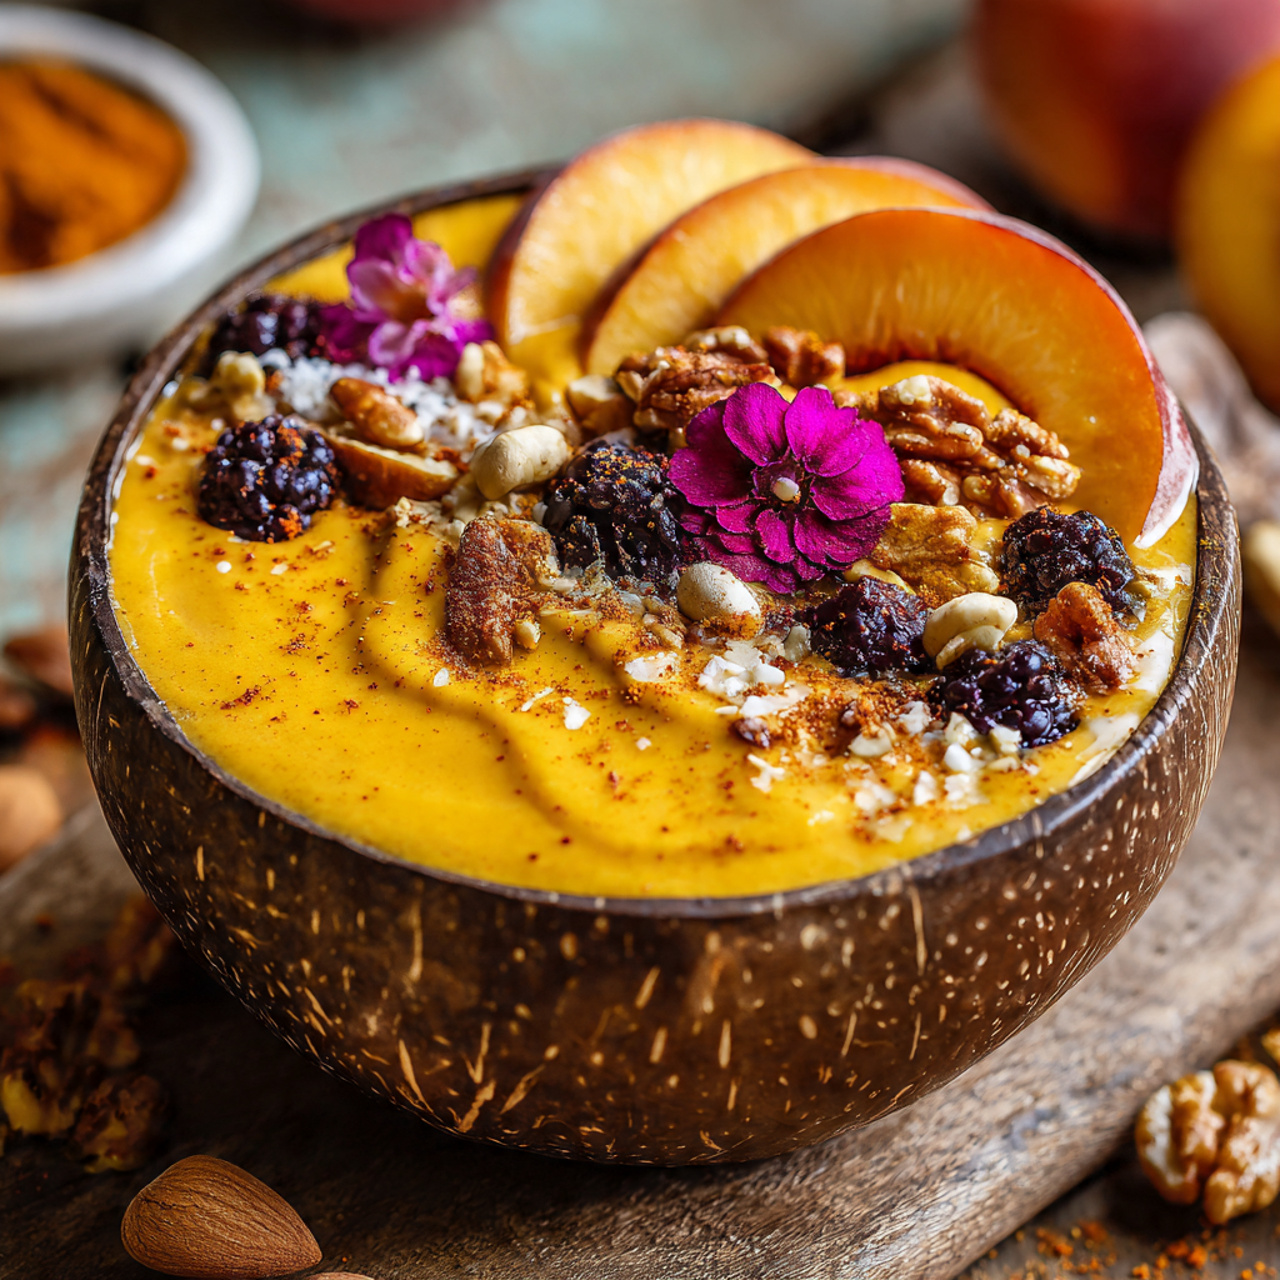
Dairy-Free Peach Turmeric Smoothie Bowl
Ingredients
Equipment
Method
-
Place the coconut yogurt, peaches, peeled turmeric root, vanilla, cinnamon, lime juice, and black pepper into a food processor or high-speed blender.
-
Process on high until the mixture is completely smooth and creamy. Taste and adjust lime or spices if necessary.
-
Pour into bowls and top with your favorite extras like diced fruit, nuts, seeds, or coconut flakes. Serve immediately.
Notes
Frozen Fruit Tip: For a thicker, spoonable bowl, slice and freeze your peaches the night before.
Turmeric Warning: Fresh turmeric stains surfaces easily. Wash hands and equipment immediately after use.
WiseRecipes’ Top Tips for a Perfect Turmeric Bowl
These simple secrets will ensure your smoothie bowl is perfectly balanced and delicious.
- Handle Turmeric with Care. Fresh turmeric is a potent dye. It will stain your fingers, your cutting board, and your white clothes instantly. Wash your hands immediately after peeling, or wear gloves if you want to be extra safe.
- Freeze the Peaches for Texture. For a thicker, more ice-cream-like bowl (similar to an acai bowl), slice and freeze your peaches the night before. This creates a luscious, frosty texture that holds toppings better.
- Don’t Skip the Pepper. It might seem weird to put black pepper in a breakfast bowl, but you won’t taste it as “spicy.” It adds a subtle earthy heat that balances the sweet fruit and is scientifically necessary to get the health benefits of the turmeric.
- Sweeten if Necessary. Depending on the season, your peaches might not be super sweet. If the bowl tastes too tart or earthy, add a teaspoon of raw honey, maple syrup, or a pitted Medjool date to the blender.
- Chill Your Yogurt. Make sure your coconut yogurt is very cold before blending. This keeps the smoothie refreshing and prevents it from becoming soupy too quickly.
Creative Twists: Customize Your Golden Bowl
This recipe is a fantastic base for experimentation.
- Tropical Gold: Swap one of the peaches for a cup of frozen mango or pineapple. These fruits pair exceptionally well with turmeric and coconut.
- Ginger Kick: Add a 1-inch piece of fresh ginger root along with the turmeric for an extra spicy, immune-boosting kick.
- Protein Boost: Add a scoop of collagen peptides or a neutral-flavored plant protein powder to make this a more substantial post-workout meal.
Keep It Fresh! Storing Your Smoothie
While smoothie bowls are best fresh, you can save this recipe.
- Refrigerator: You can store the blended mixture in a mason jar in the fridge for up to 24 hours. The separation is natural; just shake or stir it well before eating.
- Freezing: Pour leftovers into popsicle molds! These make incredible, healthy golden popsicles for a hot afternoon treat.
- Make-Ahead: You can prep “smoothie packs” by placing the sliced peaches and peeled turmeric in freezer bags. In the morning, just dump the bag into the blender with the yogurt and spices.
FAQs: Your Turmeric Smoothie Bowl Questions, Answered!
Q: Can I use ground turmeric instead of fresh? A: Yes, you can. Use about 1/2 to 1 teaspoon of high-quality ground turmeric powder. The flavor won’t be quite as bright and zesty as the fresh root, but it will still be delicious and healthy. Q: Is this really Keto? A: Peaches are a moderate-carb fruit. To make this strictly Keto-friendly, reduce the amount of peaches or swap them for berries, and ensure your coconut yogurt is high-fat and unsweetened. It fits a liberal low-carb diet well. Q: What if I don’t like coconut yogurt? A: You can use any yogurt you like! Almond milk yogurt, oat milk yogurt, or even regular Greek yogurt (if you aren’t dairy-free) will work perfectly. Q: Will the turmeric stain my blender? A: It can leave a yellow tint on plastic blender jars. To clean it, blend warm water with dish soap and a little baking soda immediately after use, then scrub. Glass blender jars usually don’t stain.
Final Thoughts: Glow From the Inside Out
There is something empowering about starting your day with a meal that you know is fighting for your health. This Radiant Peach Turmeric Smoothie Bowl isn’t just food; it’s functional nutrition that happens to taste like a creamy, spiced dream. It’s sunshine in a bowl, and I hope it brings a little brightness to your morning routine. Happy blending!
10. The Ultimate Homemade Acai Bowl (Healthy Breakfast Bowls!)
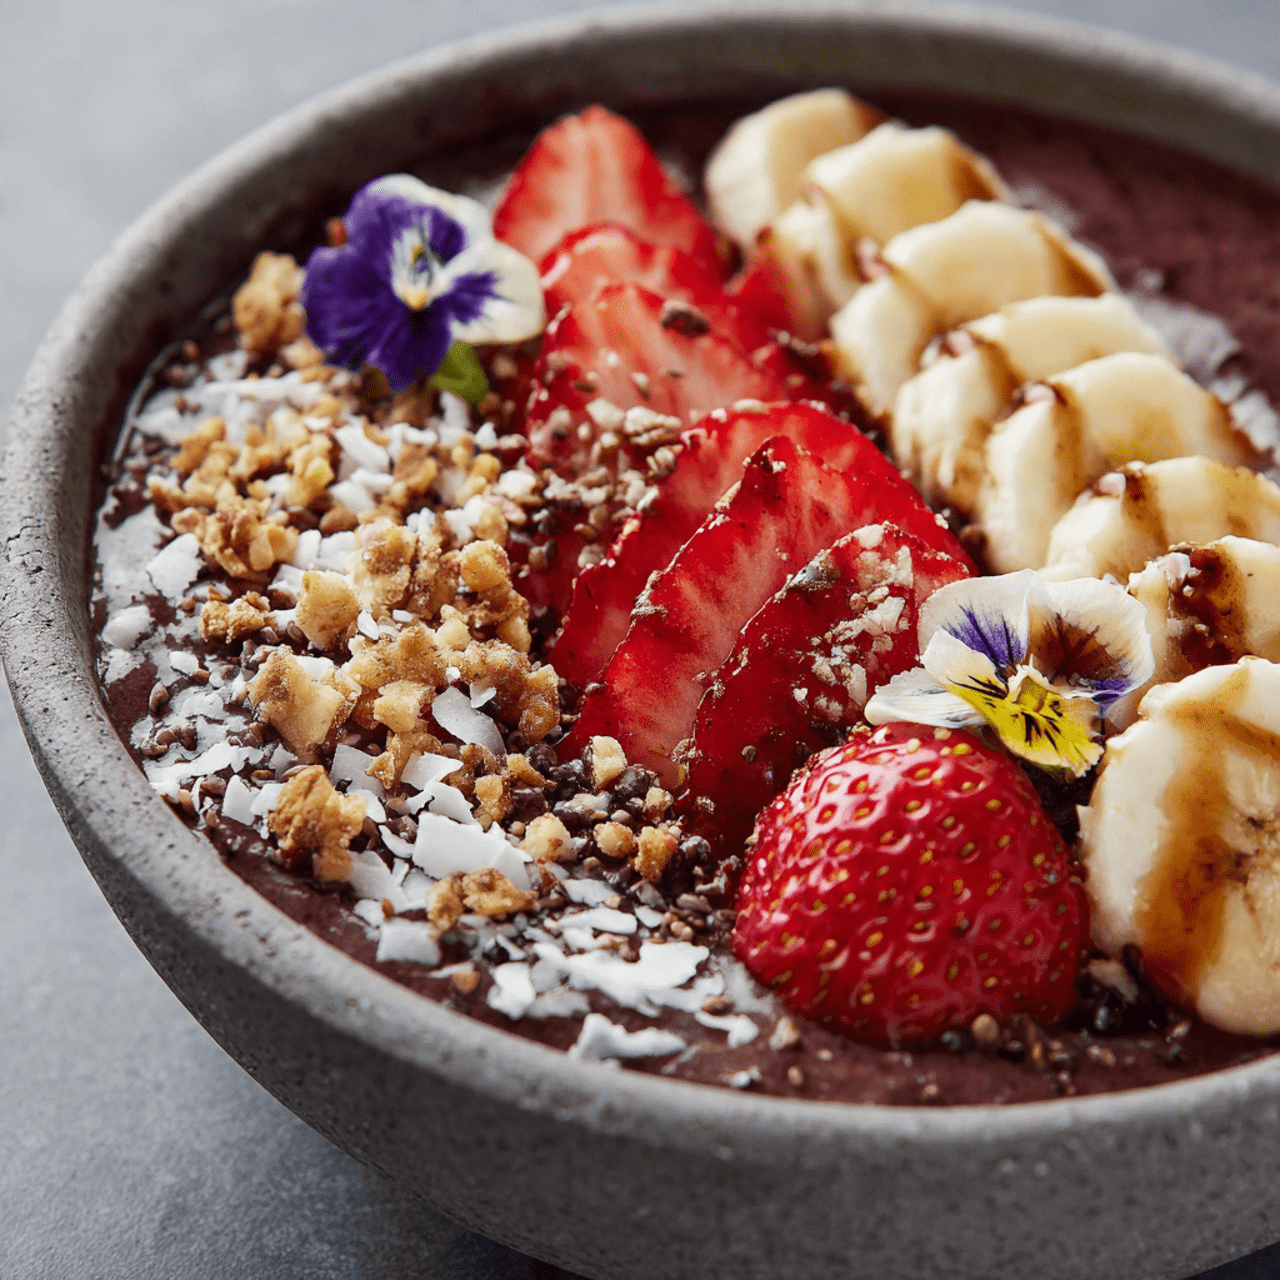
There is a reason why the Acai Bowl has become the undisputed king of healthy breakfast bowls. It’s that magical combination of an icy, sorbet-like texture, deep berry flavor, and the satisfying crunch of endless toppings. But let’s be real—spending $15 at a juice bar every morning adds up fast. That is why mastering this homemade version is an absolute game-changer. You get that thick, luscious, cafe-quality consistency right in your own kitchen, for a fraction of the price.
I promise you, there is no greater morning victory than blending up this vibrant purple masterpiece. The almond butter adds a hidden layer of creaminess and healthy fats that keeps you full, while the acai provides a rush of antioxidants. It’s refreshing, it’s beautiful, and it tastes like dessert while fueling your body like a superfood meal.
Get ready to skip the line at the smoothie shop. This is the only acai bowl recipe you will ever need.

Why This Acai Bowl Will Be Your Morning Obsession
You are going to be completely hooked on how fresh and energizing this breakfast feels. It is a standout recipe for so many reasons:
- Thick, Scoopable Texture: We use a high ratio of frozen ingredients to liquid, ensuring you get that authentic, thick, ice-cream-like consistency that defines a great bowl.
- Antioxidant Powerhouse: Acai berries are famous for their health benefits. Combined with blueberries, this bowl is packed with nutrients to start your day right.
- Ready in 10 Minutes: No cooking required! Just a bit of prep and a quick blend, and you have a gourmet breakfast ready to go.
- Cost-Effective: Making healthy breakfast bowls at home saves a significant amount of money compared to cafe prices, and you control the quality of ingredients.
- Endlessly Customizable: The base is delicious, but the toppings are where the fun begins. From tropical fruits to seeds and nut butters, you can change it up every single day.
Recipe Snapshot
| Prep Time | 10 minutes |
| Cook Time | 0 minutes |
| Total Time | 10 minutes |
| Servings | 1 bowl |
| Calories | 356 kcal |
| Course | Breakfast |
| Cuisine | American / Brazilian-Inspired |
| Difficulty/Method | Easy / Blending |
Your Shopping List for the Perfect Bowl
This recipe relies on frozen ingredients to achieve that perfect texture. Here is what you need to grab:

→ For the Base
- 1 pack frozen acai → Look for unsweetened puree packets in the freezer aisle. If you can’t find them, 2 teaspoons of dried acai powder works too!
- 1 large banana, frozen → Peel and slice your bananas before freezing them. This provides the creamy texture and natural sweetness.
- 1 cup frozen blueberries → Adds depth of color and extra berry flavor.
- 1 tbsp almond butter → Adds creaminess, healthy fats, and helps emulsify the frozen fruit.
- ¼ cup almond milk → Just enough liquid to get the blades moving. You can use any dairy-free milk you prefer.
→ Topping Ideas (The Fun Part!)
- Fresh Fruit: Sliced strawberries, bananas, kiwi, or mango.
- Crunch: Granola (homemade or store-bought), toasted coconut flakes, or cacao nibs.
- Nutrients: Chia seeds, hemp hearts, or a drizzle of honey/agave.
Let’s Blend! Your Step-by-Step Guide
Ready to make the thickest, dreamiest bowl ever? The technique is key here.
Part 1: Prep and Load
- Prep the Packs: If using frozen acai packets, run the packet under warm water for 5-10 seconds just to loosen the plastic, then break the frozen puree into 3-4 smaller chunks before opening. This saves your blender blades!
- Layer the Blender: Add the almond milk and almond butter to the blender first (liquid near the blades helps). Then add the frozen banana slices, frozen blueberries, and the chunks of acai.
Part 2: Blend to Perfection
- The Pulse and Tamp: Turn the blender on low. If you have a high-speed blender with a tamper (the black stick), use it! Vigorously push the frozen fruit down into the blades while blending on high.
- The Scrape Method: If you don’t have a tamper, blend for 10 seconds, stop, and scrape down the sides with a spatula. Repeat this process until the mixture catches and turns into a smooth, thick, purple swirl. Resist the urge to add more liquid unless absolutely necessary!

Part 3: Assemble and Serve
- Scoop and Top: Scoop the thick acai mixture into a serving bowl. It should mound up like soft serve. Immediately top with your favorite granola, fresh fruit, and a sprinkle of coconut or seeds. Serve right away before it melts!
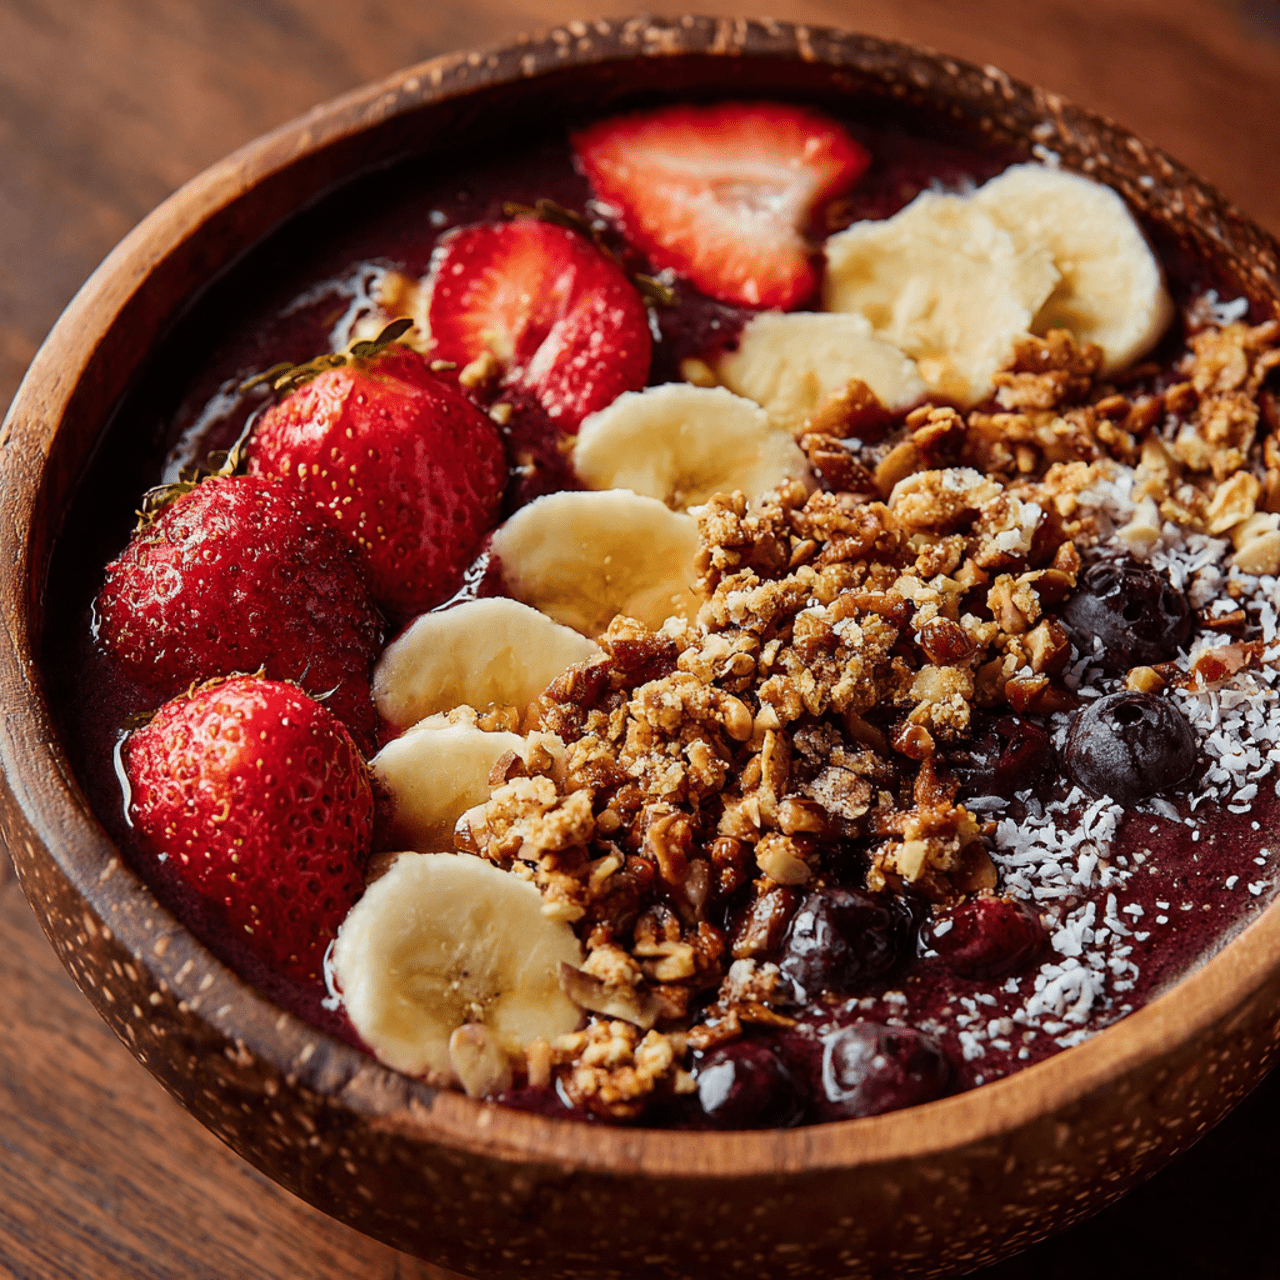
Homemade Acai Bowl
Ingredients
Equipment
Method
-
Prepare your ingredients: break the frozen acai pack into smaller chunks and ensure your banana is frozen and sliced.
-
Add the almond milk, almond butter, frozen banana, frozen blueberries, and acai chunks to a high-speed blender.
-
Blend on low, then increase to high. Use the tamper to push the frozen fruit down into the blades. If you don’t have a tamper, stop the blender periodically to scrape down the sides. Blend until thick and smooth.
-
Scoop the thick mixture into a bowl.
-
Top immediately with fresh fruit, granola, coconut, and seeds of your choice. Serve immediately.
Notes
Prep Ahead: You can pre-portion the fruit into freezer bags for quick morning blending.
Thawing Acai: Let the frozen acai packet sit on the counter for 5 minutes before blending; it makes it much easier to break up and blend smooth.
WiseRecipes’ Top Tips for Thick Bowls
These simple secrets will ensure your bowl is spoonable and luscious, not a watery soup.
- Freeze Your Bananas properly. Don’t just throw a whole banana in the freezer. Peel it, slice it into coins, and freeze them flat on a tray before bagging. This makes them blend much easier and creates a creamier texture.
- Less Liquid is More. The biggest mistake people make is adding too much milk because the blender gets stuck. Be patient! Use the tamper or stop and scrape. The less liquid you use, the thicker and better your bowl will be.
- Thaw the Acai Slightly. As the notes mention, letting the acai packet sit on the counter for 5 minutes allows it to soften just enough to blend without becoming liquid. Breaking it into chunks is crucial.
- Chill Your Bowl. If it’s a hot day, pop your serving bowl in the freezer for 10 minutes before you blend. This keeps your acai base frozen longer while you eat.
- Texture Variety. The best bowls have a mix of textures. Make sure you have something creamy (the base), something juicy (fresh fruit), and something crunchy (granola/nuts) for the perfect bite.
Creative Twists: Customize Your Bowl
Once you master the base, try these variations:
- Protein Boost: Add a scoop of vanilla or chocolate protein powder. You may need a tiny splash more milk to get it to blend.
- Tropical Twist: Swap the blueberries for frozen mango or pineapple and use coconut milk for the liquid.
- Chocolate Lover: Add a tablespoon of cacao powder to the blender and top with cacao nibs and chocolate granola.
Keep It Fresh! Storing and Prepping
Acai bowls are best eaten immediately, but you can prep ahead.
- Meal Prep Packs: Portion out the banana slices, blueberries, and broken acai chunks into individual freezer bags. In the morning, just dump a bag into the blender, add milk and nut butter, and blend!
- Leftovers: If you can’t finish it, pour the leftover mixture into popsicle molds and freeze. Acai popsicles make a great snack later! Do not try to store the blended bowl in the fridge; it will melt into a liquid smoothie.
FAQs: Your Acai Bowl Questions, Answered!
What is Acai?
Acai (pronounced ah-sigh-EE) is a small, dark purple berry from the Amazon rainforest. It has an earthy flavor that is often described as a cross between blackberries and unsweetened chocolate. It is famous for being packed with antioxidants.
Can I use water instead of almond milk?
You can, but the result will be icier and less creamy. The almond milk (or oat/soy milk) adds a richness that complements the creamy banana texture perfectly.
My blender isn’t high-speed. Can I still make this?
Yes, but you will need to be patient. You might need to let the fruit thaw for 5-10 minutes longer so it is softer, and you may need to stop and scrape down the sides more frequently. Do not just add more liquid, or you’ll lose the bowl texture.
Is this recipe vegan?
Yes! As written, using plant-based milk and nut butter, this recipe is 100% vegan and dairy-free.
Final Thoughts: A Bowl of Vitality
There is something so energizing about eating a meal that is this colorful and fresh. This Homemade Acai Bowl is more than just a pretty breakfast; it’s a nutrient-dense way to fuel your body and treat your tastebuds at the same time. Whether you are a yoga enthusiast or just someone who loves a good breakfast, this recipe is a keeper. I hope you enjoy every cool, crunchy, delicious spoonful. Happy blending!