The Most Beautiful Pink Ombre Birthday Cake (So Easy!)
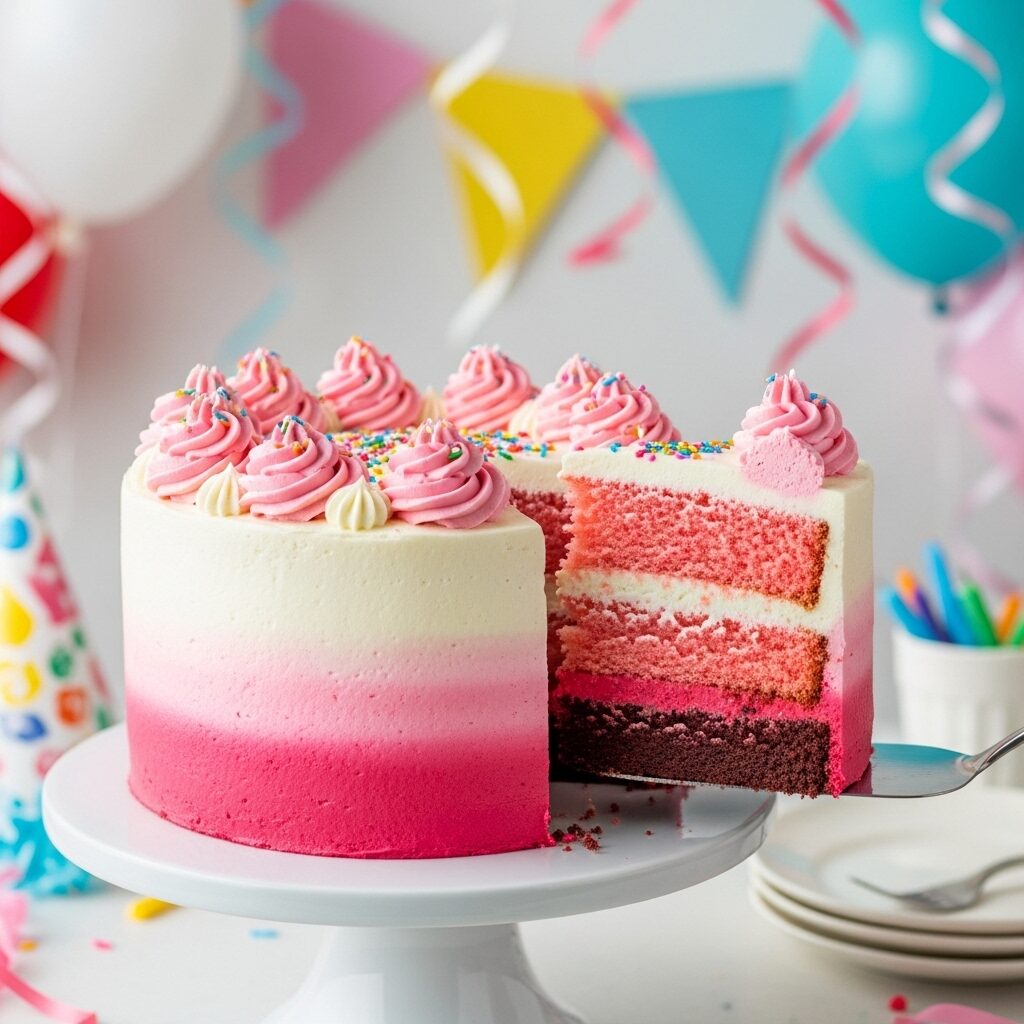
Imagine slicing into a beautiful, tall birthday cake to reveal a stunning surprise inside: three perfect, tender layers of cake in graduating shades of pink. That is the absolute magic of this incredible Pink Ombre Cake. It’s a true show-stopper that looks like it came from a fancy bakery, but is secretly so simple and…
Imagine slicing into a beautiful, tall birthday cake to reveal a stunning surprise inside: three perfect, tender layers of cake in graduating shades of pink. That is the absolute magic of this incredible Pink Ombre Cake. It’s a true show-stopper that looks like it came from a fancy bakery, but is secretly so simple and fun to create at home.
Here’s the thing about me: I believe a birthday cake should be a spectacle of joy, but I’m not a fan of stressful, complicated decorating. This recipe is my secret to creating that “wow” factor with ease. Instead of intricate piping, we let the color do all the work! The magic is all inside the cake, and it’s paired with the most luscious, tangy, and not-too-sweet cream cheese buttercream.
I promise you, this is one of the most rewarding cakes you will ever bake. The sponge is unbelievably moist and tender, and the simple technique of dividing and coloring the batter is a fun, creative project that yields a spectacular result. It’s the perfect, heartfelt centerpiece for a special birthday or celebration.
Get ready to bake the prettiest, most delicious pink layer cake that is guaranteed to make anyone’s heart beat a little faster.
Why This Pink Cake is a Celebration Must-Have!
You are going to be so proud of this beautiful creation. It’s a true joy to make and serve, and here’s why it will become your new go-to celebration cake:
- The Stunning Ombre Surprise: Slicing into the cake to reveal the beautiful graduated pink layers is a true “wow” moment that will delight kids and adults alike.
- Incredibly Moist & Tender Crumb: The combination of butter, yogurt, and milk creates a wonderfully soft, moist cake that stays fresh for days.
- Dreamy Cream Cheese Buttercream: The frosting is the perfect balance to the sweet cake—it’s tangy, creamy, and incredibly luscious without being overly sweet.
- A Fun and Creative Project: Mixing the different shades of pink is like an art project you get to eat! It’s a simple technique with a massive visual payoff.
- Looks Impressive, But It’s So Achievable: This cake looks incredibly professional, but the steps are straightforward and perfect for a baker of any skill level who wants to create something special.
Recipe Snapshot
| Prep Time | 45 minutes |
| Cook Time | 45 minutes |
| Cooling Time | 2 hours |
| Total Time | 3 hours 30 minutes |
| Servings | 16 servings |
| Calories | 439 kcal per serving |
| Course | Dessert |
| Cuisine | American |
| Difficulty/Method | Intermediate / Baking |
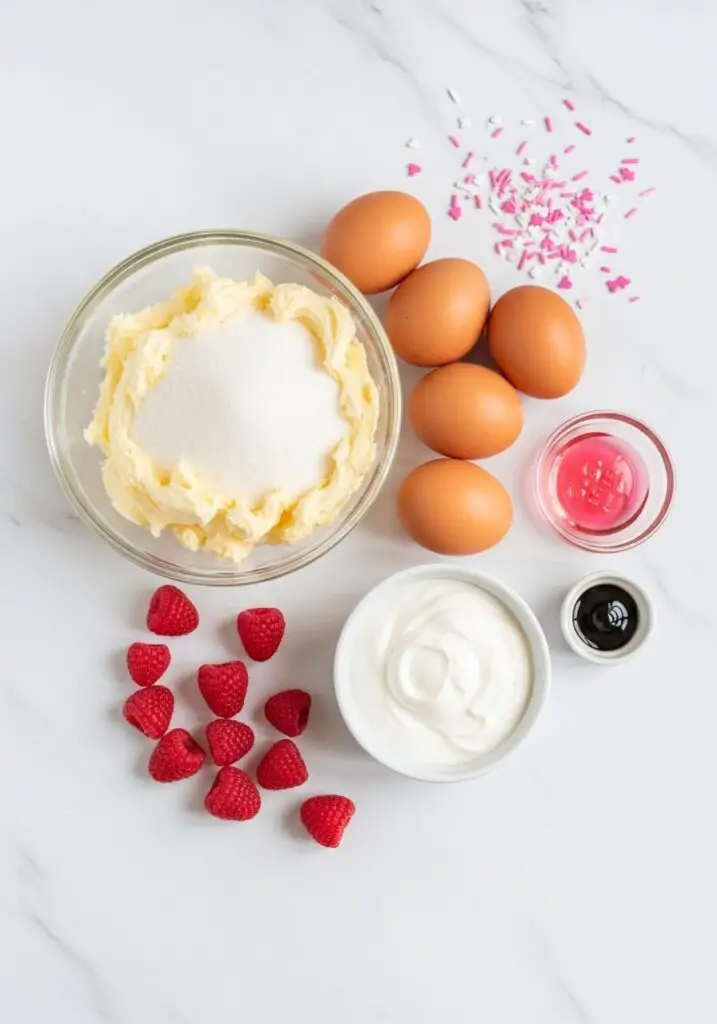
Your Shopping List for This Pretty Pink Cake
This recipe uses classic baking staples to create a show-stopping cake. Let’s get our ingredients in order!
→ For the Pink Ombre Cake Layers
- 210g (1 cup) butter, soft → Make sure it’s properly softened to room temperature for a fluffy cake.
- 180g (1 cup) sugar → Caster or granulated sugar will work.
- 3 medium eggs → At room temperature, of course!
- 300g (2 ⅖ cups) all-purpose flour
- 1 tsp baking soda & 1 tsp baking powder → Our leavening duo for the perfect rise.
- 210g (1 cup) Greek yogurt → Or whole milk yogurt or sour cream. This is a secret to a moist crumb!
- 100ml (⅖ cup) milk → To get the perfect batter consistency.
- Pink food coloring → Gel food coloring will give you the most vibrant colors without adding too much liquid.
→ For the Cream Cheese Buttercream
- 250g (1 cup) butter, very soft → Again, properly softened is key for a smooth, non-greasy frosting.
- 150g (1 ⅓ cups) powdered sugar → Also known as icing sugar.
- 200g (1 cup) full-fat, brick-style cream cheese → Don’t use the whipped kind!
→ For the Final Decorations
- 70g (⅓ cup) heavy cream
- 1 small bag bourbon vanilla sugar → Or just 1-2 teaspoons of granulated sugar.
- 1 small bag cream stiffener → (Like Whip It) Optional, but helps the whipped cream hold its shape.
- Sugar sprinkles → To match your pretty pink theme!
Let’s Bake! Crafting Your Beautiful Birthday Cake
Ready to create some edible art? This process is broken down into simple stages: the cake, the frosting, and the final, fun assembly!
Part 1: The Pink Ombre Cake Layers
- Prep Your Oven and Pan: First, preheat your oven to 350°F (175°C). Grease one 8-inch round springform pan and lightly dust it with flour.
- Cream the Butter and Sugar: In a large bowl with an electric mixer, beat the soft butter and sugar for several minutes until it’s very pale, light, and fluffy.
- Mix the Batter: Gradually beat in the room-temperature eggs, one at a time. In a separate bowl, whisk the flour, baking soda, and baking powder. Add the flour mixture to the butter mixture in three additions, alternating with the yogurt and milk, beginning and ending with the flour. Mix on low speed until just combined. Do not overmix!
- Create the Ombre: Divide the batter evenly among three separate bowls. Leave one bowl plain (lightest pink), add a tiny drop of pink food coloring to the second bowl for a medium pink, and add a few more drops to the third bowl for the darkest pink. Gently stir each to combine.
- Bake in Batches: Pour the darkest pink batter into your prepared pan and smooth the top. Bake for about 15 minutes, until a toothpick comes out mostly clean. Let it cool for a few minutes before turning it out onto a wire rack. Repeat the process with the medium pink and then the lightest pink batter, re-greasing your pan each time. Let all layers cool completely.

Part 2: The Creamy Frosting & Assembly
- Make the Buttercream: In a large bowl, beat the very soft butter with the powdered sugar until it’s light, white, and fluffy (this can take a good 5-7 minutes!). Add the cream cheese and beat on low speed for just a moment until it’s combined. Do not overbeat once the cream cheese is in!
- Assemble the Cake: Place your darkest cake layer on your serving plate. Spread a thin layer of the cream cheese buttercream on top. Place the medium pink layer on top of that, frost it, and finish with the lightest pink layer on top.
- The Crumb Coat & Chill: Apply a very thin layer of frosting all over the top and sides of the cake to trap in any loose crumbs. This is your “crumb coat.” Pop the cake in the fridge for 30-60 minutes to firm up.
- Final Frosting: Use the remaining buttercream to apply a final, beautiful, smooth or swirly coat of frosting to your chilled cake.
Part 3: The Final Decorations
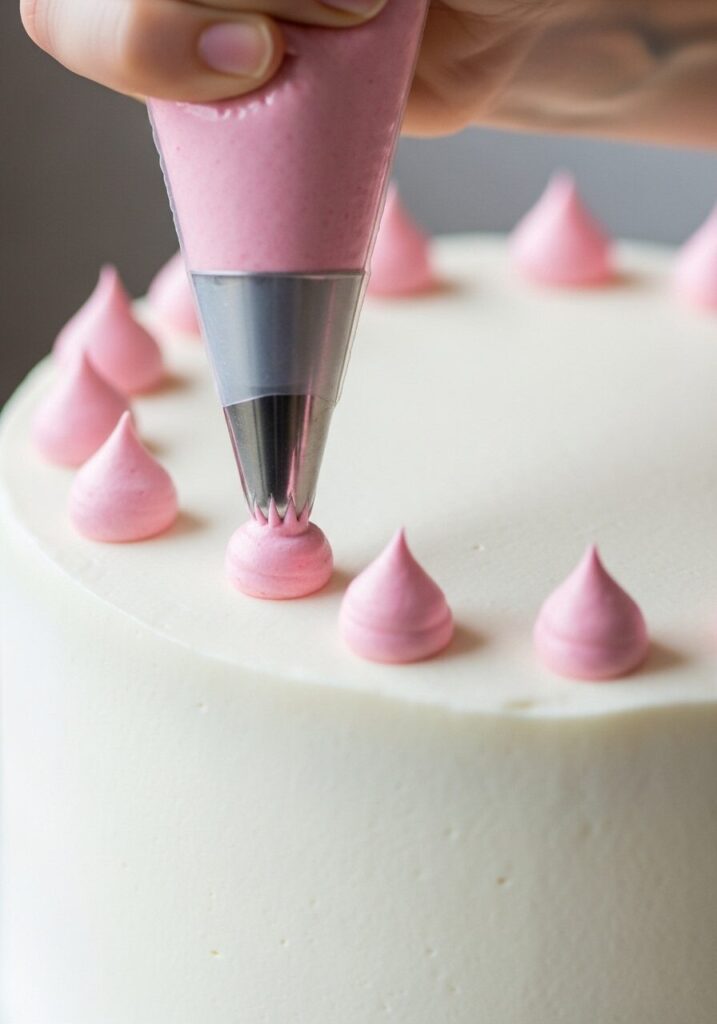
- Whip the Cream: Just before serving, whip the cold heavy cream until it starts to thicken. Add the vanilla sugar and cream stiffener, and continue to whip until it’s light and holds stiff peaks. Add a drop of pink food coloring if you like.
- Decorate and Serve: Transfer the pink whipped cream to a piping bag. Pipe small, decorative dots or rosettes on top of the cake. Finish with a generous amount of pretty sugar sprinkles, and get ready for the oohs and aahs!
WiseRecipes’ Top Tips for a Perfect Pink Cake
A beautiful cake like this has a few simple secrets. These are my must-knows for success!
- Room Temperature is Everything. For a smooth batter and a silky frosting, your butter, eggs, and yogurt MUST be at room temperature. This is the number one rule for great cakes!
- Don’t Overbeat the Cream Cheese! When making the frosting, beat the butter and sugar for ages until it’s super fluffy. But once you add the cream cheese, mix it on low and only until it’s just combined. Overbeating cream cheese can make it become runny.
- The Crumb Coat is a Professional Secret. That thin, chilled “ugly” layer of frosting is the key to a perfectly clean, crumb-free final coat. It’s a simple step that makes your cake look so much more professional.
- The “Upside Down” Top Layer Trick. For a perfectly flat top surface that’s easy to decorate, place your final cake layer on upside down, so the flat bottom of the cake becomes the top of your finished cake.
- The Quick Bake Shortcut. As the recipe notes, a great time-saver is to bake the entire, uncolored batter in one pan (you’ll need to increase the bake time significantly). Let it cool completely, then slice it into three horizontal layers and color the frosting in three shades of pink to create an ombre effect on the outside of the cake!
Keep It Fresh! Storing Your Masterpiece
This cake is a fantastic make-ahead project, perfect for stress-free party planning!
- Make-Ahead Plan: You can bake the cake layers a day or two in advance. Once completely cool, wrap them tightly in plastic wrap and store them at room temperature. The buttercream can also be made a day ahead and stored in an airtight container in the fridge (just let it come to room temperature and re-whip it before using).
- Refrigerator: Once assembled and decorated, the cake should be stored in a cake carrier in the refrigerator. It will keep beautifully for up to 4 days.
- Serving: For the best flavor and softest texture, take the cake out of the refrigerator a good 1-2 hours before you plan to serve it to let it come to room temperature.
Easy Pink Ombre Birthday Cake
Ingredients
Equipment
Method
- Preheat oven to 350°F (175°C). Grease and flour one 8-inch springform pan.
- Beat the soft butter and sugar for several minutes until light and fluffy. Gradually stir in the eggs.
- In a separate bowl, whisk flour, baking soda, and baking powder. Add to the butter mixture in three parts, alternating with the yogurt and milk, mixing on low until just combined.
- Divide the batter evenly into three bowls. Leave one plain, color the second with a little pink food coloring, and the third with more coloring to create an ombre effect.
- Bake each colored batter in the prepared pan for about 15 minutes. Let cool before turning out onto a wire rack. Repeat for all three layers and let cool completely.
- Beat the very soft butter and powdered sugar for 5-7 minutes until light and fluffy. Add the cream cheese and beat on low speed only until just combined.
- Assemble the cake by stacking the layers (darkest on the bottom) with a layer of cream cheese buttercream between each.
- Apply a thin ‘crumb coat’ of frosting over the entire cake and chill for 30-60 minutes.
- Apply a final, thicker layer of frosting over the chilled cake.
- Before serving, whip the heavy cream with sugar, cream stiffener (if using), and a drop of pink coloring. Pipe small dots on the cake and decorate with sprinkles.
Notes
FAQs: Your Pink Cake Questions, Answered!
Do I need three separate cake pans?
Nope! The recipe is written to be made with just one 8-inch pan, baking the layers one after the other. It’s a great space-saver! Of course, if you do have three identical pans, you can bake them all at once to save time.
What if I don’t have Greek yogurt?
No problem! An equal amount of full-fat sour cream or even just whole milk yogurt will work beautifully here. The goal is the fat and acidity, which contribute to a very tender and moist cake.
What is “cream stiffener”? Is it necessary?
Cream stiffener (often sold under the brand name “Whip It”) is a starch-based powder that helps stabilized whipped cream hold its shape for much longer without weeping or deflating. It’s not necessary if you’re decorating and serving the cake right away, but it’s a great little secret weapon if you want your decorations to look perfect for hours.
My cream cheese frosting is runny! How can I fix it?
This is a common issue! It usually means either your butter was too warm or you overbeat the cream cheese. The quickest fix is to pop the whole bowl of frosting in the refrigerator for 20-30 minutes to firm up the butter, then try beating it again for a short time. You can also try adding a bit more powdered sugar to thicken it.
My Final Thoughts: A Cake Made with Love
This Pink Ombre Birthday Cake is so much more than just a dessert; it’s a joyful, colorful celebration on a plate. It’s a heartfelt way to show someone you care, and the stunning result is a wonderful reward for your efforts. I hope you have a truly magical time creating this beautiful cake for a special birthday!