Easy Pizza Roses
How I Found My Go-To Snack The first time I made Easy Pizza Roses I was trying to impress a friend at a last-minute game night, and honestly I wasn’t expecting much. I had a can of pizza dough in the fridge, a jar of marinara, a handful of pepperoni, and some mozzarella slices. It…
How I Found My Go-To Snack
The first time I made Easy Pizza Roses I was trying to impress a friend at a last-minute game night, and honestly I wasn’t expecting much. I had a can of pizza dough in the fridge, a jar of marinara, a handful of pepperoni, and some mozzarella slices. It felt so simple that I almost skipped it, but the kitchen filled with this incredible, buttery, tomatoey aroma as they baked and everyone stopped talking to stare at them. If you like playful party food that tastes like a cozy pizzeria, these are for you. If you want another kid-friendly spin on things, I sometimes pair them with a sweet dessert and a fruity version I found online, which is worth a try at brunch: easy fruit pizza.
The Secret Behind Perfect Easy Pizza Roses
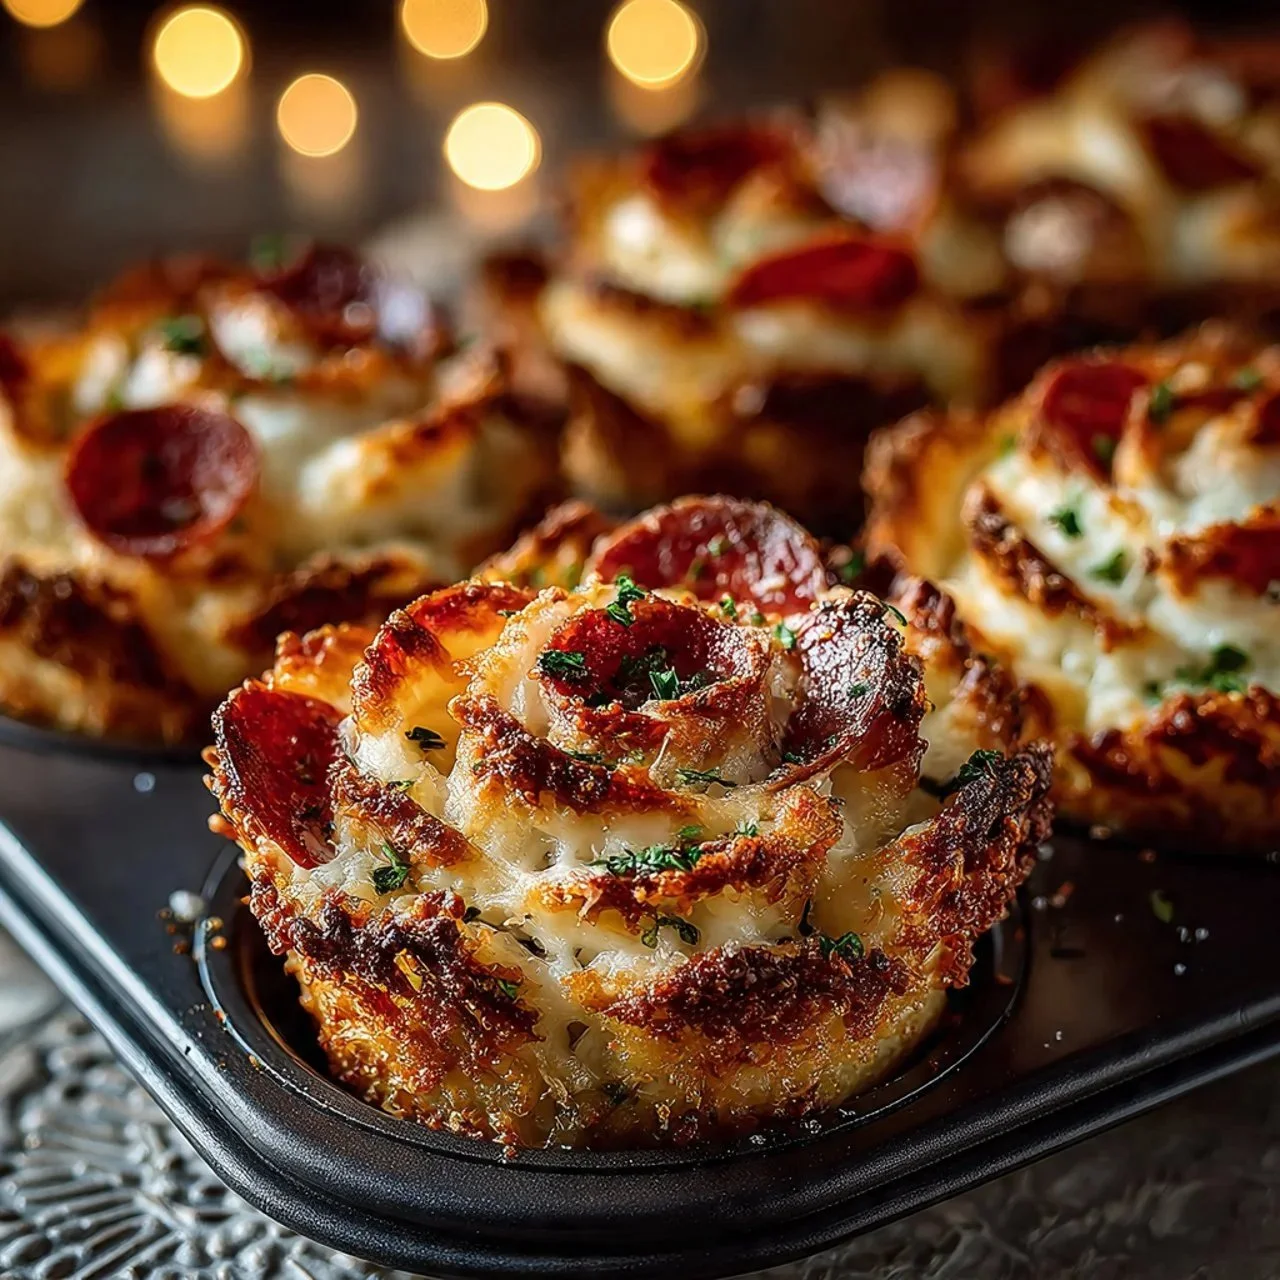
What makes these roses special is the layering and the little overhang of pepperoni that crisps up and looks like petals. For this recipe I use 1 can of pizza dough, about 1/2 cup marinara sauce, 6 to 8 slices of mozzarella cheese, and 12 to 18 slices of pepperoni. The dough becomes golden and slightly chewy at the base and tender in the folds, while the cheese melts into the spirals and the pepperoni edges get lacy and slightly crunchy. One tip I learned is to leave a thin border of dough at each strip’s edge so the sauce does not leak out and the roll stays tidy when you roll it into a rose. If you want to explore other savory bowls and high-protein ideas after you make these, I have a favorite cottage cheese pizza bowl recipe that complements this kind of meal: easy high-protein cottage cheese pizza bowl recipe.
Step-by-Step, the Way I Make Them
I usually preheat the oven at the same time I gather my ingredients so nothing sits too long, because ovens bring out smells that make me impatient. First, I follow the essential start: 1. Preheat your oven to 400°F (200°C). Then I lightly grease a muffin tin; I use a little melted butter brushed into each cup because it gives the bottoms that golden sheen: 2. Lightly grease a muffin tin with cooking spray or butter. I unroll the pizza dough and slice it into six long strips, roughly 1 to 2 inches wide, which is where you decide how big your roses will be: 3. Unroll the pizza dough and slice it into six long strips (1-2 inches wide). Next, I spread just enough marinara on each strip so the dough stays soft and does not get soggy; leave a small border for the roll: 4. Spread marinara sauce across each strip of dough, leaving a border. On top of that I place my mozzarella; sometimes I fold a slice to fit the strip and then top with another for cheesier roses: 5. Layer sliced mozzarella cheese over the sauce. Here’s my little flourish: arrange the pepperoni so half of each slice hangs off the edge, which will flare up like petals as it bakes: 6. Arrange pepperoni slices on top of the cheese, letting half hang off the edge. Then I roll each strip into a tight rose shape, pressing gently at the base so it keeps its form: 7. Roll each strip of dough into a tight rose shape. Each rose goes into a greased muffin cavity where it can unfurl slightly without losing shape: 8. Place each rolled pizza rose in the muffin tin. I slide them into the center of the oven and listen for the tiny sizzle and watch the tops turn a beautiful bronze; they need only a short time: 9. Bake for 12-15 minutes until golden brown and cheese is melted. I always let them rest a bit so the cheese firms up and you can pull them out without burning your fingers: 10. Allow to cool slightly before serving, optionally adding fresh basil or olive oil.
I know this reads like a list, but that’s the exact sequence that saves my sanity on busy nights. A quick tip: if the pepperoni curls up too much for you, press it lightly after rolling so it tucks in; if you like it super crisp, leave it exposed.
When You Know They’re Done Right
You can tell these are finished when the tops are golden brown with hints of dark caramel around the exposed pepperoni, and the cheese has melted and pooled slightly between the petals. The bottoms should be set and not doughy when you lift one out with a fork; that slight chew is part of the charm. The smell is immediate: warm tomato, melted cheese, and that toasted dough scent that always makes people hover around the oven. I usually add a tiny drizzle of olive oil and a few slivers of fresh basil at serving, which cuts through the richness and brightens everything. These go wonderfully with a simple green salad or a bowl of roasted vegetables if you want to keep it light, and for a heartier spread pair them with a soup.
Little Twists and How I Keep Leftovers Tasty
I love experimenting. Once I swapped pepperoni for thinly sliced prosciutto and added arugula after baking for a peppery bite. Another favorite is a vegetarian version using roasted red peppers and spinach with a sprinkle of feta. If you want a meatier option, add cooked Italian sausage to the cheese layer, or for a breakfast-style rose try ham and a thin slice of cheddar. If you plan to make these ahead, bake them until just golden and warm through, cool completely, then store in an airtight container in the refrigerator for up to three days. Reheat in a 350°F oven for 8 to 10 minutes so the crust crisps back up and the cheese becomes melty again. I do not recommend microwaving unless you are in a rush; it makes the dough gummy. One storage trick I’ve learned: place a sheet of parchment between layers if you stack them so they do not stick. For low-carb fans who love the concept but want fewer carbs, consider a casserole-inspired version I tried that skips the crust altogether: easy low-carb keto crustless pizza casserole.
The Little Things I Always Tell Friends
I’ll confess something—this recipe feels fancy, but it is a humble trick. I keep a can of dough on hand for parties because it turns weeknight ingredients into something celebratory. My favorite personal tips: one, use slightly chilled dough so it is easier to slice into neat strips; two, don’t drown the sauce or the dough will be hard to roll; and three, if you’re feeding kids, cut the pepperoni into fun shapes before layering. Once, I brought these to a potluck and someone asked if a bakery made them. I said yes, my oven and a little impatience did.
Conclusion
If you want another take on the pepperoni-forward version I hinted at earlier, check out this beautiful write-up of Easy Pepperoni Pizza Roses – Holoka Home for extra inspiration. For a slightly fancier technique and more variation ideas, I often read the step-by-step photos at Best Pizza Roses Recipe – Delish before trying a new twist.

Easy Pizza Roses
Ingredients
Method
- Preheat your oven to 400°F (200°C).
- Lightly grease a muffin tin with melted butter or cooking spray.
- Unroll the pizza dough and slice it into six long strips, roughly 1 to 2 inches wide.
- Spread marinara sauce across each strip of dough, leaving a small border.
- Layer sliced mozzarella cheese over the sauce.
- Arrange pepperoni slices on top of the cheese, letting half hang off the edge.
- Roll each strip of dough into a tight rose shape.
- Place each rolled pizza rose in the greased muffin tin.
- Bake for 12-15 minutes until golden brown and cheese is melted.
- Allow to cool slightly before serving, optionally adding fresh basil or a drizzle of olive oil.