The Ultimate Freaky-Face Halloween Oreo Cookies (So Easy & No-Bake!)
Imagine a Halloween treat that requires zero baking, is ready in 15 minutes, and is guaranteed to produce squeals of delighted horror from kids and adults alike. That, my spooky friends, is the absolute genius of these Freaky-Face Halloween Oreo Cookies. It’s a spectacularly simple, no-bake project that transforms a classic Oreo into a goofy,…
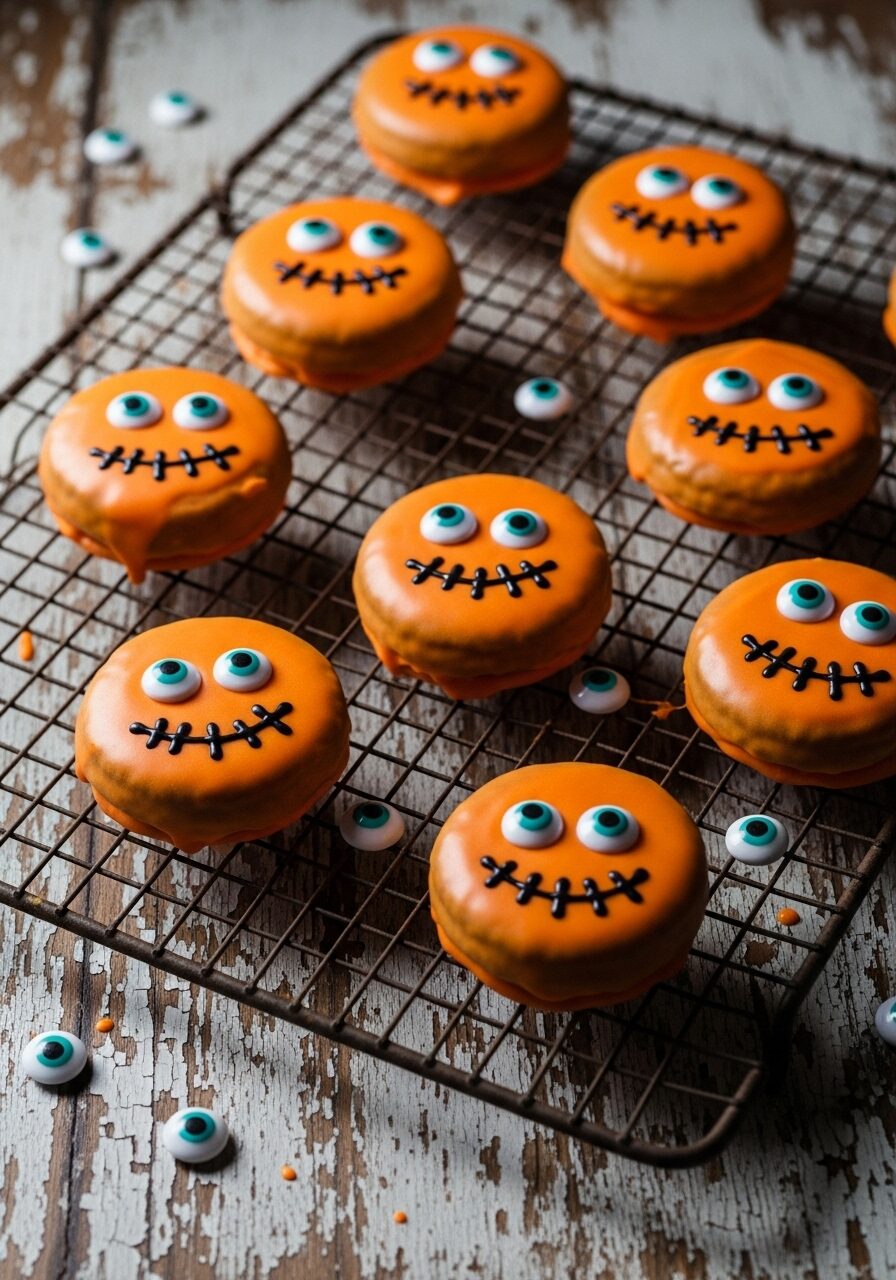
Imagine a Halloween treat that requires zero baking, is ready in 15 minutes, and is guaranteed to produce squeals of delighted horror from kids and adults alike. That, my spooky friends, is the absolute genius of these Freaky-Face Halloween Oreo Cookies. It’s a spectacularly simple, no-bake project that transforms a classic Oreo into a goofy, one-eyed, stitched-up monster that is almost too cute to eat.
Here’s the thing about Halloween: it’s all about the fun, and the food should be no exception! I am completely in love with this recipe because it embraces the power of clever shortcuts. By using ready-made Oreo cookies and pre-made icing, you get to skip all the baking and go straight to the best part: the creative, spooky decorating. It’s the perfect, low-stress activity for a classroom party or a fun afternoon with the kids.
I promise you, there is no greater joy than watching a platter of these little monsters come to life. The combination of the crunchy chocolate cookie, the sweet orange-flavored icing, and the fun of creating each unique, freaky face is what the Halloween spirit is all about. They are the ultimate easy win for any spooky celebration.
Get ready to create the fastest, easiest, and most character-filled Halloween treat of the season!

Why These Freaky-Face Cookies Are a Halloween Lifesaver!
You are going to be completely obsessed with how fast and fun these spooky cookies are to make. This recipe is a true Halloween hero. Here’s why:
- A True 15-Minute, No-Bake Treat: Seriously! With no baking and no fancy ingredients, you can have a platter of these adorable monster cookies ready in just 15 minutes.
- The Ultimate Kid-Friendly Activity: Dipping and decorating is the best part! This is a perfect, low-mess project for little hands to get creative and make their own spooky monster faces.
- Clever Use of Store-Bought Shortcuts: This recipe is all about working smarter, not harder. Using ready-made Oreos and icing means you get all the fun with none of the fuss.
- Incredibly Cute and Spooky: The combination of the bright orange icing, the single googly eye, and the stitched-on chocolate mouth is so charmingly creepy.
- Perfect for Last-Minute Parties: Need a festive treat in a hurry? This is your answer! It’s the perfect, no-stress solution for any last-minute Halloween gathering.
Recipe Snapshot
| Prep Time | 15 minutes |
| Drying Time | 30+ minutes |
| Total Time | ~45 minutes |
| Yield | 14 cookies |
| Calories | 104 kcal per cookie |
| Course | Snack, Dessert |
| Cuisine | American |
| Difficulty/Method | Easy / No-Bake |
Your Shopping List for These Freaky Friends
This recipe is all about smart shortcuts! Here’s the simple list of what you’ll need from the store:
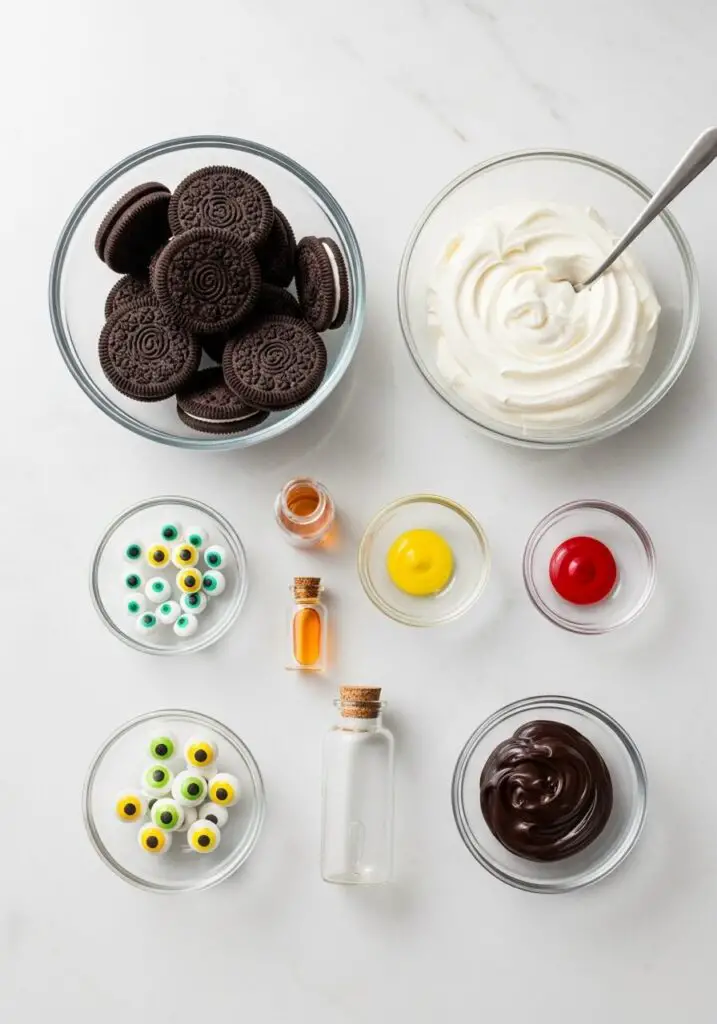
→ For the Cookies & Icing
- 1 (154g) pack Oreo Original Cookies → The perfect dark, crunchy base for our monsters.
- 400g tub Renshaw Royal Icing → Or any thick, ready-made royal icing.
- ½ tsp yellow and ½ tsp red food coloring gel → To create that perfect pumpkin-orange color.
- Few drops Valencian Orange Natural Extract → To give our icing a delicious, unexpected orange flavor.
→ For the Decorations
- 14 Cake Decor Edible Eyes → The key to bringing your monsters to life!
- Dark Chocolate Decorating Icing → A tube of black or dark brown icing is perfect for drawing the details.
Let’s Decorate! Your 15-Minute Guide
This is a fun and fast decorating project. Set up your station and let’s create some monsters!
Part 1: The Orange Icing Base
- Prep Your Station: Line a large baking tray with parchment paper and place a wire rack on top. This will be your drying station.
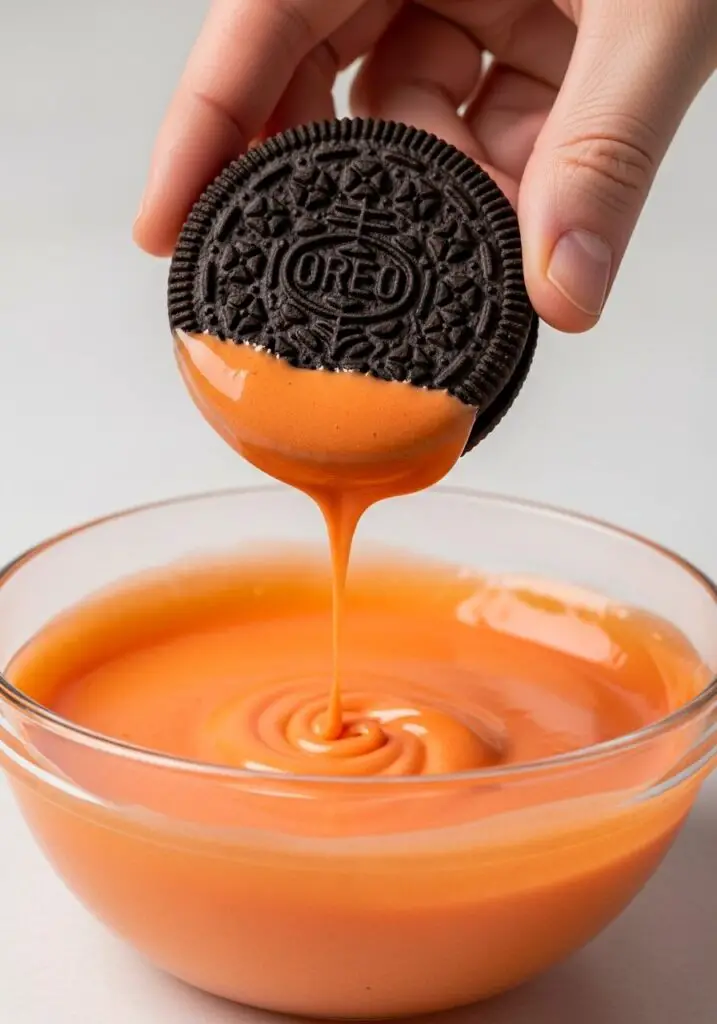
- Color the Icing: In a medium bowl, mix the royal icing with the yellow and red food coloring gels until you achieve a vibrant orange color. Stir in a few drops of the orange extract, to taste. The icing should be thick but still fluid enough to dip, about the consistency of thick cream. If it’s too stiff, add a single drop of water at a time to loosen it.
Part 2: Bring Your Monsters to Life
- Dip the Cookies: One at a time, dip the top of each Oreo cookie into the orange icing, letting any excess drip off back into the bowl. Place the iced cookie onto your prepared wire rack.
- Add the Eye: While the orange icing is still wet, immediately stick a single edible eye onto one side of each cookie.
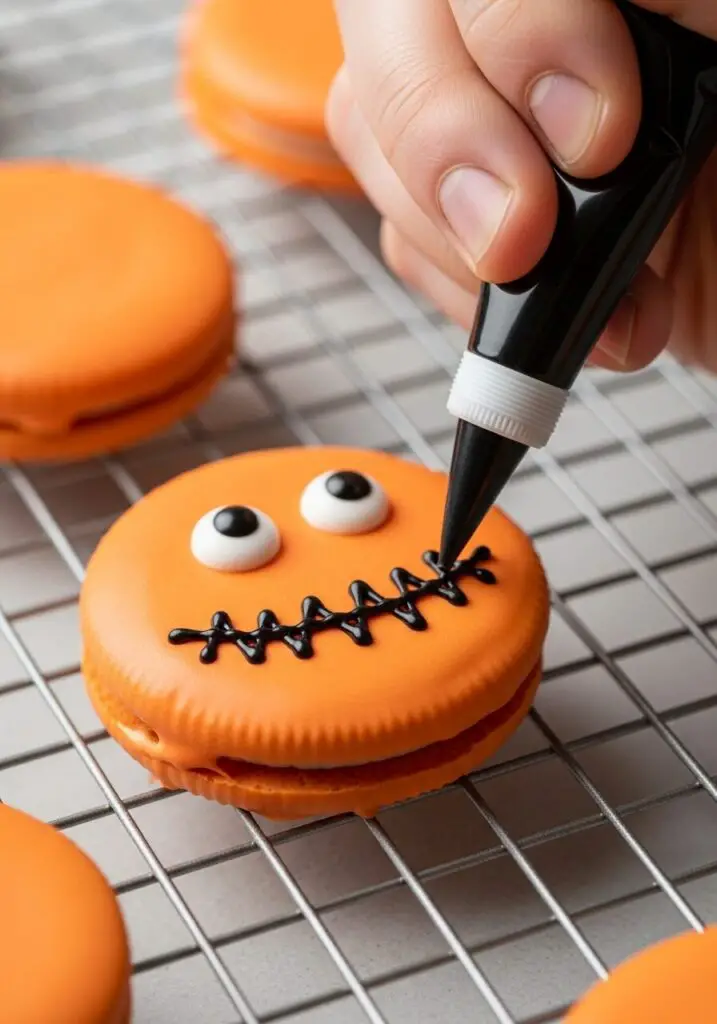
- Draw the Face: Use the dark chocolate decorating icing to draw an “X” for the other eye and a spooky mouth. You can do a zig-zag stitch, or a straight line with little vertical stitches to look like a creepy grin.
- Dry and Serve: Let the cookies sit at room temperature on the wire rack until the icing is completely dry and set before serving or storing.
WiseRecipes’ Top Tips for Perfect Monster Cookies
These simple secrets will help you create the cutest and spookiest freaky-face cookies.
- Get the Icing Consistency Right. Your royal icing should be like “viscous double cream”—thick enough to coat the cookie opaquely, but thin enough that the excess will drip off. If it’s too thick, add water ONE drop at a time. If it’s too thin, whisk in a little more powdered sugar.
- Work Quickly! Royal icing begins to form a crust very quickly. You need to dip the cookie and immediately place the edible eye on it while the surface is still wet, or it won’t stick.
- Use a Wire Rack. Placing the dipped cookies on a wire rack is essential. It allows the excess icing to drip away cleanly, preventing the cookies from forming a giant, messy “foot” of icing on the bottom.
- Embrace the Imperfection! These are supposed to be spooky, stitched-up monsters! Don’t worry about perfect lines or centered eyes. The more wonky and imperfect they are, the more character they will have.
- Let Them Dry Completely. Be patient and give the icing plenty of time to fully harden before you try to stack or store the cookies. This can take anywhere from 30 minutes to a couple of hours, depending on the humidity.
Keep Them Fresh! Storing Your Cookies
Once fully dry, these cookies store very well.
- Room Temperature: After the icing has completely hardened, store the cookies in a single layer in an airtight container at room temperature for up to a week. If you need to stack them, place a sheet of parchment paper between the layers to prevent any sticking or damage.
Chocolate & Orange Freaky-Face Cookies
Ingredients
Equipment
Method
- Line a large baking tray with baking parchment and put a wire rack on top.
- In a medium bowl, mix the royal icing with the red and yellow coloring gels and the orange extract to make a thick orange paste. Add a drop of water if needed to loosen to the consistency of thick cream.
- Dip the top of each Oreo cookie into the orange icing, allow any excess to drip off, then place onto the prepared wire rack.
- While the icing is still wet, stick a single edible eye on each cookie.
- Use the chocolate decorating icing to make an ‘X’ for the other eye, and a spooky mouth (like a zig-zag or a stitched line).
- Leave the cookies to dry completely at room temperature before serving.
Notes
FAQs: Your Freaky-Face Cookie Questions, Answered!
Can I make my own royal icing?
Yes, absolutely! You can easily make royal icing by whisking together about 2 cups of powdered sugar, 2-3 tablespoons of milk or water, and a splash of your orange extract. Add the liquid slowly until you reach the perfect dipping consistency.
What if I can’t find orange extract?
You can simply use a little bit of vanilla extract instead, or omit the extract entirely. The cookies will still be delicious! A tiny bit of fresh orange zest would also be a wonderful, fresh alternative.
Where can I find edible googly eyes?
Edible googly eyes are a fantastic cake decorating staple! You can find them in the baking or seasonal aisle of most major grocery stores, at craft stores, or online, especially around Halloween.
Can I use a different kind of cookie?
Of course! This decorating idea would be adorable on any round, sturdy cookie. Shortbread cookies, chocolate wafer cookies, or even the tops of vanilla cupcakes would be a great canvas for these freaky faces.
Final Thoughts: The Easiest Spooky Treat
There is nothing more satisfying than creating a super fun, themed Halloween treat with almost no effort. These Chocolate & Orange Freaky-Face Cookies are a celebration of clever shortcuts and the playful, creative spirit of the holiday. I hope you and your family have a blast bringing your own little army of delicious monsters to life. Happy Halloween!