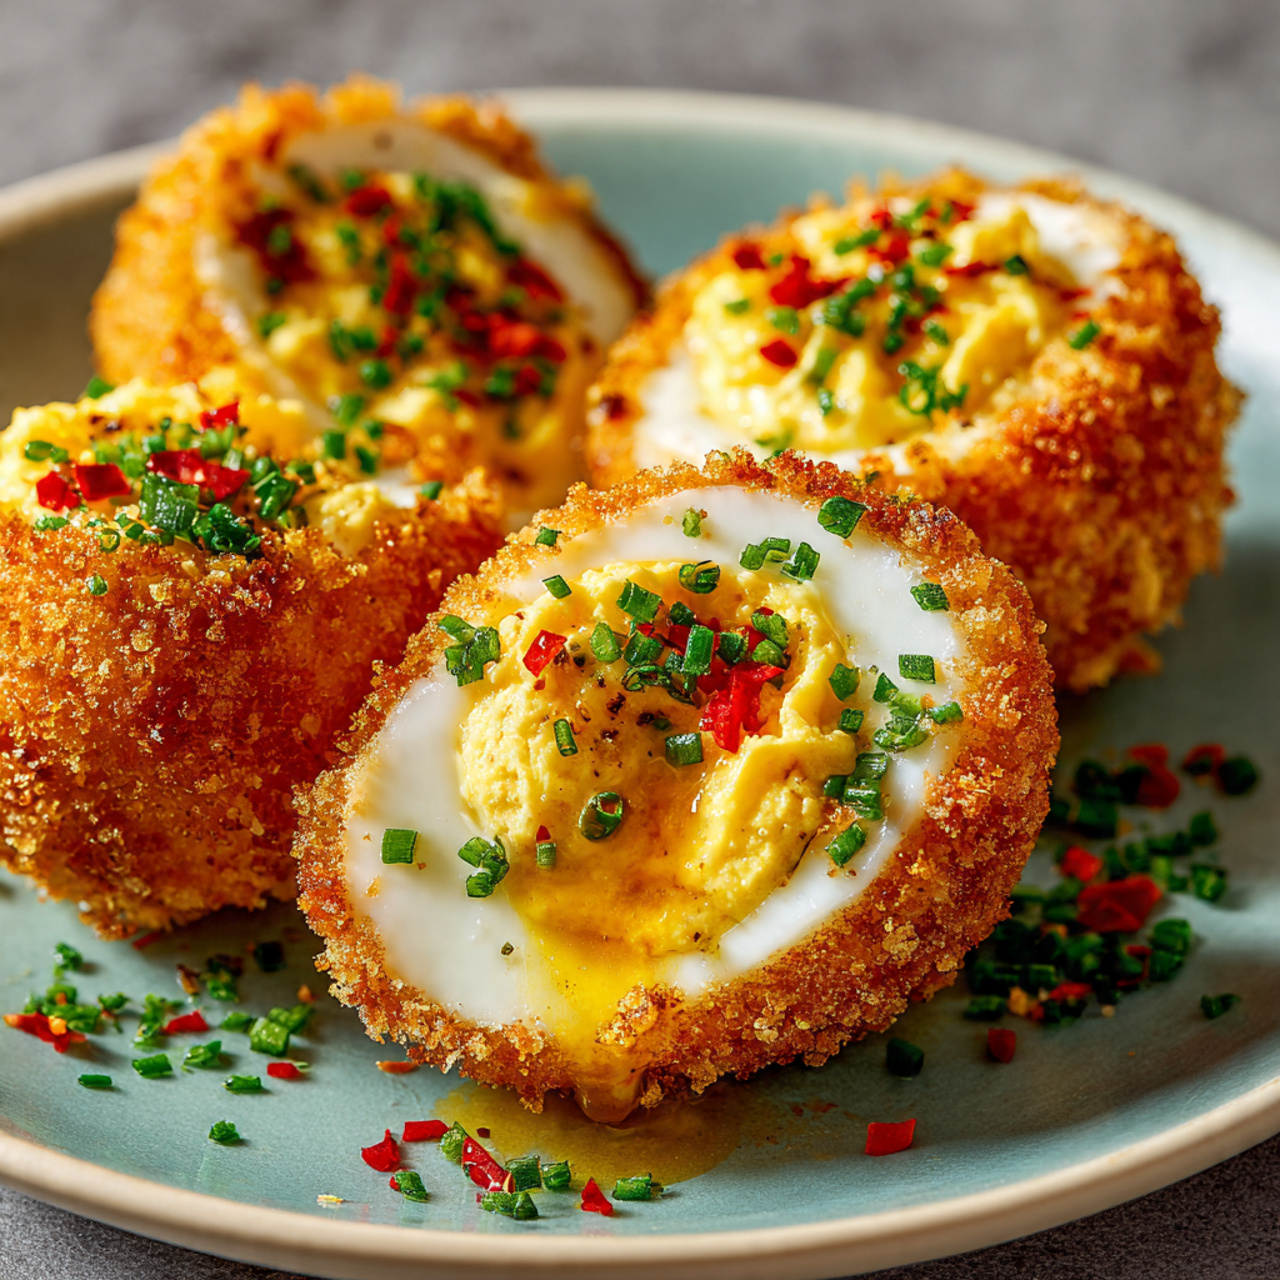
The Ultimate Fried Deviled Eggs (Crispy Christmas Appetizer!)
Imagine your favorite creamy, tangy deviled egg—a classic, beloved party staple. Now, imagine that perfect bite encased in a shatteringly crisp, golden-brown panko crust. That, my friends, is the next-level, show-stopping magic of these Fried Deviled Eggs. This is, without a doubt, the appetizer that will disappear first from your Christmas spread. I promise you,…
Imagine your favorite creamy, tangy deviled egg—a classic, beloved party staple. Now, imagine that perfect bite encased in a shatteringly crisp, golden-brown panko crust. That, my friends, is the next-level, show-stopping magic of these Fried Deviled Eggs. This is, without a doubt, the appetizer that will disappear first from your Christmas spread.
I promise you, there is no greater party triumph than watching your guests’ faces when they take their first bite. The warm, crunchy exterior gives way to the cool, creamy, savory yolk filling in the most spectacular way. It’s a true flavor and texture explosion that will have everyone begging you for the recipe.
Get ready to create the most talked-about dish of the night, a recipe that proves everything—even a perfect deviled egg—is better when it’s fried.

Why These Fried Deviled Eggs Are a Holiday Must-Have
You are going to be amazed by this incredible upgrade to a classic. This recipe is a true game-changer. Here’s why you’ll be obsessed:
- The Ultimate Texture Contrast: The warm, shatteringly crisp panko shell against the cool, smooth, and creamy yolk filling is an absolutely unforgettable experience.
- A True Show-Stopping Appetizer: These aren’t your average deviled eggs. They are a unique, impressive, and delicious starter that will elevate any holiday party or gathering.
- Easier Than They Look: The process is a straightforward three-step breading and a quick fry. We’ll break it down so you can master it on your first try!
- Perfect for Prepping Ahead: You can hard-boil the eggs and make the creamy yolk filling a day in advance, making party day assembly quick and stress-free.
- Insanely Delicious & Addictive: The combination of savory, tangy, creamy, and crunchy is simply irresistible. Be prepared to make a double batch!
Recipe Snapshot
| Prep Time | 30 minutes |
| Cook Time | 15 minutes |
| Total Time | 45 minutes |
| Servings | 6-8 servings (makes 24 halves) |
| Calories | 477 kcal per serving |
| Course | Appetizer |
| Cuisine | American |
| Difficulty/Method | Intermediate / Frying |
Your Shopping List for This Crispy Creation
This recipe uses classic deviled egg ingredients with a few additions for the perfect crunchy coating.

→ For the Creamy Yolk Filling
- 12 hard-boiled large eggs → The foundation of our dish.
- ⅓ cup mayonnaise → Use a good quality mayo like Duke’s or Hellmann’s for the best flavor.
- 2 Tbsp yellow mustard → For that classic, tangy deviled egg kick.
- 2 tsp dill pickle juice → My secret ingredient for the perfect balance of tang and brine! You can also use distilled white vinegar.
- ¼ tsp black pepper & ¾ tsp kosher salt → Divided for seasoning the filling and the breading.
- A few dashes of hot sauce → Optional, but highly recommended for a little extra depth.
→ For the Crispy Coating & Frying
- 2 raw large eggs → To act as the binder for our breading.
- Vegetable oil → Or another neutral, high-smoke-point oil for frying.
- 1 cup all-purpose flour → The first step in our three-part breading station.
- 1 cup panko breadcrumbs → The key to a light, airy, and super crispy crust. Do not substitute!
- ¼ cup grated Parmesan cheese → Adds a salty, savory, umami flavor to the crust. (Ensure it uses microbial or vegetable rennet if needed.)
→ For Garnish
- Paprika & Chopped fresh chives → The classic, beautiful finishing touches.
Let’s Get Frying! Your Step-by-Step Guide
Ready to create the best appetizer ever? Let’s break it down into simple, manageable steps.
Part 1: The Creamy Yolk Filling
- Prep the Eggs: Peel your 12 hard-boiled eggs and carefully cut them in half lengthwise. Gently scoop out the yolks into a medium bowl. Set the empty egg white halves aside.
- Make the Filling: Using a fork, mash the yolks until they are fine and crumbly. Add the mayonnaise, mustard, pickle juice, ¼ tsp of the salt, pepper, and hot sauce (if using). Stir and mash until the mixture is smooth and creamy.
- Get Ready to Pipe: Spoon the yolk mixture into a zip-top bag. Squeeze out the air, seal it, and snip about ¼ inch off one of the bottom corners to create a makeshift piping bag. Set it aside.
Part 2: Breading the Egg Whites
- Set Up Your Breading Station: You’ll need three shallow bowls. In the first, combine the flour and the remaining ½ tsp salt. In the second, whisk the 2 raw eggs until beaten. In the third, combine the panko breadcrumbs and the grated Parmesan cheese.
- Coat the Egg Whites: Working with one egg white half at a time, first dredge it in the flour mixture, shaking off the excess. Next, dip it completely in the beaten egg, letting any excess drip off. Finally, press it firmly into the panko-parmesan mixture to coat all sides. Be careful not to get too many crumbs inside the cavity. Place the breaded whites on a plate.
Part 3: Frying to Golden Perfection
- Heat the Oil: Pour about 1 ½ inches of vegetable oil into a large Dutch oven. Heat it over medium-high heat until a deep-fry thermometer registers 350°F (175°C).
- Fry in Batches: Carefully place a few of the breaded egg whites into the hot oil, being sure not to overcrowd the pot. Fry for 1 to 2 minutes, turning once, until they are a beautiful, deep golden brown and crispy.
- Drain and Season: Using a slotted spoon, transfer the fried egg whites to a wire cooling rack. Immediately sprinkle them with a little extra salt. Repeat with the remaining egg whites. Let them cool for a few minutes.
Part 4: Assemble and Garnish
- Fill the Eggs: Generously pipe the creamy yolk mixture from your zip-top bag into the center of each crispy fried egg white.
- Garnish and Serve: Garnish the filled eggs with a light sprinkle of paprika and some freshly chopped chives. Serve immediately and watch them vanish!
Crispy Fried Deviled Eggs with Panko Crust
Ingredients
Equipment
Method
- Peel the hard-boiled eggs and cut in half lengthwise. Remove the yolks to a medium bowl and mash with a fork. Add the mayonnaise, mustard, pickle juice, pepper, 1/4 teaspoon salt, and hot sauce. Stir until smooth. Spoon into a zip-top bag and snip a corner.
- Heat 1 1/2 inches of oil in a large dutch oven over medium-high heat until it reaches 350°F on a deep-fry thermometer.
- Set up a breading station with three shallow bowls: one with flour and remaining 1/2 tsp salt, one with the 2 beaten raw eggs, and one with the panko and parmesan mixed together.
- Coat each egg white half first in flour, then dip in the egg, and finally press into the panko mixture to coat thoroughly.
- Working in batches, fry the breaded egg whites until golden brown, about 1 to 2 minutes. Transfer to a wire cooling rack and sprinkle immediately with more salt.
- Let the fried whites cool slightly, then generously pipe the yolk mixture into the center of each one.
- Garnish with a sprinkle of paprika and chopped chives before serving.
Notes
WiseRecipes’ Top Tips for Frying Mastery
These are the non-negotiable secrets for ensuring your fried deviled eggs are crispy, not greasy.
- Don’t Overcook Your Hard-Boiled Eggs. The perfect hard-boiled egg has a fully cooked yolk but a tender white. Overcooking can lead to a rubbery texture, so aim for about 10-12 minutes in boiling water.
- Use a Thermometer for Your Oil. This is the single most important tip for frying. If the oil is too cool, the breading will absorb too much oil and become greasy. If it’s too hot, it will burn before the inside is warm. 350°F is the magic number.
- The Cooling Rack is Essential. Do not drain your fried eggs on paper towels! This traps steam and will make the crispy bottoms soggy. Placing them on a wire rack allows air to circulate all around, keeping them perfectly crisp.
- Panko is a Must for Crunch. Do not substitute regular breadcrumbs for panko. Japanese-style panko breadcrumbs are lighter and flakier, which creates a much crispier, less dense coating.
- Prep Ahead for a Stress-Free Party. You can make the hard-boiled eggs and the yolk filling up to a day in advance and keep them in separate airtight containers in the fridge. The breading and frying should always be done just before serving for the best results.
FAQs: Your Fried Deviled Egg Questions, Answered!
Can I make these in an air fryer?
Yes, you can! For an air-fried version, bread the egg whites as directed, then spray them generously with cooking oil spray. Place them in the air fryer basket in a single layer and cook at 375°F (190°C) for about 5-7 minutes, flipping halfway through, until golden and crisp. They won’t be quite as deeply fried, but still delicious!
My breading is falling off in the fryer! What went wrong?
This usually happens for two reasons. First, ensure you shake off the excess flour before dipping in the egg, and let the excess egg drip off before coating in panko. A thick, wet coating is a heavy coating that will fall off. Second, be gentle when placing them in the oil and when turning them. Don’t move them around too much.
How do I get my hard-boiled egg yolks perfectly centered?
Here’s a great trick! The night before you plan to boil them, lay the carton of raw eggs on its side in the refrigerator. This encourages the yolk to settle in the middle of the egg.
What are some other fun filling variations?
The possibilities are endless! You could mix in some crumbled crispy bacon, finely chopped jalapeños for a kick, or even some lump crab meat and a dash of Old Bay for a truly decadent version.
Final Thoughts: The Appetizer That Wins the Party
There is nothing more satisfying than taking a classic, beloved dish and transforming it into something new and exciting. These Fried Deviled Eggs are a true culinary surprise, a perfect blend of nostalgia and novelty. I hope this recipe brings a little bit of delicious drama to your holiday table and becomes a new, much-requested tradition. Happy Frying!