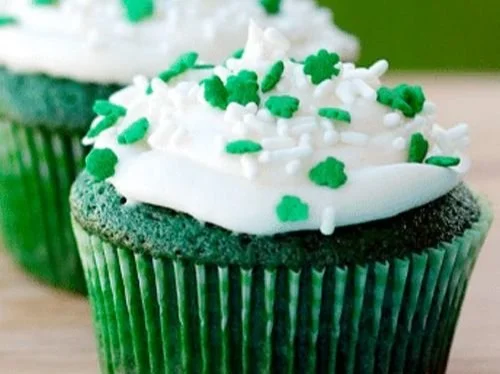
Green Velvet Cupcakes
A green cupcake that surprises you Here’s a bold claim: a dark chocolate crumb with an unexpected vibrant green hue can feel like theater on your tongue. I made these Green Velvet Cupcakes because I wanted a St. Patrick’s Day showstopper that wasn’t cloyingly sweet or predictable. If you like the drama of classic red…
A green cupcake that surprises you
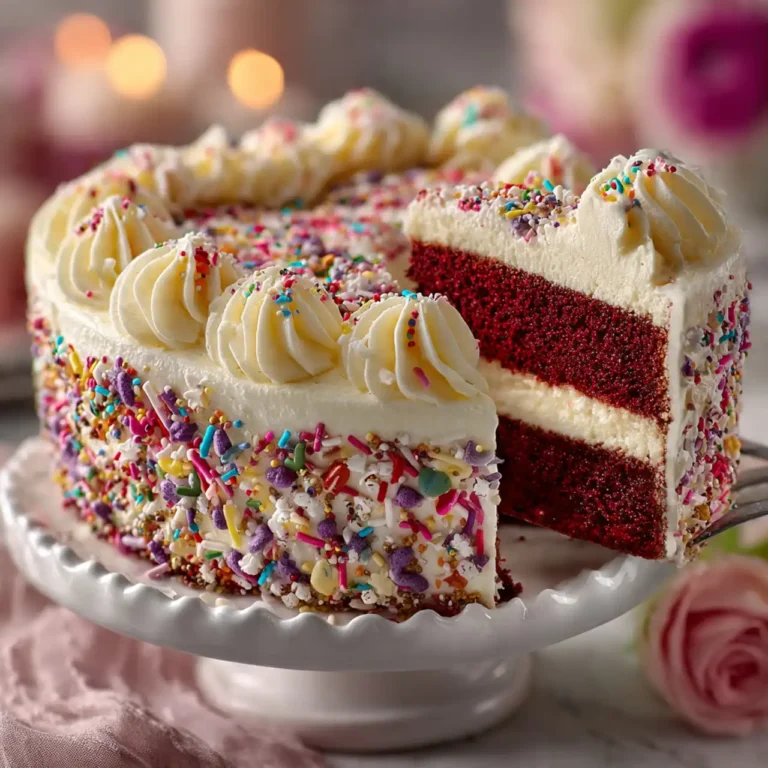
Here’s a bold claim: a dark chocolate crumb with an unexpected vibrant green hue can feel like theater on your tongue. I made these Green Velvet Cupcakes because I wanted a St. Patrick’s Day showstopper that wasn’t cloyingly sweet or predictable. If you like the drama of classic red velvet but want to experiment, this is your backstage pass. For a comparison in tone and texture, I often think about how the crumb differs from red velvet cupcakes I used to bake.
I used to assume the green color would mean a vegetable-flavored cupcake, but the trick is to let cocoa and buttermilk hold the flavor while the food coloring supplies the spectacle. The result is familiar and surprising at once.
The discoveries that changed the recipe
I started with what I already trusted: a tender, moist batter built from oil and buttermilk. The ingredients you need are these, listed precisely so you can reproduce the texture and balance:
- 1 1/2 cups all-purpose flour
- 1 cup granulated sugar
- 1/2 cup unsweetened cocoa powder
- 1 teaspoon baking soda
- 1/2 teaspoon salt
- 1 cup vegetable oil
- 1 cup buttermilk
- 2 large eggs
- 2 teaspoons vanilla extract
- 1 tablespoon green food coloring
- 1 teaspoon white vinegar
That lineup may look familiar, yet it behaves differently because of the cocoa and the aggressive green. The cocoa keeps the flavor grounded so the color doesn’t feel like a gimmick.
The Method I Trust
Here is the complete method I follow every time so the cupcakes behave predictably:
- Preheat the oven to 350°F (175°C) and line a cupcake tin with cupcake liners.
- In a large bowl, sift together the flour, sugar, cocoa powder, baking soda, and salt.
- In another bowl, whisk together the oil, buttermilk, eggs, vanilla extract, green food coloring, and vinegar until well combined.
- Gradually add the wet ingredients to the dry ingredients, mixing until just combined.
- Fill the cupcake liners about 2/3 full with the batter.
- Bake for 18-20 minutes, or until a toothpick inserted into the center comes out clean.
- Allow to cool in the pan for a few minutes before transferring to a wire rack to cool completely.
- Frost with your favorite frosting and enjoy your fun Green Velvet Cupcakes!
I usually do step 3 in a large glass bowl so I can check the color and whisk out any tiny lumps. Mix steps 2 and 3 together gently in step 4; the goal is a uniform batter without overworked gluten.
The Color Conundrum
A practical revelation: the intensity of the green depends as much on the food coloring as on the cocoa. Because there is cocoa in the batter, you need a tablespoon of concentrated green gel or liquid to get that vivid hue. If you prefer natural coloring, a strong matcha or spinach infusion will tint the batter subtly but will change the flavor. One of my favorite experiments was a half-matcha, half-food-color approach so the green felt earthy and less artificial.
Tip 1: Use gel food coloring for the brightest color without adding extra liquid.
Tip 2: If you use natural powders like matcha, reduce the cocoa slightly to keep the balance of bitterness.
Tip 3: If your batter looks too dark, that is normal; it will still appear green after baking.
Why the vinegar matters
This is a small chemistry lesson disguised as a baking decision. The teaspoon of white vinegar reacts with the baking soda, giving the crumb a light lift and preventing the cupcakes from becoming dense. Vinegar also helps keep the buttermilk tang bright against the cocoa. I treat it as a secret weapon in an otherwise straightforward batter.
A small personal note: the first time I forgot the vinegar, the cupcakes were noticeably flatter. That mistake taught me to respect the tiny measures.
How to Tell They’re Perfect
You will know this batch is right when the top is slightly domed and springs back to the touch. Insert a toothpick into the center; it should come out clean or with a few moist crumbs, not wet batter. The cupcake should feel light when you tap the base. If the tops split dramatically, your oven may be too hot or the tins crowded.
Practical tip: Rotate the tray halfway through baking if your oven has hot spots.
Practical tip: Use room-temperature eggs and buttermilk for even emulsification.
If You Want to Play with It
Variations I recommend after a few test batches:
- Swap vegetable oil for 3/4 cup melted coconut oil for a slightly tropical note.
- Replace buttermilk with a mix of 1 cup milk plus 1 tablespoon lemon juice if you’re out of buttermilk; let it sit 5 minutes before using.
- Reduce the cocoa to 1/3 cup and up the green to two tablespoons of gel color if you want a brighter emerald cake with less chocolate flavor.
You can also be playful with frostings. A classic cream cheese frosting pairs beautifully, as does a white chocolate buttercream. For a lighter finish, try whipped mascarpone with a touch of vanilla.
I often compare these to other playful cupcakes in my rotation. If you enjoy coconut and toasted flavors, you might like how these contrast with an Almond Joy cupcakes. Or, when I want something spiced and seasonal, I reach for recipes like apple cider cupcakes with apple butter filling.
Leftovers and serving
Serve these at room temperature. They keep well because of the oil-based crumb. Store unfrosted cupcakes in an airtight container at room temperature for up to two days. Frosted cupcakes should be refrigerated and brought to room temperature before serving; they last 3 to 4 days in the fridge. For longer storage, freeze unfrosted cupcakes in a single layer on a tray, then transfer to a freezer bag for up to two months. Thaw overnight in the fridge and bring to room temperature before frosting.
Practical tip: Label the container with the date if you freeze cupcakes so you use the oldest batch first.
A final experiment worth trying
If you want to stage these for a party, pipe small rosettes of frosting and top with sprinkles, edible glitter, or a tiny mint leaf. The visual contrast between the deep green crumb and a pale cream cheese swirl is striking.
Personal touch: I once brought a tray of these to a potluck where people expected mint or pistachio. Watching their surprised expressions when they bit into chocolate was the moment I knew I’d found something special. That’s why I keep this recipe in my regular rotation.
Conclusion
If you want a parade-ready cupcake that still tastes like a cupcake and not a novelty, this recipe hits that sweet spot. For more inspiration on green velvet style and presentation ideas, see this helpful write-up on Green Velvet Cake And Cupcakes – Love From The Oven.
Green Velvet Cupcakes
Ingredients
Method
- Preheat the oven to 350°F (175°C) and line a cupcake tin with cupcake liners.
- In a large bowl, sift together the flour, sugar, cocoa powder, baking soda, and salt.
- In another bowl, whisk together the oil, buttermilk, eggs, vanilla extract, green food coloring, and vinegar until well combined.
- Gradually add the wet ingredients to the dry ingredients, mixing until just combined.
- Fill the cupcake liners about 2/3 full with the batter.
- Bake for 18-20 minutes, or until a toothpick inserted into the center comes out clean.
- Allow to cool in the pan for a few minutes before transferring to a wire rack to cool completely.
- Frost with your favorite frosting and enjoy your Green Velvet Cupcakes!