The Ultimate Healthy Granola Cups (Easy Make-Ahead Breakfast!)
Imagine a breakfast that’s as fun and satisfying as a decadent treat but is secretly packed with wholesome, healthy ingredients. That, my friends, is the brilliant magic of these homemade Granola Cups. This isn’t just a grab-and-go breakfast; it’s a delightful, edible bowl made of chewy, crunchy baked oats, ready to be filled with creamy…
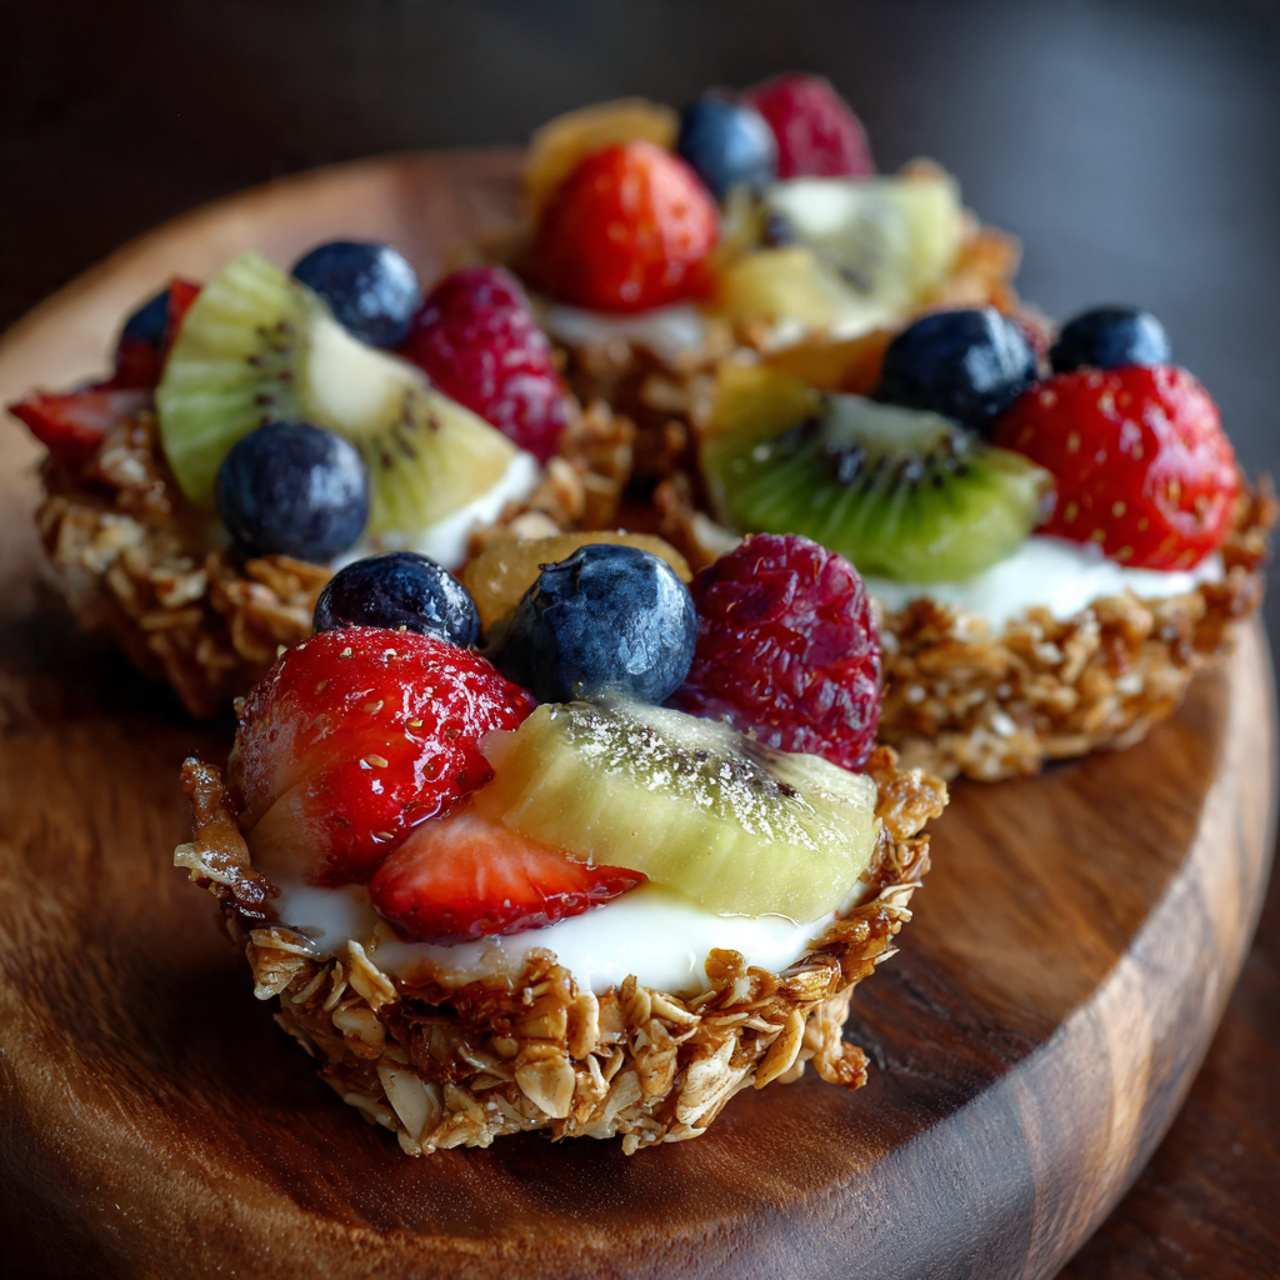
Imagine a breakfast that’s as fun and satisfying as a decadent treat but is secretly packed with wholesome, healthy ingredients. That, my friends, is the brilliant magic of these homemade Granola Cups. This isn’t just a grab-and-go breakfast; it’s a delightful, edible bowl made of chewy, crunchy baked oats, ready to be filled with creamy yogurt and a rainbow of fresh fruit. It’s the perfect, energizing start to any day.
I promise you, there is no greater feeling than having a stash of these granola cups ready to go. They are the ultimate meal-prep champion. Each bite is a perfect harmony of textures—the chewy, slightly crisp oat cup, the cool and creamy yogurt, and the sweet burst of fresh berries. They are a true game-changer for anyone looking for a healthier, happier morning routine.
Get ready to create the most versatile, delicious, and fun breakfast you’ll make all year. This is a recipe that makes healthy eating feel like a total indulgence.

Why These Granola Cups Will Be Your New Breakfast Staple!
You are going to be completely obsessed with how easy, versatile, and delicious these little cups are. They are a must-make for so many reasons:
- The Ultimate Make-Ahead Breakfast: Bake a batch of the cups on Sunday, and you have a healthy, ready-to-fill breakfast for the entire week. It’s meal-prep perfection!
- Incredibly Easy and Fun to Make: This is a simple “mix, press, and bake” recipe. Using moist hands to press the mixture into the muffin tin is a fun, tactile step that’s great for getting kids involved.
- Perfectly Portioned and Portable: Each cup is a perfect, self-contained serving. They are a fantastic, healthy, on-the-go breakfast or snack.
- Endlessly Customizable: The base recipe is a wonderful canvas for your creativity. You can fill them with any kind of yogurt, fruit, nuts, or seeds you love.
- Wholesome and Delicious: Packed with the goodness of rolled oats, wheat germ, and flaxseeds, these cups are a nutritious and satisfying way to start your day.
Recipe Snapshot
| Prep Time | 25 minutes |
| Bake Time | 15 minutes |
| Total Time | 40 minutes |
| Servings | 12 cups |
| Calories | 188 kcal per cup (unfilled) |
| Course | Breakfast, Snack |
| Cuisine | American |
| Difficulty/Method | Easy / Baking |
Your Shopping List for These Healthy Cups
This recipe uses a fantastic mix of wholesome pantry staples to create a delicious and versatile breakfast.

→ For the Granola Cups
- 2 cups regular rolled oats → Use old-fashioned rolled oats for the best chewy texture, not instant or steel-cut.
- ½ cup wheat germ → Adds a nutty flavor and a boost of nutrients.
- ¼ cup dry roasted sunflower kernels → For a savory crunch.
- ¼ cup flaked coconut → For a touch of sweetness and chewy texture.
- 2 Tbsp. flaxseeds → A great source of fiber and healthy fats.
- ¼ cup butter → Binds the mixture together and provides rich flavor.
- ¼ cup packed dark brown sugar → For a deep, caramel-like sweetness.
- 2 Tbsp. honey or maple syrup → Adds sweetness and helps create a chewy texture.
- ¼ tsp. ground cinnamon → For a touch of warm spice.
- ½ tsp. vanilla → To enhance all the other flavors.
→ For the Filling
- 1 cup desired low-fat yogurt → Greek yogurt is great for a thick, high-protein filling.
- 1 ½ cups chopped fresh fruit and/or berries → Use whatever is in season!
Let’s Make Granola Cups! Your Step-by-Step Guide
Ready to create the cutest, healthiest breakfast bowls ever? The process is simple and smells amazing.
Part 1: The Granola Mixture
- Combine Dry Ingredients: In a large bowl, stir together the rolled oats, wheat germ, sunflower kernels, flaked coconut, and flaxseeds.
- Make the “Glue”: In a small saucepan, combine the butter, brown sugar, honey (or maple syrup), and cinnamon. Cook and stir over medium heat until the butter is melted and the sugar is completely dissolved. Remove the pan from the heat and stir in the vanilla.
- Mix it All Together: Carefully pour the hot butter mixture over the dry oat mixture. Stir with a spatula until all the oats and seeds are thoroughly coated and the mixture is sticky. Cover the bowl and let it chill until it’s cool enough to handle.

Part 2: Form, Bake, and Serve
- Preheat and Prep: Preheat your oven to 325°F. Lightly grease a standard 12-cup muffin tin.
- Press the Cups: This is the fun part! Get your hands slightly damp with water (this prevents sticking). Take a scoop of the oat mixture and press it firmly and evenly onto the bottom and up the sides of a muffin cup to form a small, sturdy bowl shape. Repeat for all 12 cups.
- Bake to Perfection: Bake for 15 minutes, or until the edges are lightly golden brown. If the centers puff up during baking, gently press them back down with the back of a small spoon right when they come out of the oven.
- Cool Completely: Let the granola cups cool completely in the muffin tin on a wire rack. This is a crucial step for them to firm up and hold their shape. Once cool, carefully loosen the edges with a thin knife and remove the cups.
- Fill and Serve: Just before serving, spoon your favorite yogurt into each granola cup and top generously with fresh fruit and berries.
Granola Cups with Yogurt and Fruit
Ingredients
Equipment
Method
- In a large bowl, combine oats, wheat germ, sunflower kernels, coconut, and flaxseeds.
- In a small saucepan, combine butter, brown sugar, honey, and cinnamon. Cook and stir over medium heat until sugar is dissolved. Remove from heat and stir in vanilla.
- Pour the butter mixture over the oat mixture and stir to coat. Cover and chill until cool enough to handle.
- Preheat oven to 325°F. Lightly grease twelve 2 1/2-inch muffin cups.
- Using moist hands, press the oat mixture firmly onto the bottoms and up the sides of the prepared muffin cups.
- Bake for 15 minutes or until the edges are light brown. If centers puff during baking, gently re-press with the back of a small spoon immediately after removing from the oven.
- Cool completely in the muffin cups on a wire rack before loosening and removing the cups.
- To serve, spoon yogurt into the granola cups and top with fresh fruit.
Notes
WiseRecipes’ Top Tips for Perfect Granola Cups
These simple secrets will ensure your granola cups are sturdy, delicious, and pop right out of the pan.
- Use Rolled Oats, Not Instant. This is key to the texture. Old-fashioned rolled oats will give you a chewy, classic granola texture. Instant oats are too fine and will result in a pasty, less pleasant texture.
- Moist Hands are the Magic Trick. The granola mixture is very sticky. Keeping your hands slightly damp with water is the secret to being able to press the mixture into the muffin cups without it sticking all over your fingers.
- Press Firmly and Evenly. Take your time to press the mixture down on the bottom and up the sides of each cup. A firmly packed cup will be sturdy and less likely to crumble after baking.
- Don’t Skip the Re-Press. It’s normal for the bottoms of the cups to puff up a little while baking. As soon as you take the pan out of the oven, use the back of a small, greased spoon to gently press those centers back down. This ensures you have plenty of room for your delicious fillings.
- Cool Completely in the Pan. This is the most important step! The cups are very delicate when they are warm. They need to cool completely in the muffin tin to allow the sugars to harden and act as the “glue” that holds them together. Don’t rush this!
Keep Them Fresh! Storing Your Granola Cups
These cups are a meal-prepper’s dream! Here’s how to store them for a week of easy breakfasts.
- Important Note: Always store the granola cups empty. Only fill them with yogurt and fruit just before you plan to eat them to prevent them from becoming soggy.
- Refrigerator: Layer the completely cooled, empty granola cups between sheets of waxed paper in an airtight container. They will stay fresh and crisp in the refrigerator for up to 3 days.
- Freezer: For longer storage, you can freeze the empty cups. Layer them in a freezer-safe airtight container for up to 3 months. To serve, simply let them thaw at room temperature for about 15-20 minutes before filling.
FAQs: Your Granola Cup Questions, Answered!
My granola cups are falling apart. What did I do wrong?
Crumbly granola cups are usually caused by one of three things: not pressing the mixture firmly enough into the pan, not letting them cool completely in the pan before trying to remove them, or not using enough of the “wet binder” (the butter/sugar/honey mixture). Be sure to pack them tightly and be patient with the cooling process!
Can I make these gluten-free?
Yes, absolutely! It’s a very simple substitution. Just make sure you use certified gluten-free rolled oats. The rest of the ingredients are naturally gluten-free.
Can I make these vegan?
Yes! To make them vegan, simply substitute the butter with an equal amount of melted coconut oil, and be sure to use maple syrup instead of honey. Fill with your favorite plant-based yogurt.
Can I add other mix-ins to the granola base?
Of course! This recipe is very adaptable. You could swap the sunflower kernels for chopped pecans or almonds, add a tablespoon of chia seeds, or mix in some mini chocolate chips after the butter mixture has cooled slightly.
Final Thoughts: A Happier, Healthier Morning
There is nothing more empowering than starting your day with a breakfast that is both incredibly delicious and genuinely good for you. These Granola Cups are a celebration of wholesome ingredients and smart preparation. They are a fun, versatile, and beautiful way to make your mornings a little brighter and a lot more delicious. I hope you love them! Happy baking!