The Ultimate Homemade Cinnamon Rolls (Soft, Fluffy & Gooey!)
Imagine the intoxicating aroma of warm cinnamon and sweet brown sugar filling every corner of your home, promising a treat that’s the very definition of comfort. That, my friends, is the soul-warming magic of truly perfect, homemade cinnamon rolls—pillowy soft, with a gooey, buttery center, and slathered in a luscious vanilla glaze. This is, without…
Imagine the intoxicating aroma of warm cinnamon and sweet brown sugar filling every corner of your home, promising a treat that’s the very definition of comfort. That, my friends, is the soul-warming magic of truly perfect, homemade cinnamon rolls—pillowy soft, with a gooey, buttery center, and slathered in a luscious vanilla glaze. This is, without a doubt, the only cinnamon roll recipe you will ever need.
Here’s the thing about working with yeast: it can seem intimidating. For years, I was convinced that bakery-level soft and fluffy rolls were out of my reach. But I’m here to tell you that it’s not about being a professional baker; it’s about a reliable, straightforward recipe that guides you through each simple step. This recipe demystifies the process, making it accessible for everyone.
I promise you, there is no greater baking triumph than pulling a pan of perfectly risen, golden-brown cinnamon rolls from your oven. The moment you spread that creamy glaze over the warm rolls and watch it melt into every swirl is pure bliss. They are the star of any holiday morning, weekend brunch, or any time you need a truly special treat.
Get ready to create the softest, fluffiest, most incredibly delicious cinnamon rolls that will have your family and friends begging for the recipe.

Why This Will Be Your Go-To Cinnamon Roll Recipe!
You are going to fall head-over-heels in love with these rolls. They are a true labor of love that is worth every single step. Here’s why this recipe is the one:
- Unbelievably Soft and Fluffy: The dough is enriched with milk and butter, creating a tender, pillowy texture that melts in your mouth.
- Gooey Cinnamon-Sugar Center: We don’t skimp on the filling! Every swirl is packed with a buttery, cinnamon-brown sugar mixture that becomes wonderfully gooey as it bakes.
- A Simple, Foolproof Method: This recipe breaks down the yeast dough process into easy, manageable steps, making it perfect for bakers of all skill levels.
- The Perfect Vanilla Glaze: A simple but luscious vanilla glaze is the perfect sweet finish, cascading into all the nooks and crannies of the warm rolls.
- Make-Ahead and Freezer Friendly: These rolls are perfect for prepping in advance, making your holiday or weekend morning completely stress-free.
Recipe Snapshot
| Prep Time | 30 minutes |
| Rising Time | 2 hours |
| Cook Time | 30 minutes |
| Total Time | 3 hours |
| Servings | 12 rolls |
| Calories | ~297 kcal per roll |
| Course | Breakfast, Dessert |
| Cuisine | American |
| Difficulty/Method | Intermediate / Baking |
Your Shopping List for These Heavenly Rolls
This recipe uses simple, classic pantry staples to create something truly magical. Here’s what you’ll need:

→ For the Dough
- ½ cup warm water (110°F) → The perfect temperature for waking up the yeast.
- 1 (¼-ounce) package active dry yeast → The magic ingredient that makes our dough rise.
- 1 teaspoon + ⅓ cup granulated sugar → Divided for proofing the yeast and sweetening the dough.
- ⅓ cup melted butter → Adds richness and tenderness to the dough.
- ½ cup milk → At room temperature, for a soft, enriched dough.
- 1 teaspoon sea salt → To balance the sweetness and control the yeast.
- 2¾ cups all-purpose flour → Plus more for kneading. The structural backbone of our rolls.
→ For the Filling & Glaze
- ½ cup dark brown sugar → Provides a deep, molasses-rich sweetness for the filling.
- 1½ tablespoons cinnamon → The warm, aromatic star of the show!
- 2 tablespoons melted butter → To brush on the dough, helping the filling to stick.
- 1½ cups powdered sugar → Sifted, for a smooth, lump-free glaze.
- 3 to 4 tablespoons milk → To create the perfect glaze consistency.
- ½ teaspoon vanilla extract → Adds a wonderful aromatic flavor to the glaze.
Let’s Get Baking! Your Step-by-Step Guide
Ready to fill your home with the best smell on earth? Let’s break down the process into simple, manageable stages.
Part 1: Make and Rise the Dough
- Activate the Yeast: In a small bowl, stir together the warm water, yeast, and 1 teaspoon of granulated sugar. Set it aside for 5-10 minutes. It’s ready when the mixture becomes foamy and smells earthy.
- Mix the Dough: In a medium bowl, combine the ⅓ cup melted butter, milk, ⅓ cup granulated sugar, and salt. Stir in the foamy yeast mixture. In a separate large bowl, add the flour. Pour the wet ingredients into the flour and stir until a sticky dough forms.
- Knead the Dough: Turn the sticky dough out onto a lightly floured surface. Knead for 3-4 minutes, adding a little more flour as needed to prevent sticking, until the dough is smooth and elastic. Form it into a ball.
- First Rise: Brush a large, clean bowl with butter and place the dough ball inside. Cover with plastic wrap and set it in a warm, draft-free spot to rise for about 1 hour, or until it has doubled in size.
Part 2: Fill, Roll, and Second Rise
- Make the Filling: While the dough rises, mix the brown sugar and cinnamon together in a small bowl.
- Roll out the Dough: Once risen, gently punch down the dough to release the air. On a floured surface, roll the dough out into a large 20×14-inch rectangle.
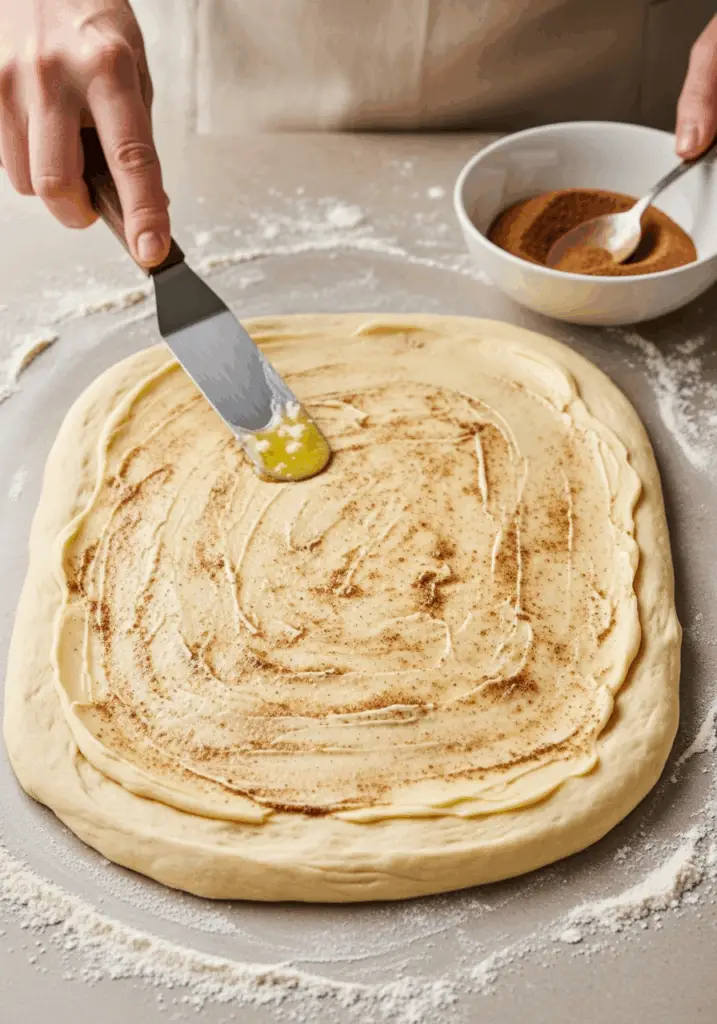
- Fill and Roll: Brush the surface of the dough with 2 tablespoons of melted butter. Sprinkle the cinnamon-sugar mixture evenly over the top, leaving a ½-inch border along one of the long edges. Starting at the opposite long end, roll the dough up tightly into a log.
- Slice the Rolls: Using a sharp serrated knife or a piece of unflavored dental floss for the cleanest cut, slice the log into 12 equal-sized rolls.
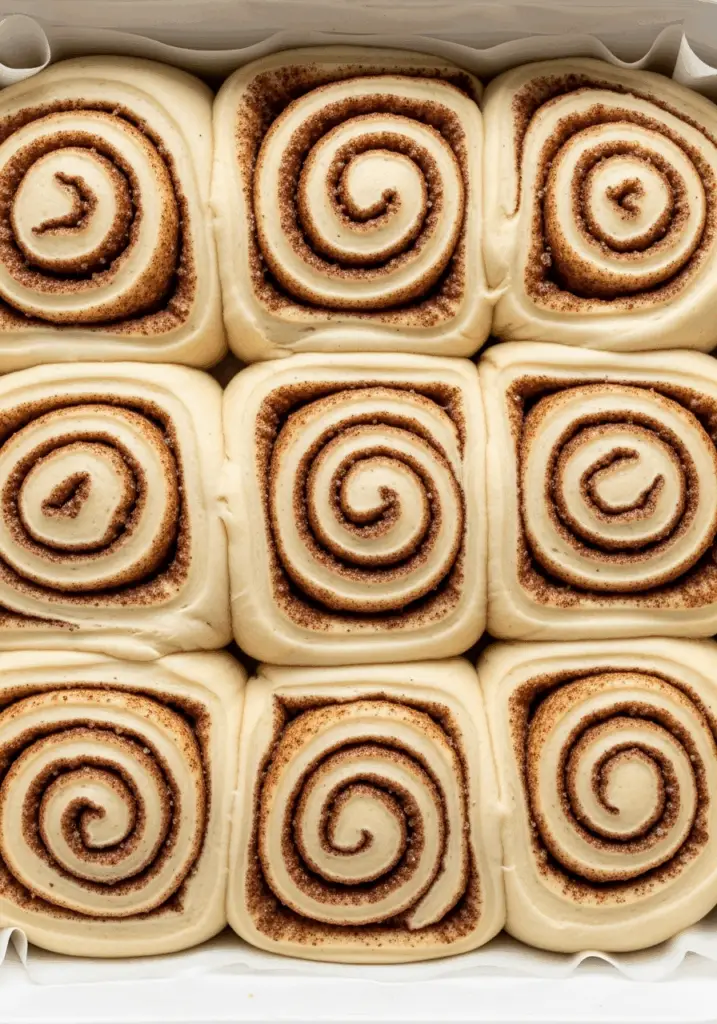
- Second Rise: Arrange the rolls cut-side up in a greased 9×13-inch baking dish. Cover them again and let them rise in a warm place for another hour until they’re puffy and have filled the pan.
Part 3: Bake and Glaze
- Preheat Oven: Towards the end of the second rise, preheat your oven to 350°F (175°C).
- Bake: Uncover the rolls and bake for 25 to 30 minutes, until they are lightly golden brown on top and cooked through.
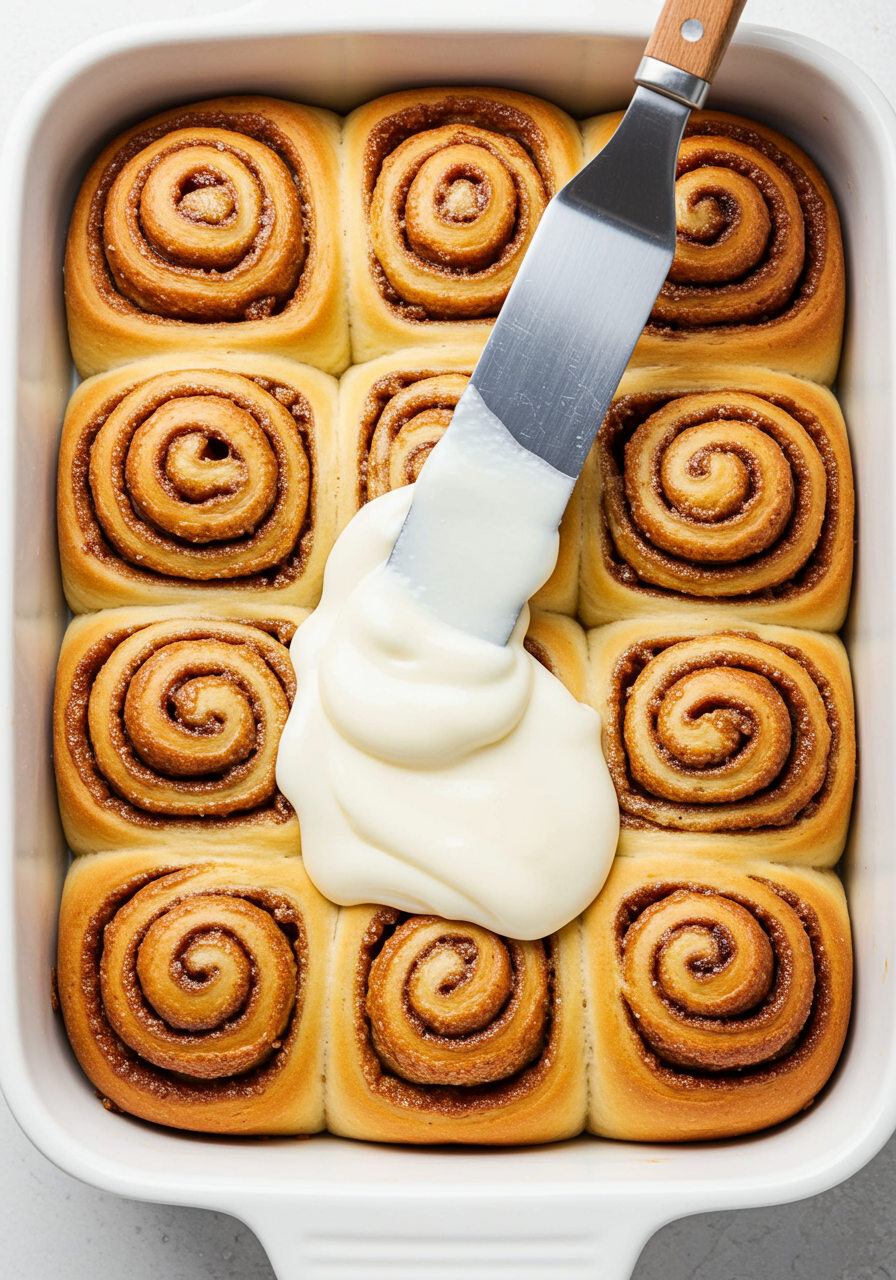
- Make the Glaze: While the rolls bake, whisk together the sifted powdered sugar, 3 tablespoons of milk, and vanilla in a medium bowl until smooth. Add more milk, one teaspoon at a time, if it’s too thick.
- Glaze and Serve: Let the baked rolls cool in the pan for about 10 minutes. It’s important they are still warm, but not piping hot. Pour or spread the glaze generously over the warm rolls. Serve immediately and enjoy the gooey perfection!
WiseRecipes’ Top Tips for Cinnamon Roll Mastery
These are the non-negotiable secrets to achieving pillowy, perfect cinnamon rolls every single time.
- Check Your Yeast. The most important step! If your yeast doesn’t get foamy and bubbly in the warm water, it’s likely expired. Discard it and start with a fresh packet to guarantee a good rise.
- Don’t Over-Flour Your Dough. The dough should be soft and slightly tacky, not dry and stiff. Only add enough extra flour during kneading to prevent it from sticking to your hands and the counter. A softer dough makes for a softer roll.
- The Dental Floss Trick for Clean Slices. For the absolute cleanest cut without squishing your beautiful log, slide a piece of unflavored dental floss under the log, cross the ends over the top, and pull. It creates a perfect, un-squished roll every time.
- Find a Warm Spot for Rising. Yeast loves warmth. A great trick is to turn your oven on to its lowest temperature for just a minute, then turn it OFF. The residual warmth creates a perfect proofing box for your dough to rise.
- Glaze While Warm, Not Hot. The timing of the glaze is key. If you glaze the rolls straight from the oven, the glaze will completely melt and pool at the bottom. Wait 10-15 minutes until they are warm to the touch, and the glaze will set slightly on top while still melting beautifully into the swirls.
Homemade Cinnamon Rolls
Ingredients
Equipment
Method
- In a small bowl, stir together the warm water, yeast, and 1 tsp. sugar. Set aside for 5 minutes, until foamy.
- In a medium bowl, combine 1/3 cup melted butter, milk, 1/3 cup sugar, and salt. Stir in the yeast mixture. Place flour in a large bowl, add the wet ingredients, and stir until a sticky dough forms.
- Turn dough onto a floured surface and knead for 3-4 minutes until smooth. Form into a ball. Place dough in a large, buttered bowl, cover, and let rise in a warm place until doubled in size, about 1 hour.
- In a small bowl, mix the brown sugar and cinnamon for the filling.
- Punch down the risen dough and roll it out on a floured surface into a 20×14-inch rectangle. Brush with 2 tablespoons of melted butter and sprinkle with the cinnamon sugar, leaving a ½-inch border.
- Starting at a long end, roll tightly into a log. Use a sharp knife or dental floss to slice the log into 12 rolls.
- Place rolls in a greased 9×13-inch baking dish, cut-side up. Cover and let rise for 1 more hour until puffy. Towards the end of the rise, preheat the oven to 350°F.
- Uncover the rolls and bake for 25 to 30 minutes, or until lightly golden.
- While baking, whisk together the sifted powdered sugar, 3 tablespoons milk, and vanilla until smooth. If it’s too thick, add more milk.
- Allow baked rolls to cool for 10 minutes, then drizzle the glaze on top and serve warm.
Notes
Keep It Fresh! Storing & Make-Ahead Instructions
Cinnamon rolls are a fantastic make-ahead treat. Here’s how to do it right.
- Storing: Store baked and glazed rolls in an airtight container at room temperature for up to 2 days, or in the refrigerator for up to a week. Reheat individual rolls in the microwave for 15-20 seconds to restore their soft, gooey texture.
- Overnight Rise Method: To have fresh rolls in the morning, prepare the recipe through step 8 (placing the sliced rolls in the pan). Instead of the second rise, cover them tightly with plastic wrap and place them in the refrigerator overnight. The next morning, let them sit at room temperature for about an hour to take the chill off while your oven preheats, then bake as directed.
- Freezing: You can freeze the baked, un-glazed rolls. Let them cool completely, wrap the pan tightly in plastic wrap and then foil, and freeze for up to 3 months. Thaw overnight in the fridge, warm in the oven, and then apply the fresh glaze.
FAQs: Your Cinnamon Roll Questions, Answered!
Why didn’t my dough rise?
This is almost always due to one of three things: your yeast was expired, the water was too hot (which kills the yeast) or too cold (which doesn’t activate it), or the spot you chose for rising was too cold and drafty.
Can I use a different kind of frosting?
Absolutely! The recipe notes mention a cream cheese frosting, which is a classic and delicious alternative. A simple buttercream or a maple glaze would also be wonderful.
My rolls came out dry. What did I do wrong?
Dry cinnamon rolls are usually the result of adding too much flour to the dough during the kneading process, or simply over-baking them. Knead with as little extra flour as possible, and pull the rolls from the oven as soon as they are a light golden brown.
Can I use instant yeast instead of active dry yeast?
Yes, you can. If using instant yeast, you can typically skip the 5-minute proofing step (Step 2) and mix it directly in with the dry ingredients. However, I find that proofing is always a good insurance policy to make sure your yeast is alive and active.
Final Thoughts: The Ultimate Comfort Bake
There is nothing more comforting or satisfying than the process and reward of baking a batch of warm, gooey, homemade cinnamon rolls. They are a true labor of love that fills your home and your heart with warmth. I hope this recipe brings you and your loved ones as much joy as it has brought mine. Happy baking!