The Ultimate Homemade Protein Bars Recipe: Seriously The Best You’ll Ever Make!
Hello, WiseRecipes readers and fellow fans of snacks that are both incredibly delicious and wonderfully good for you! Are you tired of spending a fortune on store-bought protein bars with long, confusing ingredient lists? Well, get ready to change your snack game forever, because today I’m sharing my Ultimate Homemade Protein Bars recipe! These peanut…
Hello, WiseRecipes readers and fellow fans of snacks that are both incredibly delicious and wonderfully good for you! Are you tired of spending a fortune on store-bought protein bars with long, confusing ingredient lists? Well, get ready to change your snack game forever, because today I’m sharing my Ultimate Homemade Protein Bars recipe! These peanut butter protein bars are seriously the best homemade protein bars!
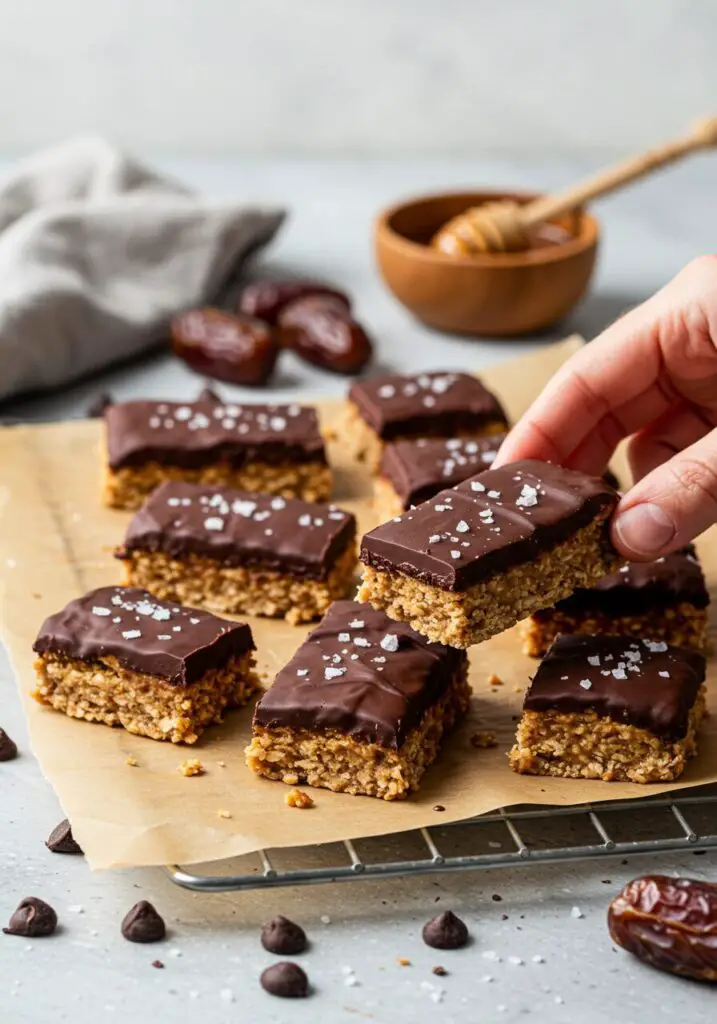
Imagine a chewy, satisfying bar with a texture like cookie dough, naturally sweetened with Medjool dates and honey, and packed with the rich flavor of peanut butter and vanilla. Then, picture it topped with a layer of decadent dark chocolate and a sprinkle of flaky sea salt. This easy no bake peanut butter protein bars with oat flour and dates recipe is not only delicious but also made with simple ingredients. And the best part? This recipe is easy to make and cheaper than store-bought protein bars!
My journey to this Homemade Protein Bars recipe was all about creating a wholesome, satisfying snack without compromising on taste. We’ll explore how to make simple protein bars with chocolate topping that will keep you fueled and happy. This is your go-to for a quick meal prep recipe for homemade protein bars cheaper than store bought.
So, if you’re ready for the best healthy protein bar recipe with vanilla whey protein (or your favorite protein!) that will become your new favorite grab-and-go snack, let’s get our food processors ready for this amazing Homemade Protein Bars recipe!
Why These Homemade Protein Bars Are “Seriously The Best”
If “cheaper and tastier than store-bought” isn’t enough, here’s why this Homemade Protein Bars recipe is a winner:
- Simple, Wholesome Ingredients: Made with recognizable ingredients like oats, peanut butter, dates, and honey. This is the heart of our Homemade Protein Bars recipe.
- No-Bake & Incredibly Easy: No oven required! Just mix in a food processor, press, chill, and slice.
- Perfectly Balanced Flavor & Texture: A delightful “cookie dough-like” texture that’s chewy, satisfying, and packed with chocolate-peanut butter flavor.
- Naturally Sweetened: Gets its sweetness from Medjool dates and honey, making them a fantastic choice for a naturally sweetened protein bars with medjool dates and honey.
- Great for Meal Prep: Make a batch on Sunday for healthy, protein-packed snacks all week long.
- Customizable: Easily adapt with different nut butters, protein powders, or mix-ins.
- Gluten-Free & Delicious: Using oat flour makes this a wonderful gluten-free option (ensure your oats are certified gluten-free if necessary).
Gather Your Wholesome Essentials: Ingredients You’ll Need
Let’s get our simple yet powerful components ready for this delicious Homemade Protein Bars recipe, based on the provided ingredient list.
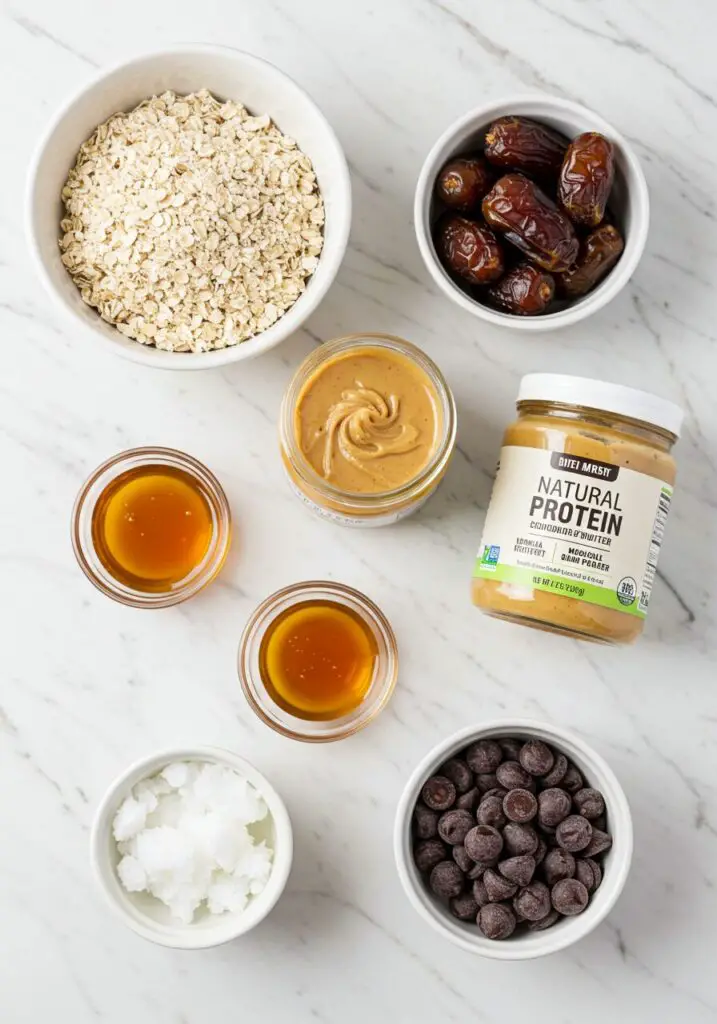
Key Ingredients (Makes 16 bars):
- Medjool Dates (Pitted): 5. Make sure they are soft! See notes.
- All-Natural, Drippy Peanut Butter: 1 cup. See notes for brand suggestions.
- Ground Oat Flour: 1.5 cups. You can make your own by blending old-fashioned rolled oats in a high-speed blender until fine.
- Honey (or Maple Syrup for Vegan): ⅓ cup.
- Vanilla Extract (Pure): 1 teaspoon.
- Vanilla Protein Powder (Whey was used, but plant-based works too): ½ cup.
- Salt: Pinch.
- Water: ¼ cup, or more/less as needed.
For the Optional (but Highly Recommended!) Chocolate Topping:
- Dark Chocolate Chips: ¾ cup.
- Coconut Oil: 2 teaspoons.
- Coarse Sea Salt: To taste, for sprinkling.
Crafting Your No-Bake Protein Power Bars: Step-by-Step Guide
Let’s create this incredibly easy and satisfying Homemade Protein Bars recipe!
Step 1: Prepare Your Pan & Process the Dough
- Line Baking Dish: First, line either a 9×9-inch baking dish or a 9×13-inch baking dish with parchment paper. Leave an overhang on two sides to easily lift the bars out later. Really any size will work, but the smaller the dish, the thicker the bars will be.
- Combine Ingredients in Food Processor:Next, place the pitted Medjool dates, 1 cup peanut butter, 1.5 cups oat flour, ⅓ cup honey, 1 teaspoon vanilla extract, ½ cup protein powder, and a pinch of salt into a high-speed food processor.
- A “good food processor… is so important” for pulverizing the dates and creating a smooth dough for your Homemade Protein Bars recipe.

- Process Until Crumbly: Process on high for 2-3 minutes, stopping to scrape the sides as needed. The mixture will look crumbly at first.
- Add Water to Form Dough: With the processor on high, add water by the tablespoon and continue to process… until a cookie dough-like batter has formed and the Medjool dates have disappeared into the dough.
Consistency is key – you want your batter to be able to hold shape and be similar to cookie dough, but not be too runny. The amount of water needed is all dependant on how drippy your peanut butter is. You may need to use less than 1/4 cup or more.- Too dry? Add more water.
- Too wet? Add more oat flour.
Step 2: Press, Top, and Chill Your Protein Bars
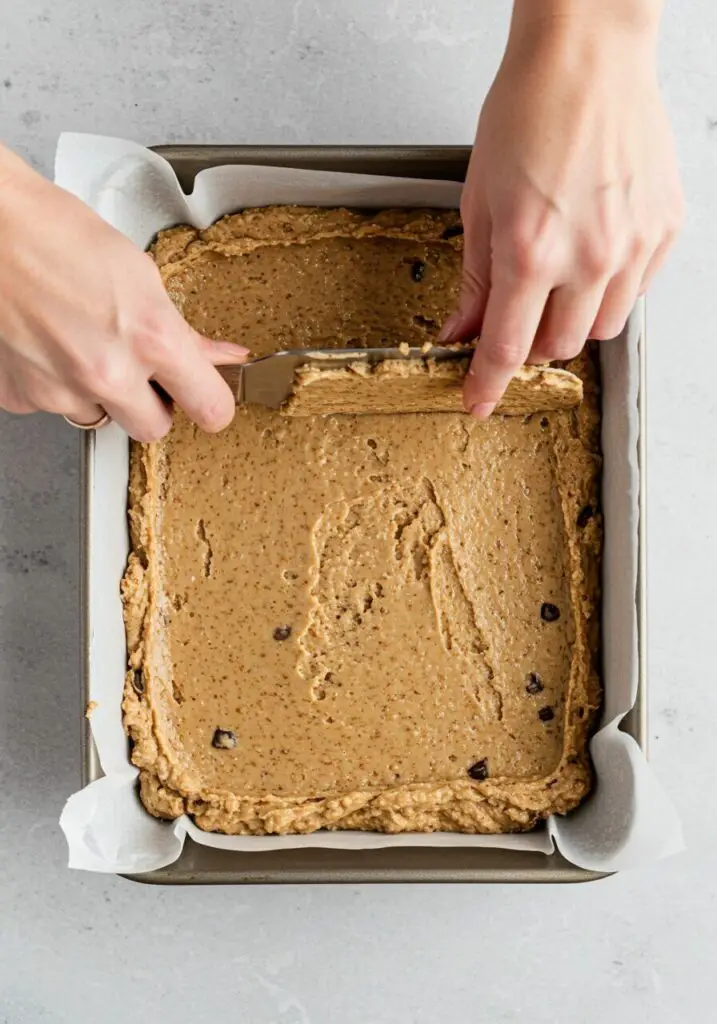
- Press Dough into Pan: Once your dough has formed, transfer it into the prepared parchment-lined… baking dish. Use a spatula or your hands (lightly greased if sticky) to press the dough down into a firm, even layer.
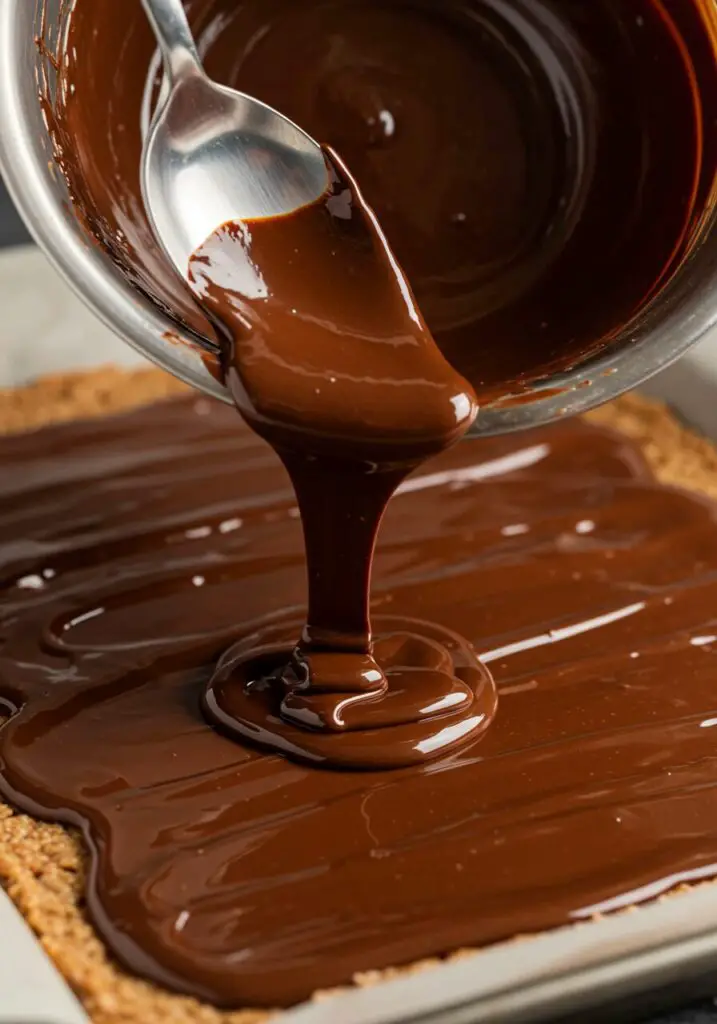
- Prepare Chocolate Topping: Prepare the optional chocolate topping by placing the ¾ cup dark chocolate chips and 2 teaspoons coconut oil into a microwave-safe bowl. Microwave in increments of 15 seconds and stir until melted and smooth.
- Add Topping & Salt: Pour the melted chocolate topping onto the pressed protein bars and use a spatula to evenly spread it out. Then, sprinkle on coarse sea salt. This is how to make simple protein bars with chocolate topping that look and taste amazing.
- Chill to Set: Place the bars into the freezer to set for 30 minutes to an hour or until the chocolate has fully hardened. This is a crucial step for a firm, sliceable Homemade Protein Bars recipe.
Step 3: Slice, Store, and Enjoy Your Healthy Treat!
- Slice into Bars: Once the chocolate is fully hardened, use the parchment paper overhangs to lift the entire slab out of the pan and onto a cutting board. Use a large, sharp knife to cut into 16 bars (or your desired size).
- Store: Store in the fridge for up to 7 days or in the freezer for up to 3 months. Keep them in an airtight container. They are delicious straight from the fridge or freezer! Enjoy your best healthy protein bar recipe with vanilla whey protein (or your favorite!).
Wise Tips for the Best Homemade Protein Bars
Make your Homemade Protein Bars recipe a guaranteed success with these essential tips:
- Soft Medjool Dates are Key: As the notes say, “make sure your Medjool dates are soft or they will not break down.” If your dates are hard, soak them in hot water for 10-15 minutes, then drain well before using.
- Use Drippy, Natural Peanut Butter: The consistency of your nut butter is very important. A natural, “drippy” peanut butter (like Kirkland, Smucker’s All-Natural, or Good and Gather All Natural, as suggested) will blend much better than a thicker, more processed peanut butter. This is crucial for your Homemade Protein Bars recipe.
- High-Speed Food Processor Recommended: This is the #1 tip from the original recipe! It’s essential for pulverizing the dates and creating a smooth, cohesive dough.
- Adjust Water for Perfect Consistency: The amount of water needed really depends on your peanut butter and protein powder. Add it slowly, just until a thick, pinchable “cookie dough” forms.
- Parchment Paper Sling: Using parchment paper with an overhang makes it incredibly easy to remove the bars from the pan for neat slicing.
- Don’t Skimp on Chilling: The freezer time is what sets the chocolate topping and firms up the bars so they can be sliced cleanly.
- Coarse Sea Salt on Top: That little sprinkle of flaky sea salt on the chocolate topping perfectly balances the sweetness and enhances the flavor.
Easy No-Bake Homemade Protein Bars
Ingredients
Method
- Line a 9×9 or 9×13 inch baking dish with parchment paper with overhang.
- In a food processor, add dates, peanut butter, oat flour, honey, vanilla, protein powder, and salt. Process 2–3 mins until crumbly. Add water gradually until thick dough forms.
- Press the batter firmly and evenly into the prepared pan.
- Melt chocolate chips and coconut oil in microwave in 15-sec bursts. Stir until smooth. Pour over the dough, spread evenly, and sprinkle with sea salt.
- Freeze the pan for 30–60 mins until firm. Lift out with parchment and slice into 16 bars.
- Store bars in an airtight container in the fridge (up to 7 days) or freezer (up to 3 months).
Delicious Variations & Customizations
This Homemade Protein Bars recipe is wonderfully adaptable!
- Different Nut Butters: Use a drippy, natural almond butter, cashew butter, or even sunflower seed butter for a nut-free option (ensure oat flour is also from a nut-free facility if needed).
- Different Protein Powders: While vanilla whey was used, feel free to use your favorite vanilla or chocolate plant-based protein powder. The consistency may vary slightly, so adjust water as needed.
- Add Mix-ins: After processing the main dough, you could try pulsing in some mini chocolate chips, shredded coconut, or chopped nuts for extra texture.
- Make them “Energy Bites”: Roll the dough (you might need slightly less water to make it firmer) into bite-sized balls instead of pressing into a pan. You can roll them in coconut or dip them in chocolate.
- Different Extracts: A little almond extract could be a delicious addition to the vanilla.
- No Food Processor? This would be very difficult without a food processor or a very high-powered blender with a good tamper, as the dates need to be broken down into a paste.
Storing Your Protein-Packed Snacks
This Homemade Protein Bars recipe is perfect for meal prep!
- Storage: As the recipe notes, “store in the fridge for up to 7 days or in the freezer for up to 3 months.”
- How to Store: Keep them in a single layer or separated by parchment paper in an airtight container to prevent them from sticking together.
- Enjoying from Fridge/Freezer: They are delicious straight from the fridge (chewy) or the freezer (firmer, great for a hot day!).
Frequently Asked Questions (FAQ) – Homemade Protein Bars Recipe
Your common questions about these easy, no-bake bars:
- Can I use a different type of oats for the oat flour?
Yes, you can make oat flour by blending old-fashioned rolled oats or quick oats in a high-speed blender until they form a fine powder. Ensure they are certified gluten-free if you need the final recipe to be GF. - What if I don’t have Medjool dates? Can I use other dates?
Medjool dates are recommended for their large size, soft texture, and rich, caramel-like sweetness. You can use other dates (like Deglet Noor), but they are often smaller and drier, so you may need to use more of them and definitely soak them in hot water first to soften them. - My batter is too dry or too wet. What should I do?
As the recipe tips suggest, this is easily adjustable! If too dry, add more water, one tablespoon at a time. If too wet, add more oat flour, one tablespoon at a time, until you reach that perfect “cookie dough-like” consistency for your Homemade Protein Bars recipe. - Are these protein bars very sweet?
They are naturally sweetened by the dates and honey/maple syrup. The sweetness level is moderate, not as intensely sweet as a candy bar, making them a great snack. You can adjust the honey/maple syrup to your preference. - Do I have to use the chocolate topping?
No, the chocolate topping is optional, but highly recommended for the best flavor and that classic “protein bar” look and feel! The bars are still delicious without it.
This Homemade Protein Bars recipe is a true game-changer for anyone looking for a quick meal prep recipe for homemade protein bars cheaper than store bought. It’s an easy no bake peanut butter protein bars with oat flour and dates that proves you don’t have to sacrifice flavor for healthy, simple ingredients. This best healthy protein bar recipe with vanilla whey protein will save you money and keep you fueled!
I am so excited for you to try this recipe and discover how easy and delicious homemade protein bars can be! If you make these Homemade Protein Bars, please come back and share your experience in the comments below! What kind of protein powder did you use? Happy snacking!