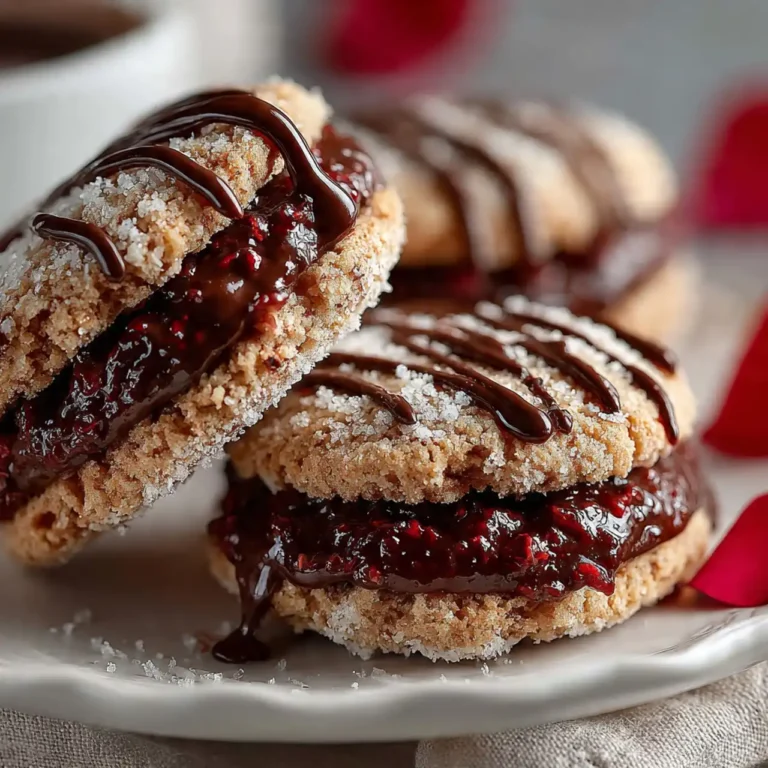
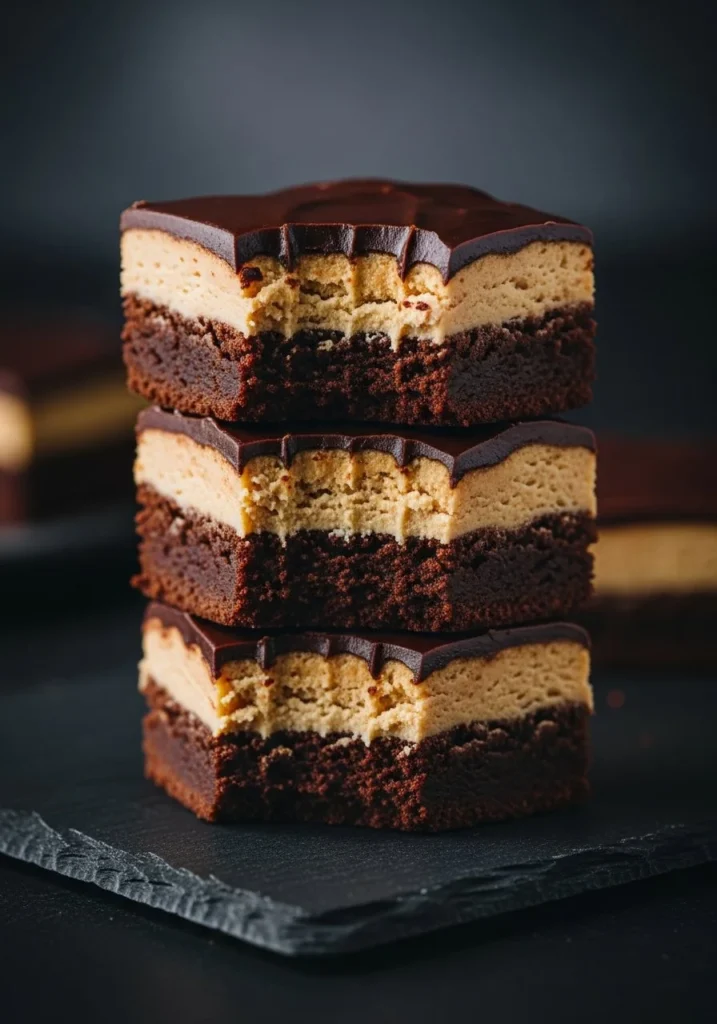
Layered Peanut Butter Brownies
I still remember the first time I made Layered Peanut Butter Brownies for a potluck: the kitchen smelled like hot chocolate and toasted peanuts, and people kept coming back for “just one more square.” That nutty, creamy middle sandwiched between a fudgy brownie base and a glossy chocolate glaze felt like the answer to every…
I still remember the first time I made Layered Peanut Butter Brownies for a potluck: the kitchen smelled like hot chocolate and toasted peanuts, and people kept coming back for “just one more square.” That nutty, creamy middle sandwiched between a fudgy brownie base and a glossy chocolate glaze felt like the answer to every dessert craving. If you like the idea of a brownie that doubles as a candy bar, this is the one to keep in your back pocket. If you want a slightly different take, I sometimes riff on this recipe the way I riff on a classic peanut butter brownie, but this layered version has its own personality.
The Ingredients That Make the Difference
I like to say the ingredient list reads like a simple shopping trip that turns into something special. For the brownie base you need 2 ounces unsweetened chocolate and ½ cup butter, cubed. You also need 2 large eggs, 1 cup granulated sugar, and ½ cup all-purpose flour. The peanut butter filling is wonderfully straightforward: 1½ cups confectioners’ sugar, ½ cup creamy peanut butter, and ¼ cup butter, softened, with 2 to 3 tablespoons half-and-half cream or milk to loosen it. For the top glaze you’ll melt 1 ounce unsweetened chocolate with 1 tablespoon butter. All of those small, ordinary things combine into something that looks and tastes like effort but is really comfort in bar form.
Putting It Together (The Method I Use)
I always preheat the oven first to 350°F (175°C) and grease a 9-inch square baking pan so I’m not rushed later. To make the base I melt the 2 ounces unsweetened chocolate and the ½ cup cubed butter in a small saucepan over low heat, stirring until they’re glossy and uniform. In a separate bowl I beat the 2 large eggs with 1 cup granulated sugar until the mixture is light and pale—that airiness is what helps the top get that pretty crackly crust. I stir the melted chocolate mixture into the eggs, then fold in ½ cup all-purpose flour until just combined; you do not want to overwork it. I pour the batter into the prepared pan and bake it for about 25 minutes; when it’s done the center should be set but still fudgy, and the top should have a faintly shiny, thin crust. I always let the brownie cool completely in the pan before doing anything else, because the filling needs a stable base.
For the filling I combine 1½ cups confectioners’ sugar with ½ cup creamy peanut butter and ¼ cup softened butter in a bowl. I beat those together and then slowly add 2 to 3 tablespoons half-and-half cream or milk until I get a spreadable, pipeable consistency—thicker if you want a tall, sandwich-like middle, thinner if you want a glossier, smoother layer. I spread the peanut butter filling over the cooled brownie base and put the whole pan into the refrigerator until the filling firms up, which makes glazing much easier.
When it is time for the glaze I gently melt 1 ounce unsweetened chocolate and 1 tablespoon butter in a small saucepan, stirring until smooth. Let it cool slightly so it won’t melt the peanut butter layer, then drizzle or pour it over the chilled filling. I smooth it carefully with an offset spatula for a mirror-like finish. Chill the pan again until the glaze is set, and then cut into neat squares. A warm knife works best if you wipe it between cuts.
Little Tricks I Swear By
I have a handful of small habits that change everything. First, always let the base cool completely before adding the filling; otherwise the peanut butter layer can sink or separate. Second, when beating eggs and sugar, take the extra two minutes—those air bubbles give you a lighter top and a better contrast between fudgy and chewy. Third, if your peanut butter is too oily, stir it briefly to make it smoother before measuring. Fourth, if you want perfectly clean slices, chill until very firm and run a sharp knife under hot water between cuts. These are the things I tell friends when they ask for advice, because they actually work.
How to Know When It’s Done Right
The signs are both visual and tactile. The brownie base should feel set in the middle but still a little springy, not wet; a toothpick will come out with moist crumbs rather than a batter smear. The peanut butter layer should be firm and not squishing out when you touch it. The glaze should be shiny and sharply set. When you bite into one, you should get the contrast: a slightly crisp top, a fudgy, chocolatey base, and a creamy peanut center that feels like velvet. If the layers collapse or smear, the only likely culprit is not enough chilling between steps.
What I Serve It With and How I Store Leftovers
These bars are wonderful with a tall glass of milk or a robust cup of coffee. On special occasions I warm one briefly and serve it with vanilla ice cream; the contrast between cold ice cream and that chewy-chocolate top is irresistible. If you plan to make them ahead, they actually improve after a day in the fridge because the flavors meld. Store leftovers in an airtight container in the refrigerator for up to five days. I also freeze individual squares wrapped tightly in plastic and foil; they thaw in minutes and keep for a couple of months. Mentioning storage here felt natural because I always think about planning ahead for parties.
Variations I Love
There are fun ways to make this your own. Swap in crunchy peanut butter for texture or add a sprinkle of chopped roasted peanuts between the filling and the glaze for extra crunch. If you want a twist, try almond butter or a half-and-half mix of peanut and Nutella for a hazelnut note. You can also fold a handful of chopped chocolate or toffee into the brownie batter for bits of surprise. If you like football-season treats, I sometimes adapt the filling into little dollops and call them my chocolate-peanut butter footballs at tailgate parties.
A Few Memories That Keep Me Making Them
This recipe reminds me of late afternoons at my grandmother’s kitchen table, when she’d hand me a square and we’d share stories about neighborhood kids and summer mischief. It’s a celebratory, cozy thing to make when friends stop by unexpectedly. I’ve baked them for everything from birthdays to potlucks, and they’re the one dessert people ask me to bring again and again.
Conclusion
If you want a gluten-free take or another version to compare, I sometimes check different adaptations like the one on Layered Peanut Butter Brownies (GF) – The Heritage Cook for inspiration before I tweak mine. Trust me, once you nail the ratio of fudgy base to peanut buttery middle to shiny glaze, you will find yourself making these whenever you want a little celebratory sweetness.
Layered Peanut Butter Brownies
Ingredients
Method
- Preheat the oven to 350°F (175°C) and grease a 9-inch square baking pan.
- Melt 2 ounces of unsweetened chocolate and ½ cup cubed butter in a small saucepan over low heat, stirring until glossy.
- In a separate bowl, beat 2 large eggs with 1 cup granulated sugar until light and pale.
- Stir the melted chocolate mixture into the egg mixture, then fold in ½ cup all-purpose flour until just combined.
- Pour the batter into the prepared pan and bake for about 25 minutes.
- Let the brownie cool completely in the pan.
- Combine 1½ cups confectioners' sugar, ½ cup creamy peanut butter, and ¼ cup softened butter in a bowl.
- Beat together and slowly add 2 to 3 tablespoons of half-and-half cream or milk until you achieve a spreadable consistency.
- Spread the peanut butter filling over the cooled brownie base and refrigerate until the filling firms up.
- Melt 1 ounce of unsweetened chocolate and 1 tablespoon of butter in a small saucepan, stirring until smooth.
- Let it cool slightly, then drizzle or pour over the chilled filling and smooth with an offset spatula.
- Chill again until the glaze is set, then cut into squares.