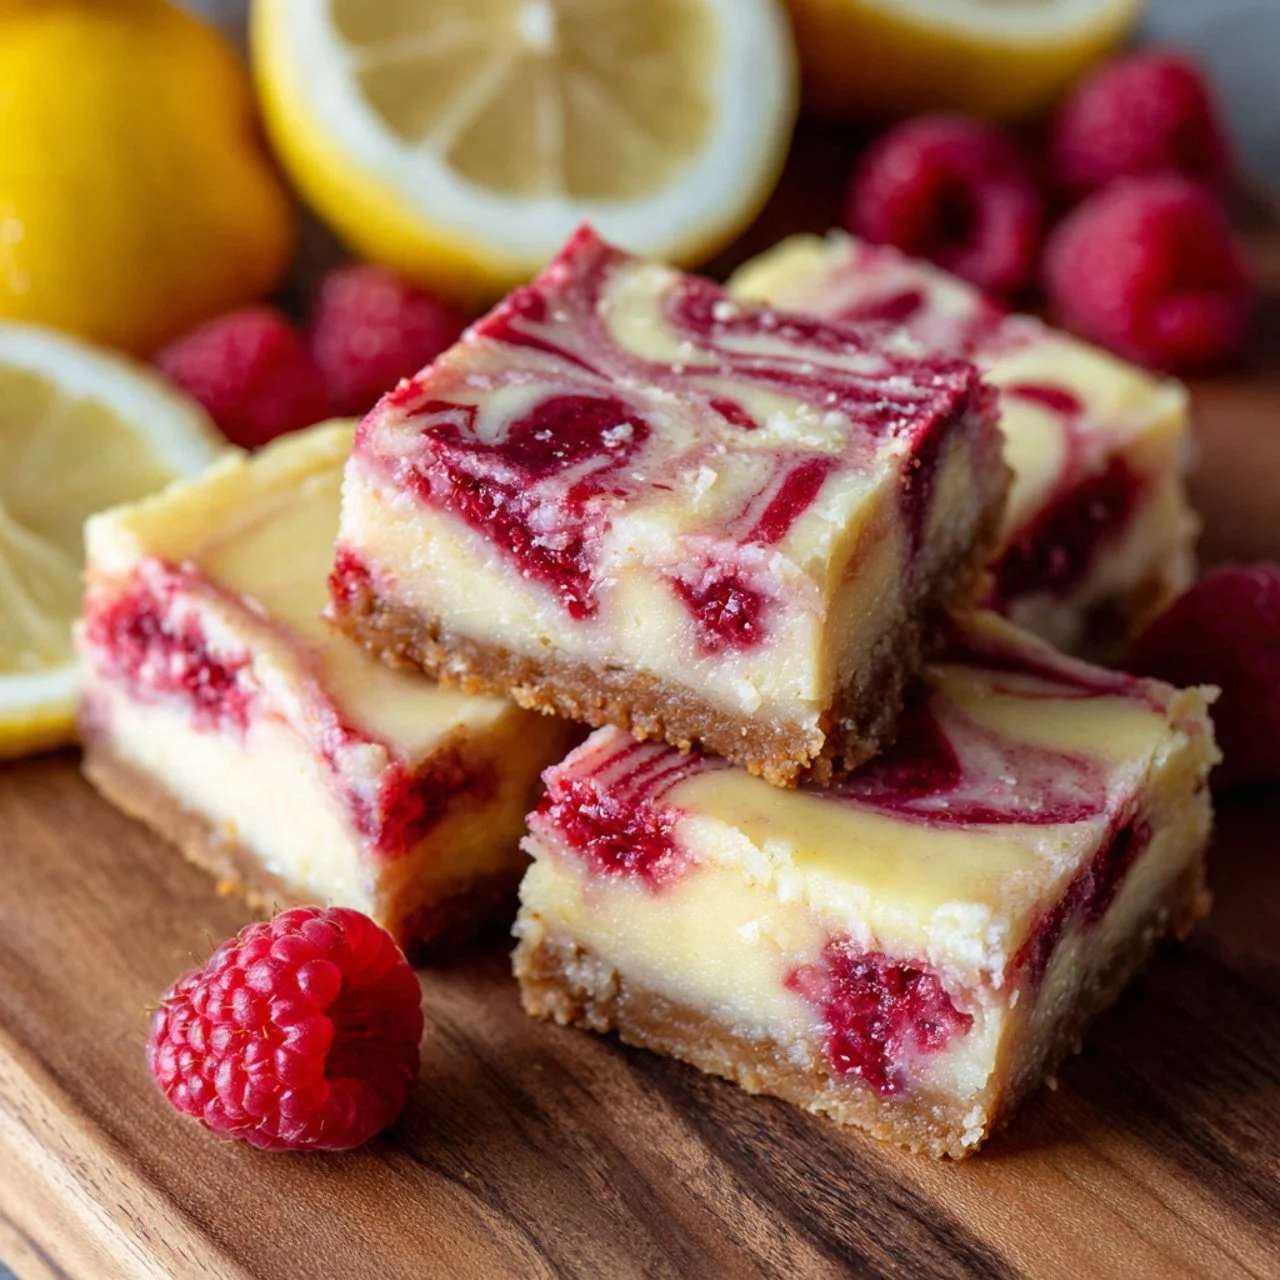
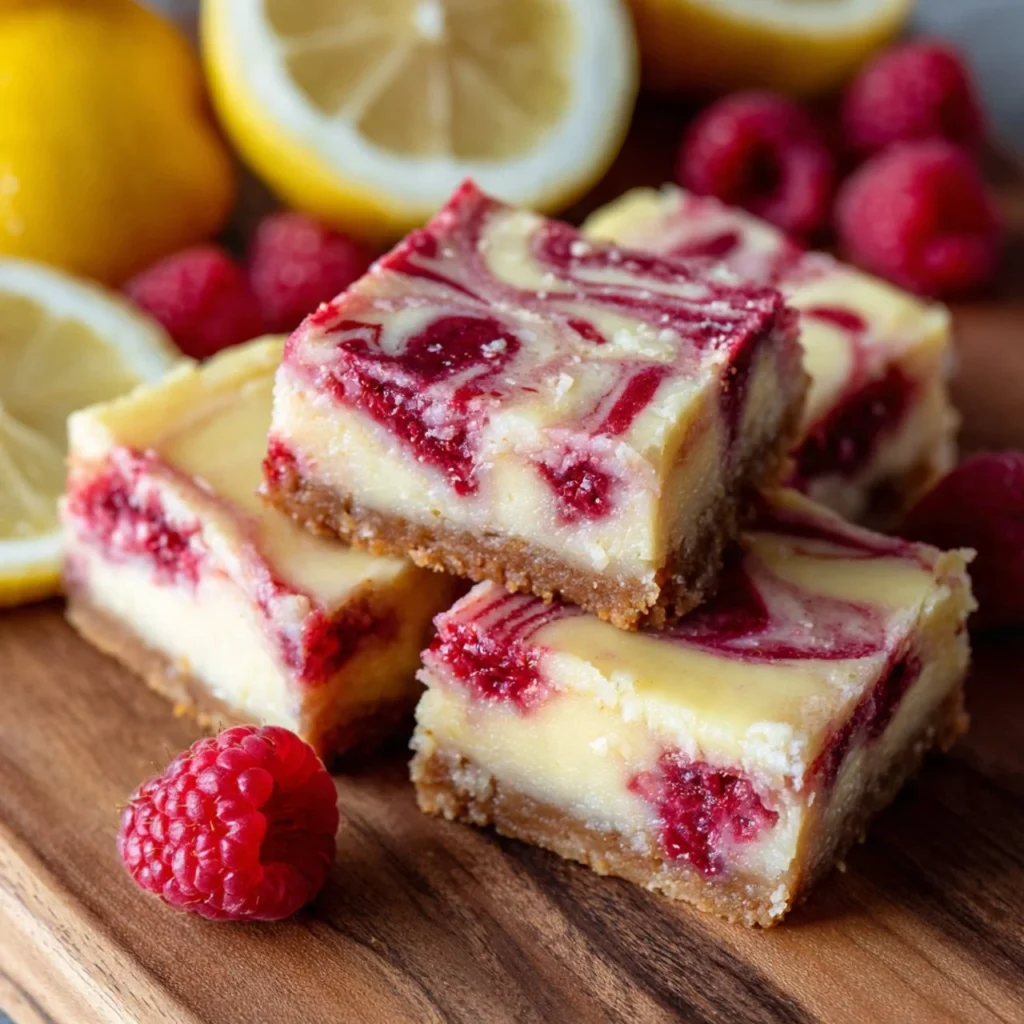
Lemon Raspberry Swirl Bars
The First Bright Idea The first time I made lemon raspberry swirl bars I was chasing sunlight. It was late spring, windows open, and the house smelled faintly of cut grass; I wanted something that tasted like that clean brightness. I started with what felt obvious: a buttery, tender base and a snap of lemon,…
The First Bright Idea
The first time I made lemon raspberry swirl bars I was chasing sunlight. It was late spring, windows open, and the house smelled faintly of cut grass; I wanted something that tasted like that clean brightness. I started with what felt obvious: a buttery, tender base and a snap of lemon, then invited raspberries to crash the party and made them swirl across the top like spilled paint. If you like the smooth fruit-on-citrus tension found in a creamy raspberry swirl cheesecake, this bar does the same thing with less fuss and more handheld charm.
Full ingredient list (so you can shop in one go): 1 cup all-purpose flour, 1/2 cup granulated sugar, 1/2 cup unsalted butter softened, 1/2 teaspoon baking powder, 1/4 teaspoon salt, 1 large egg, 1/2 cup lemon juice, 1 teaspoon lemon zest, 1 cup fresh raspberries, 1/4 cup raspberry jam.
The Lemon-Batter Moment
What surprised me was how the batter itself carries the lemon. I start by preheating the oven to 350°F (175°C) and greasing a 9×9-inch baking pan so everything is ready when the batter is done. In a mixing bowl, cream together the softened unsalted butter and the granulated sugar until light and fluffy; that step traps air and gives the crumb a fine lift. Add the egg, then pour in 1/2 cup lemon juice and fold in 1 teaspoon lemon zest — those two bring the bar from simple to sunlit. In a separate bowl combine 1 cup all-purpose flour, 1/2 teaspoon baking powder, and 1/4 teaspoon salt, then gradually add the dry mix to the wet until it is just combined. Overmixing ruins the gentle texture; stop when you see no dry streaks.
Tip 1: Use room-temperature butter and egg so the batter comes together quickly and stays tender. Tip 2: Fresh lemon zest makes a big difference; if you must use bottled zest, add a tiny extra pinch for life.
Where the Berries Come In
I learned early that adding berries is about contrast, not domination. Spread half of the batter into the prepared pan so you have a smooth, even platform. Warm 1/4 cup raspberry jam in a small saucepan until it becomes pourable; this step loosens it without overheating and helps the jam knit with fresh fruit. Spoon 1 cup fresh raspberries across the batter and drizzle the warmed jam over them. The jam is glue and flavor booster — it keeps raspberries from drying and gives glossy color.
Variation 1: If raspberries are out of season, you can substitute 1 cup frozen raspberries (thawed and drained) but reduce the jam to 3 tablespoons to avoid soggy bars. Variation 2: Swap half the granulated sugar for coconut sugar for a deeper, caramel note; the lemon will still sing through.
Swirls Like Painting
Now comes the playful bit. Drop spoonfuls of the remaining batter over the raspberry layer so there are islands of batter, not an even sheet. Using a knife, swirl the batter and raspberries together to create a marbled effect; this creates thin pockets of concentrated fruit and streaks of lemon batter. Slide the pan into the oven and bake for 25 to 30 minutes or until the top is golden and a toothpick inserted in the center comes out clean. You should still see a little moist crumb on the pick but not wet batter.
How to know it’s done right: the bars will be slightly springy on top and a deep golden along the edges. If the toothpick has a few moist crumbs but no wet batter, you are good. If the raspberries have bubbled and leaked through the crusts, that is fine — it adds character.
Tip 3: Watch the 15-minute mark. If the edges are browning too quickly but the center is still soft, tent the pan loosely with foil for the remainder of baking.
Cooling, Slicing, and Storing
Allow the bars to cool fully before cutting. Cooling lets the jam set and the crumb stabilize; if you try slicing warm bars you will end up with messy edges. Once cool, run a thin knife around the pan to loosen, lift the slab out, and cut into 9 or 12 bars depending on how generous you want portions to be.
Storage and leftovers: keep the bars in an airtight container in the refrigerator for up to 4 days, or freeze individual bars wrapped tightly for up to 2 months. Thaw in the fridge or at room temperature for about 30 minutes before serving. If storing long-term, press a piece of parchment between layers to prevent sticking.
Serving ideas: these bars are lovely with a dollop of lightly sweetened whipped cream, a scoop of vanilla ice cream, or alongside a strong black tea. For a weekend brunch, set them next to citrus-spiked yogurt and extra berries.
Small Experiments That Changed the Recipe
I treat recipes like hypotheses. When I swapped half the lemon juice for orange juice I got a softer, rounder acidity that a few friends preferred. When I scattered slivered almonds on top before baking the bars gained texture and a toasty finish. I sometimes warm the raspberry jam with a tablespoon of lemon juice for brighter jam flavor.
If you like floral accents, try a splash of lavender syrup paired with the lemon base in the batter — it will remind you of lavender lemon bars without changing the method. For a crumblier base, fold in two tablespoons of cornmeal or substitute 2 tablespoons of the flour with almond flour for a slightly nutty crumb reminiscent of lemon crumb bars.
Practical note: if your raspberries are very juicy, drain them briefly on paper towel. This prevents the bottom layer from becoming laminated with excess moisture.
My Favorite Little Touch
My personal touch is small but consistent: I zest an extra half-teaspoon of lemon over the finished bars for a hit of citrus aroma the moment you lift the lid of the container. It feels like walking into the same sunlit room that inspired the first batch.
Final tip: these bars look best when given a little patience. Let them cool fully and resist the urge to dust powdered sugar until you are ready to serve.
Conclusion
If you want a slightly different riff or additional technique photos, this adaptation pairs well with other riff-inspired recipes and you can compare methods in a detailed resource like Raspberry Lemon Bars Recipe – Jessica Gavin.
Lemon Raspberry Swirl Bars
Ingredients
Method
- Preheat the oven to 350°F (175°C) and grease a 9x9-inch baking pan.
- In a mixing bowl, cream together the softened butter and granulated sugar until light and fluffy.
- Add the egg, followed by the lemon juice and lemon zest, and mix until well combined.
- In a separate bowl, combine flour, baking powder, and salt, then gradually add to the wet mix until just combined.
- Spread half of the batter into the prepared baking pan to create a smooth layer.
- Warm the raspberry jam in a small saucepan until pourable and drizzle it over the batter.
- Spoon the raspberries over the jam and the batter, ensuring they are evenly distributed.
- Drop spoonfuls of the remaining batter over the raspberry layer to create islands.
- Using a knife, swirl the batter and raspberries together for a marbled effect.
- Bake in the oven for 25 to 30 minutes, or until the top is golden and a toothpick inserted in the center comes out clean.
- Allow the bars to cool fully in the pan before cutting them into 9 or 12 bars.
- Store in an airtight container in the refrigerator for up to 4 days or freeze for up to 2 months.