Magical Steamed Blooming Cupcakes (A No-Oven Recipe!)
Imagine a cupcake so soft and fluffy it’s like biting into a sweet cloud, a cupcake that doesn’t need an oven, and—here’s the best part—a cupcake that magically blossoms like a flower as it cooks. That is not a fairytale; that is the pure, whimsical joy of these incredible Steamed Blooming Cupcakes. I first discovered…
Imagine a cupcake so soft and fluffy it’s like biting into a sweet cloud, a cupcake that doesn’t need an oven, and—here’s the best part—a cupcake that magically blossoms like a flower as it cooks. That is not a fairytale; that is the pure, whimsical joy of these incredible Steamed Blooming Cupcakes.
I first discovered steamed cakes like this at a local Asian bakery and was completely mesmerized. They were called puto or siopao, and they had this incredible, unique texture unlike any baked good I’d ever had. My mission became clear: I had to figure out how to recreate that magic at home. After a lot of fun experimenting, I landed on this brilliantly simple version that uses a Bisquick shortcut to make it absolutely foolproof.
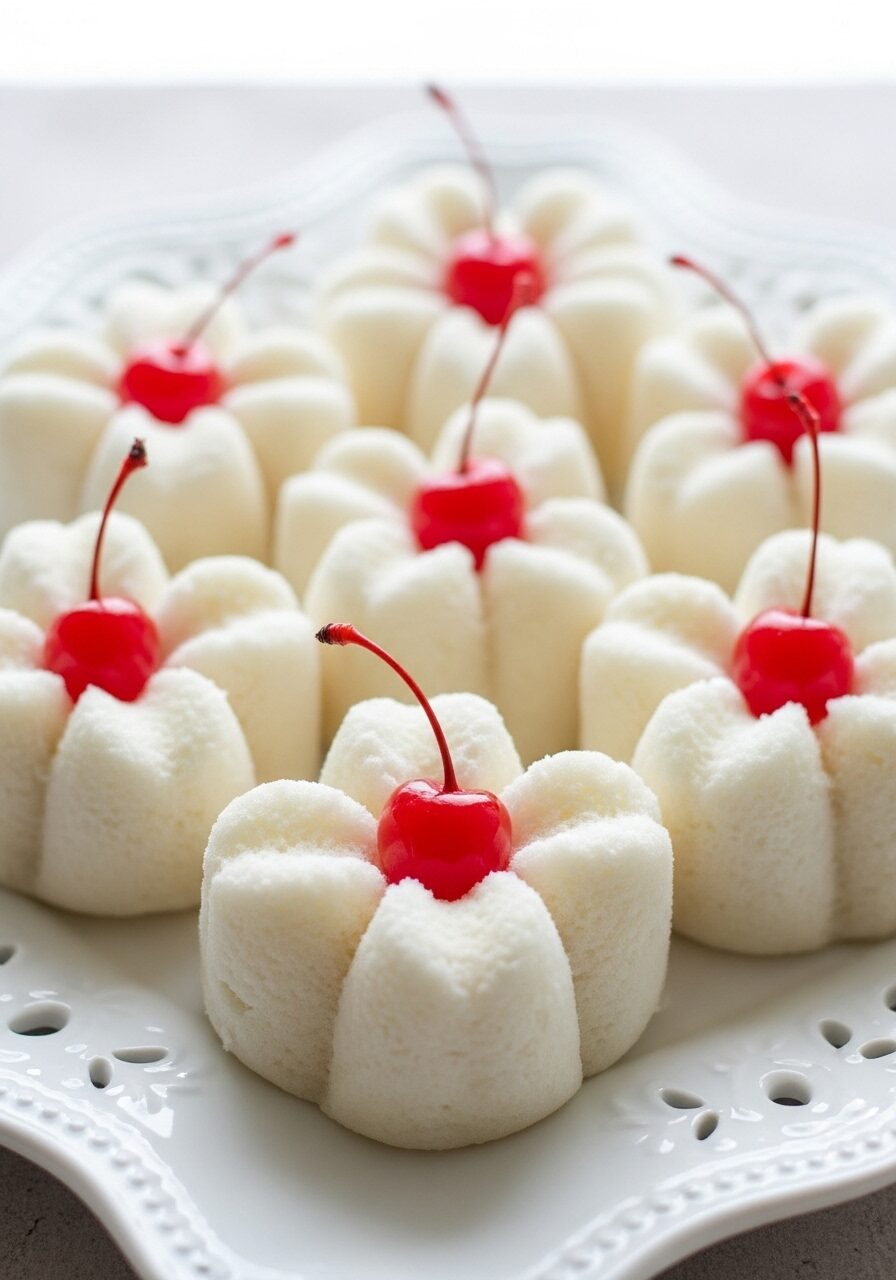
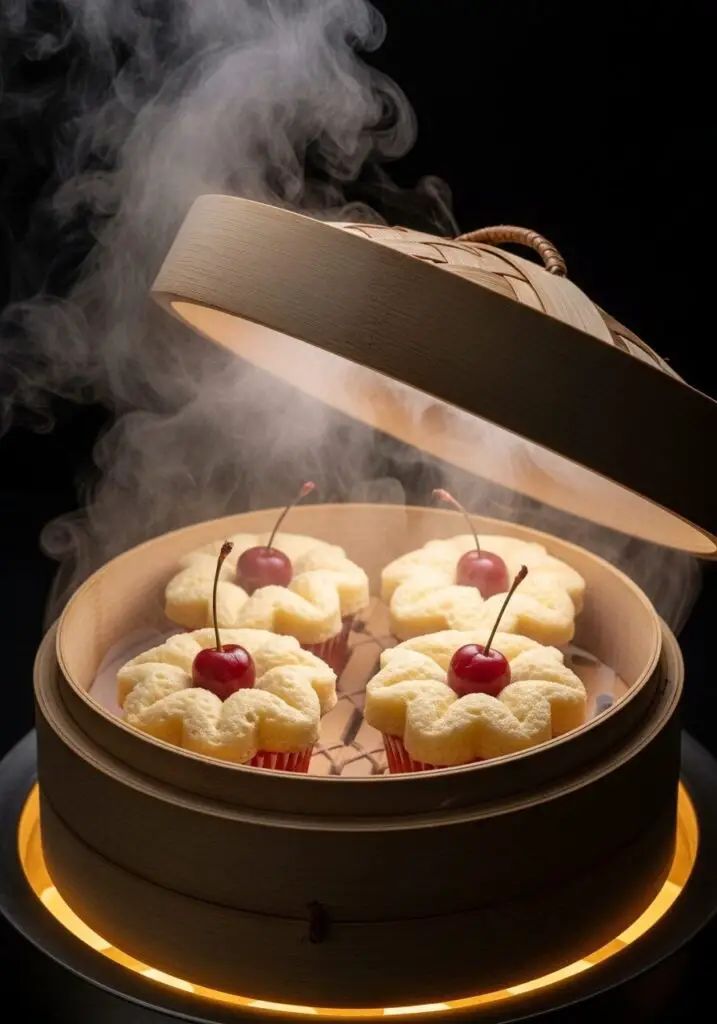
I promise you, this is one of the most fun and surprising baking projects you will ever undertake. The moment you lift the lid off your steamer to see these little cakes have “bloomed” into a beautiful four-petal flower is a true moment of kitchen magic. They are a guaranteed show-stopper for any party or a special treat for the family.
Get ready to master a simple, fascinating technique that will have everyone asking, “How did you do that?”
Why These Blooming Cupcakes Are Pure Kitchen Magic!
You are going to have an absolute blast making these. They are a unique and delightful departure from the everyday cupcake. Here’s why they are so special:
- No Oven Required! This is a total game-changer, especially on hot days or if you don’t have an oven. The steaming method creates a uniquely moist and tender crumb.
- The Magical “Bloom” Effect: Watching these cupcakes split open into a beautiful flower shape is a genuinely thrilling moment. It’s like a science experiment and a dessert all in one!
- Brilliantly Easy Shortcut: We’re using Bisquick mix as our base, which takes all the complicated measuring and guesswork out of the equation. It’s a reliable shortcut to a perfect result.
- Incredibly Soft & Fluffy Texture: If you’ve never had a steamed cake, you are in for a treat. They are unbelievably soft, moist, and light in a way that baked cupcakes just can’t replicate.
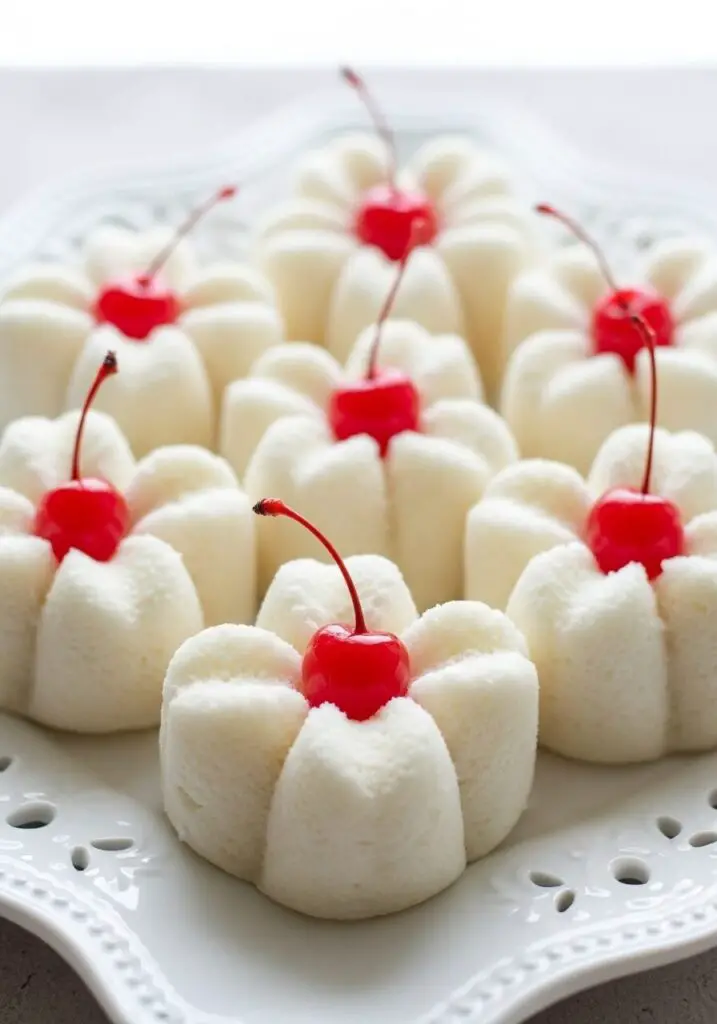
- A Fun, Unique Centerpiece: A platter of these beautiful, flower-like cupcakes with a cherry in the center is so visually stunning and different.
Recipe Snapshot
| Prep Time | 5 minutes |
| Cook Time | 15 minutes per batch |
| Total Time | 40 minutes |
| Servings | 9 cupcakes |
| Calories | 369 kcal per serving |
| Course | Dessert, Snack |
| Cuisine | American / Asian-Inspired |
| Difficulty/Method | Easy / Steaming |
Your Shopping List for This Magical Project
The beauty of this recipe is its incredibly simple ingredient list, thanks to our magical shortcut!

→ For the Cupcake Batter
- 1 large egg → Our binder and for a bit of richness.
- 3/4 cup granulated sugar → For the perfect, classic sweetness.
- 2 cups Original Bisquick™ mix → The brilliant, all-in-one shortcut that makes this recipe foolproof!
- 2/3 cup whole milk → For a tender, moist crumb.
- 2 Tbsp. unsalted butter, melted → Adds a lovely richness and flavor.
- 2 tsp. pure vanilla extract → A non-negotiable for that classic cake flavor.
→ For the Finishing Touch
- 9 maraschino cherries → The perfect, jewel-like center for our little flowers.
- Cooking spray → This is for your knife, NOT the molds!
Let’s Make Some Magic! Your Step-by-Step Guide
Ready for the most fun you’ve had in the kitchen all year? This process is so unique and the payoff is huge.
Part 1: The Set-Up and the Secret Cut
- Prep Your Steamer: Pour about 2-3 inches of water into a large pot and fit it with a steamer basket. Bring the water to a rolling boil over medium-high heat.
- Mix the Batter: In a large bowl, whisk the egg and sugar together. Add the Bisquick mix, milk, melted butter, and vanilla. Stir with a spatula until everything is just combined and smooth. Don’t overmix!
- Fill the Molds: Here’s a crucial step: DO NOT SPRAY THE MOLDS! The batter needs to cling to the sides to climb up and bloom. Using a large scoop (about 4 oz or 1/2 cup), fill 9 silicone cupcake molds almost to the top.
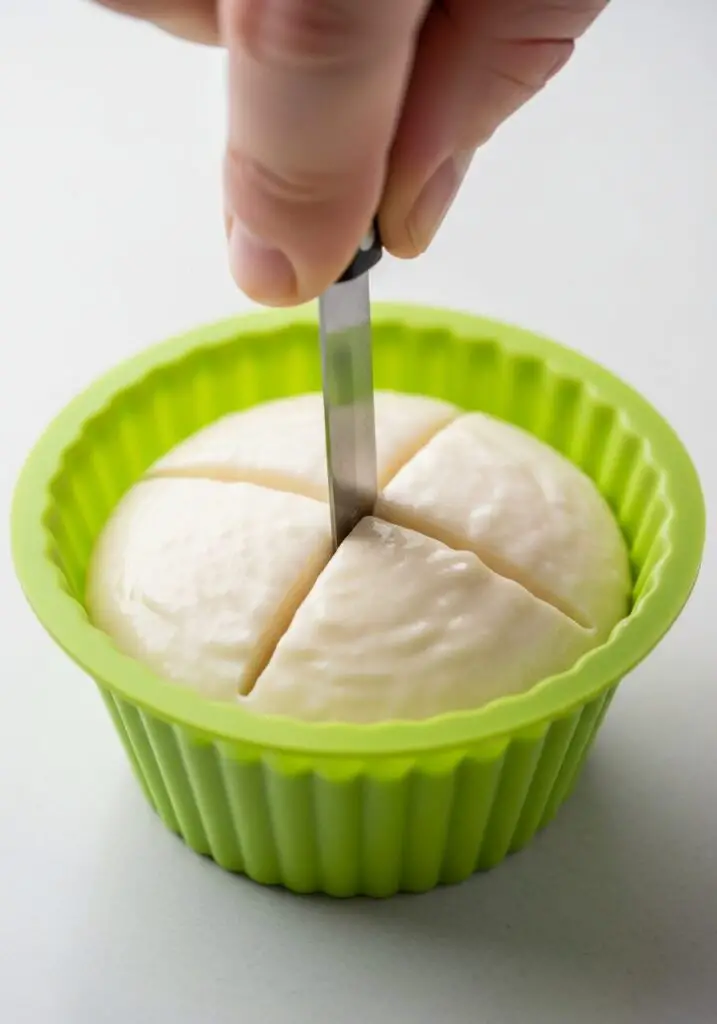
- The Secret “X” Cut: This is the key to the magic! Spray a small, sharp paring knife with cooking spray. Firmly but gently, cut a deep “X” across the top of the batter in one of the molds. Wipe the knife clean, spray it again, and repeat for all 9 cupcakes.
Part 2: Steam to Perfection!
- Steam in Batches: Carefully arrange a few of the molds in your steamer basket, making sure to leave at least 1 inch of space between them for steam to circulate.
- Cover and Steam: Cover the pot and let the cupcakes steam over the boiling water for 12 to 15 minutes. This is the hardest part: try not to peek! You need to keep all that powerful steam trapped inside. You’ll know they’re done when they have “bloomed” wide open and a toothpick inserted into the center comes out clean.
- Cool and Repeat: Using tongs, carefully remove the hot cupcakes and let them cool on a plate. Check the water level in your pot, add more if needed, and bring it back to a boil before steaming the next batch.
- The Finishing Touch: Once the cupcakes are cool, arrange them on a platter and place a single maraschino cherry right in the center of each “flower.” So pretty!
WiseRecipes’ Top Tips for a Perfect “Bloom”
I’ve had a few duds while perfecting this technique. Learn from my mistakes to guarantee a magical result every time!
- DO NOT GREASE THE MOLDS. I’m saying it again because it’s the most important and counterintuitive rule. The batter needs to grip the sides of the silicone mold as it expands and rises. If the mold is greased, the batter will just slip, and you’ll get a dome instead of a bloom.
- The “X” Must Be DEEP. Don’t be timid with your cut. You need to make a decisive, deep cross in the batter, going at least halfway down. This creates the “fault lines” that allow the cupcake to split open.
- You Need a Strong, Rolling Boil. Weak, gentle steam will not work. You need a consistent, powerful, rolling boil happening under your steamer basket. This powerful upward force of steam is what pushes the cupcake up and open.
- Fill Those Molds! This is not the time to be stingy. You need to fill the molds nearly to the top. An under-filled mold won’t have enough batter to build the pressure needed to create that dramatic split.
- Silicone Molds are a Must. This technique will not work with paper liners or a greased metal pan. The flexibility and non-stick grip of silicone are essential for the blooming process.
Creative Twists: Delicious Ways to Customize Your Cupcakes
This simple batter is a perfect canvas for your creativity. Here are some fun ideas:
- Add Food Coloring: Add a few drops of different food coloring to the batter to create a whole garden of pink, yellow, or blue blooming flowers.
- Change the Extract: Swap the vanilla for a teaspoon of ube, pandan, or almond extract for a different flavor profile.
- Add a Filling: Before scooping the batter, place a small cube of cream cheese or a dollop of jam in the bottom of the silicone mold for a surprise center.
- Sprinkle the Top: Before making your “X” cut, sprinkle the top of the batter with colorful nonpareils or sprinkles.
- Matcha Green Tea: Whisk a tablespoon of culinary-grade matcha powder into the batter for a beautiful green color and earthy flavor.
- Chocolate Version: Use a chocolate Bisquick mix or add a few tablespoons of cocoa powder to the batter.
- Different Topping: Instead of a cherry, place a single candied violet or a chocolate kiss in the center of the cooled cupcake.
- Make it Savory: Omit the sugar and vanilla, add a half-cup of shredded cheddar and some chopped chives to the batter for a savory, cheese-puto style treat.
Keep Them Fresh! Storing Your Steamed Cupcakes
Steamed cakes have a unique texture that is best enjoyed fresh. Here’s how to store any leftovers.
- Room Temperature: These cupcakes are best stored in an airtight container at room temperature. Because of their high moisture content, they will stay soft and fresh for up to 2 days.
- Reheating: If they start to feel a little firm, you can revive their soft, fluffy texture by re-steaming them for a minute or two, or by popping one in the microwave for 10-15 seconds.
- Freezing: I don’t recommend freezing these, as the delicate, fluffy texture can become a bit dense and watery upon thawing. They are truly best enjoyed within a day or two of being made.
Steamed Blooming Cupcakes (No-Oven Recipe)
Ingredients
Method
- Pour 2-3 inches of water into a large pot and fit with a steamer basket. Bring the water to a rolling boil.
- In a large bowl, whisk the egg and sugar. Add the Bisquick, milk, melted butter, and vanilla, and stir until just combined and smooth.
- Using a large scoop, fill 9 ungreased silicone cupcake molds nearly to the top with batter.
- Spray a sharp paring knife with cooking spray and cut a deep “X” across the top of each cupcake, wiping and re-spraying the knife between each cut.
- Working in batches, arrange the molds in the steamer basket, leaving at least 1 inch of space between them.
- Cover the pot and steam over medium-high heat for 12 to 15 minutes, until the cupcakes have bloomed and a tester comes out clean. Do not lift the lid while steaming.
- Using tongs, carefully remove the cupcakes and let them cool completely. Place a maraschino cherry in the center of each before serving.
Notes
FAQs: Your Blooming Cupcake Questions, Answered!
Help! My cupcakes didn’t bloom! What went wrong?
This is the number one question! It’s almost always one of four things: 1) You accidentally greased the molds. 2) Your “X” cut wasn’t deep enough. 3) You didn’t fill the molds high enough. Or 4) Your water wasn’t at a strong, rolling boil, so there wasn’t enough steam power. Review the tips section and try again—it’s a technique that’s so rewarding when you nail it!
Can I use regular paper cupcake liners?
Unfortunately, no. This recipe absolutely requires freestanding silicone cupcake molds. Paper liners don’t provide the right structure or the “grip” that the batter needs to climb the sides and bloom properly.
Can I make these without Bisquick mix?
Yes, you can! To make your own self-rising flour base, whisk together 2 cups of all-purpose flour, 3 teaspoons of baking powder, and 1/2 teaspoon of salt. Use this mixture in place of the Bisquick mix.
Can I bake these in the oven instead of steaming them?
I would not recommend it. This batter is specifically formulated for the wet heat of steaming, which gives it its unique, super-moist, and fluffy texture. It won’t bake up with the same structure or texture in the dry heat of an oven, and it certainly won’t bloom!
My Final Thoughts: A Little Bit of Kitchen Magic
These Steamed Blooming Cupcakes are more than just a dessert; they are a fun, fascinating project that brings a little bit of wonder into the kitchen. They are a delightful surprise for anyone who has never seen them before and a testament to the fact that sometimes, the most magical results come from the simplest ingredients. I hope you have an absolute blast making them!