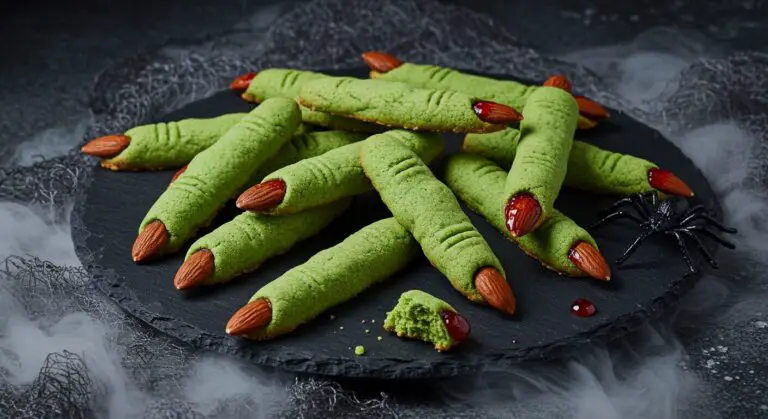
Spooktacular Fun! My Easy Melting Witches Bark (Halloween Party Perfect!)
Oh, my friends, who here isn’t utterly charmed by the playful, slightly spooky magic of Halloween? It’s the perfect excuse to get creative in the kitchen, especially with treats that bring a smile (or a delightful shiver!) to every face. Today at WiseRecipes, I’m beyond excited to share a recipe that perfectly embodies that spirit:…
Oh, my friends, who here isn’t utterly charmed by the playful, slightly spooky magic of Halloween? It’s the perfect excuse to get creative in the kitchen, especially with treats that bring a smile (or a delightful shiver!) to every face. Today at WiseRecipes, I’m beyond excited to share a recipe that perfectly embodies that spirit: this incredible Melting Witches Bark! Seriously, prepare for pure bliss – a canvas of dark and green candy melts, adorned with whimsical chocolate witch hats, pretzel broomsticks, candy eyeballs, and a shower of festive sprinkles. It’s a haunted masterpiece, and it is pure joy in every single bite!
I just adore a recipe that feels incredibly special and playful but is secretly super simple and lightning-fast to make. This Halloween treat is exactly that! It’s a fantastic way to transform simple candies and pretzels into a powerhouse party food that will have everyone reaching for more. Forget complicated baking; we’re talking about ridiculously flavorful and satisfying treats that come together with just 1 hour 25 minutes of active prep and some chilling. This isn’t just a dessert; it’s a mood-lifter, a fantastic Halloween party staple, and honestly, a guaranteed hit every single time. This Melting Witches Bark recipe yields 8 generous servings, making it perfect for school parties, trick-or-treat gatherings, or any time you crave amazing, effortless fun. Trust me, once you try this incredible combination, you’ll be making them again and again!
Why This [EASY!] Melting Witches Bark Will Be Your Halloween MVP!
This isn’t just another Halloween treat; it’s a creative, fun, and incredibly satisfying culinary delight. Here’s why I’m absolutely smitten with it:
- Spooky Fun, Made Easy: These treats look incredibly imaginative and festive, yet they’re surprisingly simple to make! Kids (and adults!) will adore creating their own witches’ faces and arranging the whimsical toppings.
- No-Bake & No-Fuss: Forget turning on the oven for complicated baking! This recipe comes together with simple melting and assembly, making it perfect for quick prep and keeping your kitchen cool.
- Irresistible Sweet & Crunchy Textures: From the smooth candy melts to the crunchy pretzel broomsticks, chocolate cookies, and candy pieces, every bite offers a delightful textural adventure.
- Customizable Monster Fun: This is where the creativity shines! With various candy melting wafers, pretzels, cookies, and sprinkles, you can personalize each piece of bark, making every treat unique and exciting.
- Perfect for Parties & Gifting: Making 8 generous servings, this bark is ideal for Halloween parties, school events, or even as a fun homemade gift for friends and neighbors.
Your Shopping List for Witchy Wonders: Gather What You’ll Need
Creating this incredible Melting Witches Bark uses a blend of candies, pretzels, and chocolatey goodness. Here’s what you’ll want to grab to get started!

→ For the Whimsical Pretzel Broomsticks
- 8 (1-inch) strips sour candy belts: A mix of colors works great for vibrant broom bristles!
- 8 pretzel sticks: Our sturdy broom handles.
→ For the Enchanting Witch Hats
- 4 ounces (about 2/3 cup) orange candy melting wafers: For melting and coating our witch hats.
- 1 teaspoon refined coconut oil: Helps thin the candy melts for a smooth coating.
- 8 fudge-covered chocolate sandwich cookies: Such as Oreos, these form the brim of our witch hats.
- 8 cone-shaped corn snacks, such as Bugles: These form the pointed top of our witch hats.
- Coarse black sanding sugar: Or regular sanding sugar, for a sparkly, spooky finish on the hats.
→ For the Spooky Bark Base
- 8 ounces (about 1 1/3 cups) green candy melting wafers: For our vibrant green witch faces.
- 4 ounces (about 2/3 cup) black candy melting wafers: To create dark swirls and depth.
- 12 ounces (about 2 cups) brown candy melting wafers: For the chocolatey bark base.
→ For the Ghastly Garnish
- 16 candy eyeballs: For those essential spooky peepers!
- Halloween sprinkles, for topping: A colorful assortment for extra festive fun.
- 8 mini candy pumpkins, such as Mellowcreme, for topping (optional): For an extra touch of autumnal charm.
Let’s Create! Crafting Your Perfect Melting Witches Bark, Step-by-Step
This recipe is designed for maximum fun and minimal fuss. The chilling time is important, so plan accordingly!
Part 1: Crafting Our Edible Decorations (Broomsticks & Witch Hats!)
- Preheat Oven & Prep Pan: First things first! Preheat your oven to 250°F (120°C). Line a baking sheet with a silicone baking mat or parchment paper and set aside.
- Make Broomsticks: Working with 1 strip of candy belt at a time, use sharp kitchen shears to make thin vertical cuts (like fringe), leaving a ¼-inch strip at the top uncut. Wrap the uncut strip around the tip of a pretzel stick, letting the two ends overlap slightly. Gently press the candy with your fingers so it clings to the pretzel, being careful not to break the pretzel. Fan out the fringe a bit to resemble a small broom. Repeat with the remaining sour candy and pretzels, making 8 brooms in total. Set aside.
- Melt Orange Candy: Put the orange candy wafers in a small oven-safe ramekin. Bake in the preheated oven until the wafers are glossy and begin to melt, about 3 to 4 minutes. Give the wafers a good stir; if the mixture isn’t smooth, return it to the oven for 30 seconds and stir again. Repeat until smooth, then stir in 1 teaspoon of refined coconut oil to thin it slightly. Set aside to cool completely for 5 to 10 minutes.
- Make Witch Hats: Arrange the 8 fudge-covered chocolate sandwich cookies on a plate or small baking sheet. Place the ramekin of melted orange candy next to it. Drop a cone-shaped corn snack (Bugle) into the orange candy, then use two wooden skewers or chopsticks to turn the snack so it’s completely coated. Lift it out and place it on an empty part of the plate or baking sheet. Sprinkle it liberally with coarse black sanding sugar (or regular sanding sugar). Use your fingers to carefully pick the coated corn snack up by the tip and the bottom, and place it pointed-side up onto a fudge-covered cookie (this forms the hat brim). Repeat with the remaining corn snacks and cookies to make 8 witch hats total. Set aside until set, about 15 minutes.

Part 2: Assembling & Decorating Our Spooky Bark!
- Arrange Green & Black Wafers: Meanwhile, divide the 8 ounces of green candy wafers into 8 even mounds, spaced evenly apart, around the prepared baking sheet (lined with silicone mat/parchment). Break 4 of the black candy wafers in half, then place one half on top of each mound of green wafers.
- Add Brown & Black Wafers: In a medium bowl, combine the 12 ounces of brown candy wafers and the remaining 4 ounces of black candy wafers. Scatter this mixture around all sides of the green mounds, creating a rough rectangle shape for the overall bark.
- Melt & Spread Bark: Bake in the preheated 250°F (120°C) oven until all the wafers are glossy and begin to melt, about 3 to 4 minutes. Immediately remove from the oven! Use a small offset spatula to gently smooth and spread the green wafers into rough circles (these will be your witch faces!). Wipe the offset spatula clean, then spread the melted black and brown wafers out around the green circles, connecting them to form the base of your bark.
- Decorate Bark: Quickly (before it sets!) place 1 witch hat slightly off-center on each green circle. Below each hat, place 2 candy eyeballs. Lay one of your pretzel broomsticks to the side of the eyes. Scatter the Halloween sprinkles generously over the black and brown melted candies. Arrange the 8 mini candy pumpkins on top if using.

- Chill to Set: Set the bark aside at room temperature (or in the fridge/freezer for faster setting!) until it is completely solid, about 1 hour.
- Break Apart & Serve! Once solid, break the bark apart into fun, irregular pieces. Serve immediately! Prepare for spooky delights!

WiseRecipes’ Top Tips for Witchy Bark Mastery!
This fun Halloween treat is incredibly easy, but these WiseRecipes insights will help you achieve Melting Witches Bark perfection every single time!
- Low Oven for Melting Wafers: Use a very low oven temperature (250°F / 120°C) for melting candy wafers. This prevents scorching and ensures they melt smoothly. Stirring halfway is crucial for even melting.
- Work Quickly with Melted Candy: Candy melts set relatively quickly. Have all your decorations (hats, brooms, eyeballs, sprinkles) ready and within reach before you spread the bark, so you can decorate while the candy is still soft.
- Refined Coconut Oil for Smoothness: Adding a tiny bit of refined coconut oil to the melting candy wafers (especially the orange) helps thin them slightly, making them smoother and easier to coat the Bugles for the witch hats.
- The Broooms are Delicate: Handle the sour candy broomsticks gently, as the pretzel sticks can break easily.
- Quality Candy Melts: Use good quality candy melting wafers (like Wilton Candy Melts or Ghirardelli Melting Wafers) for best results. They melt smoothly and set firmly.
- Don’t Over-Bake: Watch the candy wafers in the oven closely! They only need 3-4 minutes to become glossy and start melting. Over-baking can cause them to seize or burn.
Creative Twists: Delicious Ways to Customize Your Spooky Bark!
This Melting Witches Bark is already fantastic, but it’s also a wonderful canvas for your culinary creativity! Here are some ideas I love to play with:
- Different Candy Colors: Experiment with other Halloween-themed candy melt colors! Purple, orange, or black bark would all be spooktacular.
- Gingerbread Witch Hats: Instead of fudge-covered cookies, use small round gingerbread cookies as the base for your witch hats during the holidays.
- Nutty Crunch: Sprinkle some chopped toasted pecans, walnuts, or even crushed pretzels over the dark/brown bark base for extra texture.
- More Halloween Candies: Add other small Halloween candies like candy corn, candy pumpkins, candy spiders, or gummy bats to your sprinkle mix.
- Ghostly Swirls: After spreading the bark, use a toothpick to swirl a little melted white candy wafers into the green witch faces for ghostly effects.
- Edible Glitter: For extra sparkle, sprinkle edible glitter (gold, silver, or iridescent) over the bark once it’s set.
Keep It Spooky! Storing Your Halloween Treats
You’ve created something truly special, so let’s make sure it stays fresh and delicious!
- Room Temperature Storage: Once completely set, store your Melting Witches Bark in an airtight container at room temperature for up to 1 week. Keep it in a cool, dry place away from direct sunlight or heat, as candy melts can melt or bloom in warm conditions.
- Avoid Refrigeration (if possible): Storing chocolate bark in the refrigerator can sometimes cause “sugar bloom” (a white film) due to condensation changes, and it can become very hard. If you must chill it to set quickly, do so for a short time, then transfer to an airtight container at room temperature.
- Freezing? Not Recommended: I do not recommend freezing this bark. The delicate candy components, sprinkles, and pretzel sticks are likely to suffer textural changes upon freezing and thawing, making them sticky or brittle. This treat is truly best enjoyed fresh!
- Make-Ahead Prep: This bark is perfect for making ahead! Prepare it up to 1 week in advance, store as directed, and bring it out just before your Halloween party.
My Easy Melting Witches Bark (Halloween Party Perfect!)
Ingredients
Equipment
Method
- Preheat the oven to 250 degrees F (120C). Line a baking sheet with a silicone baking mat or parchment and set aside.
- Work with 1 strip of candy belt at a time, use kitchen shears to make thin vertical cuts, leaving a 1/4-inch strip at the top uncut (fringe). Wrap the uncut strip around tip of a pretzel stick (ends overlap slightly). Press candy to cling to pretzel. Fan out fringe to resemble broom. Repeat for 8 brooms. Set aside.
- Put orange candy wafers in a small oven-safe ramekin. Bake until glossy and beginning to melt (3 to 4 minutes). Stir until smooth (repeat 30 sec bake/stir if needed), then stir in coconut oil. Set aside to cool (5 to 10 minutes).
- Arrange fudge-covered cookies on a plate. Drop a cone-shaped corn snack into orange candy, turn to coat. Lift out, place on empty plate. Sprinkle liberally with sanding sugar. Pick up by tip and bottom, place pointed-side up onto a cookie. Repeat for 8 witch hats total. Set aside until set (about 15 minutes).
- Divide green candy wafers into 8 even mounds around prepared baking sheet. Break 4 black candy wafers in half, place a half on top of each green mound.
- In a medium bowl, combine brown candy wafers and remaining black wafers. Scatter mix around all sides of green mounds, creating a rough rectangle.
- Bake until wafers are glossy and begin to melt (3 to 4 minutes). Immediately use small offset spatula to smooth and spread green wafers into rough circles. Wipe spatula, then spread black and brown wafers around green circles.
- Place 1 witch hat slightly off-center on each green circle, then place 2 candy eyeballs below each hat. Lay a broomstick to the side of the eyes. Scatter Halloween sprinkles on black and brown melting candies. Arrange candy pumpkins on top if using.
- Set aside until the bark is solid (about 1 hour). Break apart and serve.
Notes
FAQs: Your Top Melting Witches Bark Questions, Answered!
Q: What are candy melting wafers? Can I use chocolate chips?
A: Candy melting wafers (also called candy melts or confectioner’s coating) are specially formulated to melt smoothly and set firmly without tempering, making them ideal for bark and decorations. While you can melt chocolate chips, they often require tempering to set properly with a good snap and shine. For ease and best results here, use melting wafers.
Q: My melted candy is thick/seized up. What went wrong?
A: This usually happens if the candy gets too hot, or if even a tiny drop of water gets into it. Melt gently at low power/heat, stirring frequently. If it seizes, you can try stirring in a tiny bit more refined coconut oil or vegetable shortening (½ tsp at a time) to try and smooth it out, but it might not fully recover.
Q: What are cone-shaped corn snacks (Bugles)? Can I substitute them?
A: Bugles are a brand of crispy, cone-shaped corn snacks. They’re used here to form the pointed top of the witch hats. There isn’t a direct perfect substitute for their shape and crunch, but you could try molding small amounts of a firm, pliable candy (like modeling chocolate or fondant) into a cone shape.
Q: How do I store leftover sour candy belts and pretzel sticks?
A: Store any leftover sour candy belts and pretzel sticks in separate airtight containers at room temperature. Pretzel sticks can go stale if left exposed to air, and candy belts can dry out.
Q: Can I customize the decorations for different holidays?
A: Absolutely! This bark concept is incredibly versatile. For Christmas, you could use red/green candy melts, mini candy canes, green sprinkles, and tiny gumdrops. For a birthday, use bright colors, sprinkles, and small candies!
And there you have it, my friends—your guide to crafting the most delightful, impressive, and truly satisfying Melting Witches Bark! This WiseRecipes creation is more than just a treat; it’s a testament to how simple ingredients, when treated with a little love and smart steps, can come together to create something truly extraordinary. It’s a vibrant, exciting meal that you’ll genuinely look forward to eating, day after day.
I am genuinely so excited for you to try these and experience the delicious magic yourself. Please, please come back and let me know in the comments below what your favorite part of this spooky-fun bark was, or any fun twists you tried! Happy cooking from WiseRecipes!