The Ultimate 4-Ingredient Marbled Fudge (Easy No-Bake Treat!)
Imagine a stunning, creamy fudge with beautiful, artistic swirls of wintery blue, that looks like it came from a high-end candy shop. Now, imagine you made this masterpiece in about 25 minutes using just four ingredients and your microwave. That, my friends, is the simple, brilliant, and jaw-dropping magic of this Microwave Marbled Fudge. This…
Imagine a stunning, creamy fudge with beautiful, artistic swirls of wintery blue, that looks like it came from a high-end candy shop. Now, imagine you made this masterpiece in about 25 minutes using just four ingredients and your microwave. That, my friends, is the simple, brilliant, and jaw-dropping magic of this Microwave Marbled Fudge. This is, without a doubt, the easiest and most impressive homemade candy you will make this holiday season.
I promise you, there is no greater holiday hosting triumph than revealing a tray of this beautiful marbled fudge. The process of swirling the two colors together is wonderfully creative, and the end result is a creamy, sweet, melt-in-your-mouth confection that is completely addictive. It’s the perfect edible gift and a stunning addition to any Christmas dessert platter.
Get ready to master the art of microwave fudge and create a beautiful, delicious, and ridiculously easy holiday treat that will have everyone asking for your secret.

Why This Marbled Fudge is a Holiday Game-Changer
You are going to be completely amazed by how easy it is to create such a beautiful candy. This recipe is a true holiday lifesaver. Here’s why:
- Made in the Microwave in Minutes: No candy thermometers, no double boilers, no stress! This entire recipe comes together with a few simple bursts in the microwave.
- Only 4 Core Ingredients: All you need are white chocolate chips, sweetened condensed milk, vanilla, and salt to create a rich, decadent, and foolproof fudge.
- Stunningly Beautiful Results: The simple technique of swirling two colored batches together creates a gorgeous, artistic marbled effect that looks incredibly professional.
- A Perfect, Foolproof Recipe: The combination of chocolate and condensed milk creates a fudge that sets up perfectly every time, with a smooth, creamy, melt-in-your-mouth texture.
- A Fantastic Edible Gift: Cut into neat squares and packaged in a festive box or tin, this beautiful fudge makes a wonderful and impressive homemade gift for the holidays.
Recipe Snapshot
| Prep Time | 25 minutes |
| Chill Time | 2 hours |
| Total Time | 2 hours 25 minutes |
| Servings | 25 pieces |
| Calories | 150 kcal per piece (estimated) |
| Course | Dessert |
| Cuisine | American |
| Difficulty/Method | Easy / No-Bake, Microwave |
Your Shopping List for This Easy Fudge
This impressive dessert comes together with just a handful of simple pantry staples.

→ For the Marbled Fudge
- Vegetable oil → For lightly greasing the foil-lined pan to ensure a clean release.
- 2 ½ cups white chocolate chips → Divided. Use a good quality brand for the best, smoothest melting.
- 1 cup sweetened condensed milk → This is the magic ingredient! It makes the fudge perfectly sweet, creamy, and foolproof. Do not substitute with evaporated milk.
- ¾ teaspoon pure vanilla extract → Divided, for a touch of warm, classic flavor.
- Fine salt → Just a pinch in each batch to balance the sweetness.
- Blue gel food coloring → Gel coloring is essential for achieving a vibrant color without thinning the fudge.
Let’s Make Fudge! Your Microwave Guide
Ready to make the easiest, prettiest fudge of your life? It’s just a few simple steps away.
Part 1: Prepare the Two Fudge Batches
- Prep Your Pan: Line an 8-inch square baking dish with foil, leaving an overhang on two sides to act as “handles.” Lightly coat the foil with vegetable oil.
- Make the White Fudge: In a medium microwave-safe bowl, combine 1 ¾ cups of the white chocolate chips with ¾ cup of the sweetened condensed milk. Microwave in 30-second intervals, stirring well after each one, until the chips are melted and the mixture is smooth. Stir in ½ teaspoon of vanilla and a pinch of salt.
- Make the Blue Fudge: In a separate, smaller microwave-safe bowl, combine the remaining ¾ cup white chocolate chips with the remaining ¼ cup condensed milk. Microwave in 30-second intervals, stirring, until smooth. Stir in the remaining ¼ teaspoon vanilla and another pinch of salt. Now, add a drop of blue gel food coloring and stir until you reach a beautiful, uniform blue color.
Part 2: The Art of the Swirl
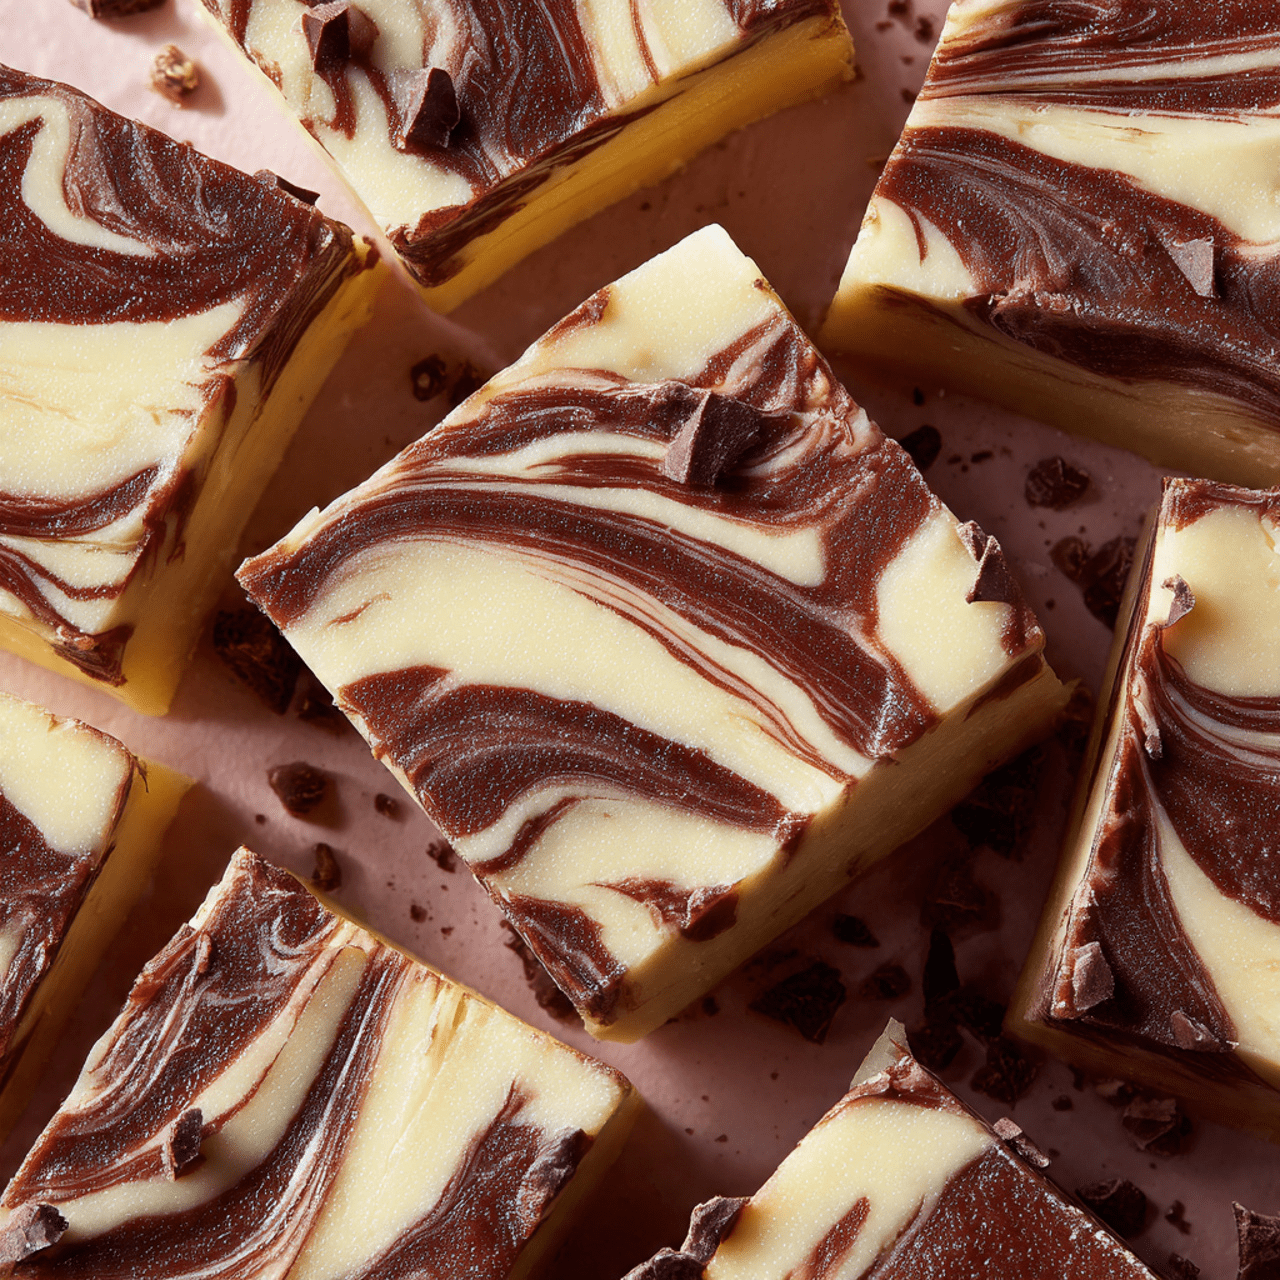
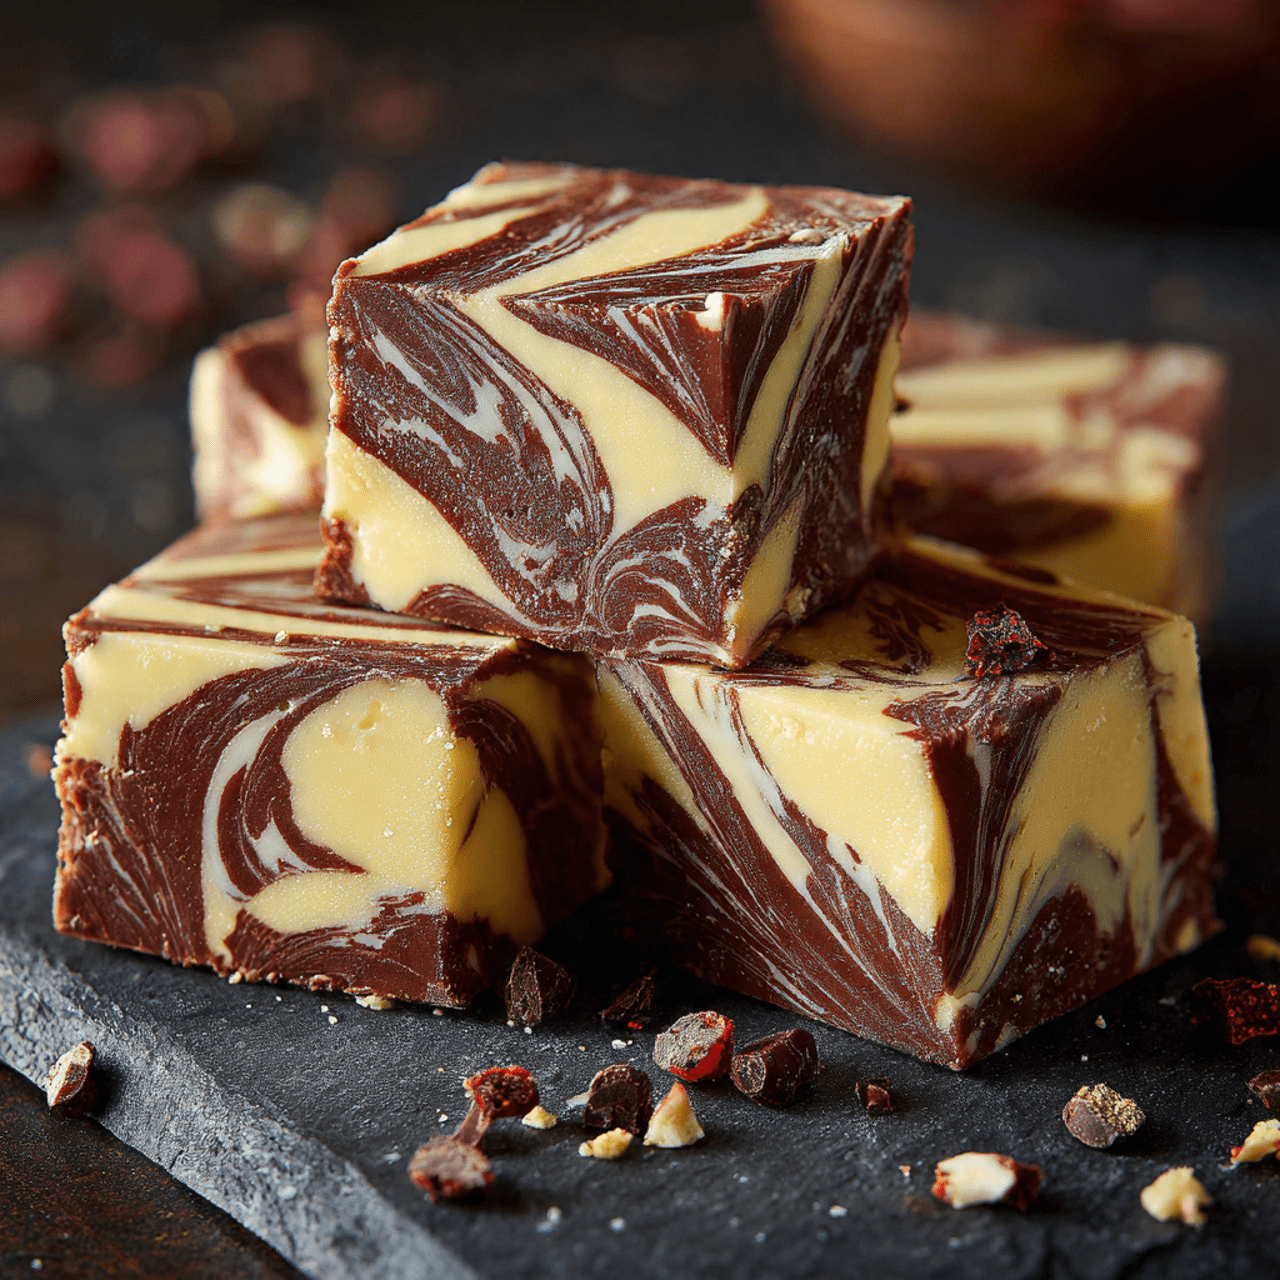
- Create the Layers: Immediately pour the white fudge mixture into the prepared baking dish and spread it into an even layer.
- Add the Color: Dollop the blue fudge mixture randomly over the top of the white fudge.
- Make the Marble!: Take a toothpick, a skewer, or the tip of a knife and gently drag it through the two colors to create beautiful, artistic swirls. Don’t overmix, or the colors will just blend together! A few simple figure-eight motions are all you need.
Part 3: Chill, Cut, and Serve
- Chill Until Firm: Place the baking dish in the refrigerator and chill until the fudge is completely firm and set. This will take at least 2 hours.
- Cut into Pieces: Once firm, use the foil overhangs to lift the entire block of fudge out of the pan. Place it on a cutting board, peel away the foil, and use a large, sharp knife to cut it into small, 1.5-inch squares. Serve and enjoy!
Microwave Marbled White Chocolate Fudge
Ingredients
Equipment
Method
- Line an 8-inch square baking dish with foil, leaving an overhang on the sides. Lightly coat the foil with vegetable oil.
- In a medium microwave-safe bowl, combine 1 3/4 cups white chocolate chips with 3/4 cup condensed milk. Microwave in 30-second intervals, stirring after each, until melted and smooth. Stir in 1/2 teaspoon vanilla and a pinch of salt.
- In another microwave-safe bowl, melt the remaining 3/4 cup white chocolate chips with the remaining 1/4 cup condensed milk in 30-second intervals until smooth. Stir in the remaining 1/4 teaspoon vanilla and a pinch of salt. Tint this mixture with blue gel food coloring.
- Pour the white fudge mixture into the prepared baking dish and spread evenly. Drop spoonfuls of the blue mixture on top.
- Use a toothpick or the tip of a knife to gently swirl the colors together to create a marbled effect. Do not overmix.
- Refrigerate until the fudge is completely firm, at least 2 hours.
- Use the foil overhangs to lift the fudge from the dish. Peel off the foil and cut the fudge into small squares.
Notes
WiseRecipes’ Top Tips for Foolproof Fudge
These simple secrets will guarantee your microwave fudge is perfect every single time.
- Don’t Overheat the Chocolate. The key to microwave candy-making is short bursts of heat and lots of stirring. The residual heat will continue to melt the chips as you stir, which prevents the chocolate from scorching or seizing.
- Use Sweetened Condensed Milk ONLY. This is non-negotiable! Do not, under any circumstances, substitute it with evaporated milk. They are not the same product. Sweetened condensed milk has the sugar and consistency needed for this foolproof fudge to set up correctly.
- Less is More When Swirling. The biggest mistake people make with marbling is overmixing. You only need to drag your toothpick through the colors a few times to create a beautiful effect. Stop swirling before you think you should!
- The Foil “Sling” is a Lifesaver. Leaving an overhang of foil on two sides of the pan creates handles that allow you to lift the entire block of chilled fudge out in one piece for easy, clean cutting.
- Use Gel Food Coloring. Liquid food coloring can add too much moisture to the fudge, which can affect how it sets and can even cause the chocolate to seize. A tiny drop of concentrated gel coloring is all you need for vibrant color.
Keep It Fresh! Storing Your Homemade Fudge
This fudge keeps beautifully, making it a perfect make-ahead treat for the holidays.
- Storage: Store the cut pieces of fudge in an airtight container in the refrigerator. Place layers of wax paper or parchment paper between them to prevent them from sticking together. It will stay fresh for up to 2 weeks.
- Serving: For the best flavor and texture, you can let the fudge sit at room temperature for about 10-15 minutes before serving, but it’s also delicious straight from the fridge.
FAQs: Your Marbled Fudge Questions, Answered!
Can I make this on the stovetop?
Yes, you can! You can melt the chocolate chips and condensed milk for each batch in separate saucepans over low heat, or use a double boiler. Just stir constantly until smooth and be careful not to scorch the chocolate.
Can I use different kinds of chocolate?
Absolutely! This recipe is a fantastic base. You could make a chocolate-peanut butter version with semi-sweet chips and peanut butter chips, or a dark chocolate and peppermint version for Christmas. Just keep the ratios of chips to condensed milk the same.
My fudge didn’t set. What went wrong?
This is very rare with this recipe! The most likely culprit is that evaporated milk was used instead of sweetened condensed milk. The other possibility is that the chocolate was overheated, causing the fats to separate. As long as you use the correct ingredients and gentle heat, it should set up perfectly.
Can I use different colors?
Of course! Let your creativity run wild. A red and white swirl would be beautiful for a candy cane theme, or red and green for a classic Christmas look. This is a great recipe to adapt for any holiday or occasion!
Final Thoughts: Your Easiest, Most Impressive Holiday Candy
There is nothing quite like the pride of offering a beautiful, homemade candy that you know was secretly the easiest thing in the world to make. This Microwave Marbled Fudge is the ultimate holiday hack for creating an impressive, delicious, and gift-worthy treat with minimal effort. I hope it brings a swirl of color and a whole lot of sweet joy to your holiday celebrations. Happy Holidays!