The Ultimate Monster Face Pumpkin Scones (A Spooky Afternoon Tea!)
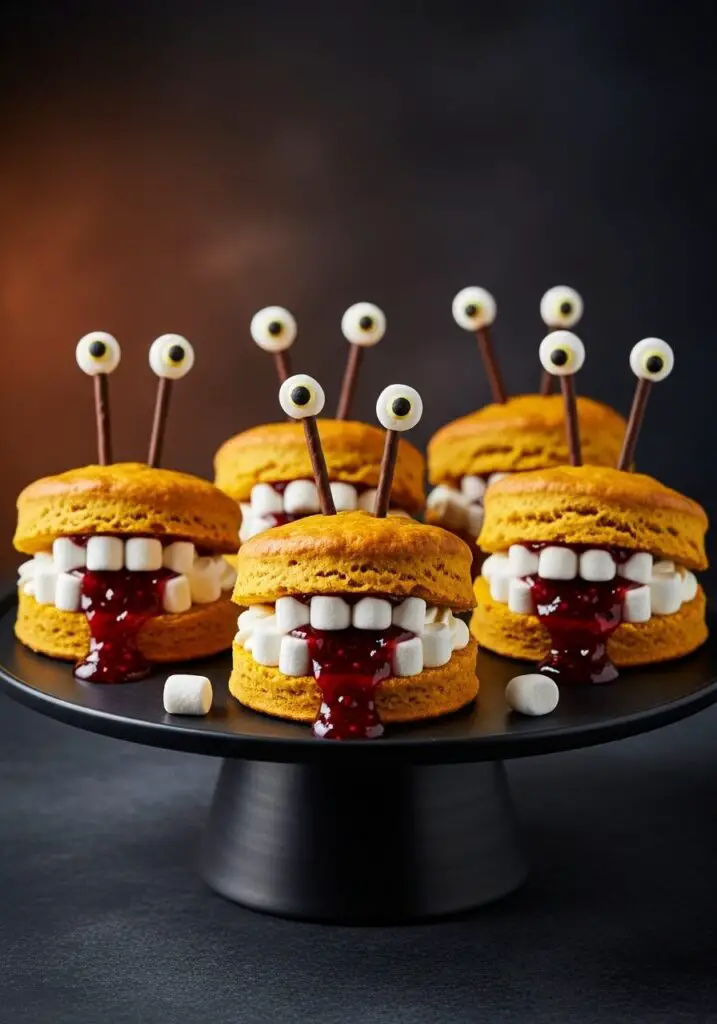
Imagine a Halloween treat that is brilliantly spooky, delightfully charming, and outrageously delicious—a fluffy, tender pumpkin scone, split open to reveal a terrifying grin of marshmallow teeth, oozing with “blood-red” raspberry jam and topped with googly chocolate eyes on stalks. That, my friends, is the terrifyingly tasty magic of these Monster Face Pumpkin Scones. They…
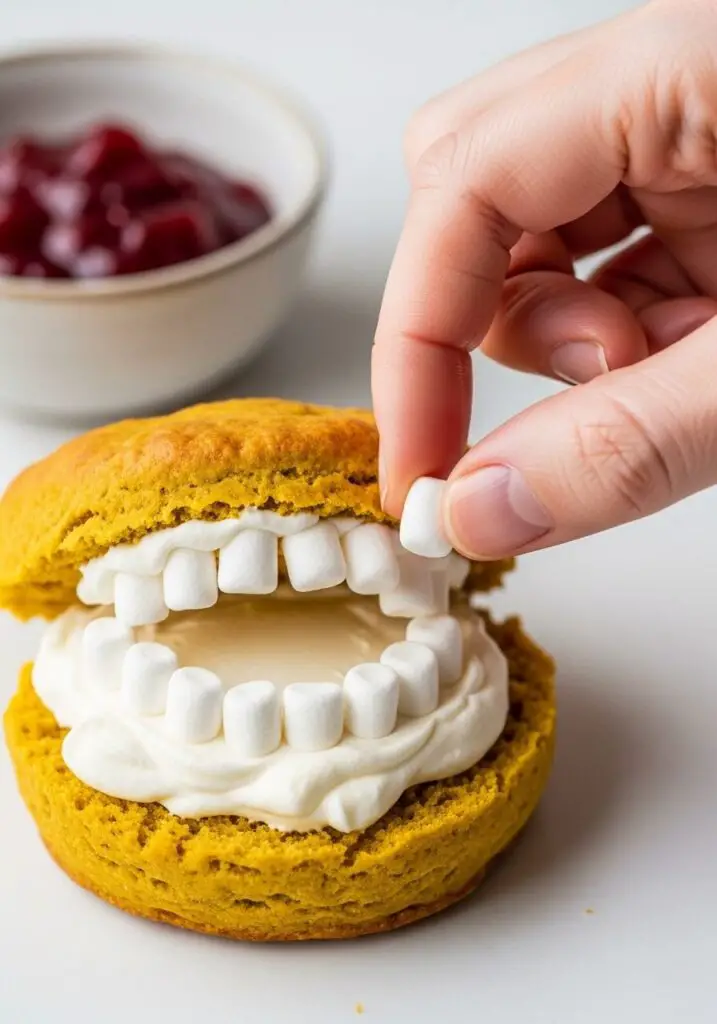
Imagine a Halloween treat that is brilliantly spooky, delightfully charming, and outrageously delicious—a fluffy, tender pumpkin scone, split open to reveal a terrifying grin of marshmallow teeth, oozing with “blood-red” raspberry jam and topped with googly chocolate eyes on stalks. That, my friends, is the terrifyingly tasty magic of these Monster Face Pumpkin Scones. They are, without a doubt, the most creative and memorable treat you will serve this Halloween.
Here’s the thing about a truly great holiday bake: it should be as much fun to create as it is to eat. I am completely obsessed with this recipe because it transforms a classic, comforting afternoon tea scone into a whimsical, edible monster. It’s the perfect, slightly gruesome project for a spooky bake day, guaranteed to get a reaction of delighted gasps and laughter from kids and adults alike.
I promise you, there is no greater joy than watching your guests pluck a googly-eyed monster from the platter. The scones themselves are a triumph—moist from the pumpkin, perfectly spiced, and incredibly tender. Paired with rich clotted cream, sweet jam, and chewy marshmallow “teeth,” every bite is a perfect harmony of flavor and texture. It’s pure, spooky fun.
Get ready to give your afternoon tea a terrifying twist and create the most talked-about, devilishly delicious scones of the season!
Why These Monster Scones are a Spooky Sensation!
You are going to have an absolute blast bringing these little monsters to life. This recipe is a Halloween party essential for so many reasons. Here’s why:
- A Hilarious and Spooky Centerpiece: These aren’t just scones; they’re edible characters! The marshmallow teeth, jammy “blood,” and googly eyes make for a spectacular and memorable Halloween presentation.
- Deliciously Tender Pumpkin Scones: Beneath the spooky exterior lies a genuinely delicious, moist, and fluffy pumpkin scone that is an absolute delight to eat.
- A Super Fun, Creative Project: From baking the scones to crafting the chocolate eyes and assembling the monster mouths, this is a wonderfully creative and rewarding baking activity.
- Perfect for a Halloween Afternoon Tea: Elevate your Halloween celebration with a sophisticated yet fun “spooky tea” that will impress guests of all ages.
- Surprisingly Simple to Assemble: While the final result looks complex, the steps are broken down and easy to follow, making this impressive treat completely achievable for home bakers.
Recipe Snapshot
| Prep Time | 45 minutes |
| Cook Time | 20 minutes |
| Total Time | 1 hour 5 minutes |
| Servings | 6 monster scones |
| Calories | 586 kcal per serving |
| Course | Dessert, Cake |
| Cuisine | British |
| Difficulty/Method | Intermediate / Baking & Assembly |
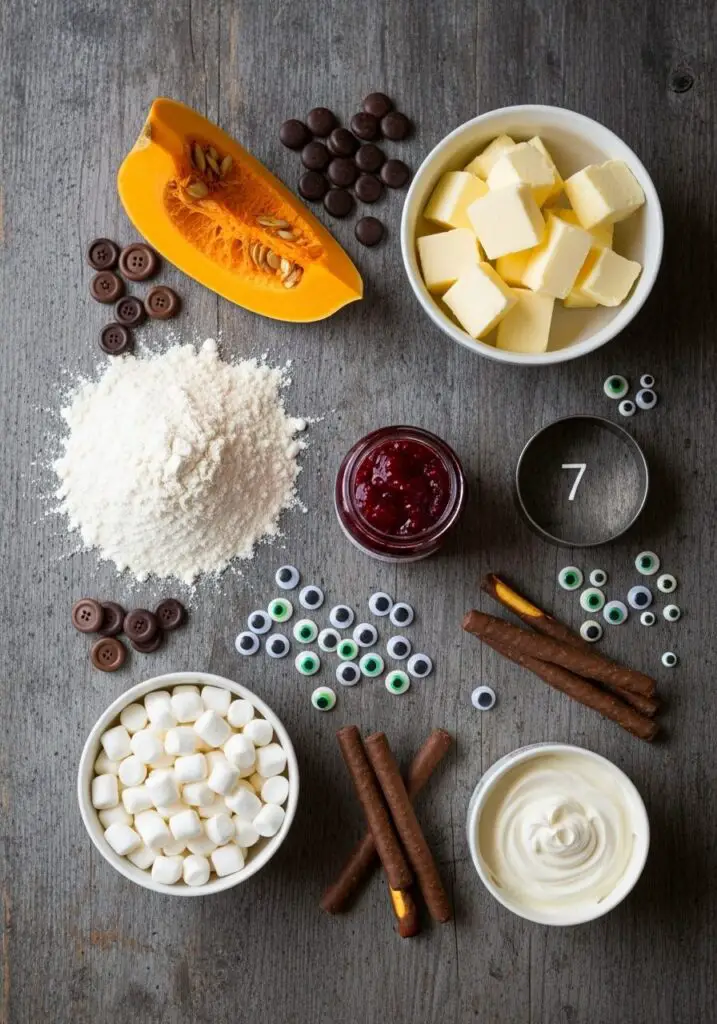
Your Shopping List for This Monster Mash
This recipe involves a few fun components for baking and assembly. Here’s everything you’ll need to create your monster squad:
→ For the Fluffy Pumpkin Scones
- 300g pumpkin or butternut squash → Peeled and chopped, to create our moist pumpkin mash.
- 325g self-raising flour → Plus extra for dusting.
- 1 ½ tsp bicarbonate of soda (baking soda)
- 60g caster sugar → Superfine sugar works best for scones.
- 80g cold butter → Cubed. It must be cold for a flaky texture!
- 3 tbsp milk
- ½ tsp salt
→ For the Monster Assembly & Decorations
- 12 Cadbury Dairy Milk Giant Buttons → Or other large chocolate buttons.
- 12 LU Mikado Milk Chocolate Biscuits → Or similar thin, chocolate-coated biscuit sticks like Pocky.
- 12 Cake Decor Edible Eyes
- Cake Décor Edible Glue → Or a tiny bit of melted chocolate.
- 6 tbsp seedless raspberry jam → The perfect “blood”!
- 6 tbsp clotted cream → For the rich and creamy “gums.”
- Mini white marshmallows → For the terrifyingly tasty teeth.
- Icing sugar → For a final, dusty flourish.
Let’s Get Baking! Your Step-by-Step Guide
This is a fun, multi-stage project. Let’s start by baking the perfect pumpkin scone base!
Part 1: The Fluffy Pumpkin Scones
- Cook the Pumpkin: Preheat your oven to 200°C (gas mark 6). Line a baking sheet with parchment. Place the chopped pumpkin in a heatproof bowl, cover, and microwave for 5-8 minutes until very tender. Mash it well with a fork, then spread it on a plate to cool completely. Chill in the fridge once cool.
- Make the Dough: In a food processor, pulse the flour, baking soda, sugar, salt, and cold butter cubes until the mixture resembles fine breadcrumbs. Add the chilled mashed pumpkin and the milk, then pulse very briefly, just until the mixture comes together into a shaggy dough. Do not overmix!
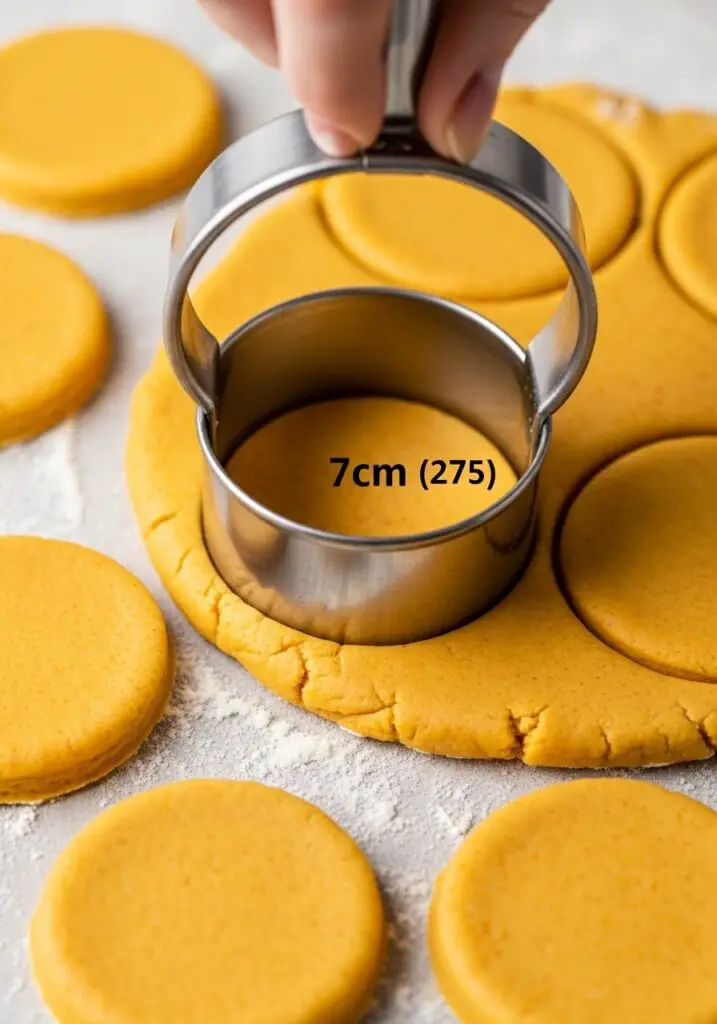
- Cut and Bake: Tip the dough onto a lightly floured surface and gently roll or pat it out until it’s about 2-3cm thick. Use a 7cm cookie cutter to stamp out 6 circles. Place them on the prepared baking sheet and bake for 16 minutes, until well-risen and golden. Transfer to a wire rack to cool completely.
Part 2: Create the Googly Eyes & Assemble
- Make the Eyes: While the scones bake, make the eyes. Use a dot of edible glue to stick one chocolate button to the end of each biscuit stick. Then, glue one edible eye onto the center of each chocolate button. You’ll have 12 eyes on sticks. Let them set in the fridge.
- Prep for Assembly: Once the scones are completely cool, split them in half horizontally. Gently warm the raspberry jam in a small pan or the microwave until it’s runny.
- Build the Monster Mouth: Spread about 2 teaspoons of clotted cream on the bottom half of each scone (these are the gums!). Spread 1 teaspoon of cream on the inside of the top half (the lid).
- Add the Teeth: Carefully arrange a row of mini marshmallows along the front edge of both the top and bottom scone halves, pressing them into the clotted cream to act as glue.
- Add the “Blood”: Drizzle about 1 tablespoon of the warm, runny raspberry jam over the clotted cream on the bottom scone half.
- Finish and Serve: Carefully place the top half of the scone onto the bottom, creating the monster mouth. Dust with a little icing sugar. Gently press two of your prepared eye-sticks into the top of each scone. For an extra gruesome effect, gently push down on the lid to make the jam “blood” ooze out from the smile.
WiseRecipes’ Top Tips for Perfect Monster Scones
These are the secrets to ensuring your scones are fluffy and your monsters are spectacular.
- Cold Ingredients are Key. For the flakiest, most tender scones, your butter must be cold, and your mashed pumpkin should be completely chilled before you add it to the flour mixture. Warm, mushy ingredients lead to tough scones.
- Don’t Overmix the Dough! This is the golden rule of scone-making. Mix the dough only until it just comes together. A few shaggy bits are fine. Overmixing develops the gluten and will make your scones heavy and tough instead of light and fluffy.
- Don’t Twist the Cutter. When you stamp out your scones, press the cutter straight down and lift it straight up. Twisting the cutter can seal the edges of the scone and prevent it from rising to its full, glorious height.
- Cool Scones Completely. Before you even think about assembling your monsters, the scones must be 100% at room temperature. Any residual warmth will melt the clotted cream and create a sloppy mess.
- Assemble Just Before Serving. These treats are at their absolute best when assembled right before you plan to serve them. This ensures the scones are fresh and the marshmallows are still perfectly distinct “teeth.”
Keep Them Spooky! Storing and Make-Ahead
This is a great make-ahead project, with final assembly best done on the day of your party.
- Make-Ahead: The pumpkin scones can be baked a day in advance and stored in an airtight container at room temperature. The chocolate eyes can also be made ahead and stored in the fridge.
- Leftovers: Once assembled, the monster scones are best eaten within a few hours. Leftovers can be stored in an airtight container in the fridge, but the marshmallows may soften.
Monster Face Pumpkin Scones
Ingredients
Equipment
Method
- Preheat the oven to 200°C (gas mark 6). Put the pumpkin in a heatproof bowl, cover, and microwave for 5-8 minutes until tender. Mash with a fork, then cool and chill completely in the fridge.
- In a food processor, pulse the flour, bicarbonate of soda, sugar, salt, and cold butter until it resembles breadcrumbs. Add the chilled mashed pumpkin and milk, then pulse briefly until the mixture just comes together. Do not overmix.
- On a floured surface, gently roll the dough until 2-3cm thick. Use a 7cm cookie cutter to stamp out 6 circles. Place on a parchment-lined baking sheet.
- Bake for 16 minutes until risen and golden, then cool completely on a wire rack.
- As the scones bake, make the monster eyes. Use edible glue to attach 1 chocolate button to the end of each biscuit stick. Then, glue an edible eye onto each chocolate button. Chill in the fridge to set.
- When scones are cool, cut them in half. Warm the jam until runny. Spread 2 tsp of clotted cream on the bottom half of each scone and 1 tsp under the lid.
- Arrange mini marshmallows as teeth along the front edges of each scone half, using the cream as glue.
- Pour 1 tbsp of warm raspberry jam over each cream base on the bottom halves. Close the lid of each scone, dust with icing sugar, and gently press the eye-sticks into the top.
Notes
FAQs: Your Monster Scone Questions, Answered!
Can I use canned pumpkin puree instead of fresh?
Yes, you can substitute with canned pumpkin puree, but you may need to adjust the recipe slightly. Canned puree can have a higher moisture content. I recommend using about 200g of canned puree and you may need to add a little less milk to get the right dough consistency.
What is clotted cream, and can I substitute it?
Clotted cream is a very thick, rich, and slightly nutty cream traditional to British scones. If you can’t find it, you can substitute it with a very thick, lightly sweetened whipped cream, or even a simple buttercream frosting to act as the “glue” for the teeth.
My dough is very sticky. What did I do wrong?
Scone dough is naturally quite soft and a little sticky! Make sure you are working on a well-floured surface. If it’s still unmanageable, it might be that your pumpkin puree was a bit too wet. You can try kneading in a tiny bit more flour, but be very careful not to overwork the dough.
Can I make these monsters without the stick-eyes?
Of course! If you don’t have the biscuit sticks, you can simply “glue” the edible eyes directly onto the top of the scone lid with a dot of clotted cream or frosting for a different but equally cute monster look.
Final Thoughts: A Frightfully Good Tea Time
There is nothing more fun than a bake that combines classic, delicious flavors with a huge dose of playful, creative personality. These Monster Face Pumpkin Scones are a true celebration of the spooky season, transforming a simple scone into an edible work of art. I hope you and your family have a blast creating (and devouring!) these terrifyingly tasty treats. Happy Halloween!