Nana’s Foolproof Cheesecake Bars (Easy 9×13 Recipe!)
Imagine a dessert that shows up to every family gathering, potluck, and celebration, and the pan is always scraped clean. That, my friends, is the legacy of my Nana’s Easy Cheesecake. This isn’t your fussy, water-bath, springform-pan cheesecake. This is a glorious, crowd-pleasing, 9×13 pan of pure, unadulterated joy: a buttery shortbread-like crust, a rich…
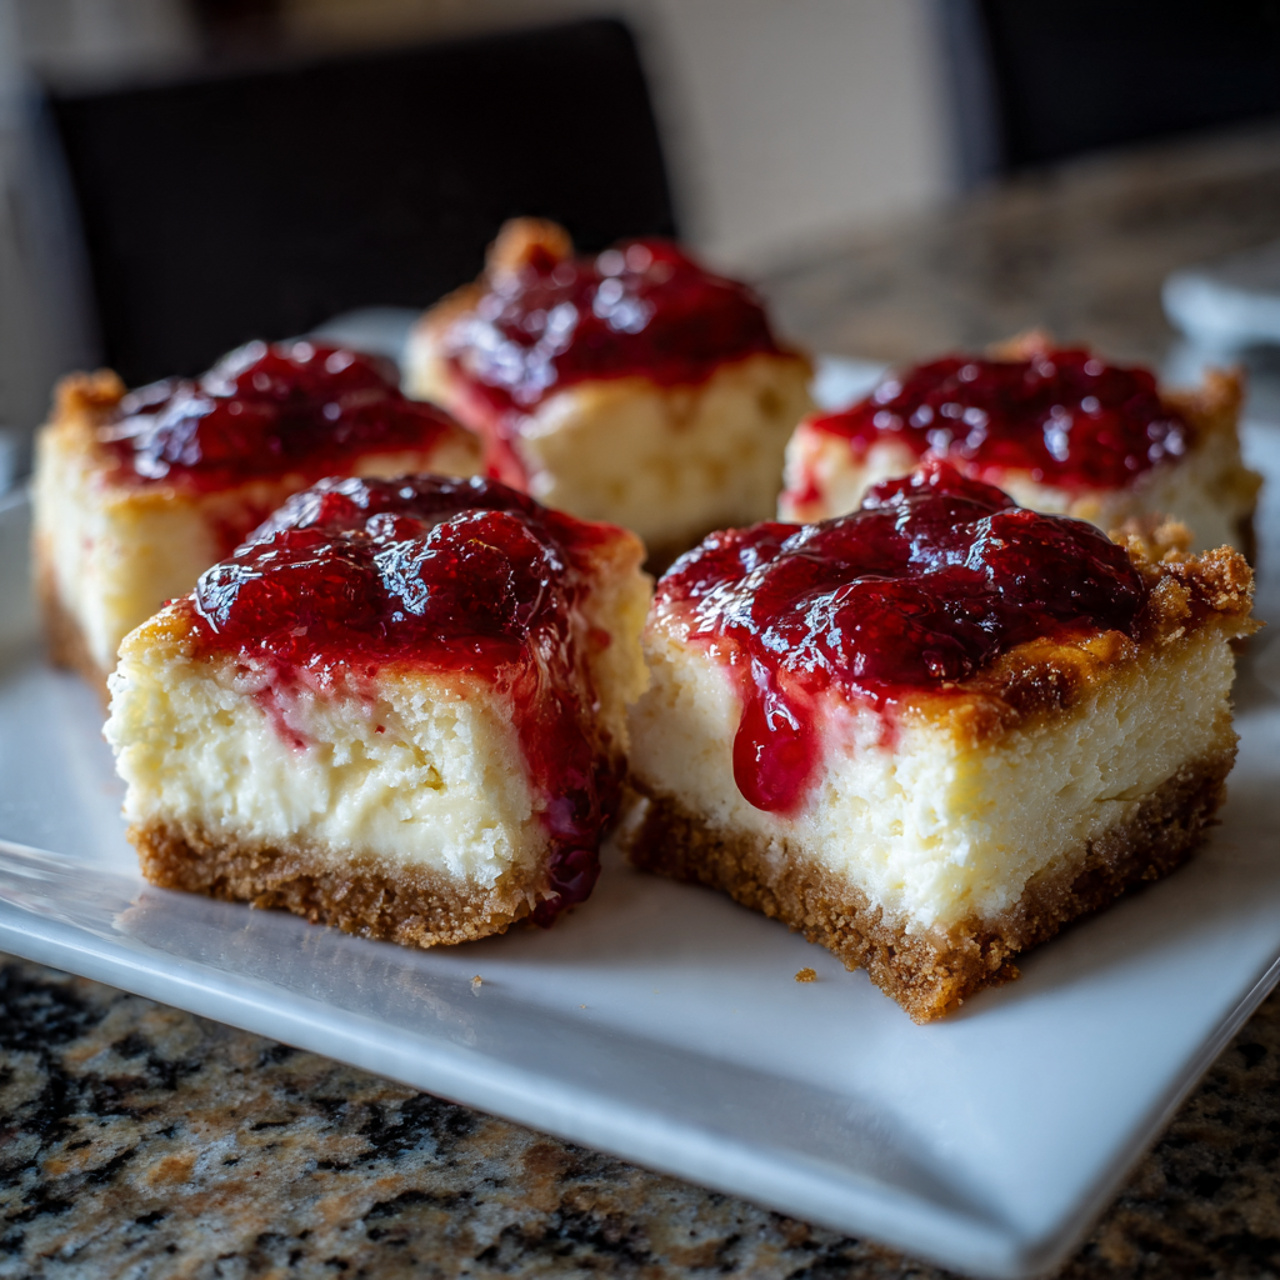
Imagine a dessert that shows up to every family gathering, potluck, and celebration, and the pan is always scraped clean. That, my friends, is the legacy of my Nana’s Easy Cheesecake. This isn’t your fussy, water-bath, springform-pan cheesecake. This is a glorious, crowd-pleasing, 9×13 pan of pure, unadulterated joy: a buttery shortbread-like crust, a rich and tangy cream cheese filling, and a colorful crown of your favorite pie filling.
I promise you, there is no greater feeling than lifting a perfect, sturdy slice of this cheesecake from the pan and seeing those beautiful, distinct layers. The crust is tender yet firm, the cream cheese filling is impossibly smooth and light, and the sweet cherry topping is the perfect finishing touch. It’s comfort, nostalgia, and deliciousness all in one perfect square.
Get ready to discover the easiest, most beloved cheesecake recipe you’ll ever make. This is the one you’ll be passing down for generations, too.

Why This Will Be Your Go-To Cheesecake Recipe!
You are going to fall head over heels for the simplicity and incredible taste of these cheesecake bars. They are a guaranteed hit for so many reasons:
- No Springform Pan, No Water Bath, No Fuss: This recipe is made in a standard 9×13-inch pan, which means no leaking, no cracking anxiety, and no complicated steps. It’s truly foolproof!
- Perfect for a Crowd: A 9×13 pan yields about 15 generous slices, making it the ideal dessert for parties, holidays, and potlucks. It’s designed for sharing.
- A Simple, Buttery Press-In Crust: The crust comes together in one bowl and is simply pressed into the pan. It’s a delicious, tender, shortbread-style base that’s incredibly easy to make.
- Light, Fluffy, and Creamy Filling: The no-bake cream cheese filling is whipped until it’s unbelievably light and airy. It sets up perfectly in the fridge to a smooth, tangy, and luscious texture.
- Endlessly Customizable Toppings: While classic cherry is Nana’s favorite, you can top this cheesecake with any pie filling you love—strawberry, blueberry, lemon—or even fresh fruit and chocolate sauce!
Recipe Snapshot
| Prep Time | 20 minutes |
| Cook Time | 15 minutes |
| Chill Time | 4 hours |
| Total Time | 4 hours 35 minutes |
| Servings | 15 servings |
| Calories | 523 kcal per serving |
| Course | Dessert |
| Cuisine | American |
| Difficulty/Method | Easy / Baking |
Your Shopping List for This Crowd-Pleasing Dessert
This recipe uses simple, classic ingredients to create a truly timeless treat. Here’s your list:

→ For the Buttery Crust
- 2 cups all-purpose flour → The foundation of our simple, tender crust.
- 1 cup unsalted butter → Must be at room temperature to combine properly.
- 3 tablespoons granulated sugar → Just enough to sweeten the shortbread-style base.
- Pinch of salt → Balances the sweetness and enhances the butter flavor.
→ For the No-Bake Cream Cheese Filling
- 24 ounces cream cheese (3 packages) → The star of the show! It absolutely MUST be at room temperature for a smooth filling.
- 2 ¼ cups powdered sugar → Sweetens the filling and helps it achieve a smooth, creamy consistency.
- 2 teaspoons pure vanilla extract → Adds a classic, warm flavor that complements the tang of the cream cheese.
→ For the Classic Topping
- 2 (21-ounce) cans cherry pie filling → The quintessential topping for Nana’s cheesecake. Feel free to use your favorite flavor!
- 8-ounce container Cool Whip (or TruWhip) → Thawed. For the final, fluffy layer of deliciousness.
Let’s Make Cheesecake! Your Step-by-Step Guide
Ready to make the easiest cheesecake of your life? This comes together in a few simple stages.
Part 1: The Easy Press-In Crust
- Preheat and Prep: Preheat your oven to 350°F. Line a 9×13-inch pan with foil or parchment paper, leaving an overhang on the sides to act as handles later. Spray it with nonstick cooking spray.
- Mix the Crust: In the bowl of a stand mixer fitted with the paddle attachment, combine the flour, room temperature butter, granulated sugar, and salt. Mix on low speed until the mixture is combined and looks crumbly, like wet sand.
- Press and Bake: Pour the crumbly mixture into your prepared pan. Use your hands or the bottom of a flat measuring cup to press the dough firmly and evenly into the bottom of the pan. Bake for 15 minutes, or until the edges are lightly golden.
- Cool Completely: Remove the pan from the oven and place it on a cooling rack. Let the crust cool completely to room temperature. This is a crucial step!
Part 2: The Fluffy Cream Cheese Filling
- Beat the Cream Cheese: Once the crust has cooled, place the room temperature cream cheese in the clean bowl of your stand mixer. Beat on medium speed for 4-5 minutes, scraping down the sides of the bowl occasionally, until the cream cheese is perfectly smooth, light, and fluffy.
- Add Sugar and Vanilla: Add the powdered sugar and vanilla extract to the bowl. Continue to beat for another 3-4 minutes until everything is fully incorporated and the filling is incredibly smooth and creamy.
Part 3: Assemble, Top, and Chill
- Spread the Filling: Spoon the cream cheese filling onto the completely cooled crust. Use an offset spatula or the back of a spoon to spread it into a smooth, even layer.
- Add the Toppings: Gently spoon the cherry pie filling over the cream cheese layer, spreading it evenly. Follow with the thawed Cool Whip, spreading it carefully over the pie filling to create the final layer.
- Chill to Perfection: Cover the pan with plastic wrap or a lid and refrigerate for at least 4 hours. This allows the filling to set and the flavors to meld together.
Nana’s Easy Cheesecake Bars
Ingredients
Equipment
Method
- Preheat oven to 350°F. Line a 9×13-inch pan with foil or parchment paper, leaving an overhang on the sides. Spray with nonstick cooking spray.
- In the bowl of a stand mixer with the paddle attachment, combine flour, butter, sugar and salt. Mix until the mixture is crumbly.
- Pour the mixture into the prepared pan and use your hands to press it into an even layer. Bake for 15 minutes. Remove from oven and let cool completely on a cooling rack.
- Once the crust is cool, add the room temperature cream cheese to the mixer bowl and beat at medium speed for 4-5 minutes until light and fluffy.
- Add the powdered sugar and vanilla and beat for an additional 3-4 minutes until smooth.
- Spread the filling evenly onto the cooled crust.
- Top with the pie filling, followed by the thawed Cool Whip.
- Cover and refrigerate for at least 4 hours before slicing and serving.
Notes
WiseRecipes’ Top Tips for Cheesecake Bar Mastery
These are Nana’s secrets, passed down to ensure this simple dessert is perfect every single time.
- Room Temperature Ingredients are a MUST. For both the crust and the filling, this is non-negotiable. Room temperature butter will combine properly into the crust, and room temperature cream cheese is the only way to get a perfectly smooth, lump-free filling.
- Cool the Crust Completely. Do not rush this step! If you spread the cream cheese filling onto a warm crust, it can melt, become greasy, and fail to set properly. Let it cool on the counter until it’s no longer warm to the touch.
- Whip the Cream Cheese Well. The key to the light, fluffy texture of the filling is whipping plenty of air into the cream cheese at the beginning. Don’t skimp on the 4-5 minute beating time—it makes a huge difference!
- Use the Parchment Paper “Sling.” Leaving an overhang of parchment paper or foil on the sides of the pan allows you to easily lift the entire chilled cheesecake out of the pan. This makes slicing clean, perfect squares a thousand times easier.
- Give It Time to Chill. The 4-hour chill time is the minimum. This dessert is even better if you can make it the night before. The extended time allows the filling to set up firmly and the flavors to deepen.
Keep It Fresh! Storing Your Cheesecake Bars
These bars are a perfect make-ahead dessert and store wonderfully.
- Refrigerator: The cheesecake must be stored in the refrigerator. Cover the pan tightly with plastic wrap or a lid. It will stay fresh and delicious for up to 5 days.
- Freezing: You can freeze these cheesecake bars! For best results, freeze them without the pie filling and Cool Whip topping. Let the cheesecake base (crust and filling) set completely, then cover tightly and freeze for up to 2 months. Thaw overnight in the refrigerator before adding the toppings and serving.
FAQs: Your Cheesecake Bar Questions, Answered!
Why is my cream cheese filling lumpy?
Lumps are almost always the result of using cream cheese that is too cold. It needs to be fully softened to room temperature so it can be whipped into a perfectly smooth consistency. Set the packages on your counter for at least an hour before you begin.
Can I use a graham cracker crust instead?
Absolutely! If you prefer a classic graham cracker crust, you can substitute it. Simply combine about 2 cups of graham cracker crumbs with 1/2 cup of melted butter and 1/4 cup of sugar, then press it into the bottom of the pan. The baking time will be shorter, around 10 minutes.
Do I have to use a stand mixer?
A stand mixer is ideal for getting the fluffiest result, but a powerful hand mixer will also work just fine. The key is to beat the cream cheese and sugar for the full amount of time to ensure it’s light, airy, and completely smooth.
Can I use a different topping?
Of course! That’s the beauty of this recipe. Any canned pie filling works great—try blueberry, strawberry, or lemon curd. You could also top it with a drizzle of chocolate or caramel sauce, or fresh berries just before serving.
Final Thoughts: A Sweet Slice of Tradition
There is nothing more special than a recipe that has been loved and shared through generations. This easy cheesecake is more than just a dessert; it’s a taste of home, a promise of a good time, and a foolproof recipe you can rely on. I hope Nana’s recipe brings as much joy to your gatherings as it has to ours. Happy baking!