The Easiest No-Bake Fruit & Granola Tart
Hello, my friends! Are you ready for a recipe that is guaranteed to make you feel like a culinary artist, but requires absolutely no baking whatsoever? Today, I’m sharing one of my all-time favorite “secret weapon” desserts: this breathtakingly beautiful No-Bake Fruit & Granola Tart. Imagine a crisp, chewy crust made from your favorite granola,…
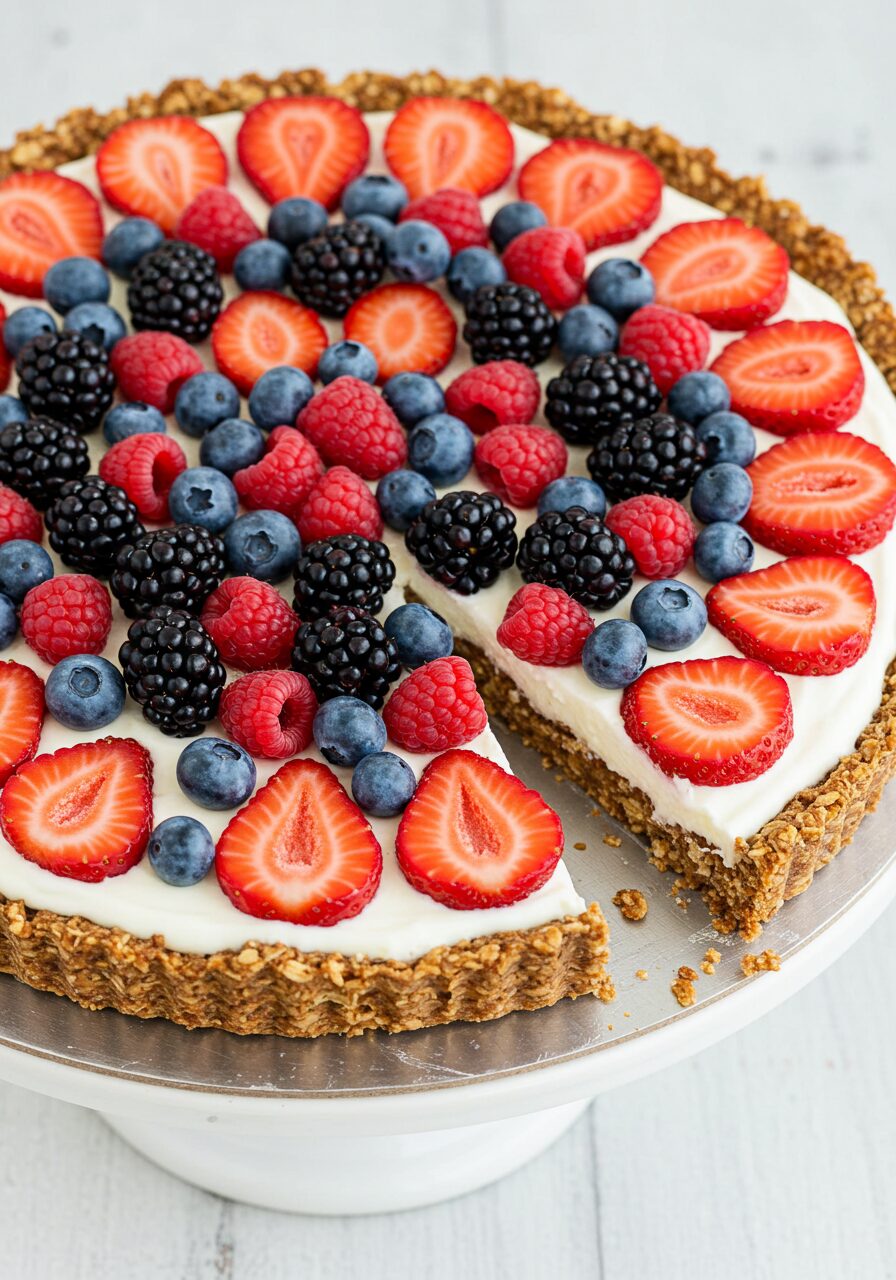
Hello, my friends! Are you ready for a recipe that is guaranteed to make you feel like a culinary artist, but requires absolutely no baking whatsoever? Today, I’m sharing one of my all-time favorite “secret weapon” desserts: this breathtakingly beautiful No-Bake Fruit & Granola Tart. Imagine a crisp, chewy crust made from your favorite granola, pressed into a tart pan and chilled to perfection. That gorgeous shell is then filled with a cool, creamy, honey-kissed Greek yogurt filling and crowned with a vibrant mosaic of fresh, juicy berries.
It is a true showstopper. It looks like it came from a high-end patisserie, but it’s one of the simplest, most foolproof treats you can make. It’s the perfect dessert for a warm summer evening, a stunning centerpiece for a brunch, or a healthy-ish indulgence for anytime you need a little beauty in your day. Let’s create something amazing together, without ever turning on the oven.

Why This No-Bake Tart is an Absolute Dream
This recipe is pure magic. It’s the perfect blend of easy, beautiful, and delicious. Here’s why you’ll fall in love.
- Absolutely No Baking Required: This is the recipe’s superpower! On a hot day or when your oven is already occupied, a stunning dessert that only requires a refrigerator is a true gift.
- Stunningly Beautiful: The contrast of the rustic granola crust, the creamy white filling, and the jewel-toned berries is just gorgeous. It’s an edible work of art that will wow your guests.
- Healthy-ish & Wholesome: Made with protein-packed Greek yogurt, hearty granola, and fresh fruit, this is a dessert you can genuinely feel good about enjoying.
- Incredibly Easy to Make: If you have a food processor and a refrigerator, you can make this tart. It’s a simple process of blitzing, pressing, and chilling.
- Perfectly Versatile: While fantastic as a light dessert, this also makes for an incredible addition to a special brunch or even a celebratory breakfast.
Gather Your Simple Ingredients: What You’ll Need
The beauty of this tart is in its simple, wholesome ingredient list.
For the Granola Crust:
- Cooking Spray: For greasing the pan.
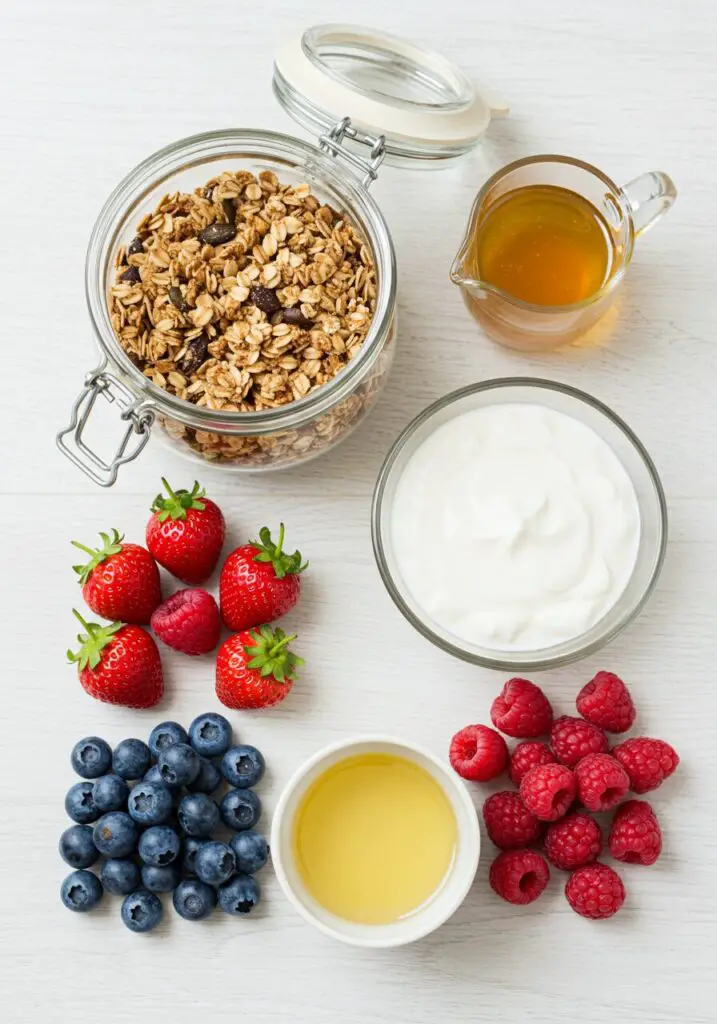
- 2 1/2 cups Honey and Oat Granola (about 9 oz.): Your favorite store-bought granola works perfectly!
- 1/4 cup Coconut Oil, melted
- 3 Tbsp. Honey: Helps bind the crust together and adds a touch of sweetness.
- 1/4 tsp. Kosher Salt: To balance the sweetness.
For the Filling & Topping:
- 2 cups Plain Full-Fat Greek Yogurt: Full-fat yogurt will give you the creamiest, richest filling.
- 1 Tbsp. Honey: Just enough to sweeten the tangy yogurt.
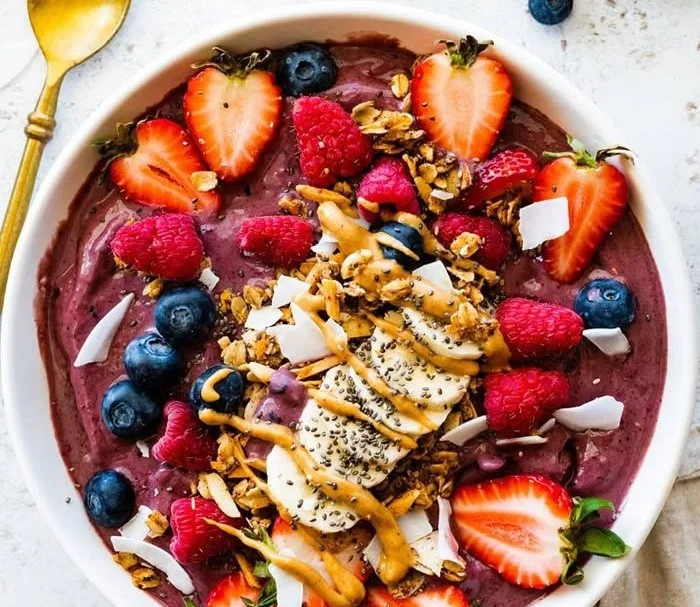
- A beautiful assortment of Fresh Berries: We love a mix of blackberries, blueberries, raspberries, and strawberries!
Crafting Your Tart: Step-by-Step Guide
Let’s assemble this work of art. It’s two simple stages: making the crust, then filling and decorating.
Part 1: The No-Bake Granola Crust
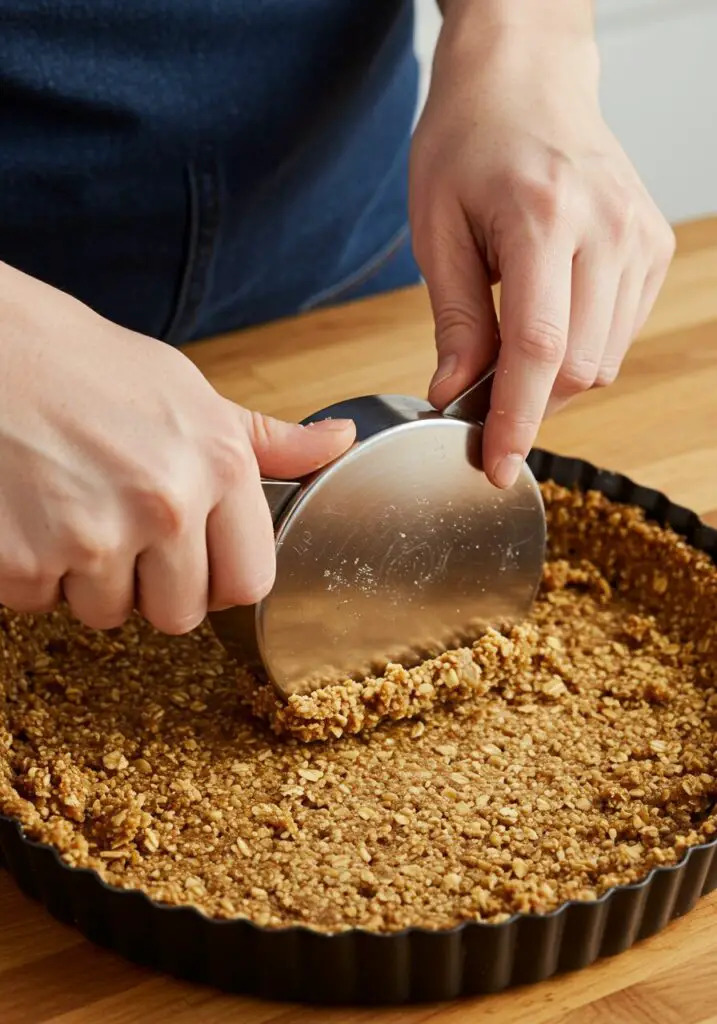
- Prep the Pan and Blitz the Crust: Lightly grease a 9-inch loose-bottomed tart pan with cooking spray. In the bowl of a food processor, add the granola, melted coconut oil, honey, and salt. Pulse the mixture until it’s combined and the granola is broken down slightly. The mixture is ready when you can squeeze a bit in your hand and it holds its shape. Be careful not to over-blitz into a fine powder; you still want some texture.
- Press and Chill: Pour the granola mixture into your prepared tart pan. Using the flat bottom of a measuring cup or the back of a spoon, press the mixture firmly and evenly into the bottom and about ½-inch up the sides of the pan. A firm press is crucial for a crust that holds together! Place the pan on a baking sheet (this just makes it easier to move) and refrigerate for at least 1 hour, or until very firm. You can even make it the night before.
Part 2: The Creamy Filling & Beautiful Topping
- Make the Yogurt Filling: In a large bowl, whisk together the Greek yogurt and honey until smooth and combined.
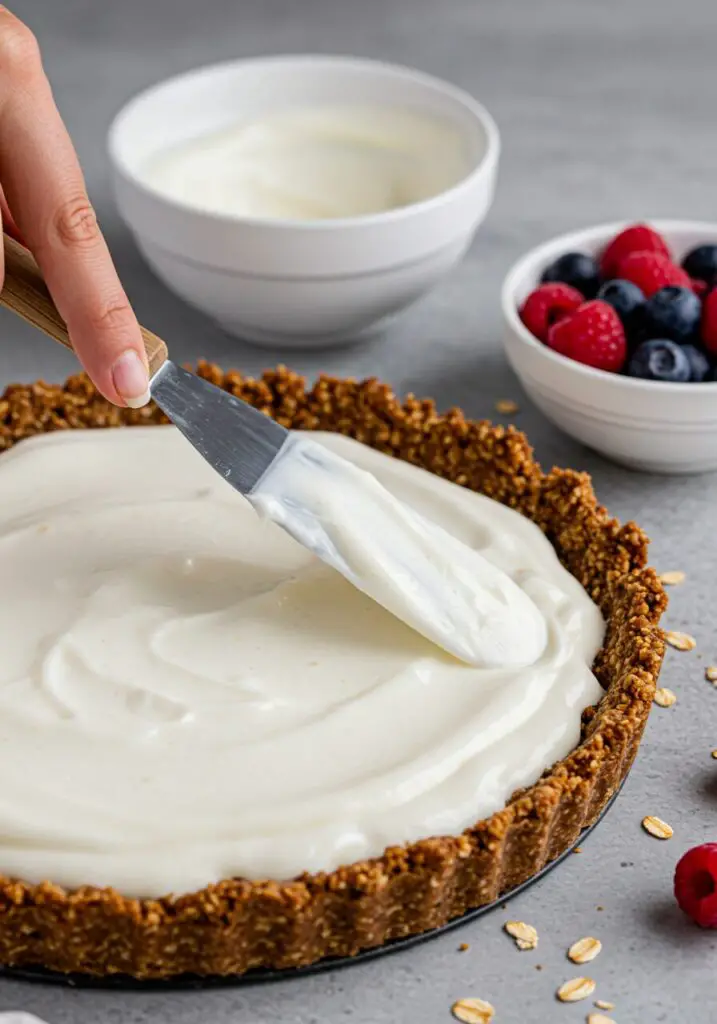
- Fill the Tart: Once your crust is thoroughly chilled and firm, spread the honey-yogurt mixture evenly inside it. Use the back of a spoon or a small offset spatula to create a smooth, beautiful surface.
- Decorate and Serve: Now for the fun, artistic part! Arrange your fresh berries over the top of the yogurt filling however you desire. You can create concentric circles, a beautiful mosaic, or a rustic pile in the center. Serve the tart immediately for the best texture.
Wise Tips for the Perfect Tart
- Choose Your Granola Wisely: A granola with clusters will give you a more rustic, textured crust. A finer granola will create a more uniform crust. Both are delicious, so just use one that you love the taste of!
- The Firmer the Press, the Better the Crust: Really take your time pressing the granola mixture into the pan. Compacting it tightly is what ensures your slices will hold together beautifully when you serve the tart.
- Make-Ahead Genius: The crust is perfect for making ahead. You can make it up to 2 days in advance. Just let it firm up in the fridge, then wrap the pan tightly in plastic wrap until you’re ready to fill and serve.
No-Bake Fruit & Granola Tart
Ingredients
Method
- Grease a 9″ loose-bottomed tart pan. In a food processor, pulse granola, oil, honey, and salt until the mixture holds together when squeezed.
- Pour the mixture into the prepared pan. Using the bottom of a measuring cup, press the mixture firmly into the bottom and 1/2″ up the sides. Refrigerate for at least 1 hour until firm.
- In a large bowl, whisk yogurt and honey until smooth. Spread the mixture into the chilled crust.
- Decorate the top of the tart with fresh fruit as desired and serve immediately.
Frequently Asked Questions (FAQ) – No-Bake Granola Tart
- Can I make this dairy-free?
Yes, easily! Substitute the Greek yogurt with your favorite plain, thick, dairy-free yogurt, such as one made from coconut or soy. - What if I don’t have a loose-bottomed tart pan?
A regular 9-inch pie dish will work! The only difference is that you won’t be able to remove the whole tart for presentation. You will just slice and serve it directly from the pie dish, which is still beautiful. - Can I use other fruits besides berries?
Absolutely! This tart would be stunning with thinly sliced peaches, kiwi, figs, or mango. Use whatever fresh, beautiful fruit is in season. - My crust seems too crumbly. What can I do?
This usually means it either wasn’t pressed firmly enough into the pan or your granola was very dry. If it seems too dry in the food processor, you can add another teaspoon or two of melted coconut oil or honey to help it bind. Make sure to chill it for the full hour or even longer.
Conclusion
This No-Bake Fruit & Granola Tart is one of those special recipes that delivers a huge “wow” factor with very little stress. It’s a celebration of fresh flavors, beautiful colors, and simple, wholesome ingredients. It’s the perfect, elegant solution for any brunch, party, or dessert occasion where you want to impress without breaking a sweat. I hope you have as much fun creating—and eating—this beautiful tart as I do!