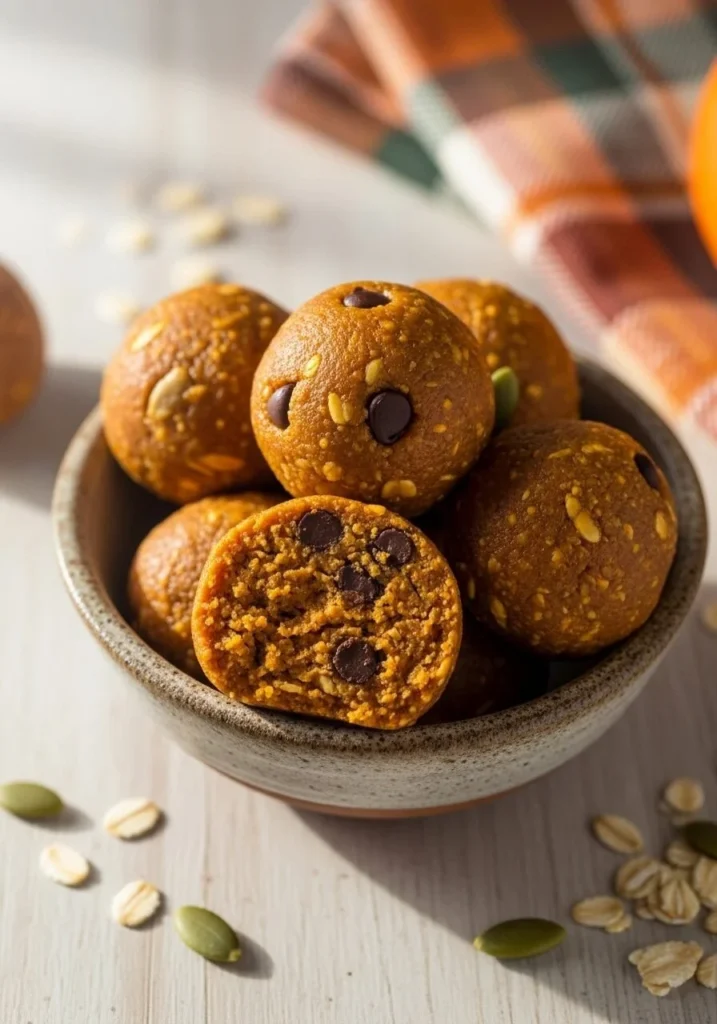
No-Bake Pumpkin Protein Balls
How I Found These No-Bake Pumpkin Protein Balls The first time I made No-Bake Pumpkin Protein Balls, it was one of those sleepy October mornings when the light through the kitchen window looked like a latte. I wanted something that smelled like fall, kept me full until lunch, and felt a little like a treat….
How I Found These No-Bake Pumpkin Protein Balls
The first time I made No-Bake Pumpkin Protein Balls, it was one of those sleepy October mornings when the light through the kitchen window looked like a latte. I wanted something that smelled like fall, kept me full until lunch, and felt a little like a treat. I mixed things that were already in my pantry—rolled oats, a jar of peanut butter, and a half can of pumpkin puree—and ended up with something my whole family disappeared within two days. If you’re into simple energy bites, you might enjoy this riff as much as I do, and if you want a slightly different texture, check out these no-bake oatmeal protein balls for inspiration.
The Ingredient Mix That Wins Every Time
I like to keep the ingredient list short and honest. For these, you will need 2 ¼ cups old fashioned or rolled quick oats, ½ teaspoon fine sea salt, 1 teaspoon pumpkin spice, ¼ cup chia seeds, ½ cup pumpkin puree, ¼ cup organic peanut butter, ¼ cup maple syrup, and ⅓ cup vegan chocolate chips. The oats give body, the chia seeds add texture and a bit of protein, pumpkin puree brings moisture and that unmistakable fall flavor, and the peanut butter and maple syrup hold everything together and sweeten it naturally. The vegan chocolate chips are the finishing touch; I always reach for the bittersweet mini chips because they melt a little into the dough and create tiny pockets of chocolate in every bite.
Getting the Texture Just Right
The texture is everything. I want these to be chewy but not soggy, and they should hold together when you pick one up. In a food processor, grind the oats for about 1 minute until they are mostly broken down but not a fine flour. That step helps the balls bind without tasting like flour. Add all the other ingredients EXCEPT the chocolate chips to the food processor. Mix until the mixture is well incorporated and begins to form a thick, sticky dough. You will know it’s ready when it clings together when you press a little between your fingers. Add the chocolate chips and pulse about 10-15 times, just until the chips are broken into smaller pieces and distributed throughout the dough. If your processor is small, scrape down the sides once so everything gets evenly mixed.
When I first learned this, I over-processed and ended up with a paste that tasted good but looked sad. The trick is to stop when it is a cohesive dough. Use a tablespoon or small cookie scoop to portion the dough. Roll the mixture into round balls. The tactile part is my favorite; it feels like making little pumpkin truffles. Place the balls on a plate or in a container and refrigerate for at least 1 hour to set before enjoying. Chilling firms them up and lets the flavors marry.
Little Tricks I Swear By
I have a few habits that make these consistently great. First, I always pulse the chocolate chips rather than stirring them in; tiny chunks spread more evenly and you avoid a single bite of pure chocolate. Second, if your pumpkin puree is too wet, add an extra 1 to 2 tablespoons of oats or a sprinkle of more chia seeds to soak up the moisture. Third, if you like a sweeter bite, a tablespoon more maple syrup does the trick without overpowering the pumpkin spice.
A small thing I do when making a big batch is line the container with parchment between layers so they are easy to stack. It saves me from having to gently pry chilled balls apart. Also, if you plan to kid-proof the kitchen, make a double batch; they are perfect for slipping into lunchboxes or for a pre- or post-workout nibble.
When It’s Done and What to Serve It With
How do you know when these are done? They should be firm to the touch after chilling, hold their shape when lifted, and be slightly sticky inside but not runny. The scent will be warm and spiced, with pumpkin and cinnamon notes up front and a whisper of roasted peanut underneath. I usually serve them with a steaming mug of coffee or a cold glass of oat milk. They are also lovely alongside Greek yogurt with a sprinkle of cinnamon, or stacked on a cheese board for an unconventional sweet bite.
If you need them to feel more dessert-like, dust them with a little cocoa powder or roll them in finely chopped toasted pecans. For a brunch spread, cut them in half and serve atop thick yogurt or cottage cheese for a balance of sweet and savory.
What I Do With Leftovers and a Couple of Variations
Leftovers are the best part because these keep well. I store them in an airtight container in the refrigerator for up to a week, and if I want a longer shelf life I pop them in the freezer for up to three months. When I freeze them, I lay them out on a sheet to harden first, then transfer them to a single container separated by parchment so they do not stick. To eat, let them sit on the counter for 10 minutes or microwave one for about 10 seconds for that just-made warmth.
If you want to switch things up, try a few variations. Swap the peanut butter for almond butter or sunflower seed butter for a nut-free option. Stir in dried cranberries and a pinch more pumpkin spice for a tart, festive version. For a creamier, slightly tangy twist, you can adapt the idea into a cheesecake-style bite by folding in a bit of softened vegan cream cheese and following the same technique; a version like that reminded me of the texture in the no-bake pumpkin cheesecake balls I bookmarked last year.
Some days I add a scoop of unflavored plant protein powder to up the protein content, but if you do that you may need an extra tablespoon or two of pumpkin or peanut butter to keep the dough moist. Play with the proportions until you find your comfort zone.
Little Memory That Makes Me Smile
I always think of the first time I shared these with my neighbor, who had stopped by with a mason jar of apple butter. We traded jars and stories on the stoop while our kids ran around kicking leaves. The smell of pumpkin and maple syrup in my hands felt like home in a small, portable way. Ever since then, these balls have been my go-to for giving a handpicked hostess gift, slipping into backpacks before a school day, or keeping on the fridge for late-night snack attacks.
Conclusion
If you want a recipe that is easy to make, stores well, and delivers the cozy warmth of pumpkin season in a healthy package, these No-Bake Pumpkin Protein Balls are a staple in my kitchen—and if you want to see another take on pumpkin energy bites, I often look to external inspiration like Jessica in the Kitchen’s pumpkin energy bites for ideas.
No-Bake Pumpkin Protein Balls
Ingredients
Method
- In a food processor, grind the oats for about 1 minute until they are mostly broken down but not a fine flour.
- Add all the other ingredients EXCEPT the chocolate chips to the food processor and mix until the mixture is well incorporated and forms a thick, sticky dough.
- Add the chocolate chips and pulse 10-15 times until the chips are broken into smaller pieces and distributed throughout the dough.
- Use a tablespoon or small cookie scoop to portion the dough and roll it into round balls.
- Place the balls on a plate or in a container and refrigerate for at least 1 hour to set.