Easy No-Bake Cheesecake for Your Spooky Party
Oh, my friends, who here isn’t utterly charmed by the playful, slightly gruesome fun of Halloween? It’s the perfect excuse to get creative in the kitchen, especially with treats that bring a smile (or a delightful shiver!) to every face. Today at WiseRecipes, I’m beyond excited to share a recipe that perfectly embodies that spirit:…
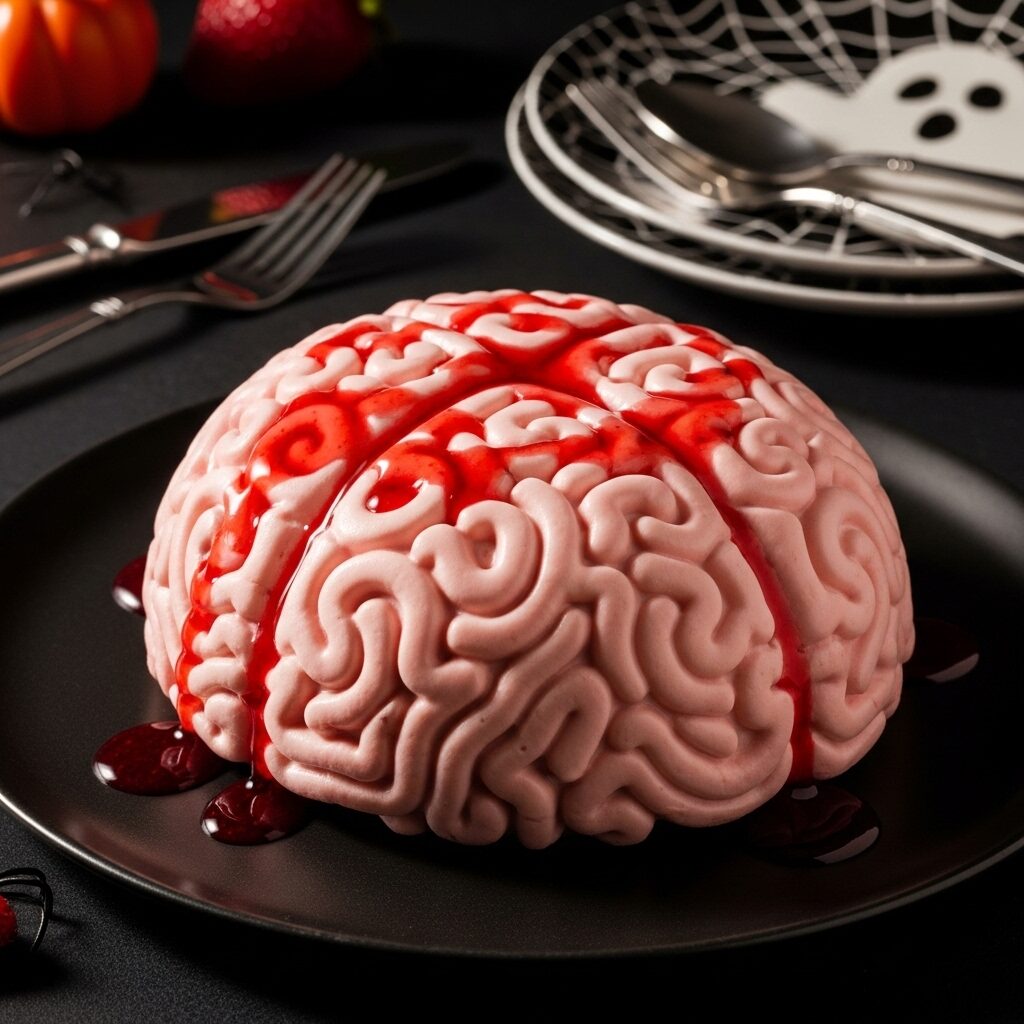
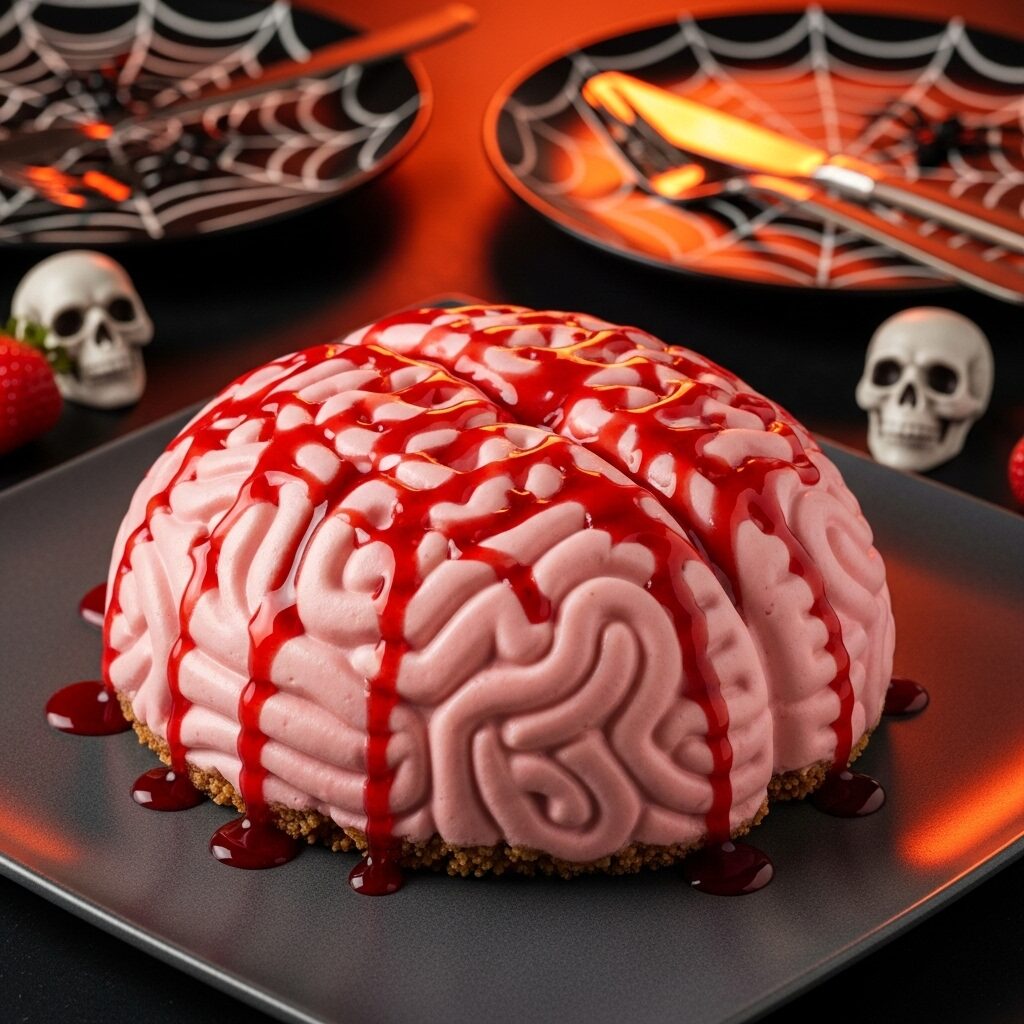
Oh, my friends, who here isn’t utterly charmed by the playful, slightly gruesome fun of Halloween? It’s the perfect excuse to get creative in the kitchen, especially with treats that bring a smile (or a delightful shiver!) to every face. Today at WiseRecipes, I’m beyond excited to share a recipe that perfectly embodies that spirit: this incredible No-Bake Strawberry Cheesecake Brain! Seriously, prepare your taste buds for pure bliss – a rich, creamy, vibrant pink strawberry cheesecake, nestled in a crunchy graham cracker crust, shaped into a surprisingly realistic (and delicious!) brain, and then oozing with bright red strawberry syrup. It’s a haunted masterpiece that’s both creepy and utterly delectable, and it is pure joy in every single slice!
I just adore a recipe that feels incredibly impressive and playful but is secretly super simple and practically hands-off. This Halloween dessert is exactly that! It’s a fantastic way to transform humble ingredients into a powerhouse party food that will have everyone reaching for more. Forget complicated baking or fussy techniques; we’re talking about ridiculously flavorful and satisfying cheesecake that comes together with just 40 minutes of active prep and a few hours of chilling. This isn’t just a dessert; it’s a mood-lifter, a fantastic Halloween party staple, and honestly, a guaranteed hit every single time. This No-Bake Strawberry Cheesecake Brain recipe yields 8 generous servings, making it perfect for school parties, trick-or-treat gatherings, or any time you crave amazing, effortless fun. Trust me, once you try this incredible combination, you’ll be making them again and again!
Why This [SPOOKY!] No-Bake Strawberry Cheesecake Brain Will Be Your Halloween MVP!
This isn’t just another Halloween treat; it’s a creative, indulgent, and incredibly satisfying culinary delight. Here’s why I’m absolutely smitten with it:
- Ghoulishly Impressive, Surprisingly Easy: This dessert looks incredibly elaborate and realistic, yet the no-bake process is surprisingly straightforward! You’ll impress everyone with your spooky creativity and minimal fuss.
- No-Bake, No Fuss: Forget turning on the oven for complicated baking! This recipe comes together with simple mixing and chilling, making it perfect for quick prep and keeping your kitchen cool.
- Creamy Cheesecake, Fruity Freshness: A rich, tangy cream cheese base, lightened with heavy cream and brightened by fresh lemon, creates an unbelievably smooth and creamy texture. The strawberry syrup adds a burst of vibrant fruit flavor.
- Fun & Interactive Presentation: The brain-shaped mold creates an instant “wow” factor, while the strawberry syrup looks wonderfully “gory.” It’s a dessert that’s designed to spark conversation and delight!
- Perfect for Make-Ahead: This dessert is designed to be made ahead! Simply prepare, chill, and then unmold and garnish just before serving, making it ideal for busy party days.
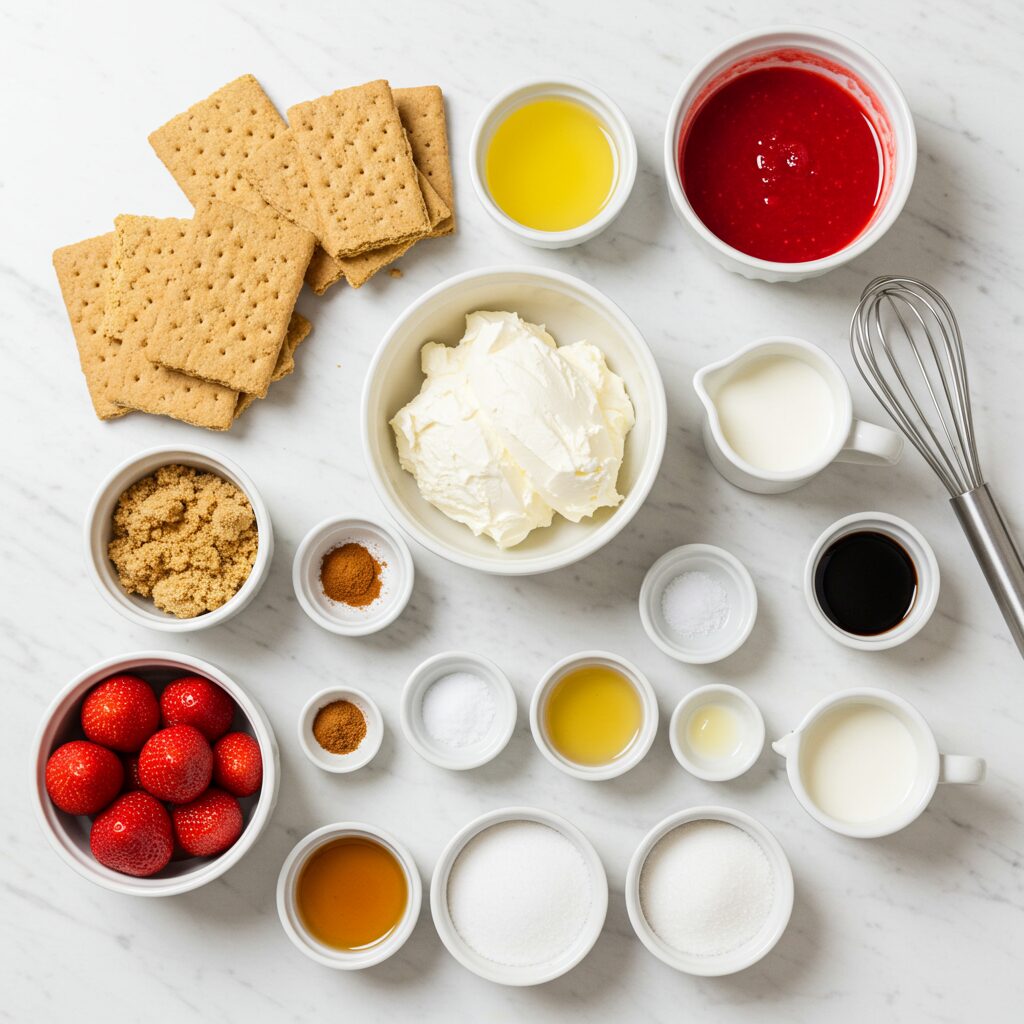
Your Shopping List for Brainy Bliss: Gather What You’ll Need
Creating this incredible No-Bake Strawberry Cheesecake Brain uses a blend of sweet treats, creamy dairy, fresh fruit, and fun decorations. Here’s what you’ll want to grab to get started!
→ For the Crunchy Graham Cracker Crust
- 1 sleeve graham crackers (9 whole crackers): Our delicious, subtly sweet crust base.
- 1/3 cup packed light brown sugar: Adds sweetness and a lovely molasses note.
- ½ teaspoon ground cinnamon: For a warm, comforting spice.
- Pinch fine salt: Balances sweetness and enhances flavor.
- 1 stick (8 tablespoons) unsalted butter, melted: Binds the crust and adds richness.
→ For the Creamy Strawberry Cheesecake
- 2 tablespoons plus 1 ½ teaspoons unflavored powdered gelatin: (From two and a half ¼-ounce packages). Our secret to a firm, set no-bake cheesecake!
- 1 pound cream cheese, at room temperature: The essential ingredient for that rich, tangy cheesecake flavor.
- ¾ cup granulated sugar: Sweetens the cheesecake base.
- ½ teaspoon pure vanilla extract: A warm, classic aroma.
- Pinch fine salt: Balances sweetness.
- Juice of ½ lemon: Adds essential brightness and tang.
- 2 cups heavy cream: Lightens the cheesecake for a fluffy, ethereal texture.
- Bright red gel food coloring: For coloring the cheesecake a vibrant, spooky pink!
→ For the Gory Strawberry Syrup
- 1 pound strawberries, hulled and halved lengthwise: Fresh strawberries for our delicious, vibrant syrup.
- ¾ cup granulated sugar: Sweetens the syrup.
- Juice of ½ lemon: Adds essential brightness and helps thicken the syrup.
- ¼ cup water: To aid in simmering the syrup.
→ Essential Equipment
- A plastic 9.75-by-8.5-by-4-inch (7-cup) brain-shaped gelatin mold: The star piece of equipment for our spooky shape!
Let’s Chill! Crafting Your Perfect No-Bake Strawberry Cheesecake Brain, Step-by-Step
This recipe has a few components and requires some chilling/freezing, but each step is straightforward and builds to an incredibly impressive dessert. Plan for the chilling time, as it’s crucial for perfect results!
Part 1: Preparing Our Crunchy Graham Cracker Crust
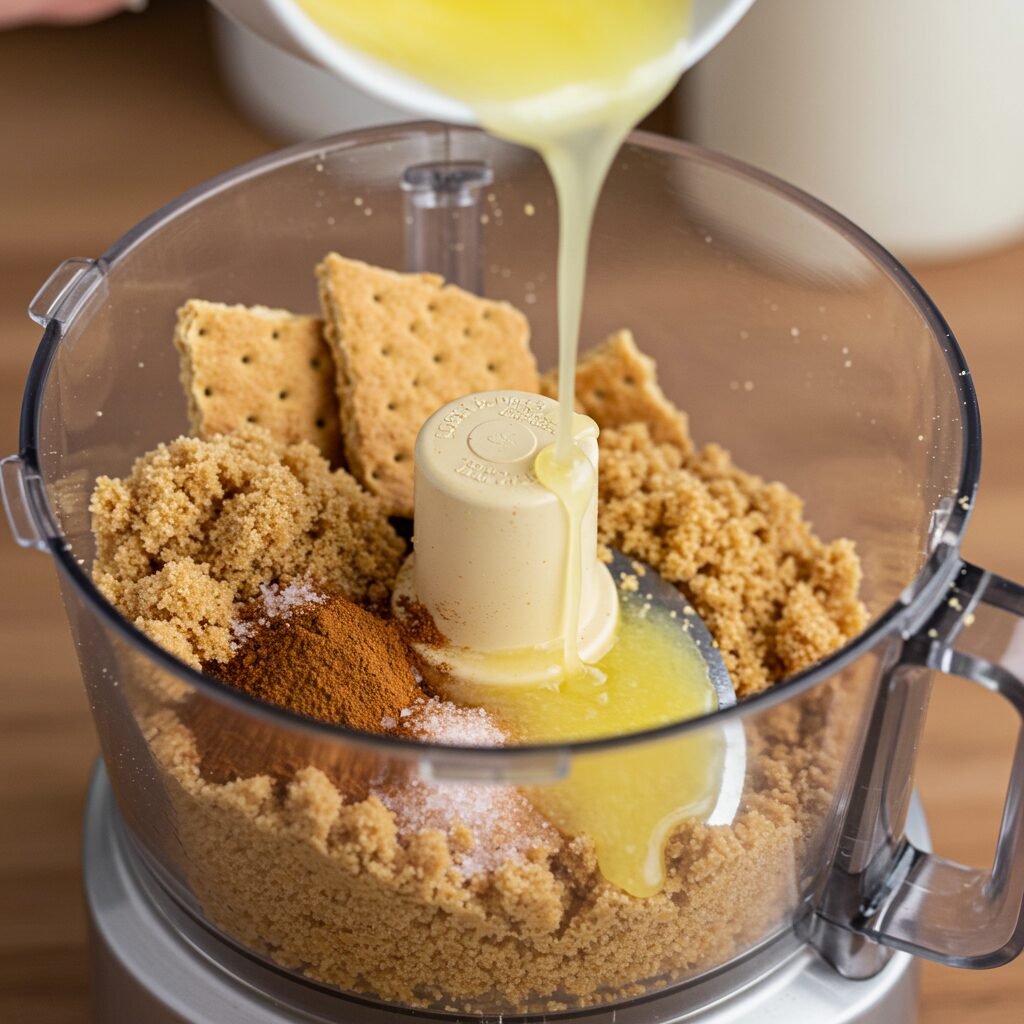
- Crush Graham Crackers: Take your 1 sleeve (9 whole) graham crackers. Pulse them in a food processor until fine crumbs form.
- Make Crust Mixture: Add 1/3 cup packed light brown sugar, ½ teaspoon ground cinnamon, and a pinch of fine salt to the food processor. Pulse briefly to combine. Drizzle in 1 stick (8 tablespoons) melted unsalted butter and pulse again until the mixture looks like wet sand.
- Transfer & Prep: Transfer the crust mixture to a small bowl. Wipe out the food processor – we’ll need it again!
Part 2: Crafting the Creamy No-Bake Cheesecake Filling
- Soften Gelatin: In a small bowl, whisk 2 tablespoons plus 1 ½ teaspoons of unflavored powdered gelatin into 1/3 cup warm water. Let it sit until softened, about 5 minutes.
- Process Cream Cheese: Pulse the 1 pound of softened cream cheese in the food processor until completely smooth, scraping down the sides as needed.
- Add Sweeteners & Gelatin: Add ¾ cup granulated sugar, ½ teaspoon pure vanilla extract, a pinch of fine salt, the juice of ½ lemon, and the softened gelatin to the food processor. Pulse until completely smooth.
- Add Heavy Cream & Color: With the food processor running, add 2 cups of cold heavy cream. Now, add enough bright red gel food coloring (a few drops at a time!) to make the cheesecake batter a beautiful, light pink color. Process until combined and smooth.

Part 3: Making the Strawberry Syrup
- Simmer Strawberries: In a medium saucepan, combine 1 pound of hulled and halved strawberries, ¾ cup granulated sugar, the juice of ½ lemon, and ¼ cup water. Set over medium-high heat and bring to a gentle simmer. Simmer until the berries are very soft but still mostly holding their shape (about 10-15 minutes).
- Strain & Chill: Carefully strain the syrup, reserving the liquid. Transfer the cooked berries to a small bowl and chill them. Return the reserved syrup liquid to the saucepan and continue cooking over medium heat until it has thickened slightly, about 10 minutes. Chill the thickened syrup until ready to use.
Part 4: Assembling, Freezing & Unmolding Our Spooky Brain!
- Coat Mold & Freeze: Coat your plastic 9.75-by-8.5-by-4-inch (7-cup) brain-shaped gelatin mold generously with nonstick cooking spray. Pour half of the prepared cheesecake batter into the mold, gently swirling the batter to cover all sides of the mold. Pop it into the freezer for 5 minutes to allow the batter to thicken slightly.
- Form Outer Layer: Remove from the freezer. Using the back of a spoon, carefully spread the thickened batter up the sides of the mold so there is a ½-inch-thick, even coating around the entire mold. Freeze for another 10 minutes to allow this outer layer to set.
- Fill with Strawberries & Syrup: Once the outer layer is set, add the chilled cooked strawberries (from step 9) to the center of the mold, filling the cavity. Drizzle 1 tablespoon of the chilled strawberry syrup over the strawberries.
- Add Remaining Batter & Crust: Evenly spread the remaining cheesecake batter over the berries, pressing gently into the mold to fill any gaps and create a smooth top. Sprinkle the remaining graham cracker crumbs evenly over the top, pressing gently to create a firm crust.
- Freeze & Chill: Place the cheesecake (in its mold) into the freezer until the sides are very firm and almost frozen, about 2 hours. Then, transfer the cheesecake to the refrigerator and chill for another 2 hours before serving.
- Unmold & Drizzle: To unmold the cheesecake: First, carefully place the mold briefly (just a few seconds!) into a bowl of hot water. Then, run a small offset spatula around the very edge of the mold to help release the cheesecake from the sides. Invert the mold onto a serving plate. You may need to poke a few small holes in the mold with a paring knife to help release the vacuum and let the cheesecake drop. Carefully pull off the mold. Top the brain with a generous drizzle of the remaining (chilled) strawberry syrup. Slice and serve immediately!
WiseRecipes’ Top Tips for Brainy Dessert Mastery!
This spooky dessert is incredibly impressive, but these WiseRecipes insights will help you achieve No-Bake Strawberry Cheesecake Brain perfection every single time!
- Prep Your Mold Well: Generously coat the brain-shaped gelatin mold with nonstick cooking spray. This is absolutely crucial for easy unmolding!
- Softened Gelatin is Key: Ensure your powdered gelatin is properly softened in warm water before adding it to the cream cheese mixture. This ensures it dissolves fully and sets the cheesecake smoothly.
- Room Temperature Cream Cheese: For the smoothest cheesecake filling, ensure your cream cheese is completely at room temperature. This helps it process perfectly smooth without lumps.
- Chill Crust & Filling Layers: The chilling and freezing steps for the crust, initial batter, and final cheesecake are non-negotiable! They help everything set firmly and hold its shape for a perfectly formed brain.
- The Strawberry Syrup Magic: Making a homemade strawberry syrup is simple but so worth it! It adds incredible fresh strawberry flavor and that wonderfully “gory” visual for Halloween.
- Careful Unmolding: Be patient and gentle when unmolding! A quick dip in hot water and running a spatula around the edge helps significantly. Don’t force it!
Creative Twists: Delicious Ways to Customize Your Spooky Treat!
This No-Bake Strawberry Cheesecake Brain is already fantastic, but it’s also a wonderful canvas for your culinary creativity! Here are some ideas I love to play with:
- Different Fruit Fillings: Instead of strawberries, try raspberries, cherries, or even a mix of berries for the syrup and fruit filling.
- Bloody White Chocolate: Instead of a graham cracker crust, you could create a white chocolate “skull” base by melting white chocolate and letting it set in the bottom of the mold before adding the cheesecake layers.
- Spiced Crust: Add ¼ teaspoon of ground ginger or a tiny pinch of ground cloves to the graham cracker crust for a warmer, spiced flavor.
- Gory Garnishes: Beyond strawberry syrup, drizzle with red gel icing “blood,” add gummy worms poking out, or place a few candy eyeballs on the “brain” for extra spooky fun.
- Chocolate Cookie Crust: Swap graham crackers for chocolate sandwich cookies (like Oreos) pulsed in the food processor for a darker, richer crust.
- Lime Zest Boost: Add extra lime zest to the cheesecake filling for an even brighter, tangier citrus note.
Keep It Spooky! Storing Your Halloween Masterpiece
You’ve created something truly special, so let’s make sure it stays fresh and delicious!
- Refrigerator Storage: Once completely chilled and unmolded, store your No-Bake Strawberry Cheesecake Brain (covered loosely with plastic wrap to protect the shape) in the refrigerator for up to 2-3 days.
- Serving Temperature: This dessert is best served thoroughly chilled, straight from the refrigerator, to maintain its firm, creamy texture.
- Freezing Cheesecake: The finished cheesecake (without the strawberry syrup garnish) can be frozen in its mold until solid, then carefully removed, wrapped tightly in plastic wrap and foil, and frozen for up to 1 month. Thaw overnight in the refrigerator before unmolding and serving.
- Freezing Strawberry Syrup: The strawberry syrup can be frozen in an airtight container for up to 2-3 months. Thaw in the fridge before serving.
- Make-Ahead Prep: This recipe is perfect for making ahead! Prepare the entire cheesecake (including the crust and filling in the mold) up to 2 days in advance, chilling it in the refrigerator. Unmold and garnish with syrup just before serving.
My Spooky No-Bake Strawberry Cheesecake Brain
Ingredients
Equipment
Method
- Pulse the graham crackers, brown sugar, cinnamon, and salt in a food processor until crumbs form. Drizzle in the butter and pulse until mixture looks like wet sand. Transfer to a bowl and wipe out food processor.
- Whisk the gelatin into 1/3 cup warm water and let sit until softened, about 5 minutes.
- Pulse cream cheese in food processor until smooth, scraping sides. Add granulated sugar, vanilla, salt, lemon juice, and softened gelatin. Pulse until smooth.
- With food processor running, add heavy cream and enough food coloring for light pink. Process until combined.
- Combine strawberries, granulated sugar, lemon juice, and 1/4 cup water in a medium saucepan over medium-high heat, bring to a simmer and simmer until berries are very soft.
- Strain the syrup, transfer berries to a small bowl and chill. Return syrup to saucepan and continue cooking until thickened (about 10 minutes). Chill syrup.
- Coat brain-shaped gelatin mold generously with nonstick cooking spray. Pour half of the cheesecake batter into mold, swirling to cover all sides. Freeze 5 minutes to thicken.
- Using back of spoon, spread batter up sides for a 1/2-inch-thick coating around mold. Freeze for 10 minutes to set.
- Add chilled strawberries to center. Drizzle 1 tbsp strawberry syrup over strawberries. Evenly spread remaining batter over berries, pressing to fill gaps.
- Top with graham cracker crumbs, pressing to create a firm crust. Place in freezer until sides are very firm (about 2 hours). Transfer to refrigerator and chill for 2 hours.
- To unmold: Place mold briefly into hot water, then run a small offset spatula around edge. Invert onto plate. Poke small holes in mold with paring knife to help release. Carefully pull off mold. Top with remaining strawberry syrup. Serve.
Notes
FAQs: Your Top No-Bake Strawberry Cheesecake Brain Questions, Answered!
Q: Where can I find a brain-shaped gelatin mold?
A: Brain-shaped gelatin molds are typically seasonal items found in cooking or party supply stores around Halloween. You can also find them online through various retailers. Look for plastic or silicone molds.
Q: My gelatin isn’t dissolving. What went wrong?
A: Gelatin needs to be “bloomed” (softened) in cold water first, then fully dissolved in warm liquid. Ensure your water is warm enough (not boiling hot, but warm enough to help it dissolve without cooking it). Whisk thoroughly for about 5 minutes to ensure it completely dissolves.
Q: Can I use different fruits for the syrup?
A: Yes, absolutely! You can adapt this recipe to use other fruits for the syrup and filling. Raspberries, blueberries, or even cherries would work beautifully. Adjust sugar content based on the sweetness of your chosen fruit.
Q: My cheesecake is too soft/not setting. What happened?
A: This is usually due to the gelatin not fully dissolving or not enough chilling/freezing time. Ensure the gelatin is completely dissolved before adding to the cream cheese mixture. Also, make sure to chill the cheesecake for the full recommended time for it to set firmly. Humidity can also affect gelatin setting.
Q: How do I prevent the graham cracker crust from getting soggy?
A: The crust is baked into the base of the mold at the end, providing a protective layer. However, if the cheesecake batter isn’t fully set before adding it, it could affect the crust. Ensuring the cheesecake sets properly (especially that outer layer in the freezer) will help keep the crust firm.
And there you have it, my friends—your guide to crafting the most delightful, impressive, and truly satisfying No-Bake Strawberry Cheesecake Brain! This WiseRecipes creation is more than just a dessert; it’s a testament to how simple ingredients, when treated with a little love and smart steps, can come together to create something truly extraordinary. It’s a vibrant, exciting meal that you’ll genuinely look forward to eating, day after day.
I am genuinely so excited for you to try these and experience the delicious magic yourself. Please, please come back and let me know in the comments below what your favorite part of this spooky-fun dessert was, or any fun twists you tried! Happy cooking from WiseRecipes!