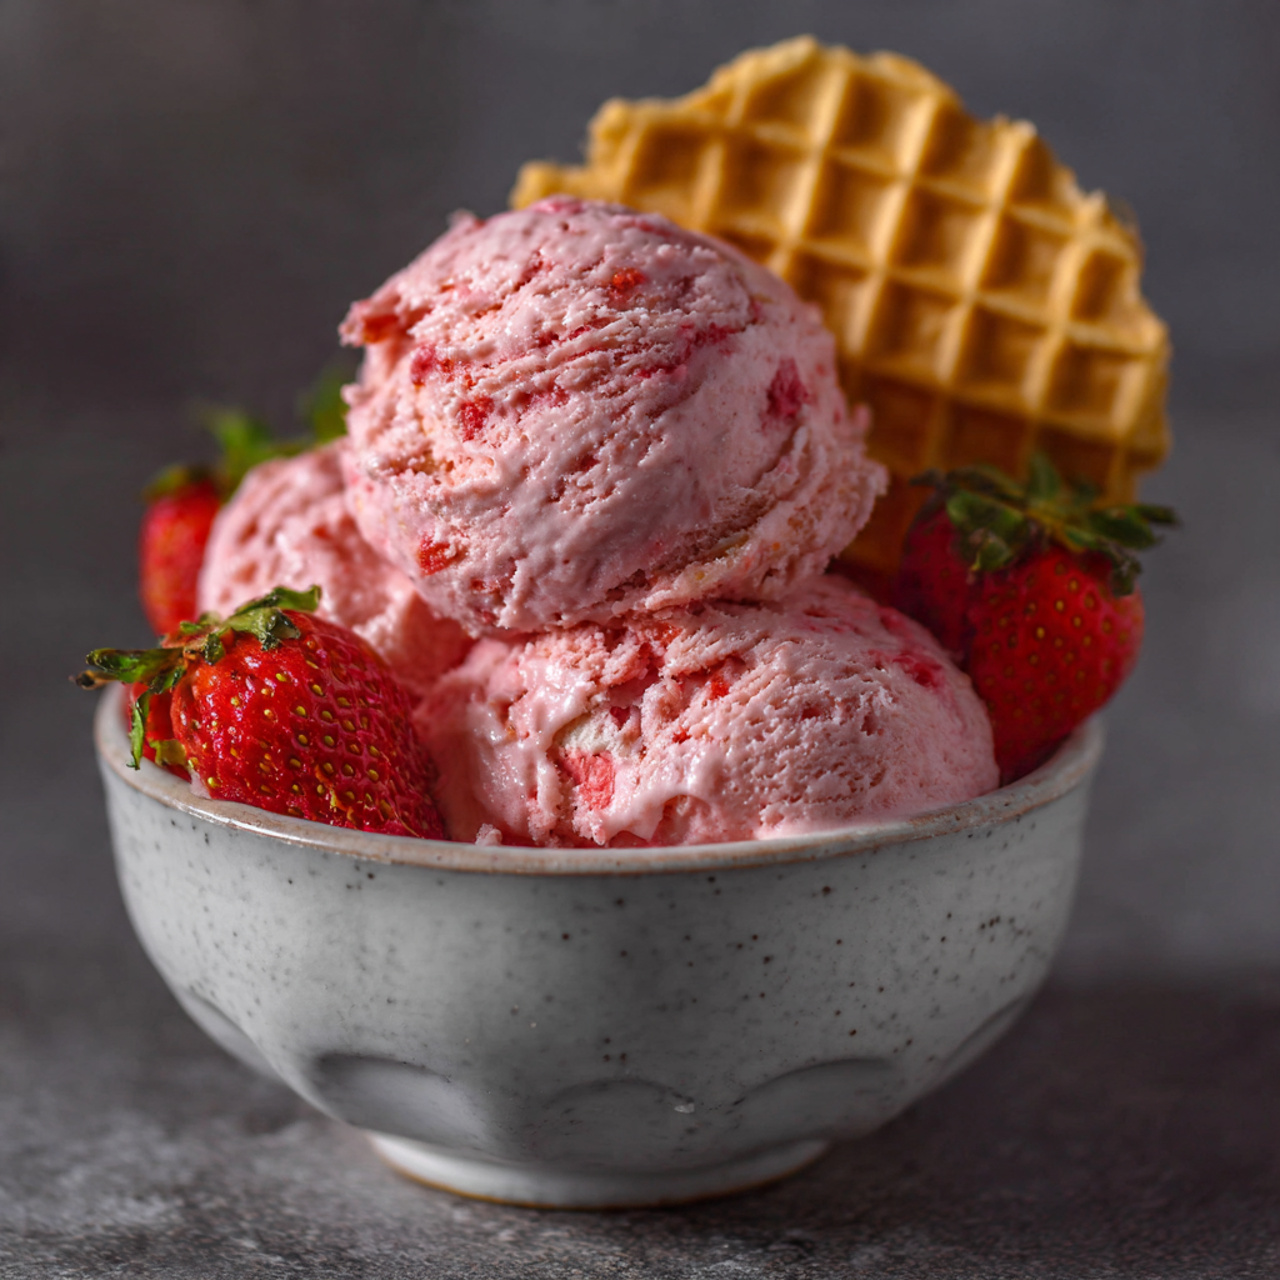
The Ultimate No-Churn Strawberry Cheesecake Ice Cream (So Easy!)
Imagine the most decadent, rich, and creamy strawberry cheesecake you’ve ever had, but transformed into a glorious, scoopable, frozen dessert. Picture a luscious, tangy cream cheese ice cream base, studded with crunchy cookie crumbles, and layered with thick, beautiful ribbons of sweet, homemade strawberry jam. That, my friends, is the stunning, surprisingly simple magic of…
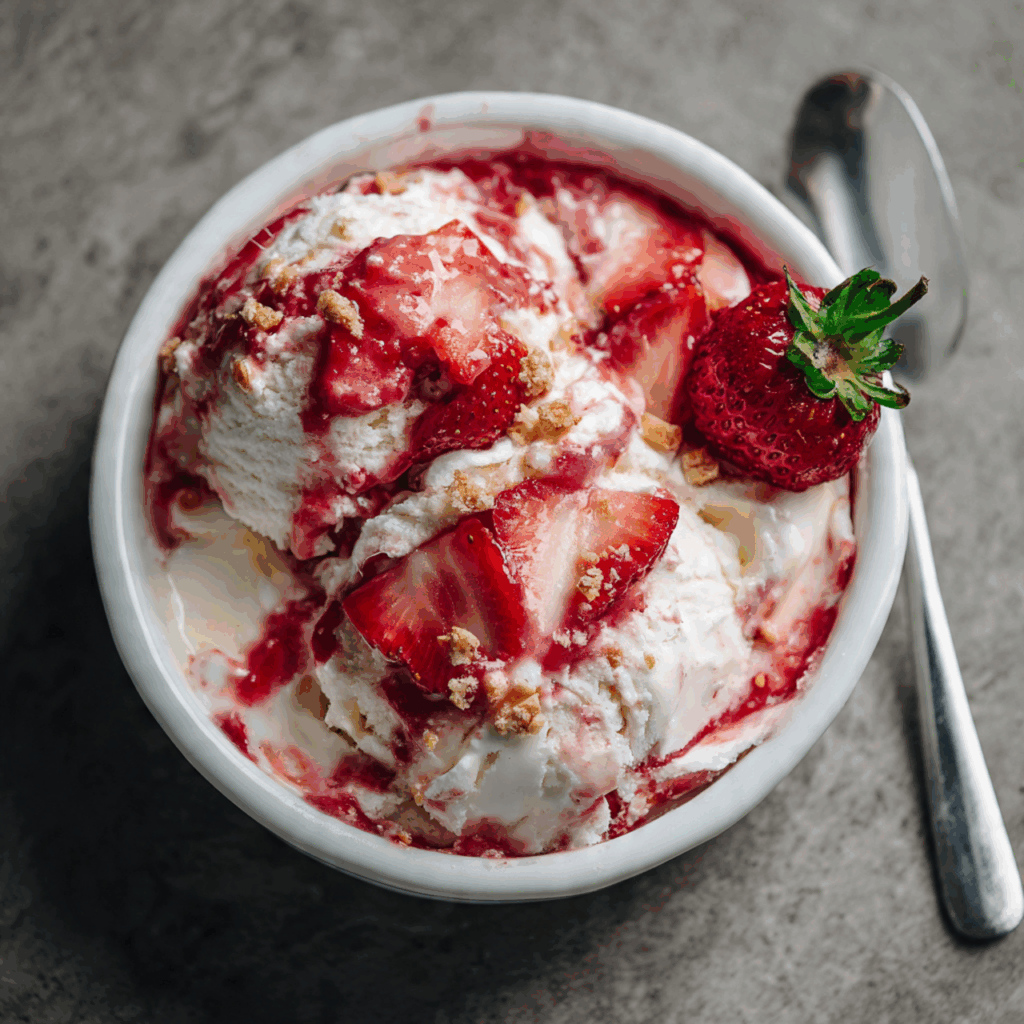
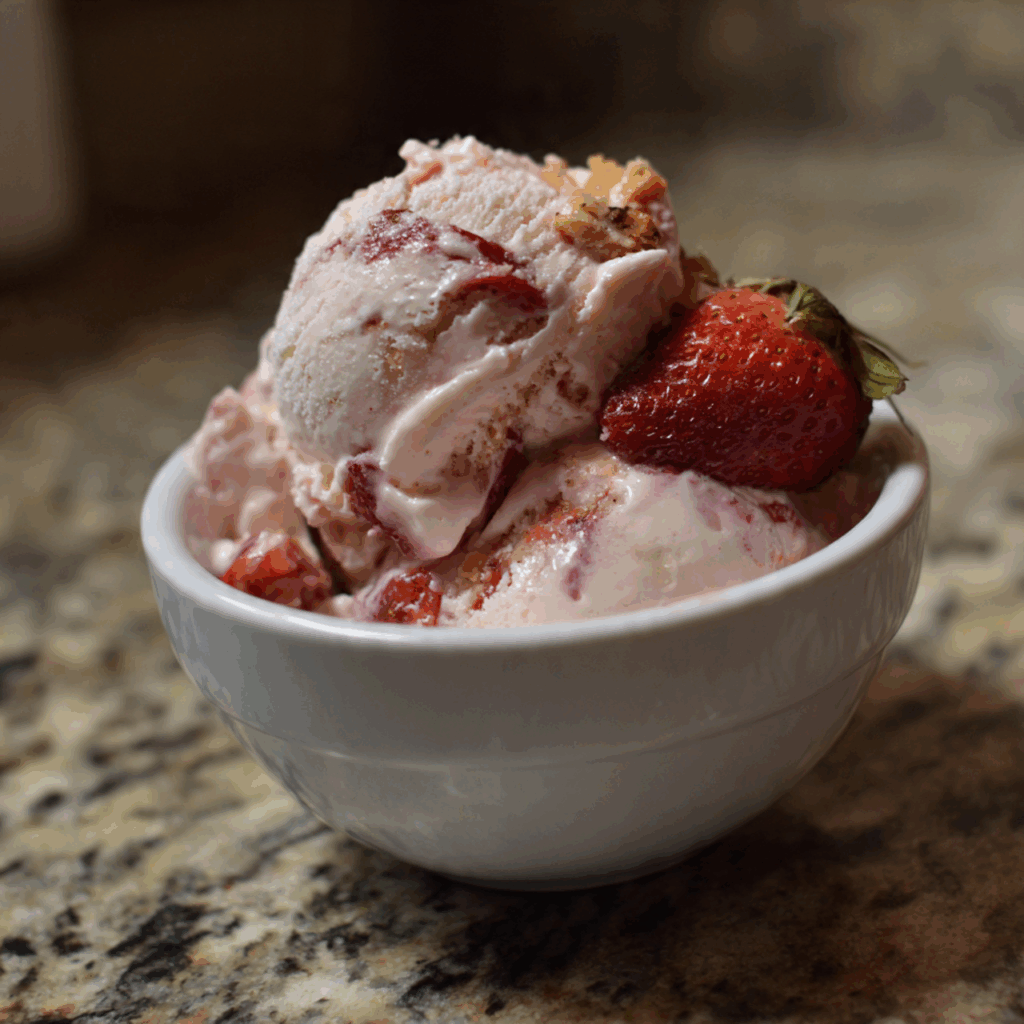
Imagine the most decadent, rich, and creamy strawberry cheesecake you’ve ever had, but transformed into a glorious, scoopable, frozen dessert. Picture a luscious, tangy cream cheese ice cream base, studded with crunchy cookie crumbles, and layered with thick, beautiful ribbons of sweet, homemade strawberry jam. That, my friends, is the stunning, surprisingly simple magic of this No-Churn Strawberry Cheesecake Ice Cream. This is, without a doubt, the most impressive and delicious homemade ice cream you will ever make without an ice cream maker.
I promise you, from the moment you swirl that vibrant, jammy strawberry sauce into the creamy base, you’ll know you’ve created something special. It’s a true show-stopper that is perfect for a hot summer day, a special celebration, or any time you’re craving a truly decadent treat. Every single bite is a perfect harmony of creamy, tangy, sweet, and crunchy.
Get ready to master the art of the perfect no-churn ice cream and create a stunning, unforgettable dessert that will have everyone thinking you’re a professional.
Why This Will Be Your New Favorite Homemade Ice Cream!
You are going to be completely amazed by how rich, creamy, and easy this ice cream is. It’s a guaranteed sensation. Here’s why you have to make it:
- No Ice Cream Maker Required! This is a completely no-churn recipe that delivers an incredibly smooth and creamy texture without any special equipment.
- All the Flavor of a Real Cheesecake: This isn’t just strawberry ice cream. The use of real cream cheese in the base and a cookie crumble mix-in perfectly captures the authentic taste and texture of a strawberry cheesecake slice.
- Incredibly Rich and Creamy: The classic no-churn base of sweetened condensed milk and real whipped cream is the secret to a foolproof, luxuriously smooth, and scoopable result.
Recipe Snapshot
| Prep Time | 20 minutes |
| Cook Time | 10 minutes |
| Freeze Time | 6 hours |
| Total Time | 6 hours 30 minutes |
| Servings | 8-10 servings |
| Calories | ~450 kcal per serving |
| Course | Dessert |
| Cuisine | American |
| Difficulty/Method | Easy / No-Churn |
Your Shopping List for This Creamy Dream
This recipe uses a handful of classic ingredients to create a truly spectacular dessert. Here’s what you’ll need:
→ For the Strawberry Swirl
- 1/2 cup sugar & 1 tbsp cornstarch → To sweeten and thicken our jammy swirl.
- 3 cups fresh strawberries, halved or quartered → The bright, fruity star of the show.
- Juice of 1/2 a lemon & 3 tbsp water → For brightness and to help the strawberries break down.
→ For the Cheesecake Ice Cream Base
- 300ml (about 10 oz) canned sweetened condensed milk → The magic ingredient for a sweet and smooth no-churn base.
- 2 teaspoons vanilla extract & 1/4 tsp salt
- 2 cups (500ml) heavy cream, cold → The secret to the light and airy texture.
- 8 to 10 vanilla sandwich cookies or graham crackers, roughly crumbled → To mimic the classic cheesecake crust.
Let’s Get Churning (Without a Churner)! Your Step-by-Step Guide
Ready to create the most luscious ice cream of your life? This process is so simple and fun.
Part 1: The Strawberry Swirl & Cheesecake Base
- Make the Strawberry Swirl: In a small saucepan, whisk together the sugar and cornstarch. Add the strawberries, lemon juice, and water. Bring to a simmer over medium heat and cook, stirring frequently, for about 10 minutes, until the strawberries have softened and started to break down into a jammy sauce. Set it aside to cool completely.
- Prep your Pan: Place an 8- or 9-inch square pan (or a standard loaf pan) in the freezer to get it nice and cold.
- Make the Cheesecake Base: In a large bowl, beat the room-temperature cream cheese with an electric mixer until it’s light and fluffy. Add the sweetened condensed milk, vanilla, and salt, and beat again until everything is smooth and well combined.
- Whip the Cream: In a separate, clean, and preferably chilled bowl, whip the cold heavy cream until it holds stiff peaks.
- Combine Gently: Gently fold about one cup of the whipped cream into the cream cheese mixture with a spatula to lighten it. Then, add the remaining whipped cream in two batches, folding gently after each addition until no white streaks remain. Finally, gently fold in most of the crumbled cookies, reserving some for the top.

Part 2: Assemble and Freeze
- Layer and Swirl: Retrieve your chilled pan from the freezer. Pour in the cheesecake ice cream base. Spoon dollops of about half of the cooled strawberry mixture over the top.
- Create the Marble Effect: Using a butter knife or a skewer, gently drag it through the ice cream base and the strawberry dollops to create a beautiful, marbled swirl effect. Don’t overmix!
- Garnish and Freeze: Sprinkle the reserved cookie crumbles over the top. Press a layer of plastic wrap directly onto the surface of the ice cream to prevent ice crystals from forming.
- Freeze to Perfection: Place the pan in the freezer for at least 6 hours, or overnight, until the ice cream is completely firm.
- Serve: When you’re ready to serve, you can let the ice cream sit at room temperature for a few minutes to soften slightly for easier scooping. Serve scoops topped with some of the remaining jammy strawberry sauce.
No-Churn Strawberry Cheesecake Ice Cream
Ingredients
Equipment
Method
- In a small saucepan, whisk sugar and cornstarch. Add strawberries, lemon juice, and water. Bring to a simmer and cook for 10 minutes, until strawberries break down into a jammy sauce. Set aside to cool completely.
- Place an 8- or 9-inch square pan in the freezer. In a large bowl, beat the room temperature cream cheese until fluffy. Beat in the sweetened condensed milk, vanilla, and salt until smooth.
- In a separate bowl, whip the cold heavy cream to stiff peaks. Gently fold the whipped cream into the cream cheese mixture in three additions. Finally, fold in most of the crumbled cookies.
- Retrieve the chilled pan from the freezer and pour in the ice cream base.
- Spoon dollops of about half of the cooled strawberry mixture over the top. Use a butter knife to gently swirl the mixtures together to create a marbled effect.
- Sprinkle with the reserved cookies. Press a layer of plastic wrap directly on top of the ice cream surface.
- Freeze for at least 6 hours, or overnight, until completely firm. Serve scoops with the remaining strawberry sauce.
Notes
WiseRecipes’ Top Tips for Perfect No-Churn Ice Cream
These simple secrets will ensure your homemade ice cream is flawlessly creamy and delicious.
- Room Temperature is Key (for the base!). Your cream cheese must be fully softened to room temperature. This is the only way to ensure it beats into a perfectly smooth, lump-free base without any graininess.
- COLD is Key (for the cream!). For the lightest, fluffiest result that gives your ice cream its airy texture, your heavy cream must be very cold. Using a chilled bowl and beaters is a pro-trick that helps it whip up beautifully.
- Cool Your Swirl Completely. You must let the homemade strawberry sauce cool to room temperature before swirling it into the ice cream base. A warm sauce will melt the base and prevent it from freezing properly.
- Plastic Wrap on the Surface. Don’t just cover the pan; press a layer of plastic wrap directly onto the surface of the ice cream before you freeze it. This is the ultimate trick to prevent those pesky ice crystals from forming on top.
Keep It Fresh! Storing Your Homemade Ice Cream
This is the perfect dessert to keep in your freezer for a delicious, ready-made treat!
- Freezer: Store the ice cream in an airtight container (or keep it in the pan, well-covered with plastic wrap and a layer of foil) in the freezer. It will stay fresh and delicious for up to a month.
FAQs: Your No-Churn Ice Cream Questions, Answered!
Can I use a different kind of fruit for the swirl?
Yes, absolutely! This recipe would be fantastic with a homemade raspberry, blueberry, or even a peach jam swirled in. You can use the same cooking method. As the recipe note suggests, you can also use a high-quality store-bought jam as a super-quick shortcut!
Can I use a different kind of cookie for the mix-in?
Of course! Crushed Nilla Wafers, shortbread cookies, or even Golden Oreos would all be delicious substitutes for the graham crackers to mimic that classic cheesecake crust flavor and texture.
Why didn’t my ice cream get firm?
No-churn ice cream needs a good, long freeze to set up properly. Make sure you are giving it at least 6 full hours in a cold freezer. Also, ensure that your strawberry sauce was completely cool before you swirled it in, as a warm sauce can inhibit the freezing process.
Can I make this recipe dairy-free?
Yes, with a few substitutions! You can use dairy-free cream cheese, a can of sweetened condensed coconut milk, and a can of chilled, full-fat coconut cream (using only the solid cream part from the top) in place of the heavy cream. The results will be a delicious, coconut-infused version!
Final Thoughts: A Scoop of Pure Decadence
There is nothing quite like the pride and satisfaction of making your own, incredibly creamy, homemade ice cream from scratch—especially when it’s this easy! This No-Churn Strawberry Cheesecake Ice Cream is a true celebration of indulgent flavors and textures. It’s a rewarding, impressive, and utterly spectacular dessert that I know will become a new favorite in your home. Happy scooping!