The Ultimate No-Spread Sugar Cookies (Perfect for Decorating!)
Imagine a sugar cookie that holds its shape perfectly every single time. A cookie that’s not just a blank canvas, but a delicious masterpiece in its own right—impossibly buttery, with a soft, tender bite and a rich vanilla flavor. That, my friends, is the holy grail of holiday baking, and it is the absolute promise…
Imagine a sugar cookie that holds its shape perfectly every single time. A cookie that’s not just a blank canvas, but a delicious masterpiece in its own right—impossibly buttery, with a soft, tender bite and a rich vanilla flavor. That, my friends, is the holy grail of holiday baking, and it is the absolute promise of this foolproof recipe for Vanilla Butter Sugar Cookies.
I promise you, there is no greater baking victory than pulling a tray of these perfect cookies from the oven, each one an identical, beautiful shape, ready for a flurry of frosting and sprinkles. The dough is a dream to work with, and the finished cookies have the most incredible melt-in-your-mouth texture that will have everyone reaching for another. This is the “forever” recipe you’ll pass down for generations.
Get ready to master the art of the cutout cookie and create your most beautiful and delicious holiday platters yet.

Why This is The Only Cutout Cookie Recipe You’ll Ever Need!
You are going to be completely amazed by the reliable, delicious results of this classic recipe. It’s a holiday staple for so many good reasons:
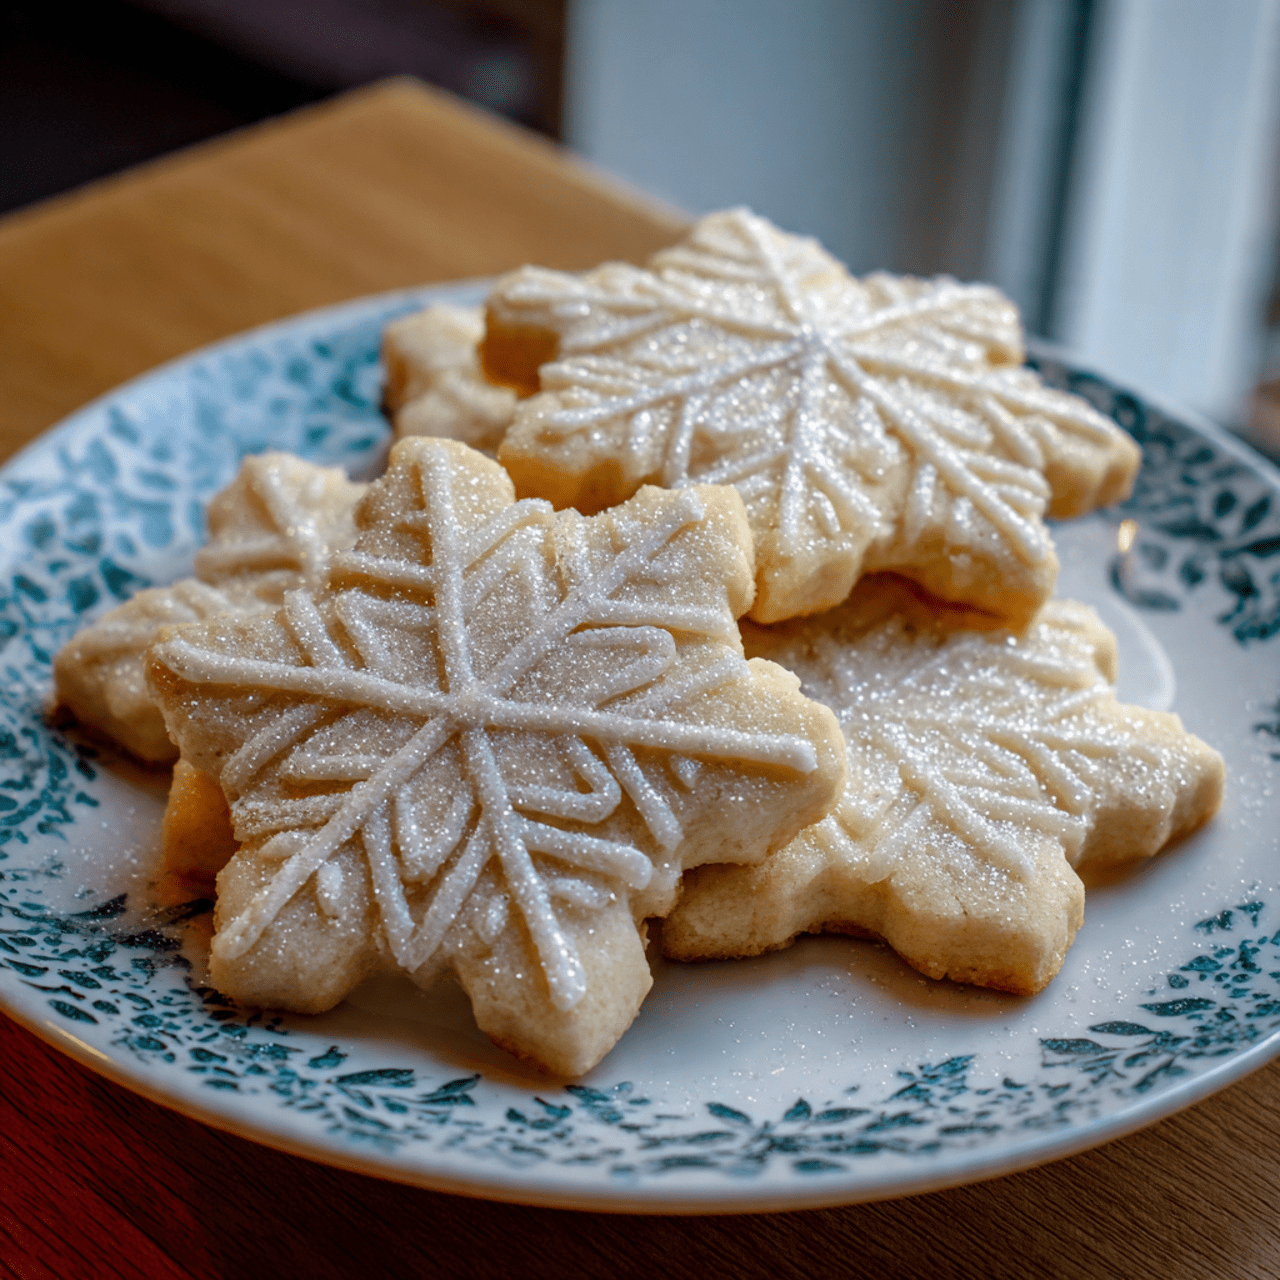
- They Hold Their Shape—Perfectly!: This is a true no-spread recipe. Your intricate snowflake and gingerbread man shapes will come out of the oven with crisp, clean, perfect edges.
- Incredibly Buttery & Rich Flavor: These cookies are packed with real butter and two tablespoons of vanilla extract for a flavor that is anything but plain. They’re delicious even before frosting!
- The Perfect Soft, Tender Texture: Forget hard, crunchy sugar cookies. This recipe yields a wonderfully soft, tender cookie with a fine, melt-in-your-mouth crumb.
- A Dream Dough to Work With: The dough is smooth, easy to roll, and not overly sticky, making the cutting process a joy instead of a frustration.
- Makes a Huge Batch: This recipe makes about seven dozen cookies, making it absolutely perfect for holiday cookie decorating parties, gifting, and large family gatherings.
Recipe Snapshot
| Prep Time | 35 minutes |
| Chill Time | 45 minutes |
| Cook Time | 10 minutes |
| Total Time | 1 hour 30 minutes |
| Servings | 84 cookies (7 dozen) |
| Calories | 80 kcal per cookie |
| Course | Dessert |
| Cuisine | American |
| Difficulty/Method | Easy / Baking |
Your Shopping List for This Classic Cookie
This recipe uses simple pantry staples to create a truly superior sugar cookie.

→ For the Cookies
- 1 ½ cups butter, softened → The key to a rich, melt-in-your-mouth flavor.
- 1 ½ cups sugar → For the perfect sweetness.
- 2 large eggs, room temperature → Binds the dough and adds richness.
- 2 tablespoons vanilla extract → Don’t be shy! This is what makes them taste so amazing.
- 4 cups all-purpose flour → Provides the perfect structure.
- 1 teaspoon salt → To balance the sweetness.
- 1 teaspoon baking soda & 1 teaspoon cream of tartar → This combination creates a wonderfully soft texture and a slight tang.
→ For the Simple Butter Frosting
- 1 ½ cups confectioners’ sugar → For a smooth, sweet icing.
- 3 tablespoons butter, softened → For a rich, creamy frosting flavor.
- 1 tablespoon vanilla extract → To complement the flavor of the cookie.
- 1 to 2 tablespoons 2% milk → To reach the perfect piping or spreading consistency.
- Optional: Food coloring, sprinkles, and colored sugar for decorating.
Let’s Bake Cookies! Your Step-by-Step Guide
Ready to create your most beautiful batch of cutout cookies ever? Let’s get our hands a little floury!
Part 1: The Perfect No-Spread Dough
- Cream Butter and Sugar: In a large bowl with an electric mixer, cream the softened butter and sugar on medium-high speed for a full 5-7 minutes. This step is key! The mixture should be very light, pale, and fluffy.
- Add Wet Ingredients: Beat in the room temperature eggs and the generous 2 tablespoons of vanilla until well combined.
- Whisk Dry Ingredients: In a separate medium bowl, whisk together the flour, salt, baking soda, and cream of tartar.
- Combine and Chill: Gradually beat the dry ingredients into the creamed mixture on low speed until just combined. Do not overmix! Cover the dough and refrigerate for at least 30 minutes to make it easier to handle.

Part 2: Roll, Cut, and Bake
- Preheat and Prep: Preheat your oven to 350°F. Prepare ungreased baking sheets.
- Roll and Cut: On a lightly floured surface, roll the chilled dough out to an even ¼-inch thickness. Use your favorite 2 ½-inch cookie cutters, dipped in flour, to cut out your shapes.
- The Secret Second Chill: Place the cut-out cookies about 1 inch apart on your baking sheets. Place the entire baking sheet in the refrigerator to chill for another 15 minutes. This step is the ultimate insurance against spreading!
- Bake to Perfection: Bake the chilled cookies for 10-12 minutes. For a soft cookie, bake just until the edges are set and the centers are no longer glossy. Do not let them get golden brown.
- Cool Completely: Let the cookies cool on the baking sheets for a few minutes before transferring them to wire racks to cool completely. You must wait until they are fully cool before frosting.
Part 3: The Simple Butter Frosting
- Make the Frosting: In a medium bowl, beat the confectioners’ sugar, softened butter, and vanilla until smooth. Add milk, one tablespoon at a time, until you reach your desired consistency for piping or spreading.
- Decorate!: If you wish, divide the frosting and tint it with food coloring. Transfer the frosting to a piping bag (or a ziptop bag with the corner snipped off) and decorate your completely cooled cookies. Add sprinkles or colored sugar immediately before the frosting sets.
Vanilla Butter Sugar Cookies
Ingredients
Equipment
Method
- In a large bowl, cream butter and sugar until light and fluffy, about 5-7 minutes. Beat in the eggs and vanilla.
- In another bowl, whisk flour, salt, baking soda and cream of tartar. Gradually beat this into the creamed mixture until just combined.
- Cover the dough and refrigerate for 30 minutes.
- Preheat oven to 350°F. On a lightly floured surface, roll the dough to 1/4-in. thickness. Cut with floured 2 1/2-in. cookie cutters.
- Place cookies 1 inch apart on ungreased baking sheets. Chill the sheets of cut-out cookies in the refrigerator for 15 minutes.
- Bake for 10-12 minutes, or until the edges are just set but not browned. Cool on wire racks completely.
- For the frosting, beat confectioners’ sugar, softened butter, vanilla and enough milk to reach your desired consistency. If desired, add food coloring.
- Pipe or spread the frosting over the completely cooled cookies. Decorate with sprinkles as desired and let the frosting set.
Notes
WiseRecipes’ Top Tips for Perfect Cutout Cookies
These are the non-negotiable rules that guarantee your cookies hold their shape every time.
- Cream for 5-7 Minutes. Seriously. This long creaming time is the foundation of a great sugar cookie. It whips air into the dough, which creates a lighter texture, and it ensures the sugar is fully incorporated.
- The Double Chill is a Game-Changer. Don’t skip it! The first 30-minute chill makes the soft dough easy to roll. The second 15-minute chill of the cut-out cookies on the pan is the ultimate secret weapon. Baking the cookies while they are cold prevents the butter from melting too quickly, which is what stops them from spreading.
- Don’t Overbake for a Soft Cookie. The key to a soft, tender sugar cookie is to pull it from the oven when it still looks pale and slightly underdone in the center. The moment the edges are set is the moment they are done. They will finish baking on the hot pan.
- Roll Dough Between Parchment Paper. For the easiest, least-messy rolling experience, roll your chilled dough between two sheets of lightly floured parchment paper. This prevents the dough from sticking to your rolling pin and counter.
- Room Temperature Eggs are a Must. Adding cold eggs to your beautifully creamed butter and sugar can cause the mixture to curdle and break. Using room temperature eggs ensures a smooth, stable emulsion and a better final cookie texture.
Keep Them Fresh! Storing Your Sugar Cookies
These cookies are a delight to have on hand and store beautifully for holiday gifting.
- Storing Iced Cookies: Once the icing has completely set and hardened, store the cookies in a single layer in an airtight container at room temperature for up to a week. For stacking, place sheets of wax paper between the layers.
- Storing Un-Iced Cookies: The plain, un-iced cookies can be stored in an airtight container at room temperature for over a week, or frozen for up to 3 months.
- Freezing the Dough: The dough is perfect for freezing! The wrapped dough disks can be frozen for up to 3 months. Let the dough thaw in the refrigerator overnight before rolling and baking as directed.
FAQs: Your Sugar Cookie Questions, Answered!
Help! My cookies still spread a little. What went wrong?
Spreading is almost always due to the dough being too warm when it goes into the oven. Ensure you did the second chill of the cutouts on the pan. Also, make sure your butter was softened, not melty, and that your baking sheets are completely cool before placing dough on them.
Can I skip the cream of tartar?
You can, but I highly recommend it! Cream of tartar is an acid that reacts with the baking soda to give the cookies a very subtle tang and a wonderfully soft, tender texture that is characteristic of a great sugar cookie.
My frosting is too thin/thick. How do I fix it?
This is an easy fix! If your frosting is too thin for piping, beat in more confectioners’ sugar, a tablespoon at a time. If it’s too thick and stiff, beat in more milk, just a few drops at a time, until it reaches the perfect consistency.
Can I use this dough for stamping cookies?
Yes, this is an excellent dough for cookie stamps! After pressing the stamp into your dough, be sure to follow the second chilling step. Chilling the stamped, unbaked cookies will help them retain the beautiful, intricate pattern during baking.
Final Thoughts: A Sweet Tradition Made Perfect
There is nothing more classic or joyful than an afternoon spent decorating beautiful, buttery sugar cookies. This recipe is your key to making those sessions foolproof, fun, and incredibly delicious. It’s a reliable, “forever” recipe that will be the star of every holiday, birthday, and celebration. I hope you love making (and sharing) these as much as I do. Happy baking!