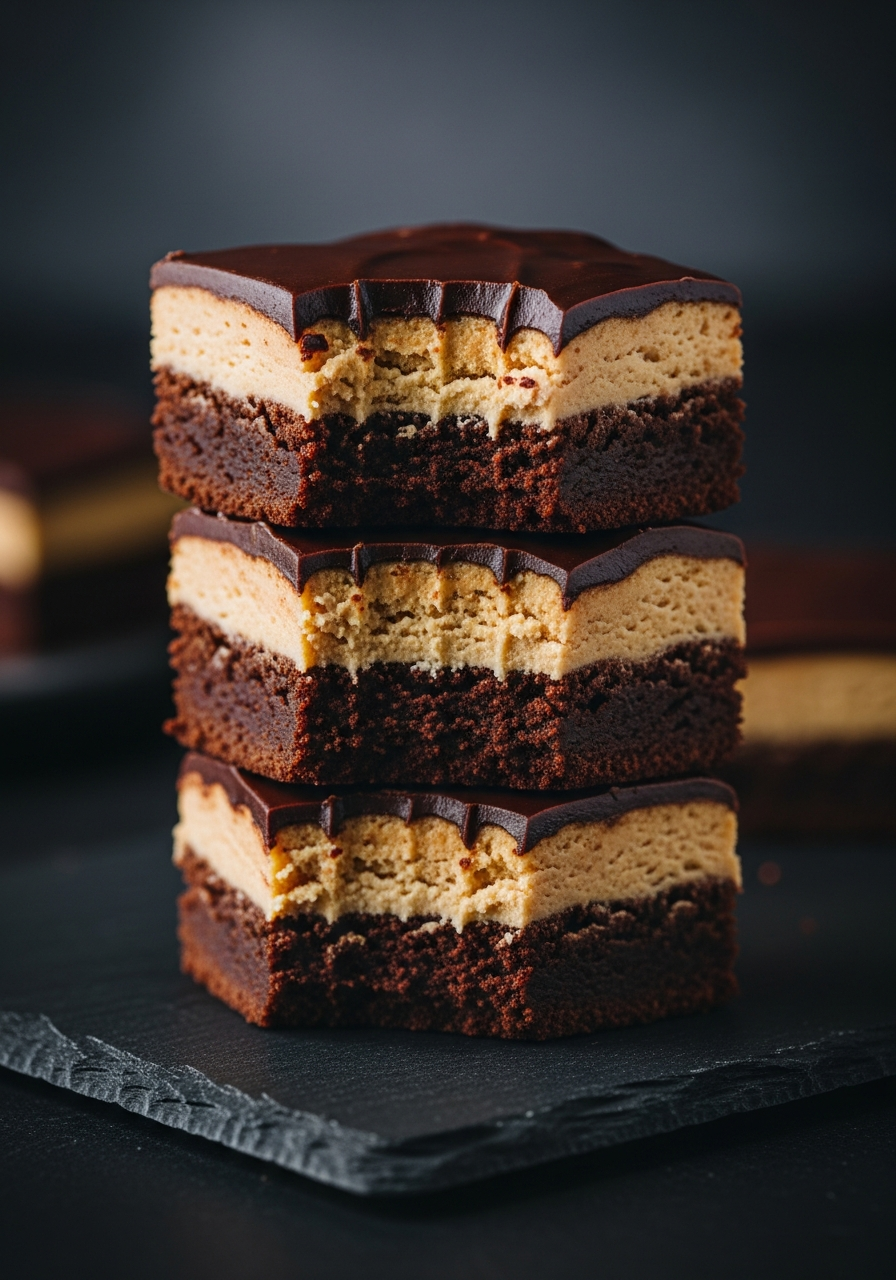
The Ultimate Peanut Butter Brownies (3 Decadent Layers!)
Imagine the most perfect dessert combination in the world: rich, decadent chocolate and creamy, salty peanut butter. Now, imagine it in three distinct, glorious layers—a dense, fudgy brownie base, a thick and fluffy peanut butter filling, and a glossy, dark chocolate glaze that cracks at the slightest touch. That, my friends, is the unapologetic indulgence…
Imagine the most perfect dessert combination in the world: rich, decadent chocolate and creamy, salty peanut butter. Now, imagine it in three distinct, glorious layers—a dense, fudgy brownie base, a thick and fluffy peanut butter filling, and a glossy, dark chocolate glaze that cracks at the slightest touch. That, my friends, is the unapologetic indulgence of these layered Peanut Butter Brownies, and they are, without a doubt, the most crowd-pleasing treat you will ever make.
Here’s the thing about classic flavor pairings: they are beloved for a reason, but there’s always room for a little extra magic. I’ve always been a fan of peanut butter swirled into brownies, but I wanted to create something more defined and spectacular. This recipe isn’t just a brownie; it’s a full-blown dessert experience. It’s a simple, step-by-step process that builds layer upon layer of pure, unadulterated bliss.
I promise you, there is no greater satisfaction than slicing into this chilled dessert and revealing those three perfect, beautiful layers. The rich chocolate and salty peanut butter hit your taste buds in waves, creating a symphony of flavors and textures that is nothing short of heavenly. They are a true show-stopper for parties, potlucks, or any time you need a serious chocolate and peanut butter fix.
Get ready to create the most decadent, multi-layered brownie that will have everyone convinced you bought it from a gourmet bakery.

Why These Layered Brownies Are an Absolute Must-Bake!
You are going to be completely obsessed with the rich flavor and incredible textures of this dessert. It’s a guaranteed hit every time. Here’s why you’ll love it:
- The Ultimate Flavor Combination: The timeless, perfect pairing of rich chocolate and salty-sweet peanut butter is the star of this decadent dessert.
- Three Layers of Heaven: This recipe features a fudgy brownie base, a creamy, no-bake peanut butter filling, and a rich chocolate glaze for a truly multi-layered experience.
- Incredibly Rich and Fudgy: The brownie base is made with melted unsweetened chocolate, resulting in a dense, chewy, and intensely chocolatey foundation.
- A Perfect Make-Ahead Dessert: This dessert requires chilling time to set, making it the ideal stress-free treat to prepare a day in advance for any party or gathering.
- Looks Incredibly Impressive, But is Secretly Easy: While it looks like a complicated bakery creation, the layers are simple to make and assemble, requiring no special skills.
Recipe Snapshot
| Prep Time | 30 minutes |
| Cook Time | 25 minutes |
| Chill Time | ~2 hours |
| Total Time | ~3 hours |
| Servings | 12 servings (24 squares) |
| Calories | 141 kcal per square |
| Course | Dessert |
| Cuisine | American |
| Difficulty/Method | Easy / Baking |
Your Shopping List for This Decadent Dessert
This recipe uses classic pantry staples to create three layers of pure indulgence. Here’s what you’ll need:
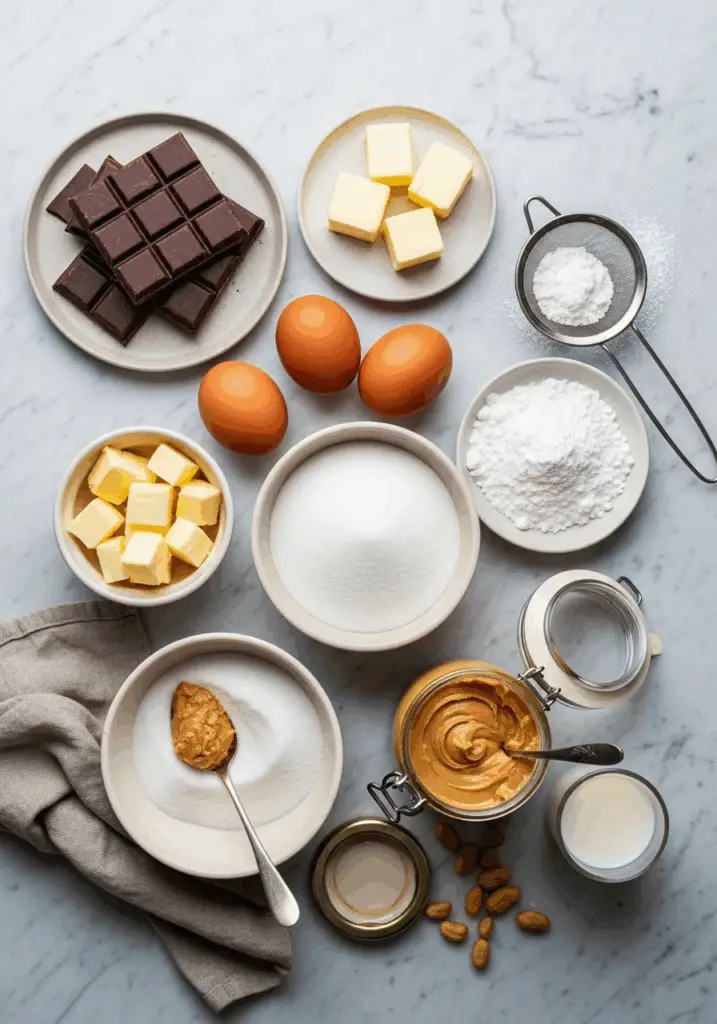
→ For the Fudgy Brownie Base
- 2 ounces unsweetened chocolate → This is the secret to a deep, rich, truly chocolatey brownie.
- ½ cup butter, cubed → For richness and a fudgy texture.
- 2 large eggs → Make sure they are at room temperature for the best results.
- 1 cup granulated sugar → For sweetness and that classic crackly brownie top.
- ½ cup all-purpose flour → Just enough to give the brownies structure without making them cakey.
→ For the Fluffy Peanut Butter Filling
- 1-½ cups confectioners’ sugar → Also known as powdered sugar, for a smooth, sweet filling.
- ½ cup creamy peanut butter → A classic brand like Jif or Skippy works best here.
- ¼ cup butter, softened → It must be soft to cream properly with the other ingredients.
- 2 to 3 tablespoons half-and-half cream or milk → To achieve the perfect spreading consistency.
→ For the Rich Chocolate Glaze
- 1 ounce unsweetened chocolate → For the final layer of intense chocolate flavor.
- 1 tablespoon butter → Adds a beautiful gloss and smooth texture to the glaze.
Let’s Get Baking! Your Step-by-Step Guide
Ready to build the most epic brownies of your life? We’ll tackle this one delicious layer at a time.
Part 1: The Fudgy Brownie Base
- Prep and Melt: Preheat your oven to 350°F (175°C). Grease a 9-inch square baking pan. In a small saucepan, gently melt the 2 ounces of unsweetened chocolate and ½ cup of butter over low heat, stirring until smooth.
- Mix the Batter: In a separate bowl, beat the eggs and granulated sugar together until the mixture is light, pale, and thick. Stir in the melted chocolate mixture, then fold in the flour until just combined. Do not overmix!
- Bake and Cool: Pour the batter into your prepared pan. Bake for about 25 minutes, or until a toothpick inserted into the center comes out with moist crumbs attached. Let the brownies cool completely in the pan.
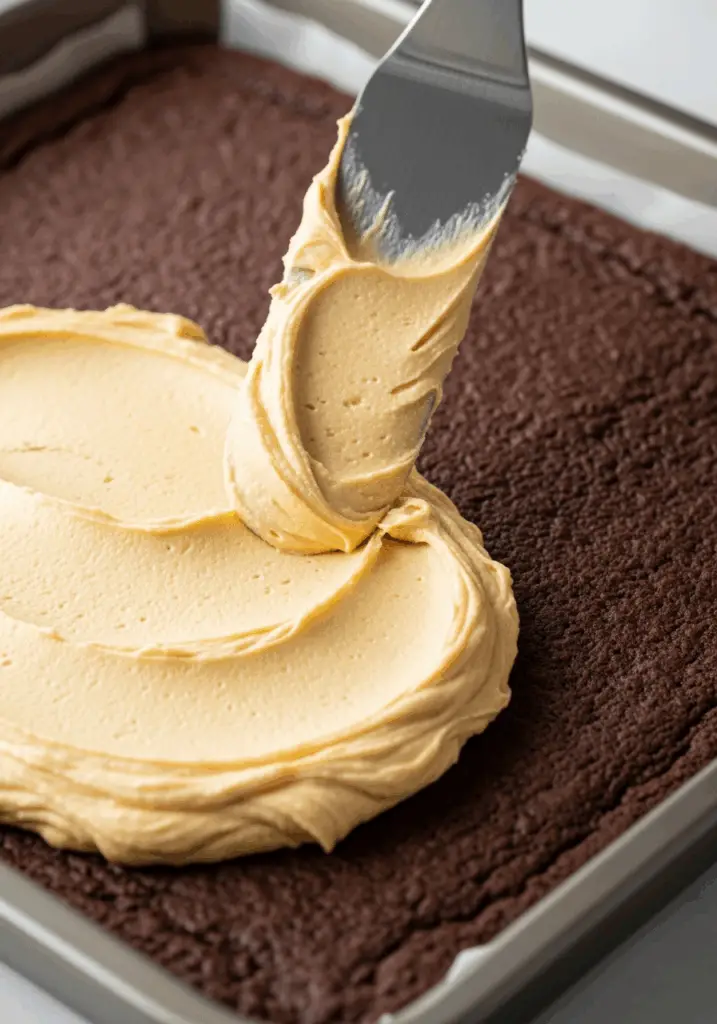
Part 2: The Fluffy Peanut Butter Filling
- Beat the Filling: In a medium bowl, combine the confectioners’ sugar, creamy peanut butter, and softened butter. Beat with an electric mixer until well combined.
- Add Cream and Spread: Beat in the half-and-half or milk, one tablespoon at a time, until the filling is light, fluffy, and reaches a smooth, spreadable consistency.
- Spread and Chill: Spread the peanut butter filling evenly over the top of the completely cooled brownie base. Cover the pan and place it in the refrigerator to chill until the filling is firm.
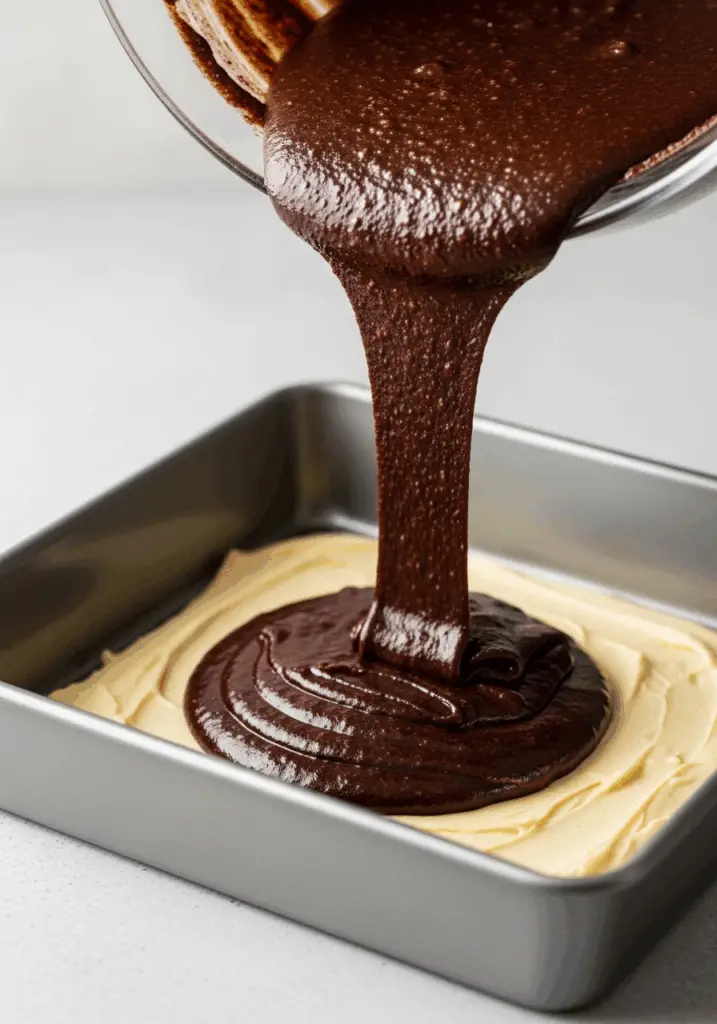
Part 3: The Chocolate Glaze and Final Chill
- Melt the Glaze: In a small saucepan, melt the final 1 ounce of unsweetened chocolate and 1 tablespoon of butter over low heat, stirring constantly until smooth and glossy.
- Drizzle and Chill: Let the glaze cool slightly, then drizzle it artfully over the chilled peanut butter filling.
- Final Chill: Return the pan to the refrigerator and chill until the glaze is set before cutting into squares. Store the finished brownies in the refrigerator.
WiseRecipes’ Top Tips for Brownie Perfection
These are my essential secrets for ensuring your layered brownies are flawless every single time.
- Don’t Overbake the Brownies. This is the key to a fudgy, not cakey, base. Pull them from the oven when a toothpick test shows moist crumbs, not a completely clean stick. They will continue to set as they cool.
- Use Room Temperature Ingredients for the Filling. Starting with softened butter and room temperature eggs is crucial. Cold ingredients won’t combine properly, resulting in a lumpy filling and a dense brownie base.
- Cool a-n-d Chill Completely Between Layers. Patience is a virtue with layered desserts! The brownie base must be completely cool before adding the filling. The filling must then be completely chilled and firm before adding the warm glaze, or you’ll have a melted mess.
- Use Low, Gentle Heat. When melting chocolate and butter for both the base and the glaze, always use low heat and stir constantly. This prevents the chocolate from scorching and ensures a smooth, glossy result.
- For Clean Cuts, Use a Hot Knife. To get those beautiful, clean slices that show off the layers, run a large, sharp knife under hot water and wipe it dry between each cut. This will slice through the chilled dessert like butter.
Layered Peanut Butter Brownies
Ingredients
Equipment
Method
- Preheat oven to 350°F and grease a 9-in. square baking pan. In a small saucepan, melt 2 oz chocolate and 1/2 cup butter over low heat.
- In a bowl, beat eggs and sugar until light and pale. Stir in the flour and melted chocolate mixture until just combined.
- Pour into the prepared pan and bake for about 25 minutes. Let cool completely.
- For the filling, combine confectioners’ sugar, peanut butter, and 1/4 cup softened butter in a bowl. Beat in cream until the mixture reaches a desired spreading consistency. Spread over the cooled brownies.
- Cover and chill the pan until the filling is firm.
- For the glaze, melt 1 oz chocolate and 1 tbsp butter in a saucepan, stirring until smooth. Let cool slightly, then drizzle over the chilled filling.
- Chill the entire pan until the glaze is set before cutting into squares. Store in the refrigerator.
Notes
Keep It Fresh! Storing Your Decadent Brownies
Because of the creamy filling, these brownies must be stored in the refrigerator.
- Refrigerator: Store the cut brownies in an airtight container in the refrigerator. They will stay fresh and delicious for up to a week. They are fantastic served chilled, straight from the fridge!
FAQs: Your Peanut Butter Brownie Questions, Answered!
Can I use a different kind of peanut butter?
For the best results, a smooth, processed creamy peanut butter (like Jif or Skippy) is recommended. Natural peanut butters that separate can sometimes make the filling oily or grainy. Crunchy peanut butter can be used if you’d like a textured filling!
Can I make this in a different sized pan?
You can! An 8×8-inch pan will also work, but your brownies will be slightly thicker, and you may need to add a few minutes to the baking time. A 9×13-inch pan is not recommended as the brownie layer will be too thin.
Why does the recipe use unsweetened chocolate?
Unsweetened chocolate provides a deep, intense chocolate flavor that isn’t overly sweet. This is perfect for balancing the sweetness of the sugar in the brownie base and the very sweet peanut butter filling and glaze.
Can I double this recipe?
Yes, you can easily double this recipe and bake it in a 9×13-inch pan. You will likely need to increase the baking time for the brownie base by 5-10 minutes. Just be sure to check for doneness with a toothpick.
Final Thoughts: The Ultimate Indulgence
There is nothing more universally loved than the timeless combination of chocolate and peanut butter, and this recipe takes it to a whole new level of decadence. These layered Peanut Butter Brownies are a true celebration of all things rich, creamy, and delicious. I hope they become a go-to for all your special occasions and sweet cravings. Happy baking!