The Ultimate Princess Palace Cake (An Easy No-Bake Guide!)
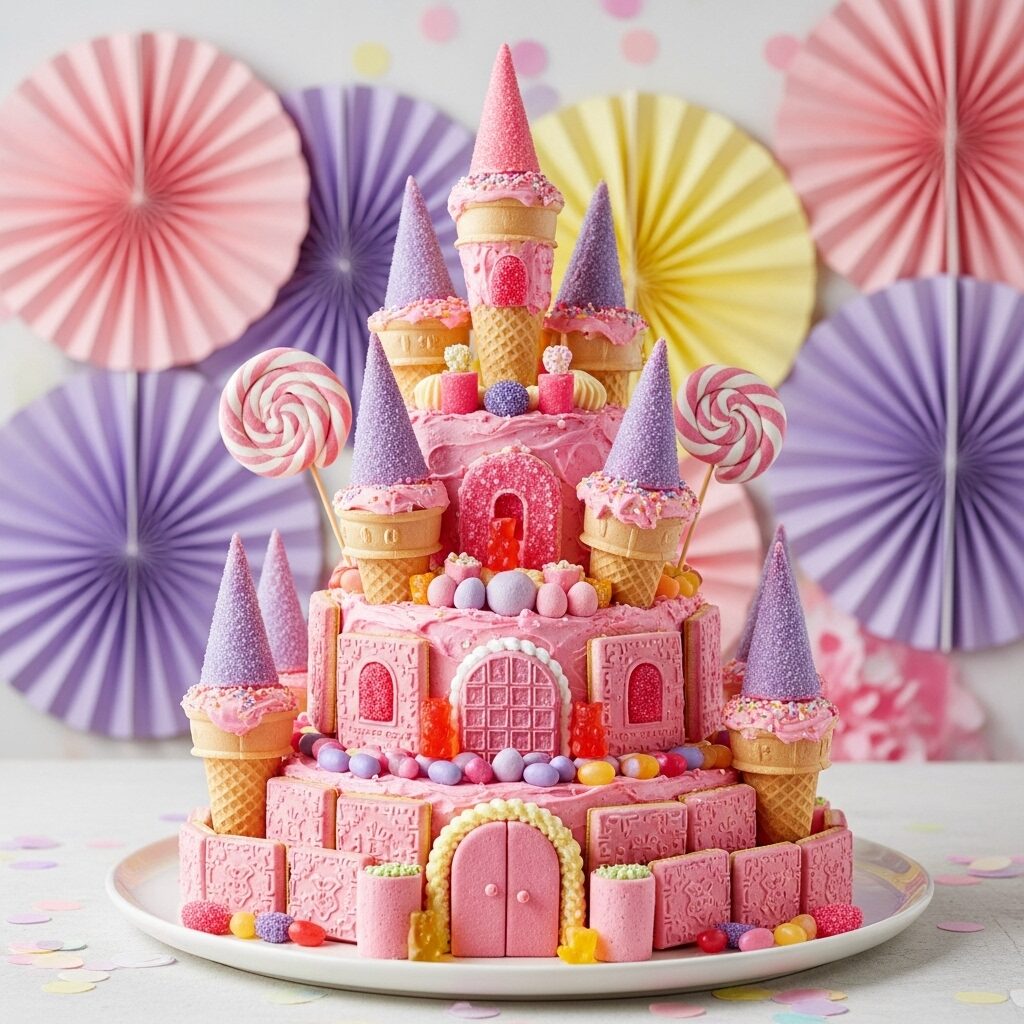
Imagine the look on your little one’s face when you present them with a magical, sprawling, candy-covered princess palace cake, complete with soaring ice cream cone turrets and a sparkling biscuit fence. It’s the kind of show-stopping centerpiece that birthday dreams are made of. And I’m going to let you in on a little secret:…
Imagine the look on your little one’s face when you present them with a magical, sprawling, candy-covered princess palace cake, complete with soaring ice cream cone turrets and a sparkling biscuit fence. It’s the kind of show-stopping centerpiece that birthday dreams are made of. And I’m going to let you in on a little secret: you don’t need to be a professional baker to create this masterpiece.
I am a firm believer that you don’t need to spend days baking from scratch to create birthday magic. This recipe is my ultimate proof. It’s less of a baking project and more of a fun, creative assembly job—an edible art project! We’re using clever shortcuts like store-bought sponge cakes and a whimsical assortment of candies and cookies to build the castle of their dreams.
I promise you, this is one of the most fun and rewarding “bakes” you’ll ever undertake. There’s no stress, no complicated techniques, just the pure joy of creating something spectacular. It’s the perfect activity to get the kids involved in, letting them help design their very own fairytale castle.
Get ready to build a stunning, delicious, and completely unforgettable cake that will make you the hero of the party.
Why This Castle Cake is a Party-Planning Dream!
You are going to have so much fun with this project, and the final result is pure magic. Here’s why this is the perfect party cake solution:
- A True No-Bake Show-Stopper: This cake is all about assembly, not baking! Using store-bought cakes saves you hours of time and stress, letting you focus on the fun decorating part.
- Endlessly Customizable: You can swap out the candies and colors to perfectly match your party’s theme. A blue and white ice palace? A rainbow candy castle? The possibilities are endless!
- So Much Fun to Decorate: This is a creative project the whole family can get excited about. Let the kids help pick out the candies and place the decorations.
- Feeds a Royal Court: This is a large, impressive cake that can easily serve a whole party of little princes and princesses.
- Looks Incredibly Impressive: Your guests will think you spent days creating this intricate masterpiece. Only you will know the brilliant, time-saving secrets!
Recipe Snapshot
| Prep Time | 1 hour 45 minutes |
| Cook Time | 0 minutes |
| Total Time | 1 hour 45 minutes |
| Servings | 36 servings |
| Calories | Varies |
| Course | Dessert |
| Cuisine | American / Australian |
| Difficulty/Method | Intermediate (Assembly) |
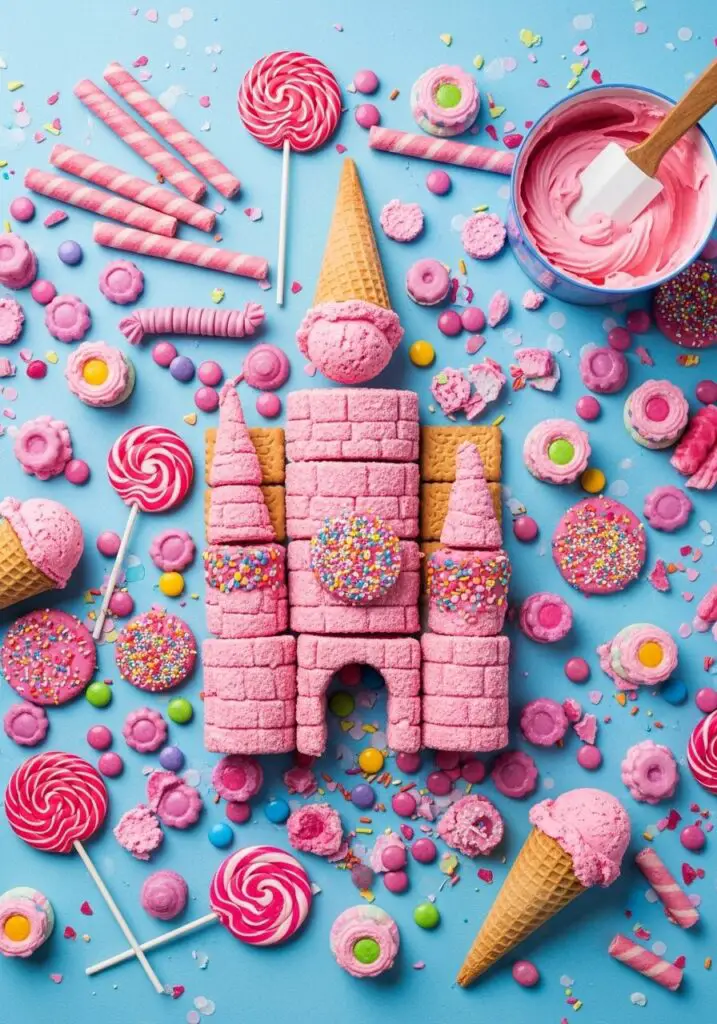
Your Royal Shopping List for the Palace
The magic of this cake is in the creative use of store-bought goodies. Think of yourself as an architect shopping for building materials!
→ The Castle Foundation (Cakes)
- 2 rectangular sponge cake slabs → These will form the large, rectangular base of our castle.
- 2 round sponge cakes → These will be stacked on top to create the upper levels.
→ The Royal “Mortar” (Frosting & Jam)
- Strawberry jam → For a delicious layer of filling.
- Pink strawberry frosting & vanilla frosting → Store-bought tubs are your best friend here!
→ The Walls, Gates & Turrets (Biscuits & Cones)
- Musk sticks → Or any long, pink wafer sticks/Pocky to create the palace gate and fence posts.
- Iced VoVo biscuits → Or any rectangular pink and white iced cookie for the castle walls.
- Rectangular & mini “hundreds and thousands” biscuits → Or any sprinkle-covered cookie for decorating the castle tiers.
- Ice-cream cones → The essential, pointy tops for your castle towers!
→ The Palace Jewels (Candies & Decorations)
- An assortment of pink, purple, and yellow candies → Think M&M’s, candy chews, and other small, colorful sweets.
- Lollipops → For decorating the top of the castle.
- Small flags on toothpicks → To place on top of your cone turrets.
Let’s Build! Assembling Your Fairytale Castle, Step-by-Step
Ready to build a masterpiece? Think of this in stages: first the foundation, then the walls, then the towers, and finally, the royal decorations!
Part 1: Building the Castle Foundation
- Create the Base: Slice your two rectangular sponge slabs in half horizontally. Place the two bottom halves side-by-side on a large cake board to form one large rectangle. Spread a thin layer of jam over the top, then sandwich with the top halves of the sponge. Frost the entire rectangular base with about three-quarters of the pink strawberry frosting.
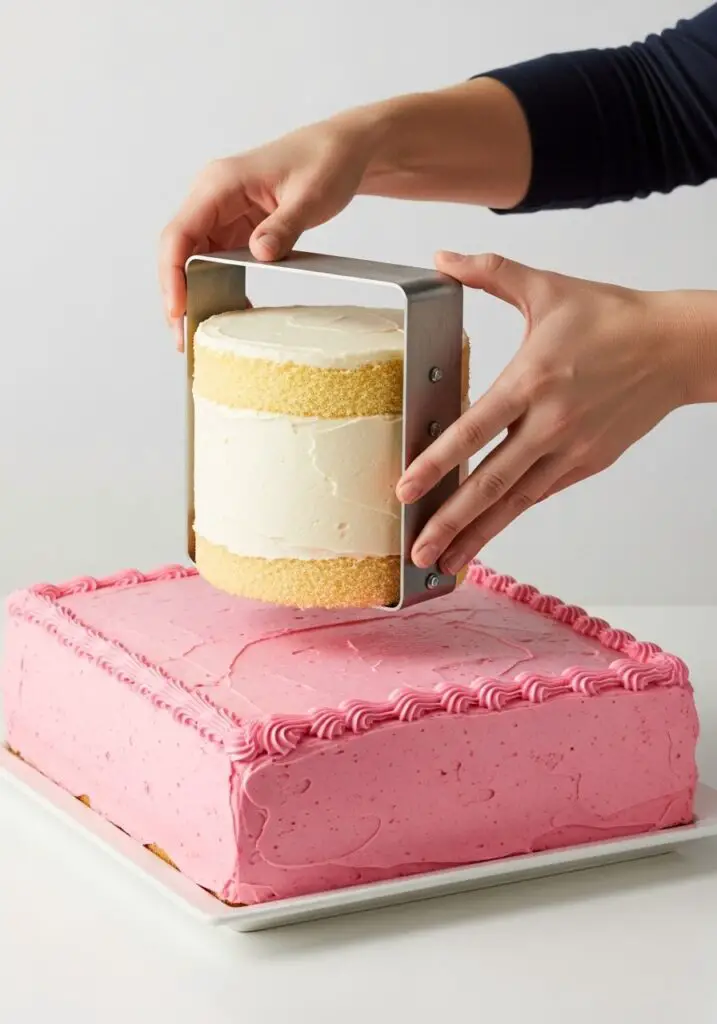
- Stack the Tiers: Now for the round cakes. Slice one round sponge in half horizontally, fill with jam, and frost the outside with vanilla frosting. Carefully place this in the center of your rectangular base.
- The Top Tier: Take your second round sponge and use a smaller plate or cutter to trim it down to a 12cm (about 5-inch) circle. Frost this smaller cake with the remaining pink frosting and carefully place it on top of the vanilla-frosted tier. Your castle structure is now built!
Part 2: Raising the Walls & Gates
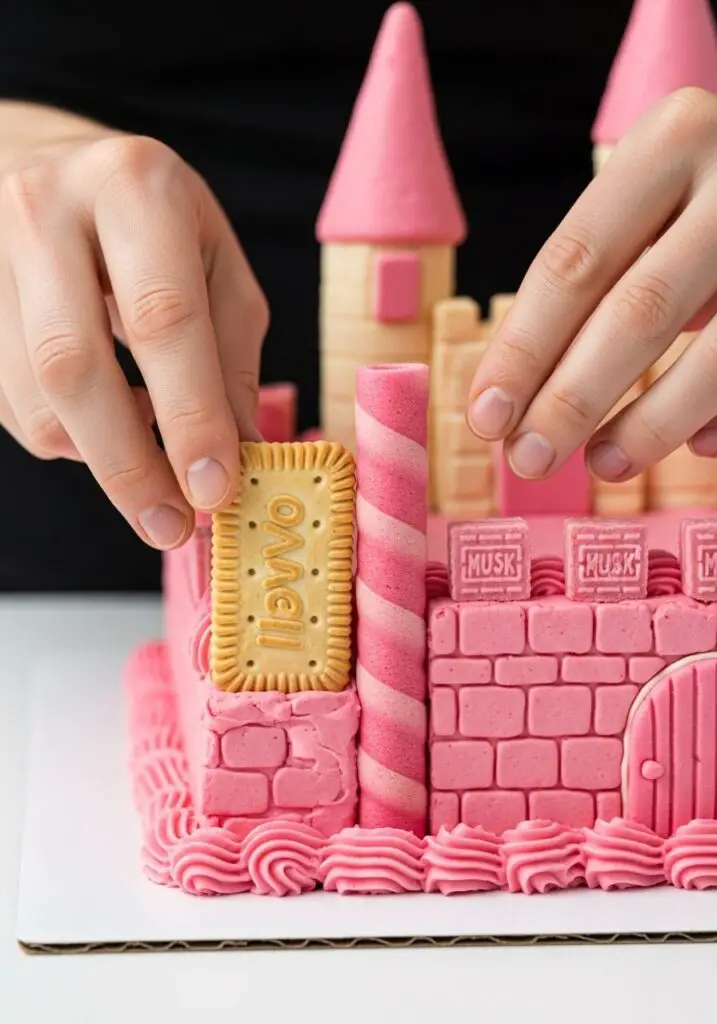
- Create the Gate: Using the picture as a guide, cut your musk sticks (or pink wafer sticks) into different lengths with pointed tops to create a castle gate at the front of the rectangular base. Use a dab of frosting to stick on a pink candy “door handle.”
- Build the Outer Wall: Press yellow M&M’s next to the gate. Then, begin creating the castle wall by alternating the Iced VoVo biscuits and shorter pieces of musk sticks all the way around the base of the cake.
Part 3: Decorating the Tiers & Adding the Turrets
- Decorate the Tiers: Press the rectangular sprinkle biscuits all the way around the middle tier of the castle. Use smaller sprinkle biscuits for the top tier. Create a decorative border around the top tier using alternating pink and purple candies.
- Add the Turrets: Now for the towers! Use a little frosting to “glue” stacks of mini sprinkle biscuits together. Place one tall stack in the center of the top of the cake, and place four shorter stacks at the corners of the rectangular base.
- Top the Towers: Carefully place an upside-down ice cream cone on top of each of your biscuit stacks to create the castle turrets. Place a little flag in the top of each cone.
Part 4: The Final Royal Flourish
- The Final Decorations: Now for the best part! Use your remaining assorted pink lollies and candies to fill in any gaps and decorate the tops of the cake tiers. Press lollipops into the top edge of the highest tier. Step back and admire your incredible, edible palace!
WiseRecipes’ Royal Decrees for Success
Even an easy assembly project has a few secrets to success. These are my must-know tips!
- The Parchment Paper Trick. When you’re frosting the round tiers, do it on a separate piece of parchment paper first. This makes it so much easier to lift and transfer them onto the main cake without getting frosting everywhere.
- A Warm Spatula is Your Best Friend. For spreading store-bought frosting smoothly, dip your palette knife or spatula in hot water, wipe it dry, and then frost. The warmth helps the frosting glide on like a dream.
- Create a “Blueprint.” Before you start sticking candies on, it can be helpful to lay out your design for the walls and gates on the counter first. This helps you get the spacing and pattern just right.
- Use Frosting as Your Royal Glue. Keep a small bowl of extra frosting handy. It’s the perfect edible “glue” for sticking on stubborn candies, securing the biscuit stacks, and attaching the ice cream cone turrets.
- Get the Kids Involved (Strategically!). Let the little ones help with the fun parts, like pressing candies onto the tiers or placing the lollipops. You might want to handle the stacking of the main cake layers yourself to avoid a royal disaster!
Keep It Fresh! Storing Your Masterpiece
This magnificent cake is a sight to behold! Here’s how to handle it before and after the party.
- Assembly: This cake is best assembled on the day of the party to ensure all the biscuits and candies are at their freshest and crispest. You can, however, prepare the base cakes a day in advance.
- Refrigerator: Once assembled, the cake can be loosely covered and stored in the refrigerator. The sheer size can make this a challenge, so make sure you have a clear shelf!
- Serving: For the best flavor, I recommend taking the cake out of the refrigerator about an hour before serving to let it come to room temperature. Leftovers can be stored, covered, in the fridge for up to 3 days.
Easy Princess Palace Cake (No-Bake)
Ingredients
Method
- Slice the 2 rectangular sponge slabs in half horizontally. Place the 2 bases side-by-side on a large cake board to form a large rectangle. Spread with jam and top with the sponge tops. Frost this entire rectangular base with most of the strawberry frosting.
- Slice 1 round sponge cake in half horizontally, fill with jam, and frost the outside with vanilla frosting. Carefully place this in the center of the rectangular base.
- Cut the remaining round sponge into a smaller 12cm (5-inch) circle. Frost this with the remaining strawberry frosting and place it on top of the vanilla tier.
- Cut the musk sticks (or wafer sticks) to size to create a pointed ‘picket fence’ gate on the front of the bottom tier.
- Create the outer wall by pressing alternating Iced VoVo biscuits (or rectangular cookies) and musk stick pieces into the frosting around the entire base.
- Decorate the middle and top tiers by pressing sprinkle biscuits and assorted candies into the frosting.
- Create the turrets by using frosting to glue stacks of mini biscuits together. Place a tall stack on the very top of the cake, and shorter stacks at the four corners of the base.
- Top each biscuit stack with an upside-down ice cream cone. Place a small flag in the tip of each cone. Fill any remaining spaces with candies and lollipops.
Notes
FAQs: Your Royal Court’s Questions, Answered!
Do I have to bake my own cakes?
Absolutely not! The whole point of this recipe is the “no-bake” magic. Heading to your local grocery store’s bakery section and buying plain, unfrosted sponge cake slabs and rounds is the ultimate time-saving shortcut and the intended method for this recipe.
My castle seems a little wobbly! How can I make it more stable?
For a very tall cake like this, the professional secret is to use dowels! You can insert a few wooden dowel rods (cut to size) down through the top and middle tiers into the base cake for extra stability, especially if you need to transport it.
I can’t find the specific biscuits and candies listed! What do I do?
Don’t worry at all! This recipe is incredibly flexible. The specific brands are just suggestions. Look for candies and cookies that fit the right shape and color for your theme. For the walls, any rectangular pink or white cookie will do. For the gate, any long, pink wafer stick is perfect. Get creative in the candy and cookie aisles!
How do I transport this cake to a party?
Transporting a cake this large and intricate can be tricky! My best advice is to assemble it directly on the final, sturdy cake board or serving platter that you’ll be using. For the car ride, the floor of the passenger seat or the trunk is the flattest, most stable surface. Drive slowly!
My Final Thoughts: A Magical, Edible Masterpiece
This Princess Palace Cake is so much more than a dessert; it’s the centerpiece of a magical memory. It’s a joyful, creative project that proves you don’t need to be a professional baker to create something truly spectacular for your child’s special day. I hope you have an absolute blast building—and eating—this incredible fairytale creation!