The Ultimate Pumpkin Fruit Tray (A Fun & Healthy Halloween Platter!)
Imagine a Halloween party table, usually laden with candy and spooky sweets, suddenly brightened by a cheerful, vibrant, and completely edible jack-o’-lantern made of fresh fruit. That, my friends, is the simple, show-stopping magic of this Pumpkin Fruit Tray. It is, without a doubt, the cutest, healthiest, and easiest appetizer you will bring to any…
Imagine a Halloween party table, usually laden with candy and spooky sweets, suddenly brightened by a cheerful, vibrant, and completely edible jack-o’-lantern made of fresh fruit. That, my friends, is the simple, show-stopping magic of this Pumpkin Fruit Tray. It is, without a doubt, the cutest, healthiest, and easiest appetizer you will bring to any fall gathering or Halloween party.
Here’s the thing about festive food: it should spark joy and be fun for everyone. I absolutely adore this “recipe” because it’s less about cooking and more about creative, edible art. It’s my go-to for a healthy classroom party snack, a fun project to make with the kids, or a stunning centerpiece for a fall brunch that proves festive food can be fresh and wholesome, too.
I promise you, there is no greater feeling than watching both kids and adults flock to the fruit tray with delight. The sweet clementine “pumpkin,” the juicy grape “eyes,” the blueberry “nose,” and the strawberry “smile” create a perfect harmony of fresh, delicious flavors. It’s a guilt-free treat that celebrates the season in the most colorful way possible.
Get ready to assemble the most charming and talked-about platter at the party, all in just 10 minutes!
Why This Pumpkin Fruit Tray is a Festive Favorite!
You are going to be delighted by how quickly this beautiful and healthy platter comes together. It’s a holiday hero for so many reasons. Here’s why:
- Ready in 10 Minutes Flat: This is the ultimate last-minute party dish! With no cooking required, it’s all about fun, creative assembly that takes just minutes.
- A Fun, Kid-Friendly Project: This is the perfect recipe to get the kids involved in the kitchen. They will have a blast creating the pumpkin’s face with all the colorful fruit.
- The Healthy Halloween Hero: On a holiday often dominated by sugar, this beautiful fruit platter is a welcome, refreshing, and wholesome alternative that everyone will appreciate.
- Visually Stunning Centerpiece: The bright, vibrant colors and the clever jack-o’-lantern design make this a true show-stopper that looks like it took way more effort than it did.
- Completely No-Cook and Allergy-Friendly: Naturally gluten-free, dairy-free, and nut-free, this is a safe and delicious option for almost any guest.
Recipe Snapshot
| Prep Time | 10 minutes |
| Cook Time | 0 minutes |
| Total Time | 10 minutes |
| Servings | 12 servings |
| Calories | 65 kcal per serving |
| Course | Appetizer, Snack |
| Cuisine | American |
| Difficulty/Method | Easy / No-Cook, Assembly |
Your Shopping List for This Fruity Pumpkin
It doesn’t get any simpler or fresher than this! Here’s the short and colorful list of what you’ll need:
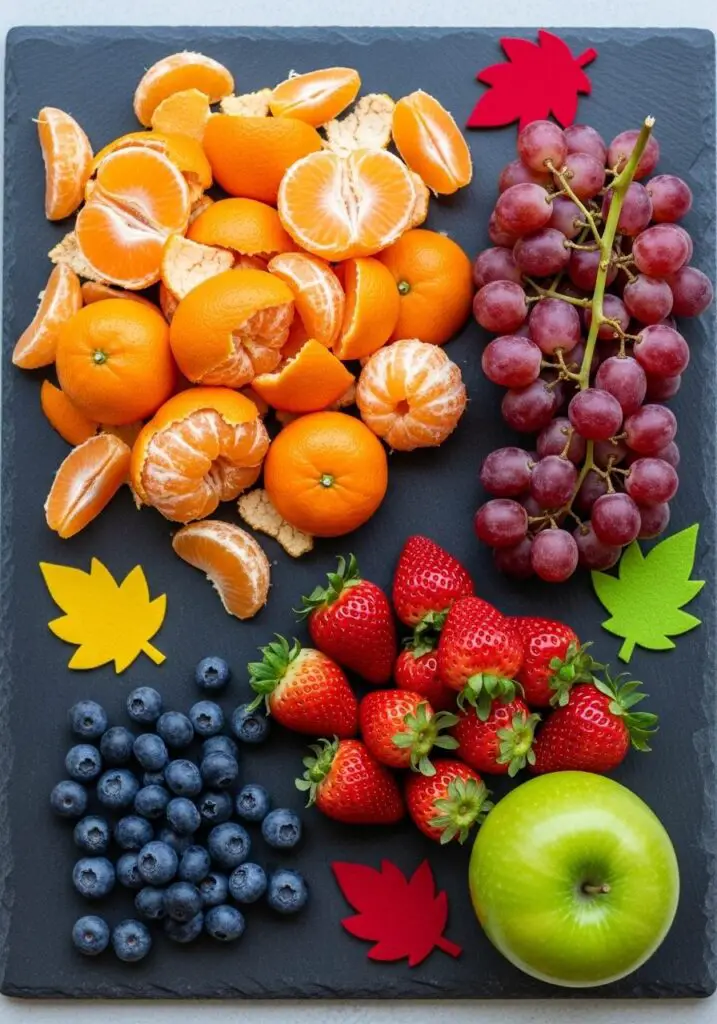
→ For Your Fruit Platter
- 12 clementines → Peeled and separated into wedges. These create the perfect bright orange pumpkin base.
- 1 cup red grapes → Washed. These will form the spooky (or happy!) eyes.
- ¼ cup blueberries → Washed. They make a perfect little nose.
- 4 strawberries → Halved, to create a beautiful red smile.
- 4 slices Granny Smith apple → For that classic green pumpkin stem.
Let’s Get Assembling! Your 10-Minute Guide
This is all about creative placement. Grab your platter and let’s build a pumpkin!
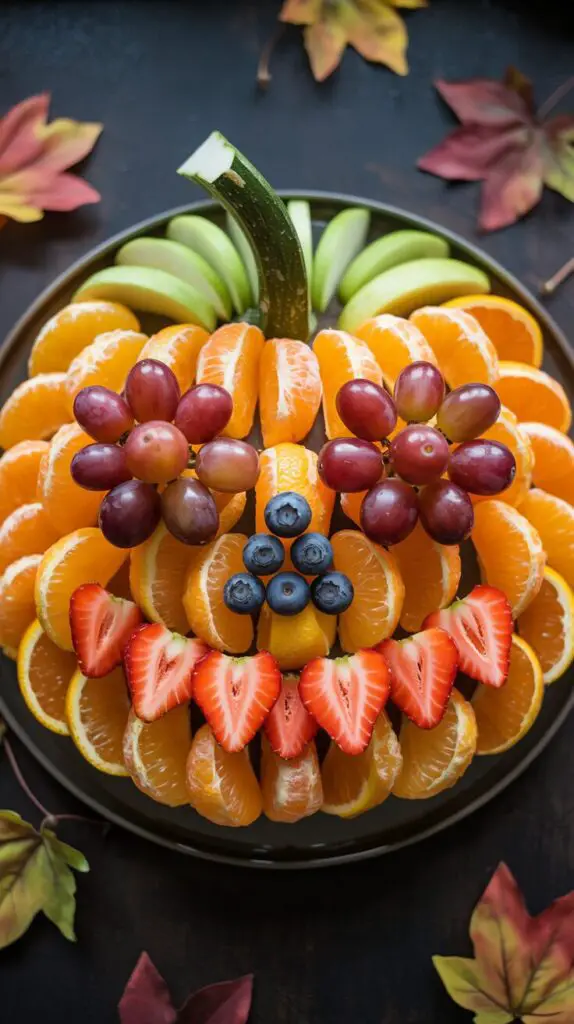
Part 1: The Pumpkin Base
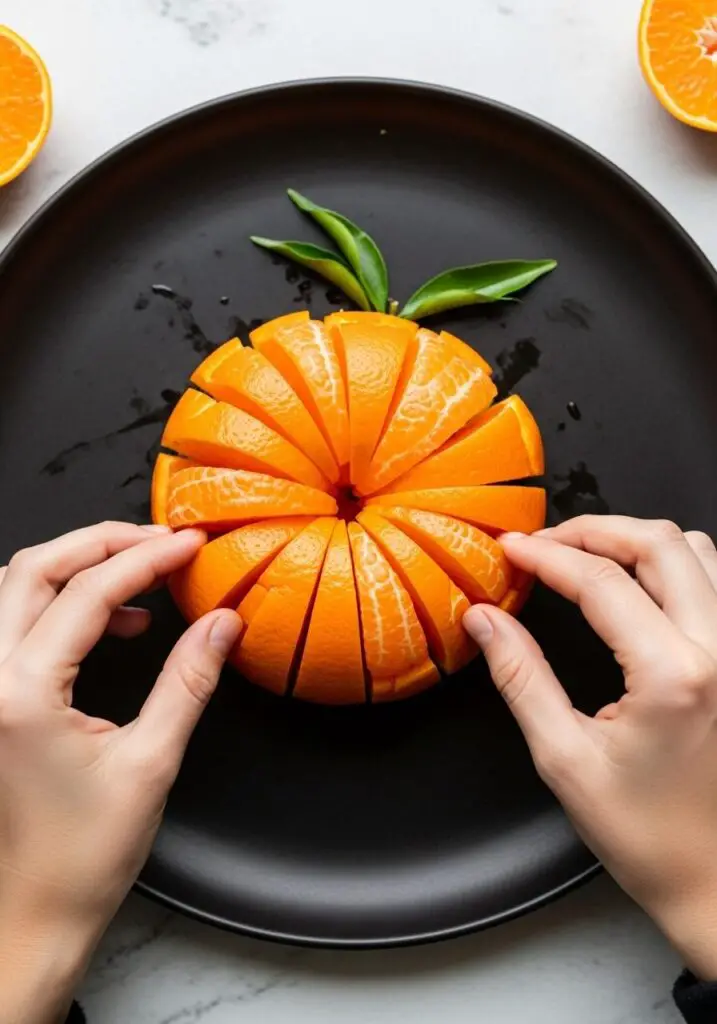
- Create the Pumpkin Shape: On a large, round platter (a dark color works best to make the orange pop!), begin arranging the clementine wedges. Start from the outside and work your way in, overlapping them slightly to create a full, round pumpkin shape.
Part 2: Create the Jack-O’-Lantern Face
- Make the Eyes and Nose: Arrange the red grapes into two equal circles on the upper half of your clementine base to create the eyes. Place the small pile of blueberries in the center to form a nose.
- Add the Smile: Arrange the strawberry halves, cut-side up, in a curved line on the bottom half to create a happy smile.
- The Final Stem: Place the slices of green apple at the very top of the platter to create the pumpkin stem. That’s it! Your masterpiece is ready.
WiseRecipes’ Top Tips for the Perfect Fruit Tray
These simple secrets will help you create a fresh, beautiful, and delicious platter every time.
- Use Seedless Clementines. For the best eating experience, make sure your clementines (or mandarins) are seedless and easy to peel. This makes the tray effortless for your guests to enjoy.
- Wash and Dry Your Fruit Well. After washing your berries and grapes, be sure to pat them completely dry with a paper towel before adding them to the platter. This prevents a watery puddle from forming at the bottom of your tray.
- Choose a Contrasting Platter. A dark-colored platter—like black, dark gray, or a deep wood tone—will really make the bright orange of the clementines and the other colorful fruits pop.
- Prep Ahead for Super-Fast Assembly. You can wash, peel, and separate all your fruit a few hours ahead of time. Store each fruit in separate airtight containers in the fridge. When it’s party time, the assembly will take less than five minutes!
- Keep Your Apple Slices Green. If you need to slice your apple for the stem more than a few minutes in advance, toss the slices in a tiny bit of lemon juice. This will prevent them from browning and keep them looking fresh.
Keep It Fresh! Storing Your Fruit Tray
This festive platter is at its most beautiful when freshly assembled.
- Best Served Fresh: For the best look and texture, this fruit tray should be assembled right before serving.
- Storage: If you have leftovers, you can transfer the fruit into an airtight container and store it in the refrigerator for 2-3 days. The fruits will be perfect for snacking, smoothies, or a simple fruit salad.
Pumpkin Fruit Tray (Halloween Platter)
Ingredients
Equipment
Method
- On a large round platter, arrange the clementine wedges in an overlapping circular pattern to completely cover the tray and form a pumpkin shape.
- Arrange the washed grapes into two equal circles on the upper half of the clementines to make the eyes.
- Place the washed blueberries in the center to create a circle or triangle shape for the nose.
- Arrange the halved strawberries in a curved line on the bottom half to create a smile.
- Place the slices of green apple at the top to create the pumpkin stem. Serve immediately.
Notes
FAQs: Your Pumpkin Fruit Tray Questions, Answered!
Can I use other types of oranges?
You can, but clementines or mandarins are highly recommended. Their small, easy-to-separate wedges are the perfect size and shape for creating the textured look of a pumpkin, and they are typically seedless.
What if I can’t find good strawberries?
No problem! You can get creative with the mouth. A line of blackberries or even a curved slice of a red apple could make a great substitute for the smile.
How can I make this even more festive?
For a fun twist, you could serve this with a yummy fruit dip! A simple yogurt dip (Greek yogurt, honey, and a dash of cinnamon) or a light cream cheese dip (cream cheese, powdered sugar, and a splash of milk) would be delicious served in a small bowl in the center of the platter.
What’s the best way to transport this to a party?
The easiest way is to assemble it on your serving platter at home, then cover it tightly with plastic wrap. Carry it flat to the party. The fruit is heavy enough that it shouldn’t shift too much during a car ride.
Final Thoughts: A Platter of Healthy Fun
There is such a simple joy in creating a dish that is not only delicious and healthy but also brings a huge smile to everyone’s face. This Pumpkin Fruit Tray is a celebration of freshness, creativity, and the playful spirit of the fall season. I hope it brings a touch of colorful, wholesome fun to your next gathering. Happy assembling!