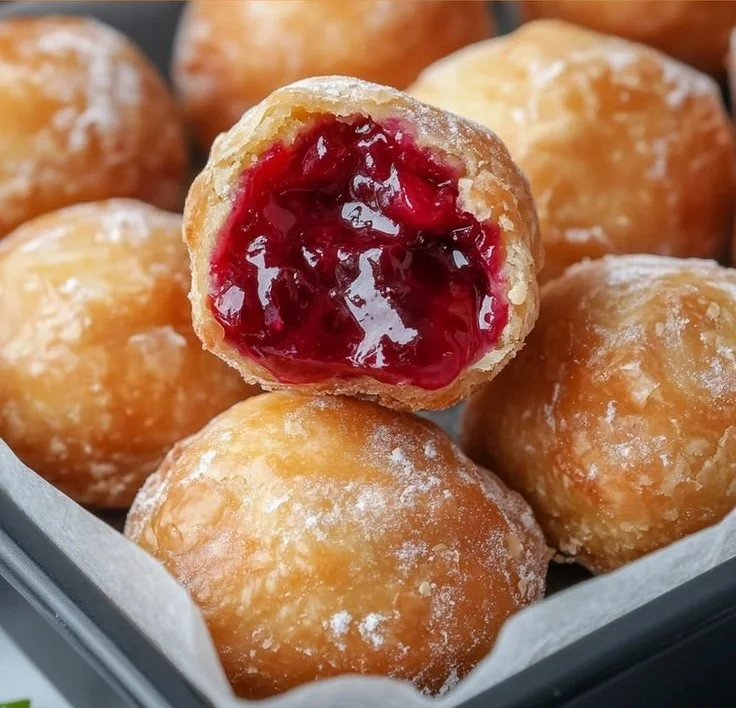
Quick Cherry Pie Bites
A Little Story Before We Start The first time I made Quick Cherry Pie Bites I was trying to impress a last-minute guest with something homemade that didn’t require me to spend an afternoon in the kitchen. I had a can of cherry pie filling in the pantry and a package of refrigerated pie crusts…
A Little Story Before We Start
The first time I made Quick Cherry Pie Bites I was trying to impress a last-minute guest with something homemade that didn’t require me to spend an afternoon in the kitchen. I had a can of cherry pie filling in the pantry and a package of refrigerated pie crusts in the fridge, and somehow those two things felt like the start of a tiny celebration. If you like bigger cherry desserts, I once adapted ideas from a double cherry almond slab pie for a summer barbecue, but these bites are the secret weapon for when you want the same cherry flavor without the fuss.
What You’ll Need
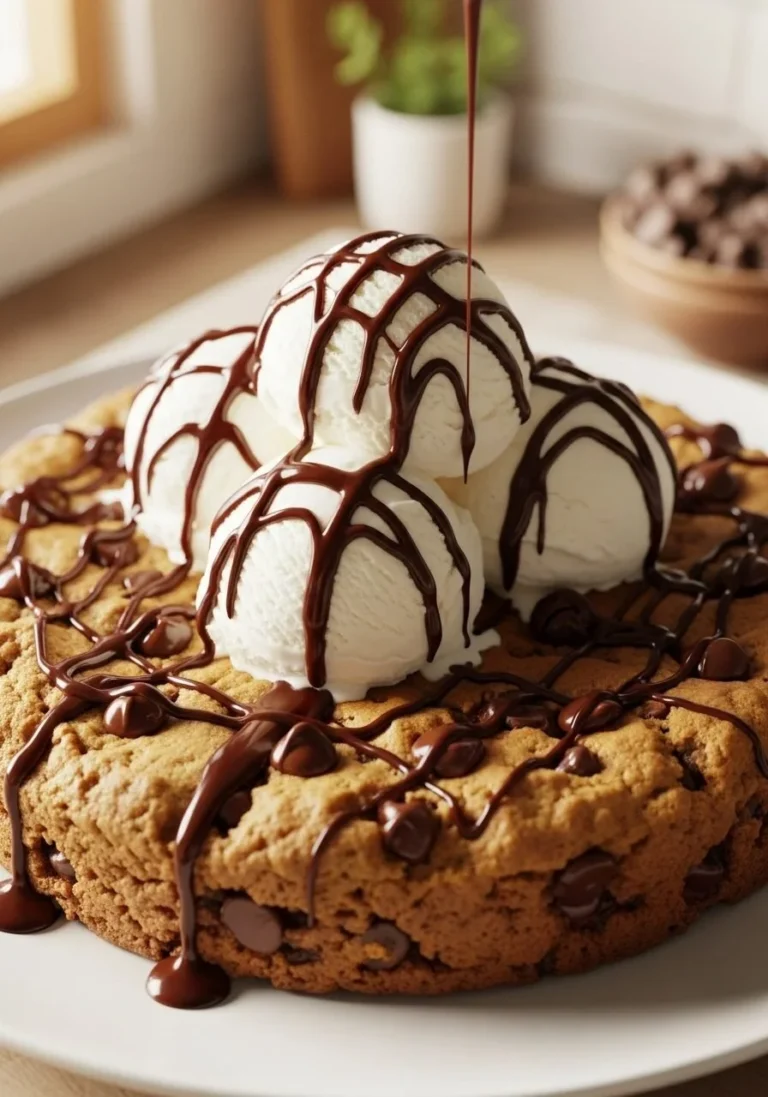
I always tell friends the list is delightfully short: 1 can cherry pie filling, 1 package refrigerated pie crusts, 1 egg, beaten (for egg wash), Sugar (for sprinkling), and Vanilla ice cream (optional, for serving). It reads almost too simple, but every one of those ingredients plays a role: the canned filling brings that glossy ruby color and tangy-sweet pop, the refrigerated crust gives you flaky layers without having to roll butter into flour for an hour, the beaten egg helps the tops brown into that irresistible sheen, and a light sprinkle of sugar gives the crunch and sparkle. If you want the grown-up version, a scoop of vanilla ice cream melting over a warm bite is a small miracle.
The Simple Method
I start in the exact same way every time because it gets me into a rhythm: Preheat the oven to 425°F (220°C). While it warms, I flour a board lightly and unroll the pie crusts, thinking about shapes. Roll out the pie crusts on a floured surface and cut them into small circles or squares. I like using a glass for circles because it’s fast, but squares are cozy if you want a rustic look.
When the shapes are ready, place a small amount of cherry pie filling in the center of each piece of dough. I learned early not to overfill these; a tablespoon or so is enough to get that cherry burst without a sticky, leaking oven. Fold the dough over and seal the edges with a fork. That little crimping step is satisfying and practical — it keeps the filling in and gives a pretty edge.
Brush the tops with the beaten egg and sprinkle with sugar. I brush in one smooth stroke to avoid tearing the dough, and then give a tiny sift of sugar so each bite catches the light. Place on a baking sheet lined with parchment paper. The parchment makes cleanup lazy-easy and prevents any sticky disasters. Bake for 12-15 minutes or until golden brown. Timing can vary a little by oven, so I keep an eye on the first batch; the aroma of caramelized sugar and warm cherries is usually my cue that they are close.
Serve warm, optionally with a scoop of vanilla ice cream. When a spoon of cold vanilla meets a warm pocket of cherry, the texture contrast is everything — crunchy crust, jammy filling, creamy melt.
How I Know They’re Done
When these are perfect the tops are a deep golden amber and the edges have a slightly darker hue where the butter in the crust concentrates. The sound is subtle; if you tap the top lightly it has a faint crispness. You may see a tiny bit of cherry juice peeking through a seam; a little escape is okay, but large puddles mean you overfilled. If you bake them for 12 minutes and they look pale, give them the extra couple minutes — it makes a huge difference in flavor because the sugars caramelize more. If you want to check a center, pick one up gently with a spatula; the bottom should be set, not doughy.
A few tips I always share: let the dough sit at room temperature just long enough to be workable but not so long it becomes sticky; chill the filled bites for five minutes before baking if your kitchen is very warm to help them hold their shape; and if you want extra sparkle, sprinkle coarse sugar on top instead of regular sugar for a pretty crunch.
Small Twists and Memories
There are a couple of variations I make depending on the mood. Tossing a teaspoon of almond extract into the filling before you fill the dough gives a lovely, marzipan-like note that makes the bites taste a little fancier. For a streusel top, crumble a bit of cold butter, flour, and brown sugar and press it onto the top after the egg wash for extra texture. If cherries aren’t what you have, swap in blueberry or apple pie filling and the method is the same; I once made them with a mixed berry filling for a picnic and they disappeared before I finished arranging them on a plate.
I remember the summer my neighbor’s kid learned to make these with me; we turned them into mini faces with jam for eyes and tiny strips of crust for smiles. Kids love the hands-on folding and sealing step, and those moments are why I keep the recipe so simple.
If you’re serving a savory dish alongside and want a contrast, these bites are happy next to something like a quick breakfast spread. Sometimes I set them out with a savory tray and the combination works because sweet bites can reset the palate. I’ve even paired them with a skillet breakfast and a batch of McGriddle bites sweet sausage muffins for a brunch that felt indulgent without being complicated. For a dinner party, you could pair one or two of these with a small cheese plate and my friend’s favorite air-fried fish — I tried it once with a zesty side and it balanced perfectly; that’s when I bookmarked air fryer bang bang salmon bites as a savory counterpoint.
Little Practical Things: Leftovers and Make-Ahead
If you want to make these ahead, you can assemble them, place them on a parchment-lined sheet tray, cover lightly with plastic wrap, and refrigerate for up to a day before baking. For true make-ahead, freeze the shaped, sealed bites on a tray until firm and then bag them; you can bake from frozen, but add a few minutes to the bake time and watch the edges. Leftovers keep well in an airtight container in the fridge for two to three days; warm them briefly in a low oven to refresh the texture. Reheating in a toaster oven for a few minutes brings back some of the crispness in the crust. If you’re storing several days, separate layers with parchment so they don’t stick.
I love this recipe because it feels homemade even though it’s fast. The smell of cherries and warm pastry is nostalgic and comforting, the kind of thing that makes a Tuesday feel special. Making a big batch is easy when friends drop by, and they’re perfect for handing out at potlucks.
Conclusion
If you want a straight-up version of this idea from another cook’s kitchen, I keep the original inspiration bookmarked at Cherry Pie Bites – The Country Cook, which is a lovely companion to my quick method and little tweaks.
Quick Cherry Pie Bites
Ingredients
Method
- Preheat the oven to 425°F (220°C).
- Flour a board lightly and unroll the pie crusts.
- Roll out the pie crusts on a floured surface and cut them into small circles or squares.
- Place a small amount (about a tablespoon) of cherry pie filling in the center of each piece of dough.
- Fold the dough over the filling and seal the edges with a fork.
- Brush the tops with the beaten egg and sprinkle with sugar.
- Place on a baking sheet lined with parchment paper.
- Bake for 12 to 15 minutes or until golden brown.
- Keep an eye on the first batch; the aroma of caramelized sugar and warm cherries is a good indicator of readiness.
- Serve warm, optionally with a scoop of vanilla ice cream.