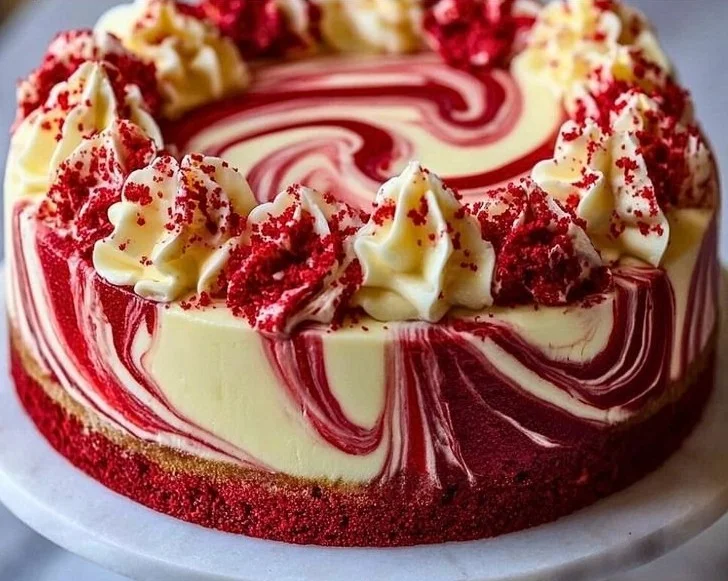
Red Velvet Cheesecake Swirl Cake
I still remember the afternoon it all came together: sunlight pooling on the counter, the smell of cocoa and vanilla combining into something that felt like nostalgia. That’s how Red Velvet Cheesecake Swirl Cake became my go-to for celebrations and quiet weekends alike. If you want a little twist on classic red velvet, this cake…
I still remember the afternoon it all came together: sunlight pooling on the counter, the smell of cocoa and vanilla combining into something that felt like nostalgia. That’s how Red Velvet Cheesecake Swirl Cake became my go-to for celebrations and quiet weekends alike. If you want a little twist on classic red velvet, this cake gives you the tender crumb and that tangy cream cheese ribbon in every bite—think velvet and cheesecake getting married in the oven. If you like playing with shapes or trying a themed dessert, I once adapted the batter for a heart-shaped red velvet cake and the look on everyone’s faces was worth the extra parchment.
What I keep on the counter when I make it
I don’t start a cake unless I can reach everything without pacing the kitchen a thousand times. For this one I always measure everything out first so the rhythm is smooth: 2 ½ cups all-purpose flour, 1 ½ cups granulated sugar, 2 tablespoons unsweetened cocoa powder, 1 teaspoon baking soda, ½ teaspoon salt, 1 cup buttermilk, 1 cup vegetable oil, 2 large eggs, 1 teaspoon white vinegar, 1 tablespoon red food coloring, 16 ounces cream cheese (room temperature), 1 ½ cups powdered sugar, 2 teaspoons vanilla extract. Saying it out loud like that helps me picture each step before I even preheat the oven.
Grease and line two 9-inch round cake pans with parchment paper. Preheat oven to 350°F (175°C). I always put the pans on the middle rack so heat circulates evenly.
How I put it together (without panicking)
Once the oven’s warming, I get the dry bowl going. 2. In a large bowl, whisk flour, sugar, cocoa powder, baking soda, and salt. The cocoa is just enough to deepen the red without making it chocolate-y; it gives a subtle background note that I love. Then the wet bowl: 3. In another bowl, mix buttermilk, oil, eggs, vinegar, vanilla, and food coloring. The vinegar reacts slightly with the baking soda and helps that classic tender red velvet texture—plus the red color pops against the cream cheese like a jewel.
-
Combine wet and dry mixtures, stirring until smooth and red. Don’t overdo it—mix until just combined. The batter should feel silky and pourable, not thick and gummy. While that’s happening, I start the cheesecake layer: 5. In a separate bowl, beat cream cheese until smooth. Add powdered sugar and vanilla; beat until fluffy. If your cream cheese is too cold it will clump, so letting it sit at room temperature is one of those small things that changes everything.
-
Pour red velvet batter into pans. Add spoonfuls of cheesecake mixture and swirl with a knife. I spoon the red batter in first, then dot with the cream cheese mixture, then drag a knife through in wide, lazy S shapes. The swirl doesn’t need to be perfect—messier swirls bake into prettier marbling. 7. Bake for 30-35 minutes. Cool for 10 minutes in pans, then completely on racks. You want the edges to be set and the center to have a tiny jiggle; a toothpick might come out with a few moist crumbs because of the cheesecake, and that’s okay. I take mine out once the top has a subtle give and the edges pull slightly away from the pan.
-
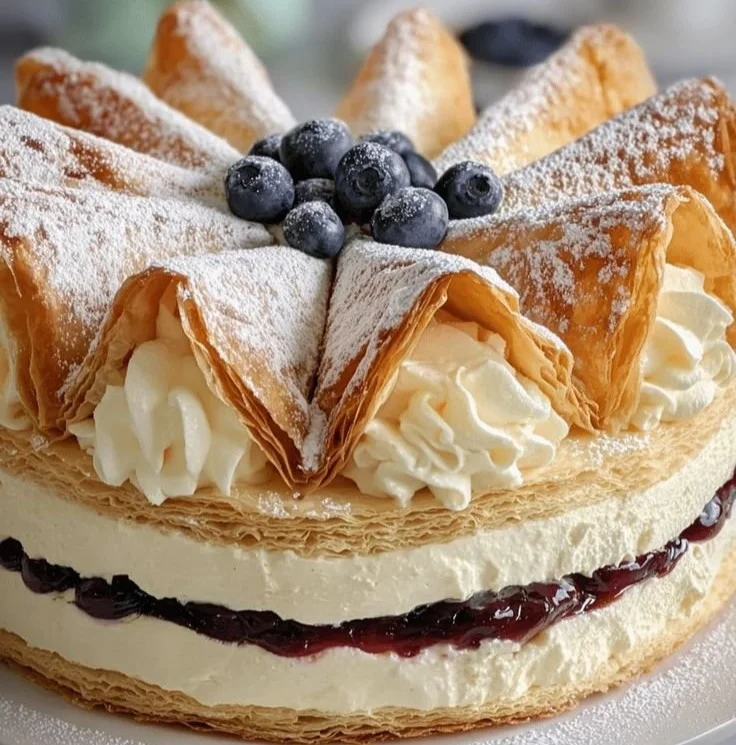
Frost with remaining cheesecake mix or cream cheese frosting. Decorate with swirls and crumbs. For serving I often reserve a little extra whipped cream or a dusting of cocoa and some fresh berries. The contrast of bright berries with the deep red looks stunning and tastes bright against the rich cake.
A few tricks that save the day
One: always use room-temperature cream cheese and eggs—cold ingredients make the batter lumpy. Two: when you’re swirling, less is more; a few decisive motions create the prettiest marbling. Three: if you want even layers, divide the batter and cheesecake filling into two equal portions using a kitchen scale or measuring cup—that way both cakes match and stack beautifully. Four: if you prefer a pronounced cheesecake top, scoop more of the cream cheese mix on top and smooth it gently before baking. I keep a small towel under the bowl while I beat the cream cheese so I don’t end up with frosting on the counter—little practical things like that keep me baking instead of cleaning.
If you want to play with a gooey center rather than a chiffon-like cake, check out my experiment inspired by molten red velvet cakes—adjusting bake time a touch gives a luscious, semi-molten pocket. And if you’re curious about simpler red velvet basics, I often cross-reference a straightforward red velvet cake recipe when I’m doubling quantities or simplifying for a crowd.
When it’s done right and how to serve it
Knowing when a cake like this is done is a little looser than other cakes because of the cheesecake. The cake’s edges should feel set, it should spring back lightly when you press the center, and the cheesecake ribbons should have a slight golden edge. If the center still looks raw, give it a few more minutes; if the top begins to brown too fast, tent with foil.
I like serving slices with a spoonful of lightly whipped cream and a handful of raspberries or strawberries. Coffee is my usual companion, though a cold glass of milk makes it feel like a Sunday. For parties I slice it thin; the swirls are so pretty that even small pieces look generous.
Variations, make-ahead thoughts, and a memory
You can swap the cocoa for an extra teaspoon if you like a deeper cocoa note, or fold in a cup of white chocolate chips for pockets of sweetness. Another fun change is to add a teaspoon of instant espresso to the wet mix to boost the chocolate tone. If you’re feeling nostalgic, I once turned leftovers into red velvet cake truffles by crumbling cooled slices, mixing with a bit of frosting, and chilling—bite-sized heaven.
Make-ahead: you can bake the layers a day in advance, wrap them tightly, and refrigerate. Because there’s cream cheese involved, leftover cake should be refrigerated in an airtight container for up to 4 days; if you need to keep it longer, the plain cake layers freeze well before frosting. When I plan a party, I often bake the day before and frost the morning of—less frantic and everything tastes fresher.
A final memory: my grandmother taught me to never skip the parchment—she’d say the cake is too pretty to lose to a pan. That little habit saved me dozens of sticky disasters and helped the cake come out in perfect rounds every time. That gentle tug of parchment off a warm cake still feels like a small victory.
Conclusion
If you want another riff on cream-cheese-swirl treats, I often look at recipes like Red Velvet Cheesecake Swirl Brownies – Sally’s Baking Addiction for inspiration on texture and ratio adjustments. For a different shape and presentation idea, this Red Velvet Cream Cheese Swirl Bundt Cake – Sprinkle Bakes gives a beautiful alternative to the round layers.
Red Velvet Cheesecake Swirl Cake
Ingredients
Method
- Grease and line two 9-inch round cake pans with parchment paper.
- Preheat oven to 350°F (175°C).
- In a large bowl, whisk together the flour, sugar, cocoa powder, baking soda, and salt.
- In another bowl, mix together buttermilk, oil, eggs, vinegar, vanilla, and red food coloring.
- Combine the wet and dry mixtures, stirring until smooth but do not overmix.
- In a separate bowl, beat the cream cheese until smooth.
- Add powdered sugar and vanilla; beat until fluffy.
- Pour the red velvet batter into the prepared pans.
- Add spoonfuls of the cheesecake mixture and swirl with a knife.
- Bake for 30-35 minutes until edges are set and the center has a slight jiggle.
- Cool in pans for 10 minutes, then transfer to racks to cool completely.
- Frost with remaining cheesecake mix or cream cheese frosting.
- Decorate with swirls of frosting, cocoa, and fresh berries.