Red Velvet Cookies with Easy Cream Cheese Frosting
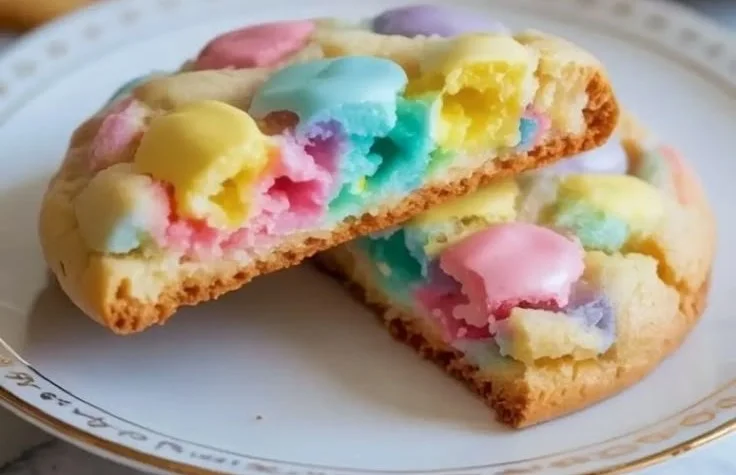
There’s something undeniably enchanting about the deep, rich hue of red velvet cookies, and when you add a luscious layer of cream cheese frosting on top, it’s like inviting a piece of magic to your kitchen. These cookies are not just a treat; they embody a festive spirit that warms the heart and titillates the…
There’s something undeniably enchanting about the deep, rich hue of red velvet cookies, and when you add a luscious layer of cream cheese frosting on top, it’s like inviting a piece of magic to your kitchen. These cookies are not just a treat; they embody a festive spirit that warms the heart and titillates the taste buds. Picture this: a tender, velvety bite that melts in your mouth, with a hint of chocolate and the tang of cream cheese dancing together in perfect harmony. Whether you’re celebrating a special occasion or simply treating yourself on a cozy afternoon, these cookies are sure to delight.
The Allure of Red Velvet Cookies with Easy Cream Cheese Frosting
Why should these velvety delights hold a special place in your heart? Let me share a few reasons why this recipe deserves a spot in your kitchen:
- A Showstopper for Any Occasion: Their striking color and delightful flavor make these cookies perfect for celebrations, holidays, or simply as a sweet surprise for loved ones.
- Simplicity Meets Elegance: With straightforward ingredients and easy instructions, you’ll impress your friends and family without spending hours in the kitchen.
- Irresistible Flavor Profile: The subtle cocoa powder combined with a sweet, tangy cream cheese frosting creates a wonderful symphony of flavors that isn’t too rich or overpowering.
- Versatile for Personalization: Feel free to add your own twist with mix-ins or toppings, adapting these cookies to suit your taste perfectly.
Gathering Your Ingredients
Before we roll up our sleeves and dive into baking, let’s gather everything we need. Here’s a list of the ingredients that’ll make these red velvet cookies shine:
- 2 cups all-purpose flour (240g): The foundation of our cookies, giving them structure and chewiness.
- 2 tablespoons unsweetened cocoa powder (15g): Adds a hint of chocolate flavor that complements the red velvet beautifully.
- 1 teaspoon baking soda (5g): This will help our cookies rise to a perfectly tender texture.
- 1/2 teaspoon fine sea salt (3g): Just a pinch to enhance flavors and balance the sweetness.
- 1/2 cup unsalted butter, room temperature (113g): The rich base that ensures buttery flavor and a soft, flaky texture.
- 3/4 cup granulated sugar (150g): Sweetness is key, providing that lovely sugary warmth.
- 1 large egg, room temperature: The binding agent that brings all the ingredients together for a cohesive dough.
- 2 teaspoons pure vanilla extract (10ml): A must for elevating the flavor and imparting a comforting aroma.
- 1 teaspoon distilled white vinegar (5ml): This clever addition reacts with the baking soda, lending moisture and that signature red velvet flavor.
- 1 1/2 tablespoons red gel food coloring (22ml): This is where the magic happens! The gel ensures a vibrant red without adding too much liquid.
- Optional: 1/2 cup white chocolate chips (85g): For those moments when you want an extra touch of sweetness and creaminess.
- Optional: Valentine’s sprinkles: Because let’s be honest, everything is better with a sprinkle of joy!
For the Cream Cheese Frosting:
- 4 ounces cream cheese, softened (113g): The star of the frosting show, providing richness and tang.
- 2 tablespoons unsalted butter, softened (28g): Adds an extra layer of creaminess to the frosting.
- 1 cup powdered sugar, sifted if clumpy (120g): Ensures that our frosting is the perfect balance of sweetness and smoothness.
- 1/2 teaspoon vanilla extract (2.5ml): For that wonderful aroma and taste that complements the cream cheese.
- Pinch of salt: A little salt goes a long way in enhancing the flavors.
Let’s Bake!
Now that we’ve gathered our ingredients, let’s get to the fun part—baking these delightful cookies! Follow these simple steps to create a batch that will be the talk of your kitchen (and beyond):
- Preheat your oven to 350°F (175°C). Line two baking sheets with parchment paper, making prep a breeze.
- In a medium bowl, whisk together the flour, cocoa powder, baking soda, and salt until well combined. This blend creates the perfect cookie foundation!
- In a large bowl, beat the room-temperature butter and granulated sugar together until light and fluffy—about 2 minutes using a hand mixer on medium speed. This step brings air into the mixture, ensuring a tender cookie.
- Gradually beat in the egg, vanilla extract, and vinegar until smooth, scraping down the sides as needed for even incorporation.
- Add the vibrant red gel food coloring and mix until the batter is a bright, beautiful red. Trust me; this step will excite you!
- Carefully fold in the dry ingredients from the medium bowl to the wet ingredients. Remember, gentle mixing is key—overmixing could lead to tough cookies!
- If you’re using white chocolate chips, now’s the time to fold them in. Who says we can’t have a little more sweetness?
- Scoop the dough into balls about 1 1/2 tablespoons in size and place them on the prepared baking sheets, spacing them around 2 inches apart.
- Bake in the preheated oven for 10-12 minutes. The edges should be set while the centers remain soft for that glorious, chewy texture. If you want perfectly round cookies, use a round cutter to shape them immediately after baking.
- Allow the cookies to cool on the baking pan for about 5 minutes before transferring them to a wire rack to cool completely.
- Now for the cream cheese frosting! Beat the softened cream cheese and butter together until smooth. Gradually add the powdered sugar, vanilla, and a pinch of salt, beating until fluffy—this should take about a minute. If it’s too stiff, add a teaspoon of milk for a softer consistency.
- Finally, spread or pipe the frosting onto the cooled cookies and decorate with sprinkles, if desired.
Tricks of the Trade
Here are some expert tips to ensure your red velvet cookies turn out perfectly every time:
- Room Temperature Ingredients: Make sure your butter and egg are at room temperature. This helps create a creamier batter and better texture in the cookies.
- Gel Food Coloring: Using gel food coloring instead of liquid will give you that vibrant hue without altering the batter’s consistency.
- Don’t Overmix: Mixing the dry and wet ingredients until just combined will yield lighter cookies. Overmixing can develop the gluten in the flour, leading to denser cookies.
- Cooling Time: Letting the cookies cool a bit before frosting helps prevent the cream cheese from melting and becoming runny. We want a luscious yet sturdy frosting!
- Frosting Variations: If you want a zesty kick, add a splash of lemon juice or zest into your frosting to brighten the flavor profile.
Adding Your Personal Touch
If you’re feeling adventurous and want to switch things up, here are some variations to consider:
- Add Spices: A dash of cinnamon or nutmeg can bring a warm, cozy flavor to your cookies.
- Nuts and Seeds: Walnuts or pecans chopped and folded into the dough add great texture and crunch.
- Chocolate Ganache Topping: Instead of cream cheese frosting, drizzle a rich chocolate ganache for a chocoholic twist.
- Mint Flavor: Adding a few drops of mint extract to your frosting creates a lovely minty bite that’s sure to impress!
- Red Velvet Sandwich Cookies: Pipe frosting between two cookies for a delightful twist and creamy bite!
Delightfully Displaying Your Cookies
When it comes to serving your red velvet cookies, presentation is key. Arrange them on a beautiful platter or a tiered cake stand to add elegance to your table. Pair these cookies with a piping hot cup of coffee or a soothing herbal tea, allowing the flavors to meld in your mouth. If you’re celebrating, add a few festive decorations or placeholders with sweet messages for your guests. And for an extra touch, consider serving them alongside some luscious strawberries or raspberries to complement the richness of the cookies!
Keeping Those Cookies Fresh
Wondering how to store your delightful cookies? Here’s how to keep them fresh and delicious for days to come:
- Room Temperature Storage: Store your cookies in an airtight container at room temperature. They’ll stay fresh for about 3-4 days. Just be mindful not to stack them if they’re frosted, as they can stick together!
- Refrigeration: If you prefer a chilled treat, pop the cookies in the fridge. They’ll last about a week but note that the cream cheese might firm up a bit.
- Freezing: You can freeze the cookies for up to three months. Place them in a zip-top freezer bag or airtight container, removing as much air as possible before sealing. Frost them once completely thawed for the best texture.
- Reheating Tips: If you want to enjoy a freshly baked taste after freezing, simply thaw, then warm them in the oven for a few minutes at a low temperature.
Your Questions Answered
As you embark on your cookie-baking adventure, you might have some questions. Here are a few commonly asked ones:
- Can I use liquid food coloring instead? It’s best to use gel food coloring as it provides a deeper color without changing the batter’s moisture level.
- What can I do if my cream cheese frosting is too runny? If your frosting is too runny, simply add more powdered sugar—a teaspoon at a time—until you reach the desired consistency.
- Can I make the dough ahead of time? Absolutely! You can prepare the cookie dough, wrap it tightly, and refrigerate it for up to 2 days before baking. Let it sit at room temperature for a few minutes before scooping.
- How can I get the cookies to be softer? Underbake slightly, keeping in mind that they’ll continue to cook a little on the baking sheet after being removed from the oven.
Baking these red velvet cookies with easy cream cheese frosting is not just about creating a sweet treat; it’s about crafting delicious memories laden with joy. The process, the aroma wafting through your kitchen, and the sheer delight when you take that first bite are what make this recipe truly special. So gather your ingredients, put on your favorite apron, and let’s create some magic together. I can’t wait for you to try these cookies—trust me, they will become a cherished favorite in your baking repertoire!

Red Velvet Cookies with Easy Cream Cheese Frosting
Ingredients
Method
- Preheat your oven to 350°F (175°C) and line two baking sheets with parchment paper.
- In a medium bowl, whisk together the flour, cocoa powder, baking soda, and salt until well combined.
- In a large bowl, beat the room-temperature butter and granulated sugar together until light and fluffy—about 2 minutes.
- Gradually beat in the egg, vanilla extract, and vinegar until smooth, scraping down the sides as needed.
- Add the gel food coloring and mix until the batter is vibrant red.
- Carefully fold in the dry ingredients.
- If using, fold in the white chocolate chips.
- Scoop the dough into balls about 1 1/2 tablespoons in size and place them on the baking sheets, spacing them 2 inches apart.
- Bake for 10-12 minutes until the edges are set and the centers remain soft.
- Allow the cookies to cool on the baking pan for about 5 minutes before transferring to a wire rack.
- Beat the softened cream cheese and butter together until smooth.
- Gradually add the powdered sugar, vanilla, and a pinch of salt, beating until fluffy.
- Spread or pipe the frosting onto cooled cookies and decorate with sprinkles if desired.