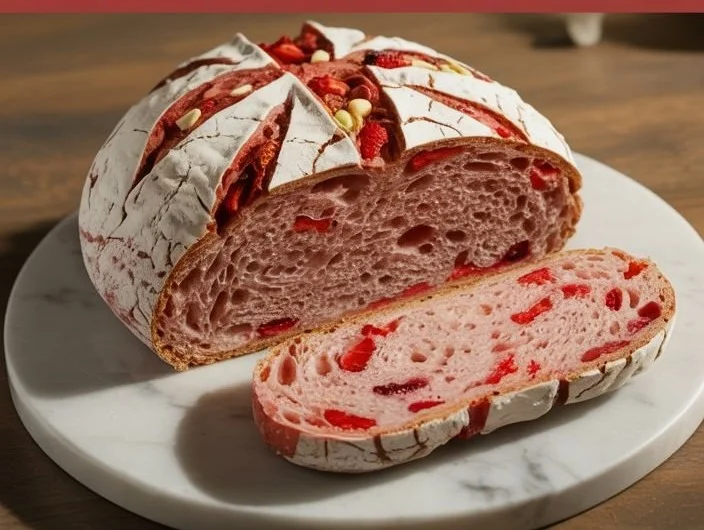
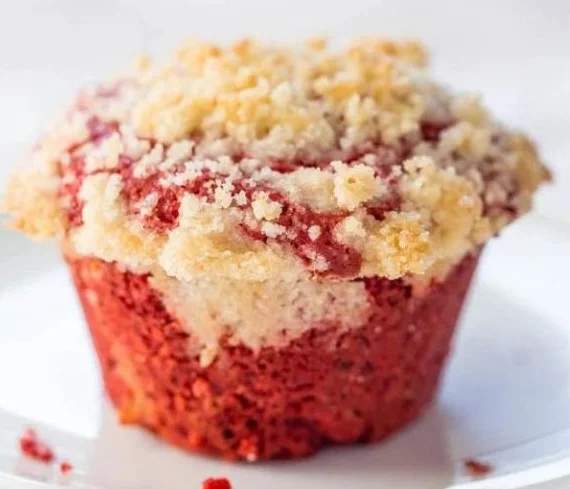
Red Velvet Cream Cheese Muffins
I still remember the first time I bit into a warm Red Velvet Cream Cheese Muffin: the cake was tender and a little cakey around the edges, the cream cheese center pleasantly tangy and silky, and the streusel on top added a buttery crunch that made me close my eyes. These muffins are as comforting…
I still remember the first time I bit into a warm Red Velvet Cream Cheese Muffin: the cake was tender and a little cakey around the edges, the cream cheese center pleasantly tangy and silky, and the streusel on top added a buttery crunch that made me close my eyes. These muffins are as comforting as a cozy sweater and as celebratory as confetti — small, jewel-like treats that brighten a morning or steal the show at a brunch. If you love red velvet cookie cups, this recipe gives you that same cream cheese bliss in a muffin form with a crunchy crumb on top: red velvet cookie cups with cream cheese frosting.
Why You’ll Fall for These Muffins
- They offer a delightful contrast: moist, chocolate-kissed red velvet crumb with pockets of smooth, slightly tangy cream cheese.
- The crumb topping adds a glistening, buttery crunch that changes the texture with every bite.
- They’re versatile — perfect for a weekday pick-me-up, a birthday brunch, or tucked into a lunchbox.
- The recipe is forgiving; the batter is thick and forgiving of a few lumps, so it’s great for home bakers of all levels.
- They freeze beautifully, so you can bake a batch and enjoy them over several weeks.
Gathering Your Ingredients
- 1/2 cup granulated sugar — for the crumb topping; provides sweet, sandy texture.
- 1/4 cup all-purpose flour — binds the crumb and keeps it slightly tender.
- 2 tablespoons unsalted butter (diced into cubes) — cold butter cut into the flour creates that coarse, flaky crumb.
- 4 ounces brick-style cream cheese (softened (lite is okay)) — the star of the filling, adding tang and creaminess.
- 1/4 cup granulated sugar — for the cream cheese filling; balances the tang.
- 1/2 teaspoon vanilla extract — rounds and lifts the cream cheese flavor.
- 1 1/4 cups all-purpose flour — the base of the muffin, gives structure.
- 1/2 cup granulated sugar — sweetens the muffin batter.
- 2 teaspoons baking powder — the lift that creates a tender crumb.
- 1/2 teaspoon salt (or to taste) — enhances all flavors.
- 1 large egg — binds and enriches the batter.
- 1/2 cup canola or vegetable oil — keeps the crumbs moist and tender.
- 1/3 cup buttermilk — adds tang and tenderness while activating the baking powder.
- 2 tablespoons natural unsweetened cocoa powder — small but essential for that subtle red velvet chocolate note.
- 2 teaspoons red liquid food coloring (I used McCormick) — gives the muffins that signature, celebratory hue.
If you enjoy playing with red velvet variations, try these related cookie ideas for more cream cheese combinations: red velvet cookie cups with cream cheese frosting.
Let’s Get Baking: Step-by-Step Directions
These instructions are straightforward and kind to home bakers. Follow them in order and enjoy the little moments — creaming the filling, cutting the butter into crumbs, and seeing the batter swirl with cream cheese.
- Preheat oven to 375F.
- Spray a Non-Stick 12-Cup Regular Muffin Pan very well with floured cooking spray or grease and flour the pan; set aside. (I don’t prefer the cosmetic look of muffin liners).
- Crumb Topping – To a medium bowl, add the sugar, flour, and using two forks or a pastry cutter, cut in the butter until you have coarse crumbs; set aside.
- Cream Cheese Mixture – To a separate medium bowl, combine the cream cheese, sugar, vanilla, and beat with a handheld electric mixer until smooth, or whisk by hand until smooth; set aside.
- Muffins – To a large bowl, add the flour, sugar, baking powder, salt, and whisk to combine; set aside.
- To a separate medium bowl, add the egg, oil, buttermilk, cocoa powder, red food coloring, and whisk to combine.
- Add the wet ingredients to the dry and stir just until moistened. Batter is thick and some lumps will remain, don’t overmix.
- Fold the cream cheese mixture into the muffin batter, being careful not to overmix. Some streaks of cream cheese should remain.
- Turn batter out into prepared pan, filling each cavity about two-thirds full.
- Evenly sprinkle each muffin with the crumb topping.
- Bake for about 17 to 19 minutes, or until a toothpick inserted in the center comes out clean or with a few moist crumbs but no batter.
- Allow muffins to cool in pan for about 10 minutes, or until they’ve firmed up and are cool enough to handle, and then transfer to a rack to cool completely. Muffins will keep airtight at room temperature for up to 3 days (I’m comfortable storing baked good with cream cheese at room temp, but use the fridge if you prefer), or in the freezer for up to 4 months.
- Lightly adapted from Red Velvet Lover’s Cookbook who blogs at Taste and Tell.
If you want another fun cream cheese-filled red velvet idea, I like the soft center in these cookies: red velvet cookies with easy cream cheese frosting.
Pro Tips to Nail the Texture
- Keep the cream cheese cold while making the crumb topping, but softened for the filling. That contrast helps you create distinct pockets of filling.
- Don’t overmix after adding wet to dry. Lumps are fine and lead to a tender muffin. I always stop mixing as soon as the last dry streak disappears.
- Use a scoop to fill the muffin pan for even portions and consistent bake times.
- If you prefer a glossier top, brush the crumb with a touch of warmed apricot jam after baking. It’s a small trick I picked up from brunch experiments.
- Test one muffin with a toothpick: you want a few moist crumbs for the perfect moistness, not raw batter.
Creative Twists to Try
- Swap half the oil for melted butter for a richer flavor and a slightly golden edge.
- Stir in mini white chocolate chips for pockets of sweet, creamy melt.
- Add 1/2 teaspoon instant espresso powder to the wet ingredients to deepen the cocoa notes without making it taste like coffee.
- Make them bite-sized in a mini muffin tin for parties and drop the baking time to about 10 to 12 minutes.
- Turn them into cupcakes: bake the batter in lined pans and top with a decadent cream cheese frosting. If you like thumbprint-style fillings, you might enjoy this related idea: red velvet cream cheese thumbprint cookies.
How to Serve and Savor
Serve these muffins warm so the cream cheese still feels pillow-soft and the crumb topping glistens. They’re lovely with a steaming mug of coffee or a milky hot chocolate. For brunch, place them on a cake stand with a scattering of fresh berries; the bright red of the muffin makes a beautiful contrast against deep blue berries. For gifting, wrap a stack of three in parchment and tie with twine — the combination of colors and textures feels festive and thoughtful.
Keeping Them Fresh: Storage Tips
Store at room temperature in an airtight container for up to three days, placing a paper towel on top of the muffins to absorb extra moisture if you like a crisper crumb. If you prefer refrigeration because of the cream cheese, keep them in the fridge for up to five days. To freeze, wrap individually in plastic and place in a freezer-safe bag for up to four months; thaw at room temperature and warm briefly in a low oven for that freshly baked feel. For reheating, 10 to 15 seconds in the microwave is great for a quick warm-up, or 8 to 10 minutes at 300F in an oven revives the crumb and topping.
Questions You Might Have
Q: Can I use low-fat cream cheese for the filling?
A: Yes, light cream cheese works fine and still gives you that tangy creaminess. The texture will be slightly less rich but still delicious.
Q: What if I don’t have buttermilk?
A: Make a quick substitute by stirring 1 tablespoon white vinegar or lemon juice into 1/3 cup milk and let it sit for 5 minutes. It’s not identical, but it adds the necessary acidity.
Q: Can I make this dairy-free?
A: Swap in a dairy-free cream cheese and use a neutral oil you like. Choose a non-dairy milk thinned with a touch of vinegar for buttermilk. Expect slight differences in texture and richness.
Q: How do I stop the cream cheese from sinking?
A: Ensure the cream cheese mixture is just soft, not runny, and fold it gently. Cold pan or overfilling can also lead to sinking, so fill pans about two-thirds full as directed.
Conclusion
These Red Velvet Cream Cheese Muffins are one of those recipes that feel elevated yet comfortingly familiar — tender and tenderly chocolate-kissed, with tangy pockets of cream cheese and a buttery crumb that sings in your mouth. If you want to compare versions or see other people’s takes for inspiration, check out this classic collection of Red Velvet Muffins with Cream Cheese Filling, this homestyle approach at Red Velvet Cream Cheese Muffins – A baJillian Recipes, and Averie’s glossy, bakery-style take Red Velvet Cream Cheese Muffins – Averie Cooks. Go ahead, preheat the oven, and make a batch — part of the joy is how quickly a little baking can brighten a day. If you try them, I’d love to hear how your crumb turned out and any twists you added.
Red Velvet Cream Cheese Muffins
Ingredients
Method
- Preheat oven to 375F.
- Spray a Non-Stick 12-Cup Regular Muffin Pan very well with floured cooking spray or grease and flour the pan; set aside.
- In a medium bowl, add the sugar, flour for the crumb topping, and using two forks or a pastry cutter, cut in the butter until you have coarse crumbs; set aside.
- In a separate medium bowl, combine the cream cheese, sugar, and vanilla; beat with a handheld electric mixer until smooth, or whisk by hand until smooth; set aside.
- In a large bowl, add the flour, sugar, baking powder, salt for the muffins; whisk to combine; set aside.
- In a separate medium bowl, add the egg, oil, buttermilk, cocoa powder, red food coloring, and whisk to combine.
- Add the wet ingredients to the dry and stir just until moistened. Batter is thick and some lumps will remain, don’t overmix.
- Fold the cream cheese mixture into the muffin batter, being careful not to overmix. Some streaks of cream cheese should remain.
- Turn batter out into prepared pan, filling each cavity about two-thirds full.
- Evenly sprinkle each muffin with the crumb topping.
- Bake for about 17 to 19 minutes, or until a toothpick inserted in the center comes out clean or with a few moist crumbs but no batter.
- Allow muffins to cool in pan for about 10 minutes, then transfer to a rack to cool completely.