Red Velvet Marble Waffles
There’s something truly enchanting about the way Red Velvet Marble Waffles come together: the vibrant red swirls dancing alongside the rich cocoa hues create a visual feast for the eyes even before that first forkful. As you pour syrup over these delicate, fluffy waffles, you’re met with the sweet aroma that wafts up, making your…
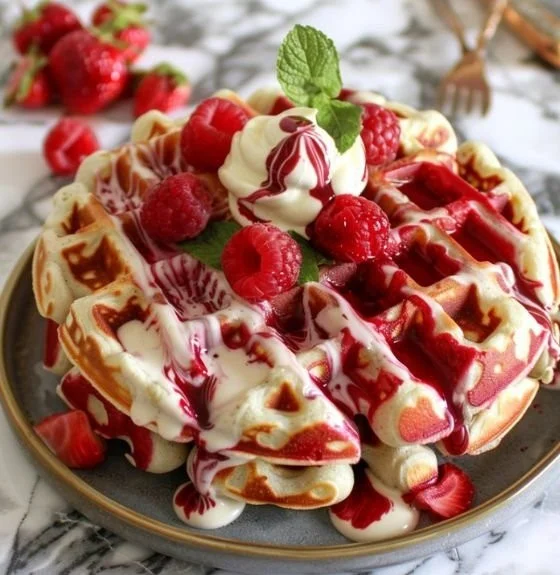
There’s something truly enchanting about the way Red Velvet Marble Waffles come together: the vibrant red swirls dancing alongside the rich cocoa hues create a visual feast for the eyes even before that first forkful. As you pour syrup over these delicate, fluffy waffles, you’re met with the sweet aroma that wafts up, making your mouth water in anticipation. Whether you’re looking to add a special touch to a cozy breakfast or surprise your loved ones with something out of the ordinary, these delightful waffles promise to elevate your brunch game to new heights.
You’re Going to Love This
What sets these Red Velvet Marble Waffles apart from your standard breakfast fare? Let me share a few reasons why this recipe deserves a prime spot in your kitchen:
- A Feast for the Eyes: The beautiful marbling effect is not just for show; it adds an element of artistry to your breakfast table that’s sure to impress anyone who sees (or tastes) them.
- The Perfect Balance of Flavors: Combining the classic richness of chocolate with the unique touch of red velvet, each bite is a pleasant surprise that dances on your palate.
- Endless Creativity: These waffles serve as a fantastic base for various toppings. From cream cheese frosting to fresh strawberries, the options are limited only by your imagination.
- Fun to Make: Mixing and layering the batters can be a joy, especially if you have little ones helping out. They’ll love creating their own waffle masterpieces!
- Impressive Yet Simple: While they look sophisticated, these waffles are easy to whip up and are perfect for any occasion—from a casual Saturday breakfast to a festive holiday brunch.
Gathering Your Ingredients
Before you dive into the cooking process, let’s make sure you have everything at hand. Here’s what you’ll need to whip up these delectable waffles, along with some helpful tidbits about each ingredient:
- 1 1/2 cups all-purpose flour: This forms the base of your waffles, giving them that lovely fluffy texture.
- 1 tablespoon baking powder: This will help your waffles rise, ensuring they’re light and airy with each bite.
- 1/2 teaspoon salt: Just a pinch to enhance the sweetness and balance the flavors beautifully.
- 1 tablespoon sugar: Adds a light sweetness that complements the other ingredients without overpowering them.
- 1 cup milk: The moisture hero, contributing to the waffles’ tenderness and flavor; feel free to use almond or oat milk for a non-dairy alternative!
- 2 large eggs: These bind the ingredients together and help create that delightful structure.
- 1/4 cup vegetable oil: This adds richness and ensures your waffles don’t stick to the iron.
- 1 teaspoon vanilla extract: A splash of vanilla goes a long way in enhancing the overall flavor profile.
- 2 tablespoons cocoa powder: This introduces that rich, chocolatey goodness into the mix.
- 1 tablespoon red food coloring: The star of the show! It gives the red velvet aspect of the dish that signature hue.
Let’s Get Cooking
Now that you have everything prepped, it’s time to create your very own batch of Red Velvet Marble Waffles. Follow these steps, and you’ll have a beautiful tower of waffles ready for syrup and toppings in no time!
- Preheat your waffle iron according to the manufacturer’s instructions. This ensures your waffles cook evenly and become delightfully crispy on the outside.
- In a large bowl, whisk together the flour, baking powder, salt, and sugar until well combined. This will help to evenly distribute all the dry ingredients.
- In another bowl, mix the milk, eggs, vegetable oil, and vanilla extract until smooth and creamy. The smell of vanilla will fill the air, adding a warm, inviting scent to your kitchen.
- Combine the wet and dry ingredients, stirring gently until just blended. Be careful not to overmix to keep your waffles fluffy!
- Divide the batter in half. To one half, mix in the cocoa powder and red food coloring. This is where the magic happens—watch your batter transform into a luscious chocolatey red delight!
- Spoon dollops of the classic batter and the red velvet batter alternately into the waffle iron to create a marbled effect. Have fun with this step; you can mix it up as much as you like.
- Close the waffle iron and cook according to the manufacturer’s instructions until the waffles are fluffy and cooked through. Check for that perfect golden-brown color!
- Serve with your favorite toppings such as whipped cream or syrup. I personally love drizzling maple syrup over mine, allowing it to cascade down and pool in the waffle’s nooks and crannies.
My Favorite Tricks
To really impress with these waffles, here are a few tips to ensure they come out perfect every time:
- Preheat the Iron: Make sure your waffle iron is nice and hot before pouring in the batter. This will lock in the fluffiness and create that perfect crisp.
- Experiment with Flavors: Don’t hesitate to add a dash of spices like cinnamon or nutmeg into the batter for a cozy twist.
- Don’t Overmix: A few lumps in the batter are okay! Overmixing can lead to tough waffles, and we definitely want them to be soft and tender.
- Test First Waffle: The first waffle usually tells the tale. If it’s too light, your iron might need additional heat; if it’s too dark, it might be too hot.
- Stay Creative: Feel free to add a handful of chocolate chips or nuts to your batter for added texture and flavor.
Creative Twists
Feeling adventurous? Here are some fun ways to make your Red Velvet Marble Waffles even more uniquely yours:
- Swap the Cocoa: Instead of using cocoa powder, try white chocolate for a different flavor profile that still gives you the marble effect.
- Berries Galore: Add fresh blueberries or raspberries into the classic batter for a burst of fruity flavor that pairs beautifully with red velvet.
- Gluten-Free Option: Use a gluten-free all-purpose flour to make this recipe suit those with dietary restrictions.
- Spice it Up: Add a hint of cinnamon or allspice to the batter for a spiced red velvet twist that warms the heart.
- Dairy-Free Delight: Experiment using almond or coconut milk along with a vegan egg substitute to whip up a delightful dairy-free version.
Perfect Pairings to Elevate Your Meal
Now that your Red Velvet Marble Waffles are looking stunning on your plate, let’s talk about how to present them. Imagine this: a stack of waffles topped with a generous dollop of whipped cream that glistens in the morning light, fresh berries cascading down the sides, and a sprinkle of chocolate shavings for that final touch of elegance.
You could also serve them with a side of crispy bacon or savory sausage for a delightful sweet-and-salty balance. For an extra indulgent experience, drizzle some cream cheese frosting atop the warm waffles—truly a match made in heaven!
Keeping Your Waffles Fresh
If you happen to have some leftover waffles, you’re in luck! They can be stored easily to ensure you enjoy them for days to come. Here’s how:
- Refrigeration: Place your uneaten waffles in an airtight container or wrap them in plastic wrap. Store in the refrigerator for up to three days.
- Freezing: For longer storage, allow your waffles to cool completely. Then, layer them between sheets of parchment paper and place them in a freezer-safe bag or container. They can last up to two months in the freezer without losing their deliciousness.
- Reheating: When you’re ready to enjoy them again, simply pop them in the toaster or oven to refresh their warmth and crispiness rather than using a microwave, which can make them soggy.
Your Questions Answered
If you have lingering curiosity or want to enhance your waffles further, here are some common questions that people often ask:
- Can I make the batter ahead of time? Absolutely! You can prepare the batter the night before and store it in the fridge. Just give it a good stir before using.
- Can I use a different food coloring? Yes! While red food coloring is traditional, you can experiment with gel-based or natural food colorings to achieve different hues.
- What if I can’t find red food coloring? No problem! You can omit it for just chocolate waffles, or use beet juice as a natural alternative, adding sweetness and color.
- Are these waffles okay to serve for special occasions? Definitely! Their stunning appearance and unique flavor make them perfect for Valentine’s Day, birthdays, or any fun gathering.
As you embark on your waffle-making adventure, I hope you fall in love with these Red Velvet Marble Waffles just like I have. Their captivating colors and scrumptious flavors are sure to create memorable moments at your breakfast table! Go ahead and give this recipe a try—your tastebuds are waiting for the delightful experience that will surely start or elevate your day!
Red Velvet Marble Waffles
Ingredients
Method
- Preheat your waffle iron according to the manufacturer’s instructions.
- In a large bowl, whisk together the flour, baking powder, salt, and sugar until well combined.
- In another bowl, mix the milk, eggs, vegetable oil, and vanilla extract until smooth and creamy.
- Combine the wet and dry ingredients, stirring gently until just blended.
- Divide the batter in half. To one half, mix in the cocoa powder and red food coloring.
- Spoon dollops of the classic batter and the red velvet batter alternately into the waffle iron.
- Close the waffle iron and cook according to the manufacturer’s instructions, checking for golden-brown color.
- Serve with your favorite toppings such as whipped cream or syrup.