Red Velvet Marble Waffles
Red Velvet Marble Waffles I never set out to make something that looked like a dessert and breakfast at the same time; it happened when I experimented with two batters and a warm iron. If you want a compact reference while trying this at home, I found a helpful internal write-up on red velvet marble…
Red Velvet Marble Waffles
I never set out to make something that looked like a dessert and breakfast at the same time; it happened when I experimented with two batters and a warm iron. If you want a compact reference while trying this at home, I found a helpful internal write-up on red velvet marble waffles on WiseRecipes that reminded me to keep the cocoa batter bold and the red batter bright.
Ingredients in plain language: enough plain white flour for a light batter (about one and a half cups), a spoonful or so of chemical leavener to give the waffles lift, a small pinch of salt and a teaspoon-ish of sugar to balance flavors, plus milk and two eggs to bind and thin. I use a neutral vegetable oil instead of melted butter because it keeps the exterior snappy while the interior stays tender; a splash of vanilla smooths the flavor. To make the marble effect I set aside a couple of tablespoons of the base batter and stir in cocoa powder to make a chocolate portion, then tint the remainder with a tablespoon of red coloring until it looks like Valentine’s frosting in liquid form.
Mixing technique matters more than measuring to the gram. I whisk the dry components in one bowl until homogenous; in another I beat together milk, eggs, oil, and vanilla until the yolk ribbons show. The wet goes into the dry and I fold gently—lumps are okay, over-mixing isn’t. Scoop a small ladle of plain batter onto the hot waffle iron, then drop a spoonful of the cocoa batter beside it; with the tip of the ladle I swirl once or twice to create veins without turning them into a uniform brown. Close the iron and let it steam away — you want deep mahogany ridges and a soft, cake-like interior.
If you’re curious about making a gluten-free version, I experimented once and learned a lot from this gluten-free adaptation on WiseRecipes — a blend of rice and tapioca flour plus a binder kept the structure close to the all-purpose original, though the crust finished a touch differently.
Practical timing: preheat the waffle iron fully, which takes a few minutes; each waffle usually needs three to four minutes depending on how dark you like them. I keep finished waffles in a warm oven (about 200°F / 95°C) on a rack so steam escapes and they stay crisp rather than soggy.
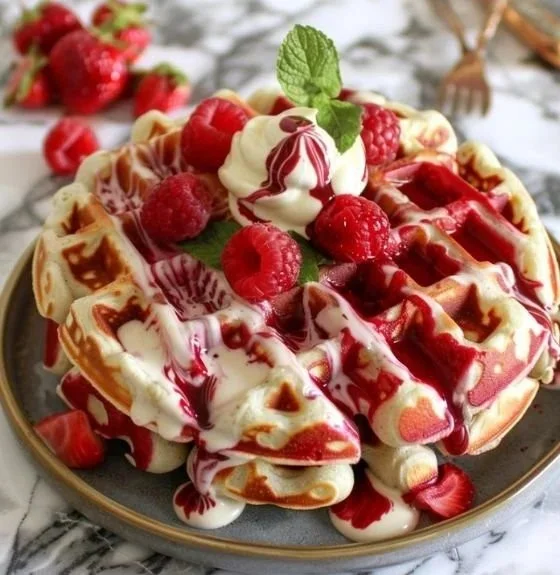
Serving ideas are where I play: powdered sugar and a dollop of mascarpone, or maple syrup and fresh berries. One of my favorite experiments was pairing the waffles with a chewy red velvet cookie for texture contrast; I used insights from a recipe I adapted after reading a copycat approach on WiseRecipes’ Crumbl copycat cookies, which taught me how dense cookie crumbs can echo the waffle’s tender crumb.
Quick tips and variations (short bullets because sometimes I like order):
- If you want a deeper red, add coloring a little at a time; too much can thin the batter.
- Cocoa strength matters: use a dark, unsweetened cocoa for contrast.
- For an adult twist, a teaspoon of instant espresso in the chocolate batter amplifies flavor without tasting like coffee.
Storage: cooled waffles freeze well in a single layer with parchment between them; reheat in a toaster or oven to reclaim crispness. Leftovers kept in the fridge will soften sooner, so I re-crisp rather than microwave if I can.
A tiny FAQ in case you ask myself what I wish I’d known sooner: don’t overfill the waffle iron — a modest ladle prevents overflow. Also, batter that’s too cold can stall rising; I usually let the mixed batter rest at room temperature for ten minutes.
Conclusion
For an approachable how-to with photos, I like the detailed walkthrough at Red Velvet Waffles – Cafe Delites which mirrors many of the techniques I use. If you want a fast, no-fuss version with clear timing, the quick recipe on Red Velvet Marble Waffles [20 Minutes] – Chasety is handy. For plating ideas and creative toppings that turned my weekday brunch into a tiny celebration, I often browse Get Creative With Your Waffles – Mom Trends.
A small limitation I discovered: the red coloring can sometimes mute the cocoa if I don’t get the chocolate portion dark enough, so I now always err on the side of a more intense cocoa mix.
Red Velvet Marble Waffles
Ingredients
Method
- In one bowl, whisk together the flour, chemical leavener, salt, and sugar until homogenous.
- In another bowl, beat together milk, eggs, vegetable oil, and vanilla until the yolk ribbons show.
- Gently fold the wet ingredients into the dry ingredients. Lumps are okay; do not over-mix.
- Set aside 2 tablespoons of the batter and stir in cocoa powder for the chocolate portion.
- Tint the remaining batter with red food coloring until it reaches a bright color.
- Preheat the waffle iron until fully heated.
- Scoop a small ladle of plain batter onto the hot waffle iron, then drop a spoonful of the cocoa batter beside it.
- Using the tip of the ladle, swirl the two batters together to create a marbled effect.
- Close the waffle iron and cook for 3-4 minutes, until deep mahogany ridges form.
- Keep finished waffles in a warm oven to prevent them from getting soggy.