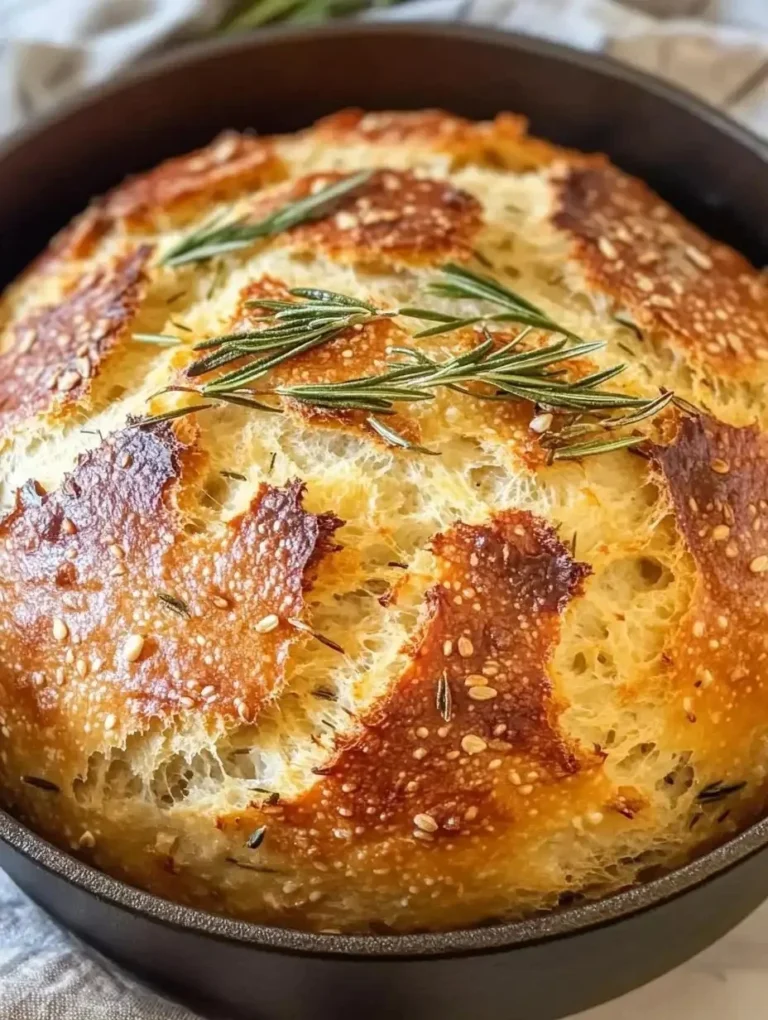
Rustic Garlic Rosemary Skillet Bread
A loaf that smells like Sunday morning I still remember the first time I made Rustic Garlic Rosemary Skillet Bread for friends: the kitchen filled with the warm, herbaceous perfume of rosemary and garlic, and everyone hovering with coffee mugs and hungry smiles. If you already adore other skillet loaves, you might enjoy a similar…
A loaf that smells like Sunday morning
I still remember the first time I made Rustic Garlic Rosemary Skillet Bread for friends: the kitchen filled with the warm, herbaceous perfume of rosemary and garlic, and everyone hovering with coffee mugs and hungry smiles. If you already adore other skillet loaves, you might enjoy a similar take like this rustic skillet bread recipe, but what I want to share is the exact version I keep coming back to, the one with a crackly edge and a soft, slightly chewy interior that gets better each day.
Before I dive into the little tricks, here are the ingredients you will actually need, spoken like I’m unpacking them onto the counter: 1.75 cups all-purpose flour, 0.75 cups warm water, 1.5 teaspoons active dry yeast, 2 tablespoons olive oil (plus more for the skillet and drizzling), 0.75 teaspoons salt, 1 tablespoon fresh rosemary finely chopped, and 2 cloves garlic, minced or roasted. I like to use roasted garlic when I want something mellow and slightly sweet, but quick minced garlic gives a bright, punchy hit.
The secret behind perfect Rustic Garlic Rosemary Skillet Bread
A lot of what makes this loaf feel rustic is texture and timing. In a large bowl, combine warm water and active dry yeast. Let sit for 5–10 minutes until bubbly. That little pause is worth the wait—you want a soft, frothy head on the yeast to know it’s alive. Add the flour, salt, rosemary, and garlic to the yeast mixture, and then drizzle in the olive oil and mix into a shaggy dough. At this stage it looks untidy and perfectly forgiving; the dough should be tacky rather than wet.
I pause here to pass on a tip: water that is too hot will kill the yeast, and too cool will make the rise sluggish. Aim for water that’s pleasantly warm to your wrist. Also, if you roast your garlic first, scoop it into the flour mixture so the garlic melts into the dough as you knead.
Making the dough and the patient rise
You’ll knead the dough for about 5 minutes until smooth and elastic. It’s a short knead, really—just enough to develop some gluten so the crumb has that chewy bite. After that, place the dough back in the bowl, cover with a damp towel, and let rise for 1 hour until doubled in size. I set the bowl near a warm window or the oven with the light on; it’s not about speed so much as comfort for the dough.
A tip I always share: to test whether the dough has doubled, press two fingers into it gently; if the indentation springs back slowly and not completely, it’s ready. If it snaps back immediately, give it another ten minutes. Also, if you’re short on time, a warm spot speeds things up—just don’t rush the flavor development.
During a slow afternoon when I made this for the first time, my neighbor popped in to borrow rosemary from my little herb pot. We sat while the dough rose and talked about summer plans; that kind of unhurried company seems to make bread taste better.
The skillet stage and the oven magic
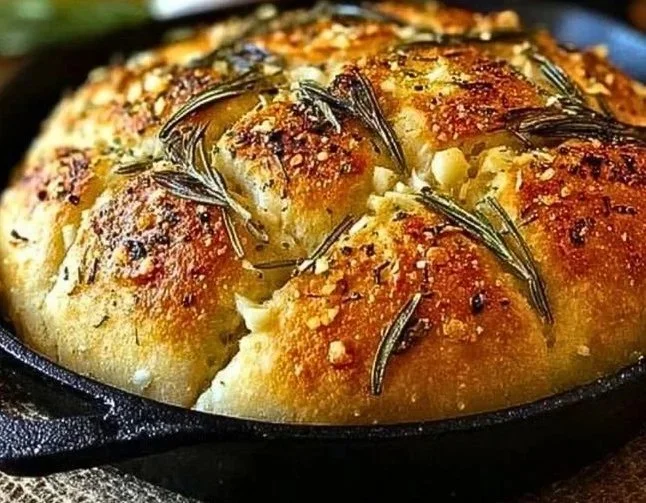
When the first rise is done, drizzle olive oil into a cast iron skillet, coating the bottom and sides—this is where the crust gets its lacy, golden edge. Transfer the dough to the skillet, gently stretch it to fit, and cover. Let rise for another 30 minutes. While it’s puffing, preheat oven to 400°F (200°C). Before it goes in, drizzle more olive oil on top, and sprinkle rosemary and sea salt if desired; the oil on top helps the crust blister and turn that beautiful amber color. Bake for 25–30 minutes until the top is golden and edges are crisp. I know it’s done when the top is deeply golden, the edges are noticeably crisp, and when I tap the bottom it sounds hollow. After it comes out, cool for 10 minutes before slicing. Serve warm with butter or dipping oil.
One of my practical tips is to oil the skillet generously. That thin film of oil creates a glorious contrast between crisp exterior and tender crumb. Another trick: if you like a more blistered crust, slide the skillet onto the lower rack for the last five minutes of baking.
Ways to make it yours, and what to serve it with
This bread is forgiving and welcomes variation. You can stuff it with shredded parmesan and cracked black pepper for a cheesy twist; fold in sliced olives and sun-dried tomatoes for a Mediterranean version; or mix a little whole wheat flour (swap about 1/4 cup) to give it a nuttier flavor. If you’re curious about other methods, I sometimes compare this skillet approach to a hotel-style loaf or a dutch oven variant like the one I bookmarked here dutch oven garlic rosemary bread, but the skillet keeps things fast and fuss-free.
As for what to serve it with, think soups, braises, or simply a small bowl of good olive oil with a splash of balsamic. I love tearing it and dipping it into a warm tomato stew, or making quick garlic toast slices topped with fresh ricotta and lemon zest. If you want a fast garlic-bready side for weeknights, you might also like a shortcut idea I tried once from a 10-minute method at 10-minute air fryer garlic bread—it’s indulgent for different reasons but worth testing.
How to know it’s right and how to keep it for later
You’ll know this loaf is done when it has that deep golden top, crisp edges, and a hollow sound when tapped underneath. Slice too soon and it will tear; giving it the 10 minutes to cool helps the crumb finish its set. If you have leftovers, I wrap the cooled loaf in a clean towel and keep it in a sealed container at room temperature for up to two days. For longer storage, slice and freeze individual pieces in a freezer bag; just pop them in a toaster or a warm oven straight from frozen. One of my favorite tips is to reheat slices with a quick brush of olive oil so they regain that fresh-baked mouthfeel.
I also like to add a few small notes about texture: the inside should be softly structured with irregular holes—if the crumb is too dense, you likely under-kneaded or under-proofed. If it collapses, it was probably over-proofed. Those are easy fixes once you get a feel for the dough.
Small rituals and final thoughts
A small ritual I keep is rubbing the top of the loaf with a cut clove of garlic right after baking if I used roasted garlic; it adds a whisper of fresh garlic scent without overwhelming. I love this recipe because it’s somehow both humble and dramatic: humble in ingredients but dramatic in aroma, and it never fails to make a meal feel intentional. Whenever I bring this bread somewhere, people comment on that crust and the rosemary note, and I always tell them it’s worth the patience.
If you try it, remember three gentle rules: keep the water comfortably warm, be generous with the skillet oil, and do not slice too quickly. That little bit of restraint is the difference between a flabby loaf and one that sings. Enjoy the process as much as the bread—it’s the reason I bake it again and again.
Conclusion
If you want a slightly different take or more inspiration for garlic and rosemary skillet loaves, I sometimes cross-reference recipes like Garlic and Rosemary Skillet Bread – The Food Charlatan for ideas on presentation, and I also find Easy Garlic Rosemary Skillet Bread – 2 Cookin Mamas helpful when I need a quick refresher on timing. Give this Rustic Garlic Rosemary Skillet Bread a try on a lazy weekend and tell me how it turns out.
Rustic Garlic Rosemary Skillet Bread
Ingredients
Method
- In a large bowl, combine warm water and active dry yeast. Let sit for 5–10 minutes until bubbly.
- Add flour, salt, rosemary, and garlic to the yeast mixture, then drizzle in the olive oil and mix into a shaggy dough.
- Knead the dough for about 5 minutes until smooth and elastic.
- Cover the bowl with a damp towel and let rise for 1 hour until doubled in size.
- Drizzle olive oil into a cast iron skillet, coating the bottom and sides.
- Transfer the dough to the skillet, gently stretching it to fit, and cover. Let rise for another 30 minutes.
- Preheat the oven to 400°F (200°C).
- Drizzle more olive oil on top, and sprinkle rosemary and sea salt if desired.
- Bake for 25–30 minutes until the top is golden and edges are crisp.
- Cool for 10 minutes before slicing. Serve warm.