Rustic Garlic Rosemary Skillet Bread Recipe
The Secret Behind Perfect Rustic Garlic Rosemary Skillet Bread Recipe There are certain smells that, for me, instantly transport me home, and nothing does that more reliably than a hot pan of garlic and rosemary bread sliding out of the oven. I call this my Rustic Garlic Rosemary Skillet Bread Recipe because it feels like…
The Secret Behind Perfect Rustic Garlic Rosemary Skillet Bread Recipe
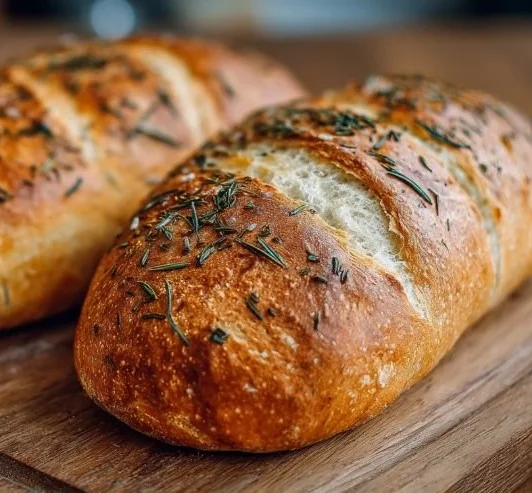
There are certain smells that, for me, instantly transport me home, and nothing does that more reliably than a hot pan of garlic and rosemary bread sliding out of the oven. I call this my Rustic Garlic Rosemary Skillet Bread Recipe because it feels like something you could pull together without a fuss, sit down with a bowl of soup, and suddenly the whole night is softer. If you like the idea of a crusty loaf made in a single pan, you might enjoy trying a dutch oven garlic rosemary bread as another cozy option.
When I tell friends the ingredients, they usually smile and say, "That’s it?" It really is simple: 1 ¾ cups all-purpose flour, ¾ cup warm water, 1 ½ teaspoons active dry yeast, 2 tablespoons olive oil (plus more for skillet and drizzling), ¾ teaspoon salt, 1 tablespoon fresh rosemary, finely chopped, and 2 cloves garlic, minced or roasted. Those few things — flour, water, yeast, a touch of salt, rosemary and garlic — are all you need to make something that smells like a Sunday afternoon.
The Ingredients That Make the Difference
I always emphasize freshness when it matters. The tablespoon of fresh rosemary should be finely chopped so the piney flavor distributes through the dough, and the two cloves of garlic can be either minced raw for a bright, sharp hit or roasted first for a mellow, caramelized note. I usually keep a head of roasted garlic in my fridge for days like this; the cloves mash into a buttery paste that blends perfectly. Use good olive oil — the 2 tablespoons in the dough add richness, and a little extra for coating the skillet and drizzling on top gives you that glossy, crisp crust.
If you’re short on time but still want the garlicky vibe, a quick trick is to toast some garlic in oil until golden and add both to the dough and to the top before baking. For a faster weeknight riff, I sometimes borrow ideas from a 10-minute air fryer garlic bread recipe and adapt the garlic intensity to my taste.
How I Make It (and the exact steps)
Here’s how it comes together in my kitchen, and I always say the method is as important as the ingredients because it shapes the texture.
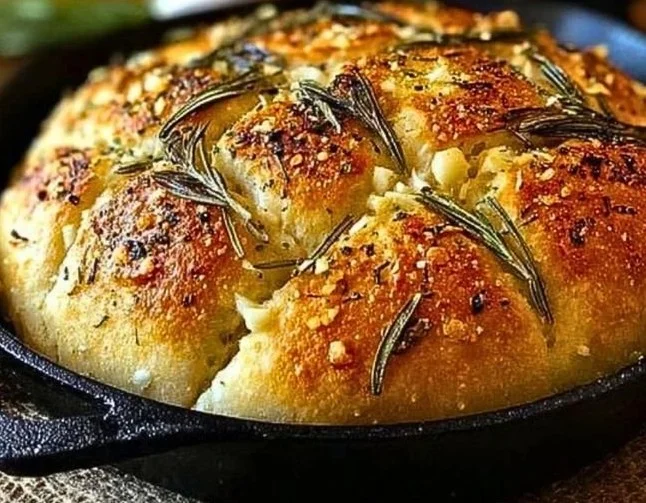
In a large bowl, combine warm water and active dry yeast. Let sit for 5–10 minutes until bubbly. Add flour, salt, rosemary, and garlic. Drizzle in olive oil and mix into a shaggy dough. Knead for about 5 minutes until smooth and elastic. Place dough back in the bowl, cover with a damp towel, and let rise for 1 hour until doubled in size. Drizzle olive oil into a cast iron skillet, coating bottom and sides well. Transfer the dough to the skillet, gently stretch it to fit, and cover. Let rise for another 30 minutes. Preheat oven to 400°F (200°C). Drizzle more olive oil on top, sprinkle rosemary and sea salt if desired. Bake for 25–30 minutes until the top is golden and edges are crisp. Cool for 10 minutes before slicing. Serve warm with butter or dipping oil.
When I say "gently stretch it to fit," I mean don’t panic if the dough resists — give it a few moments and it will relax. A small tip I use here is to coat my hands with a little olive oil instead of flour when shaping; it prevents sticking and keeps the dough tender. Also, if your kitchen is cool, let that second rise happen in the oven with the light on so it feels like a warm little bakery.
A Few Things I’ve Learned Along the Way
Baking this bread taught me to listen to sight and sound. The top should be a deep golden brown and you’ll hear a faint crackling as it cools in the pan. Tap the bottom with a spoon if you can lift it; a hollow sound means it’s done. If the edges brown too quickly, loosely tent foil over the top for the last 5 to 10 minutes.
Here are a few more tricks I use without thinking now: use warm water but not too hot, about the same temperature you’d enjoy for a bath, so the yeast wakes up but doesn’t get scalded. If I want a more intense herb aroma, I press a few extra rosemary tips into the top just before baking. And when I’m short on time, I’ll knead in a stand mixer for 3 minutes, though hand-kneading for 5 minutes gives such a satisfying texture.
If you like playing with dishes, try pairing the skillet bread with quick protein ideas like garlic-forward skewers. I often serve it with air fryer garlic parmesan chicken skewers because the garlicky echoes feel like the meal was planned to fit together.
Little Tricks, Variations, and What I Serve It With
This recipe is forgiving, which is why I love it. For variations, you can fold in ¼ cup grated Parmesan for a nutty undertone, or swap some of the flour for whole wheat to make it heartier. If you want a softer, pull-apart style, brush the top with melted butter immediately when it comes out of the oven. For a smoky twist, add a teaspoon of smoked paprika or a few chopped sun-dried tomatoes.
I usually serve this bread with a simple bowl of tomato soup or a big salad and roasted chicken. It also sings alongside a tray of baked garlic parmesan chicken for a dinner that feels indulgent but is easy to pull together — I sometimes use this baked garlic parmesan chicken when friends are coming over because everything on the table matches.
When it comes to storing leftovers, wrap the cooled loaf in a clean towel and keep it in a paper bag on the counter for up to two days to preserve the crust. For longer storage, slice and freeze in an airtight bag; reheat slices in a hot oven or toaster to crisp them back up. If you toast a slice straight from the freezer and rub it with a cut clove of raw garlic, the result makes me feel like I discovered something new even though it’s just a clever shortcut.
When It Tells You It’s Ready
You know it’s right when the top is golden, the rosemary scent fills the room, and the first slice gives you a soft steam of warm bread and garlic. The crumb should be tender with a slight chew, not gummy. If the center seems doughy, give it a few more minutes; ovens can vary, and that extra patience pays off. I still remember the first time I underbaked one for a dinner party and had to apologize sheepishly while cutting it into oven slices to finish baking. Since then, I always let it rest for about 10 minutes before slicing so the crumb sets and you get neat, pillowy pieces.
Conclusion
If you want another take on this same idea, the recipe at Garlic and Rosemary Skillet Bread – The Food Charlatan offers a lovely alternative that inspired one of my tweaks. And for an extra-easy version that still delivers on flavor, see Easy Garlic Rosemary Skillet Bread – 2 Cookin Mamas for a helpful, no-fuss approach.
Rustic Garlic Rosemary Skillet Bread
Ingredients
Method
- In a large bowl, combine warm water and active dry yeast. Let sit for 5–10 minutes until bubbly.
- Add the flour, salt, rosemary, and garlic to the yeast mixture.
- Drizzle in the olive oil and mix into a shaggy dough.
- Knead the dough for about 5 minutes until smooth and elastic.
- Place the dough back in the bowl, cover with a damp towel, and let rise for 1 hour until doubled in size.
- Drizzle olive oil into a cast iron skillet, coating the bottom and sides.
- Transfer the dough to the skillet, gently stretch it to fit, and cover. Let rise for another 30 minutes.
- Preheat oven to 400°F (200°C).
- Drizzle more olive oil on top, and sprinkle rosemary and sea salt if desired.
- Bake for 25–30 minutes until the top is golden and edges are crisp.
- Cool for 10 minutes before slicing. Serve warm with butter or dipping oil.