The Ultimate Sheet Pan Quesadillas (Perfect for a Crowd!)
Imagine a giant, golden-brown quesadilla, sizzling hot from the oven, loaded with tender fajita-spiced chicken, colorful peppers, and tons of gooey, melted cheese. That, my friends, is the game-changing magic of this Sheet Pan Quesadilla. It’s the answer to feeding a hungry family all at once, and it is, without a doubt, the most brilliant…
Imagine a giant, golden-brown quesadilla, sizzling hot from the oven, loaded with tender fajita-spiced chicken, colorful peppers, and tons of gooey, melted cheese. That, my friends, is the game-changing magic of this Sheet Pan Quesadilla. It’s the answer to feeding a hungry family all at once, and it is, without a doubt, the most brilliant and delicious party food you will ever make.
I promise you, this will revolutionize your taco night. The tortillas get unbelievably crispy on the top and bottom, while the center is packed with a savory, perfectly seasoned chicken and veggie filling. Topped with cool sour cream and fresh pico de gallo, it’s a complete flavor and texture explosion. It’s a true show-stopper that looks impressive but is secretly one of the easiest meals you can make.
Get ready to ditch the skillet-flipping and create a stunning, crowd-pleasing meal that will have everyone begging for the recipe.
Why This Will Be Your New Favorite Dinner Hack!
You are going to be completely obsessed with this clever and delicious recipe. It’s a guaranteed winner for so many reasons. Here’s why you have to try it:
- Feeds a Crowd at Once: No more making quesadillas one at a time! This method creates one giant quesadilla that you can slice and serve to the whole family simultaneously.
- Incredibly Crispy Texture: Baking the quesadilla pressed between two sheet pans (initially) is the secret to an unbelievably crispy, golden-brown tortilla crust on all sides.
- One-Pan Oven Magic: While the filling is cooked in a skillet, the final assembly and baking happen on one sheet pan, making the process streamlined and cleanup a breeze.
- Classic Fajita Flavor: The savory, perfectly seasoned chicken and tender bell pepper filling delivers all the classic flavors you love from your favorite restaurant.
- Perfect for Parties & Game Day: This is the ultimate shareable, sliceable, and crowd-pleasing food for any gathering. It’s easy to make and even easier to devour.
Recipe Snapshot
| Prep Time | 10 minutes |
| Cook Time | 25 minutes |
| Total Time | 35 minutes |
| Servings | 8 servings |
| Calories | 555 kcal per serving |
| Course | Main Course |
| Cuisine | Tex-Mex / American |
| Difficulty/Method | Easy / Sheet Pan |
Your Shopping List for This Quesadilla Fiesta
This recipe uses simple, classic ingredients to create its signature flavor. Here’s what you’ll need:
→ For the Fajita Filling
- 1 tablespoon olive oil → For sautéing our veggies and chicken.
- 1 onion & 2 bell peppers → I use one green and one red for a beautiful color combination.
- 1 pound boneless, skinless chicken breast → Chopped into small, bite-sized pieces.
- 2 tablespoons water → Helps the seasoning mix create a nice sauce.
- 1 (1.1-ounce) package fajita seasoning mix → A quick and easy way to get that perfect, savory fajita flavor.
→ For Assembly & Serving
- 8 (8-inch) flour tortillas → The foundation of our giant quesadilla creation.
- 2 cups shredded Mexican cheese blend → The gooey, cheesy glue that holds everything together.
- Sour cream & Pico de Gallo → For that cool, creamy, and fresh topping.
- Fresh cilantro → For a final, vibrant garnish.
Let’s Get Cooking! Your Step-by-Step Guide
Ready to create the most epic quesadilla of your life? This process is so fun and simple.
Part 1: Cook the Fajita Filling
- Preheat the Oven: Get your oven preheating to 375°F (190°C).
- Sauté the Veggies: Heat the olive oil in a large skillet over medium heat. Add the chopped onion and bell peppers and cook, stirring occasionally, for about 2 minutes until they just begin to soften. Remove them from the skillet with a slotted spoon and set aside.
- Cook the Chicken: Add the chopped chicken to the same skillet and cook for about 3 minutes, until it’s no longer pink on the outside.
- Combine and Season: Return the cooked vegetables to the skillet with the chicken. Stir in the water and the packet of fajita seasoning. Continue to cook and stir until the chicken is cooked through and everything is coated in the seasoning.
Part 2: The Genius Assembly
- Arrange the Tortillas: This is the fun part! Arrange 6 of the tortillas around the edges of a half sheet pan, overlapping them, so about half of each tortilla hangs over the sides. Place 1 more tortilla in the very center to completely cover the bottom of the pan.
- Add the Filling: Spoon the cooked chicken mixture evenly over the layer of tortillas, trying to avoid adding excess liquid from the pan. Sprinkle the shredded cheese evenly over the top of the filling.
- Enclose the Quesadilla: Place the final, 8th tortilla in the center on top of the cheese. Then, one by one, fold the overhanging tortillas up and toward the center to completely enclose the filling.
Part 3: Bake to Crispy Perfection
- Press and First Bake: Place a second baking sheet directly on top of the folded quesadilla. This presses it down and helps it hold its shape. Bake in the preheated oven for 10 minutes.
- Crisp It Up: Carefully remove the top baking sheet. Continue to bake for another 8 to 12 minutes, until the top tortillas are beautifully golden and crispy.
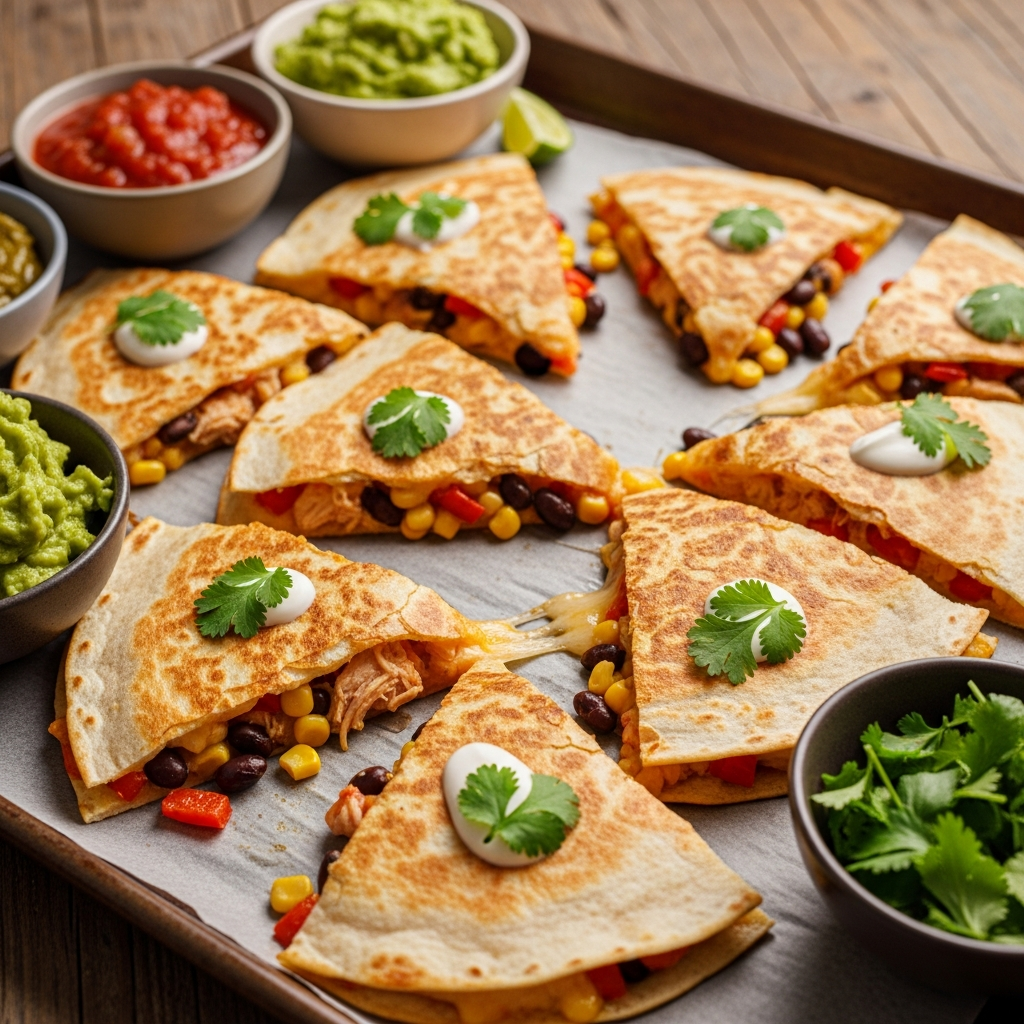
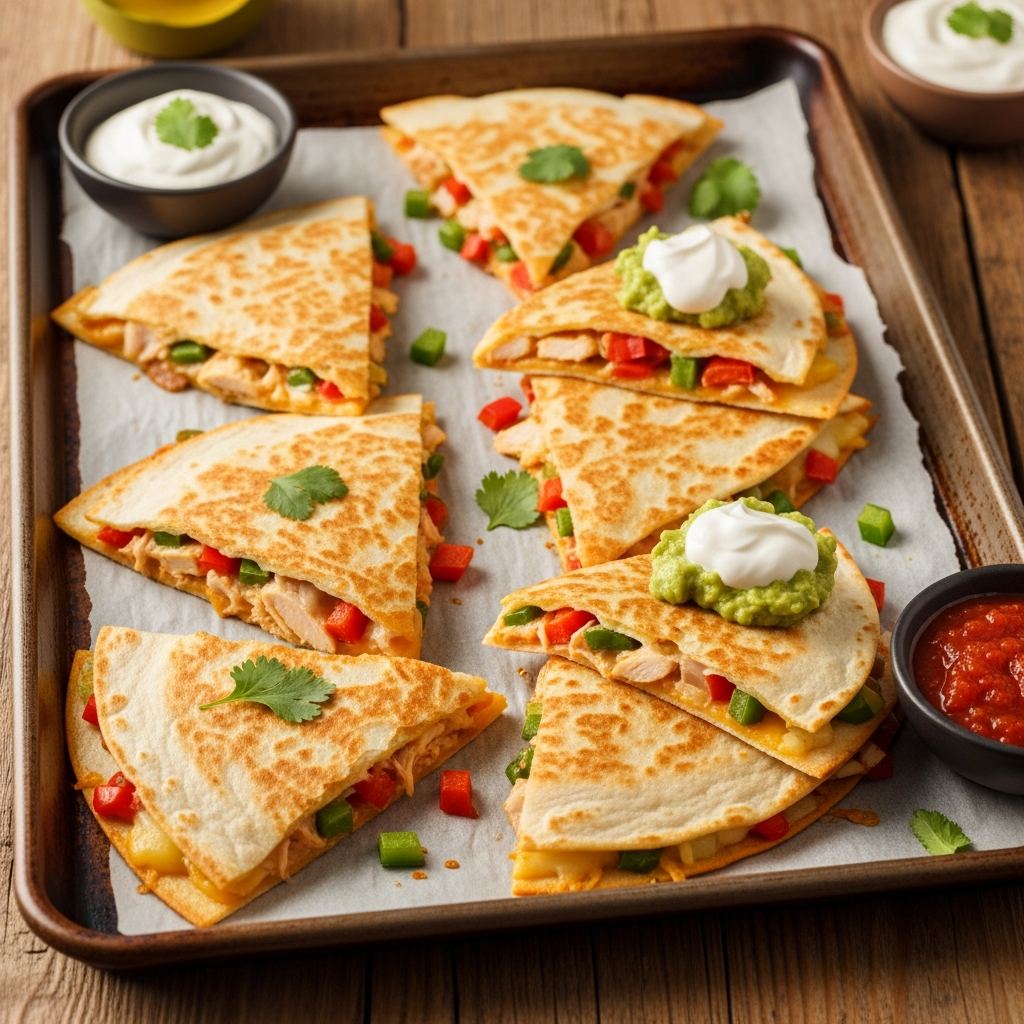
- Slice and Serve: Let the quesadilla cool for a minute before slicing it into large rectangles. Serve immediately, topped with sour cream, pico de gallo, and a sprinkle of fresh cilantro.
Easy Sheet Pan Chicken Quesadillas
Ingredients
Equipment
Method
- Preheat the oven to 375 degrees F (190 degrees C).
- Heat olive oil in a large skillet over medium heat. Add onion and bell peppers; cook, stirring occasionally, until just softened, about 2 minutes. Remove with a slotted spoon and set aside.
- Add chicken to the same skillet and cook until no longer pink, about 3 minutes. Return onion and peppers to the skillet. Stir in water and fajita seasoning. Cook and stir until the chicken is cooked through.
- Arrange 6 tortillas around the edges of a half sheet pan so half of each hangs over the sides. Place 1 tortilla in the center to cover the bottom.
- Spoon the chicken mixture evenly over tortillas, avoiding excess liquid. Sprinkle evenly with cheese.
- Place the final tortilla in the center on top of the filling. Fold the overhanging tortillas toward the center to completely enclose the filling.
- Top with a second baking sheet to press the quesadilla. Bake in the preheated oven for 10 minutes.
- Remove the top baking sheet and continue baking until the tortillas are golden and crispy, 8 to 12 more minutes.
- Slice into rectangles and serve topped with sour cream, pico de gallo, and cilantro, if desired.
Notes
WiseRecipes’ Top Tips for Quesadilla Success
These simple tricks will ensure your sheet pan quesadilla is absolutely perfect.
- Drain the Filling Well. Before spooning the chicken and veggie mixture onto the tortillas, try to drain off as much excess liquid as possible. Too much moisture is the enemy of a crispy tortilla and can lead to a soggy bottom.
- The Pressing Step is Crucial. Don’t skip placing a second baking sheet on top for the first 10 minutes of baking. This weight is what melds the cheese and filling together and helps “glue” the folded tortillas in place, creating a perfect, sealed pocket.
- Don’t Skip the Second Bake. Removing the top pan for the final 8-12 minutes is what allows the top layer of tortillas to get direct heat, turning them irresistibly golden-brown and crispy.
- Use a Pizza Cutter for Easy Slicing. The easiest and cleanest way to slice this giant quesadilla into neat portions is with a pizza cutter. It glides right through the crispy tortilla with ease.
- Shred Your Own Cheese. For the best, gooiest cheese melt, buy a block of Mexican cheese blend or cheddar and shred it yourself. Pre-shredded cheeses are often coated in starches that prevent them from melting as smoothly.
Keep It Fresh! Storing Your Leftovers
Leftover quesadilla slices make for a fantastic and easy lunch the next day!
- Refrigerator: Store any leftover slices in an airtight container in the refrigerator for up to 3 days.
- Reheating: For the best results and to revive the crispiness, reheat the slices in an air fryer at 375°F for 3-5 minutes. You can also reheat them on a baking sheet in a 375°F oven for about 10 minutes, or until warmed through and crispy again.
FAQs: Your Sheet Pan Quesadilla Questions, Answered!
Can I use a different protein, like steak or ground beef?
Absolutely! This method works great with other proteins. For steak, slice it thin and cook it quickly. For ground beef, simply brown it and drain the fat before mixing it with the veggies and seasoning. A black bean and corn mixture would also make a fantastic vegetarian version!
Can I assemble this ahead of time?
You can prepare the chicken and vegetable filling up to a day in advance and store it in the fridge. However, I highly recommend assembling the quesadilla right before you plan to bake it. If you assemble it too far in advance, the tortillas can become soggy from the filling.
What if I don’t have a second baking sheet to press it down?
No problem. You can place a layer of foil on top of the quesadilla and then place something heavy and oven-safe on top of it, like a cast-iron skillet or an oven-safe casserole dish, to provide the weight needed for the first 10 minutes of baking.
Can I use corn tortillas instead of flour?
You can, but it might be a bit trickier. Corn tortillas are smaller and less pliable than flour tortillas, so they can be more prone to cracking when you fold them. If you use them, make sure they are very fresh and warmed slightly to make them more flexible before assembling.
Final Thoughts: The Ultimate Dinner Hack
There is nothing quite like a recipe that solves a common kitchen problem in such a delicious and brilliant way. This Sheet Pan Quesadilla is a true game-changer for family dinners, parties, or any time you need to feed a hungry group with minimal fuss. It’s fun to make, spectacular to serve, and absolutely guaranteed to be a hit. Happy cooking!