The Ultimate Silky Chocolate Cream Pie (A Show-Stopper!)
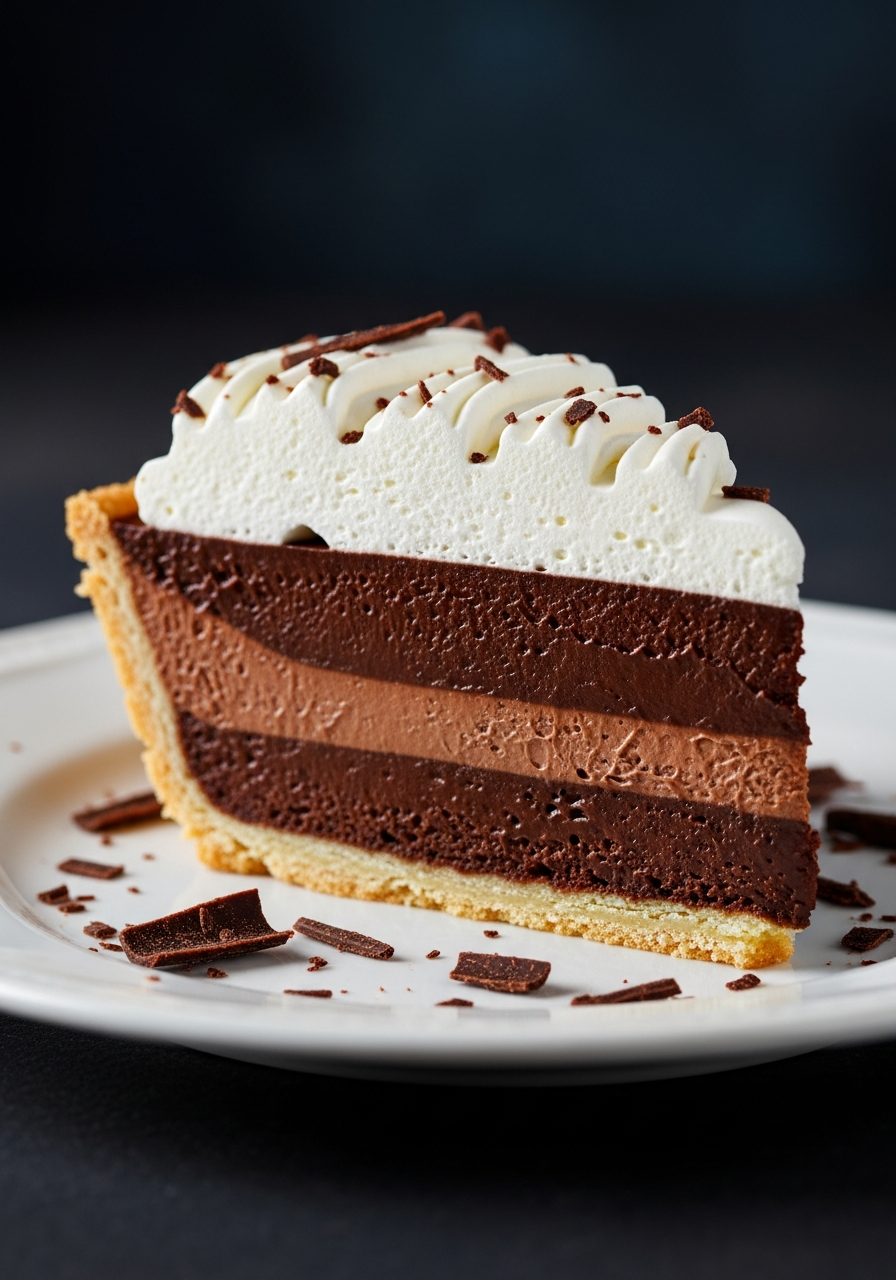
Imagine the most decadent, luxurious, and intensely chocolatey dessert you can dream of. Now, picture it in pie form: a shatteringly crisp, flaky pie crust holding a deep, dark, and unbelievably silky chocolate pudding filling, all crowned with a cloud of light, fluffy whipped cream. That, my friends, is the pure, unadulterated bliss of a…
Imagine the most decadent, luxurious, and intensely chocolatey dessert you can dream of. Now, picture it in pie form: a shatteringly crisp, flaky pie crust holding a deep, dark, and unbelievably silky chocolate pudding filling, all crowned with a cloud of light, fluffy whipped cream. That, my friends, is the pure, unadulterated bliss of a perfect, from-scratch Chocolate Cream Pie, and this recipe is, without a doubt, a true show-stopper.
Here’s the thing about classic desserts like this: they have a reputation for being fussy and difficult. For years, I was intimidated by the thought of making a homemade pudding filling, terrified of getting lumps or, even worse, scrambled eggs! But this recipe is my foolproof guide. It’s not about being a pastry chef; it’s about a few key, non-negotiable steps—like tempering your eggs and sieving the filling—that guarantee a flawlessly smooth and silky result every single time.
I promise you, there is no greater baking triumph than slicing into a chilled, perfect Chocolate Cream Pie and seeing that clean, beautiful cross-section of layers. The rich, deep flavor from both cocoa powder and semi-sweet chocolate is perfectly balanced by the light, airy cream on top. It’s a dessert that feels incredibly special and is perfect for holidays, birthdays, or any time you need to impress.
Get ready to master this timeless classic and create a stunning, professional-looking pie that will have everyone believing it came from a high-end bakery.

Why This Chocolate Cream Pie is Pure Perfection!
You are going to be so incredibly proud of this beautiful and delicious pie. It’s a true labor of love that is worth every single step. Here’s why this recipe is the one to try:
- Unbelievably Silky-Smooth Texture: Our method, including tempering the eggs and sieving the final pudding, is the professional secret to a guaranteed, flawlessly smooth and creamy filling.
- Deep, Intense Chocolate Flavor: By using both unsweetened cocoa powder and semi-sweet baking chocolate, we create a filling with a complex, rich, and deeply satisfying chocolate flavor that isn’t overly sweet.
- The Perfect Make-Ahead Dessert: This pie requires several hours to chill and set, making it the ideal dessert to prepare a day in advance of a party or holiday dinner, freeing up your time and oven space.
- A True Show-Stopping Centerpiece: With its distinct layers of crisp crust, dark filling, and snowy-white whipped cream, this pie is an absolute stunner on any dessert table.
- Surprisingly Simple Techniques: While it looks incredibly impressive, the recipe is broken down into simple, manageable steps that are easy for any home baker to master.
Recipe Snapshot
| Prep Time | 30 minutes |
| Cook Time | 30 minutes |
| Chill Time | 4 hours |
| Total Time | 5 hours |
| Servings | 8 slices |
| Calories | 552 kcal per slice |
| Course | Dessert |
| Cuisine | American |
| Difficulty/Method | Intermediate / Baking |
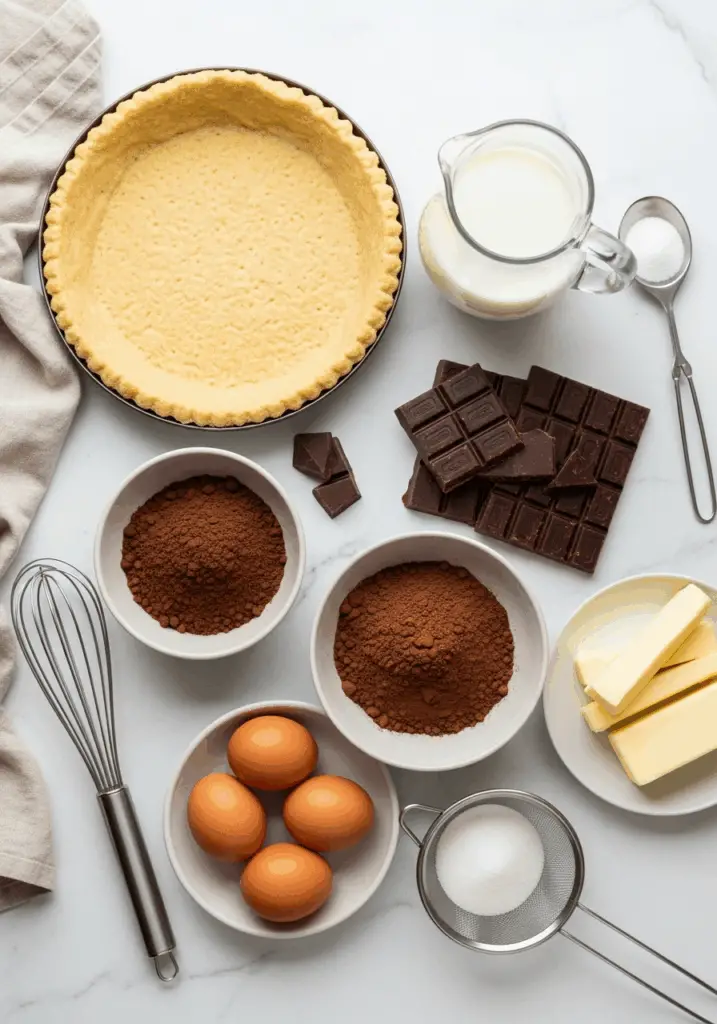
Your Shopping List for This Decadent Pie
This recipe uses classic pantry staples to create something truly extraordinary. Quality ingredients will make all the difference!
→ For the Crust & Topping
- 1 (9-inch) pie crust → Use your favorite store-bought or homemade flaky crust.
- 2 cups whipped cream → For the light, fluffy topping.
→ For the Silky Chocolate Filling
- 3 cups whole milk → Divided. Whole milk is essential for a rich, creamy texture.
- 1 cup granulated sugar → For the perfect level of sweetness.
- 3 large eggs → The key to our rich, custard-like filling.
- 3 Tbsp. cornstarch → Our thickening agent for a perfect, sliceable pudding.
- ⅓ cup unsweetened cocoa powder → Provides the deep, foundational chocolate flavor.
- 3 Tbsp. salted butter → Adds richness, flavor, and a beautiful sheen.
- 2 (4oz.) bars semi-sweet baking chocolate → Finely chopped, this melts in at the end for an extra layer of chocolatey goodness.
Let’s Get Baking! Your Step-by-Step Pie Guide
Ready to create the silkiest chocolate pie of your life? We’ll break it down into simple stages: the crust, the filling, and the final chill.
Part 1: The Crisp Pie Crust
- Preheat and Prep: Preheat your oven according to your pie crust directions (usually around 400°F or 200°C). Gently press your pie crust into a 9-inch pie plate. Poke the bottom a few times with a fork.
- Blind Bake the Crust: Line the crust with a sheet of parchment paper and fill it with pie weights or dry beans. Cover the edges of the crust with a pie shield or a ring of aluminum foil to prevent them from burning.
- Bake and Cool: Bake the crust according to its directions until it’s crispy and golden. Carefully remove the parchment and weights. Let the baked crust cool completely on a wire rack.
Part 2: The Silky Chocolate Filling
- Heat the Milk: In a large saucepan over medium heat, stir together 2 cups of the milk and the sugar. Bring this mixture slowly to a boil, stirring occasionally.
- Prepare the Slurry: While the milk is heating, whisk the remaining 1 cup of cold milk, the beaten eggs, cornstarch, and cocoa powder together in a small bowl until completely smooth.
- Temper the Eggs: This is the most important step! Once the milk on the stove boils, remove it from the heat. Very slowly, pour about ¼ cup of the hot milk into the egg mixture while whisking constantly. Repeat with another ¼ cup of hot milk. This gently warms the eggs so they don’t scramble.
- Thicken the Pudding: Return the saucepan of milk to medium heat. Pour the warmed egg mixture into the saucepan, whisking non-stop. Continue to cook and whisk until the mixture thickens to a pudding-like consistency.
- Finish with Chocolate and Butter: Remove the pan from the heat. Add the finely chopped semi-sweet chocolate and whisk until it’s completely melted. Add the butter and whisk until the filling is smooth and glossy.
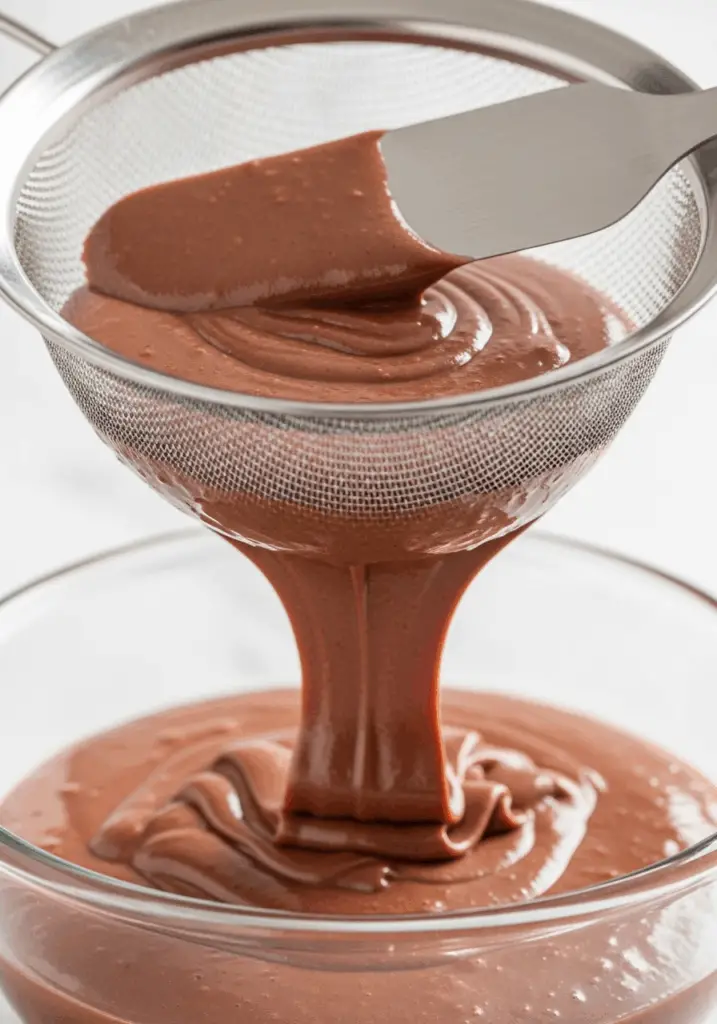
- Sieve for Perfection: Place a fine-mesh sieve over a large bowl and pour the hot chocolate filling through it. This will catch any tiny lumps and is the secret to an ultra-silky texture.

Part 3: Assemble and Chill
- First Chill: Spray a piece of plastic wrap with cooking spray and press it directly onto the surface of the warm chocolate filling in the bowl. This prevents a skin from forming. Refrigerate for 1 hour, or until cool.
- Fill and Final Chill: Pour the cooled chocolate filling into the completely cooled, baked pie shell and spread it evenly. Place the plastic wrap directly on the surface of the filling again. Chill the entire pie for at least 3 more hours, or until it is completely firm.
- Top and Serve: Just before serving, top the chilled pie with a generous layer of whipped cream. Slice and enjoy!
WiseRecipes’ Top Tips for a Flawless Cream Pie
These are my non-negotiable secrets for a pie that’s perfectly crisp, creamy, and sliceable every time.
- Blind Bake Your Crust Properly. A soggy crust is the enemy of a good cream pie. Using pie weights (or dry beans) is essential to prevent the bottom from puffing up, and a pie shield is the best way to get golden edges without burning.
- Temper Your Eggs with Confidence. Don’t be scared of this step! The key is to add the hot liquid to the eggs slowly while whisking constantly. This gently raises their temperature and is the foolproof way to prevent a lumpy, scrambled mess.
- Do Not Skip the Sieve. This is the professional secret that separates a good homemade pudding from a great one. Pushing the finished filling through a fine-mesh sieve guarantees an unbelievably silky, smooth, luxurious texture.
- Plastic Wrap Directly on the Surface. This is a crucial trick for any pudding or custard. Pressing plastic wrap directly onto the surface of the filling as it cools prevents a thick, unpleasant “skin” from forming.
- Embrace the Chill Time. The long, multi-stage chilling process is non-negotiable. The filling needs this time to cool, set, and firm up completely. A well-chilled pie is the only way to get those beautiful, clean slices.
Silky Chocolate Cream Pie
Ingredients
Equipment
Method
- Preheat the oven according to pie crust directions. Press crust into a 9-inch pie plate and poke the bottom with a fork. Line with parchment paper and fill with pie weights or dry beans. Cover the edges with foil.
- Bake according to package directions until crispy and golden. Remove weights and let the crust cool completely.
- In a large saucepan over medium heat, bring 2 cups of milk and the sugar to a slow boil. In a separate bowl, whisk the remaining 1 cup of milk, beaten eggs, cornstarch, and cocoa powder until smooth.
- Once the milk boils, remove it from the heat. Slowly pour about 1/2 cup of the hot milk into the egg mixture while whisking constantly to temper the eggs.
- Return the saucepan to medium heat and pour the warmed egg mixture back into it, whisking non-stop until the mixture thickens to a pudding consistency.
- Remove from heat and whisk in the finely chopped chocolate until melted, then whisk in the butter until smooth. Pass the filling through a fine mesh sieve into a large bowl.
- Press a piece of plastic wrap directly onto the surface of the warm filling. Refrigerate for 1 hour, or until cool.
- Pour the cooled filling into the baked pie shell. Place the plastic wrap directly on the surface of the filling again. Chill the pie for an additional 3 hours, or until completely firm.
- To serve, remove the plastic wrap and top the pie with whipped cream. Slice and enjoy.
Notes
Keep It Fresh! Storing Your Chocolate Cream Pie
Because of its dairy-based filling and topping, this pie must be kept refrigerated.
- Refrigerator: Loosely cover the pie with plastic wrap (you can use toothpicks to keep it from touching the whipped cream) and store it in the refrigerator. It is best enjoyed within 3-4 days.
FAQs: Your Chocolate Cream Pie Questions, Answered!
Can I use a different kind of crust?
Absolutely! This silky filling would be phenomenal in a chocolate cookie crust (like Oreo) or a classic graham cracker crust. You would still pre-bake the crumb crust according to its recipe before filling.
My filling seems a little thin. Will it set up?
The cornstarch-thickened pudding should be noticeably thick, like a classic pudding, before you take it off the heat. If it seems thin, it may need another minute or two of constant whisking over the heat. However, don’t worry too much—the chocolate and butter will help it firm up, and the long chilling time is what really solidifies it into a sliceable pie.
Can I make this pie ahead of time?
Yes, this is a perfect make-ahead dessert! You can prepare and assemble the entire pie (without the whipped cream topping) up to 2 days in advance. Keep it covered in the refrigerator. Add the fresh whipped cream just before you plan to serve it for the best look and texture.
What kind of chocolate is best for the filling?
A good quality semi-sweet baking chocolate bar (often found in the baking aisle) is ideal. Its flavor is designed to shine in desserts. Avoid using chocolate chips, as they often contain stabilizers that can prevent them from melting as smoothly.
Final Thoughts: A Slice of Chocolate Heaven
There is nothing more purely indulgent than a slice of rich, cold, creamy Chocolate Cream Pie. It’s a timeless classic that brings a touch of elegance and deep comfort to any occasion. I hope this guide gives you the confidence to master this incredible dessert and create a truly memorable treat for your loved ones. Happy baking!