Sourdough Bread
The Loaf That Changed My Weekend Mornings Recipe title: Sourdough Bread. It sounds simple, but for me this recipe became more than just a list of steps—it is the smell of warm crust on a slow Saturday and the sound of my partner humming while slicing the first piece. I first tried a playful twist…
The Loaf That Changed My Weekend Mornings
Recipe title: Sourdough Bread. It sounds simple, but for me this recipe became more than just a list of steps—it is the smell of warm crust on a slow Saturday and the sound of my partner humming while slicing the first piece. I first tried a playful twist on this loaf with blueberries and lemon, which led me down a rabbit hole of sourdough experiments; if you want something sweeter and tangy, I wrote about a version that brightened a rainy afternoon here. That curiosity is how I landed on this straightforward, reliable version that I make when I want a classic crust and open crumb.
What you need in plain language are four simple things: 4 cups (500g) of bread flour or all-purpose flour, 1⅔ cups (375g) of warm water, 1 cup (200g) of active sourdough starter, and 2 teaspoons (10g) of salt. I never shout ingredients like a grocery list; instead I keep the flour bag nearby, warm water in a jug, and my fed starter ready on the counter so the process feels like a small ritual rather than a chore. If you ever want the basic sourdough primer I used when learning, there is a helpful breakdown I revisited a few times here.
What I Keep on the Counter
Making this dough is almost meditative. I begin the way I was taught: in a large mixing bowl, combine 4 cups of flour with 1⅔ cups of warm water. Use a spatula or wooden spoon to mix until a shaggy dough forms, then let the mixture rest for 30 minutes. That pause, called autolyse, gives the flour a head start; you’ll notice the texture soften and the dough feel less stubborn to work with after the rest.
After that quiet half hour, I add the living part of the bread: one cup of active sourdough starter and 2 teaspoons of salt to the dough. Mix well until everything is combined, which is where the shaggy bundle becomes more cohesive and slightly tacky. I cover the bowl with a clean towel or plastic wrap, and let it sit at room temperature. For the next two hours, every 30 minutes, perform a set of stretch and folds. Doing those folds while the kettle is boiling means the dough gets attention without taking over my day.
If you like keeping notes, I sometimes write the time of each fold on the counter with a little scrap of paper; it helps me remember whether I need one more set. A small tip: wet your hand slightly when you do the folds to avoid tearing the dough. Also, if your starter is particularly lively, you may see dramatic bubbling during the stretch-and-fold period—this is a good sign that fermentation is doing its job.
How It Comes Together
After the final fold, cover the bowl again and let the dough rise for 6 to 8 hours until it doubles in size. There was a day early on when I panicked because my dough did not double exactly on the eight-hour mark; I learned to trust texture and smell more than the clock. When the dough is puffy and springs back slowly when poked, it is usually ready to be shaped.
Gently transfer the dough to a lightly floured surface. Shape it into a round or oval loaf, being tender with the air pockets you’ve nurtured. Place the shaped dough seam-side up into a floured proofing basket or a towel-lined bowl. Cover and refrigerate for 8 to 12 hours. Overnight retarding in the fridge develops flavor and makes the schedule flexible; I do this when I want to bake in the morning but start the process in the evening. If you enjoy sweet-fruited versions, I once folded in white chocolate and strawberries and wrote about that decadent turn here.
A personal tip here: chill your proofing basket slightly before placing the dough if your kitchen is very warm. It helps slow fermentation so the dough does not overproof in the fridge.
A Few Tricks I Swear By
The next day, preheat a Dutch oven in the oven to 450°F (232°C). This step is worth the fuss because the hot pot traps steam and creates a glossy, blistered crust. Remove the dough from the fridge and turn it out onto parchment paper. Score the top of the dough with a sharp knife; a confident single slash along the length gives a dramatic ear, while a few shallow cuts create a rustic pattern. Carefully lower the dough into the hot Dutch oven using the parchment paper. Cover and bake for 20 minutes. Then remove the lid and bake uncovered for another 25 minutes.
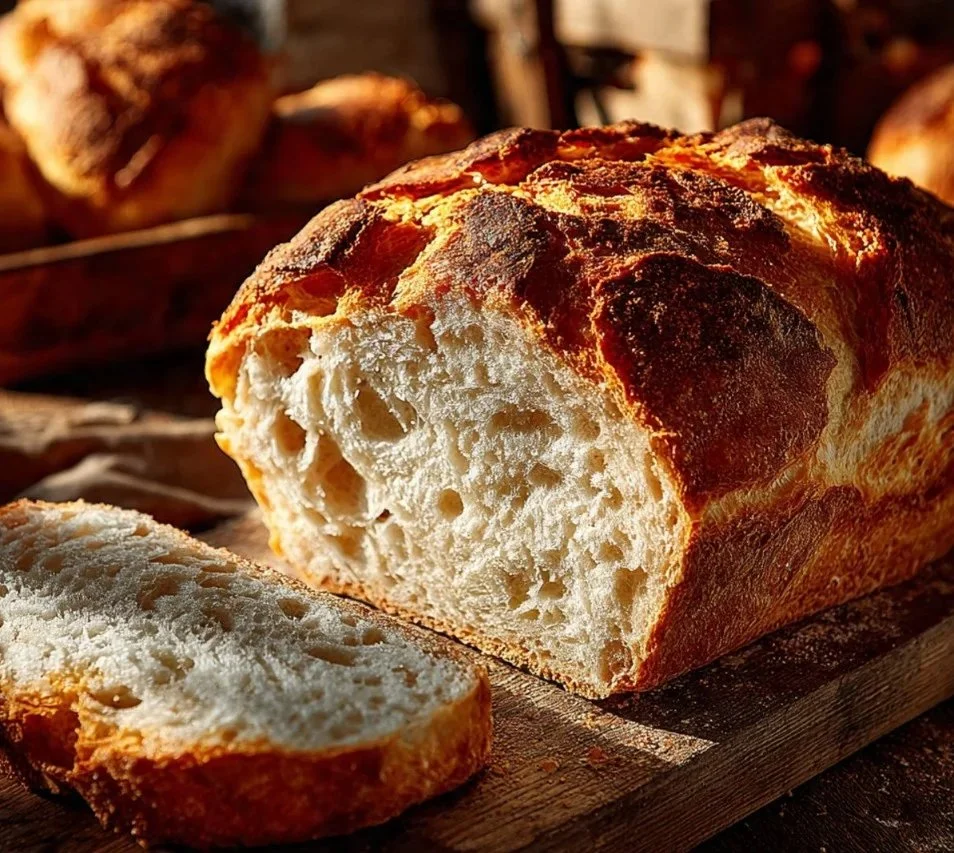
Once baked, take the bread out of the Dutch oven and let it cool completely on a wire rack before slicing. Waiting is hard, I know; the aroma alone is punishment. But if you cut too soon the crumb turns gummy. You will know it’s done right when the crust is a deep golden brown, the loaf sounds hollow when tapped on the bottom, and the interior has those glossy, irregular holes that make every slice feel artisanal.
Three quick tricks I always rely on: keep your starter active and fed so it gives reliable rise, use the stretch-and-fold method rather than intense kneading to preserve those air pockets, and cool the loaf fully for the best crumb. Another small hack is to rotate the Dutch oven halfway through the uncovered bake if your oven has hot spots; it helps get even browning.
Making It Your Own
Why I love this recipe is twofold: it is forgiving and it rewards patience. The long fermentation yields a depth of flavor that supermarket loaves can’t touch, and you can adapt it to your mood. For savory variations, fold in roasted garlic and rosemary just after the first set of folds. For a sweeter loaf, gently knead in dried fruit and a little honey during shaping. For an all-seed loaf, coat the shaped dough with a mix of sesame, sunflower, and flax before the fridge step.
Serve it warm with butter and flaky salt, or use it as the base for an enormous sandwich overflowing with roasted vegetables and melting cheese. It is excellent with soups because the crust holds up to dunking while the interior soaks up broth. To store leftovers, wrap the cooled loaf in a clean kitchen towel and keep it at room temperature for up to two days; beyond that, slice and freeze for up to three months. Reheat briefly in a 350°F oven to refresh the crust.
There have been many moments tied to this loaf: a neighbor bringing over a jar of wildflower honey and asking for a slice, and a Sunday when a power outage turned my kitchen into a candlelit bakery as I finished scoring by lantern light. Those small memories make the recipe feel like family.
Conclusion
If you want a deeper primer on starter care and troubleshooting, I go back to a great beginner’s guide that explains why timing and temperature matter, which helped me in the early stages: Sourdough Bread: A Beginner’s Guide – The Clever Carrot. For another clear, step-by-step take on artisan sourdough that complements this method, I also found this detailed walkthrough very useful: Homemade Sourdough Bread, Step by Step | Alexandra’s Kitchen.
If you try this loaf, tell me how you scored it and what you served with that first warm slice. I always want to hear about new twists and the little moments that make sourdough feel like home.
Sourdough Bread
Ingredients
Method
- In a large mixing bowl, combine 4 cups of flour with 1⅔ cups of warm water. Mix until a shaggy dough forms.
- Let the mixture rest for 30 minutes (autolyse).
- Add 1 cup of active sourdough starter and 2 teaspoons of salt to the dough. Mix until well combined.
- Cover the bowl and let it sit at room temperature.
- Every 30 minutes for the next 2 hours, perform a set of stretch and folds.
- After the final fold, cover the bowl again and let the dough rise for 6 to 8 hours until it doubles in size.
- Transfer the dough to a lightly floured surface and shape it into a round or oval loaf.
- Place the shaped dough seam-side up into a floured proofing basket or towel-lined bowl and cover.
- Refrigerate for 8 to 12 hours overnight.
- Preheat a Dutch oven to 450°F (232°C).
- Turn the dough out onto parchment paper and score the top with a sharp knife.
- Lower the dough into the hot Dutch oven and cover. Bake for 20 minutes.
- Remove the lid and bake uncovered for an additional 25 minutes.
- Remove the bread from the Dutch oven and let it cool completely on a wire rack before slicing.