The Ultimate Spiced Pear Tarts (Stunning & Easy Recipe!)
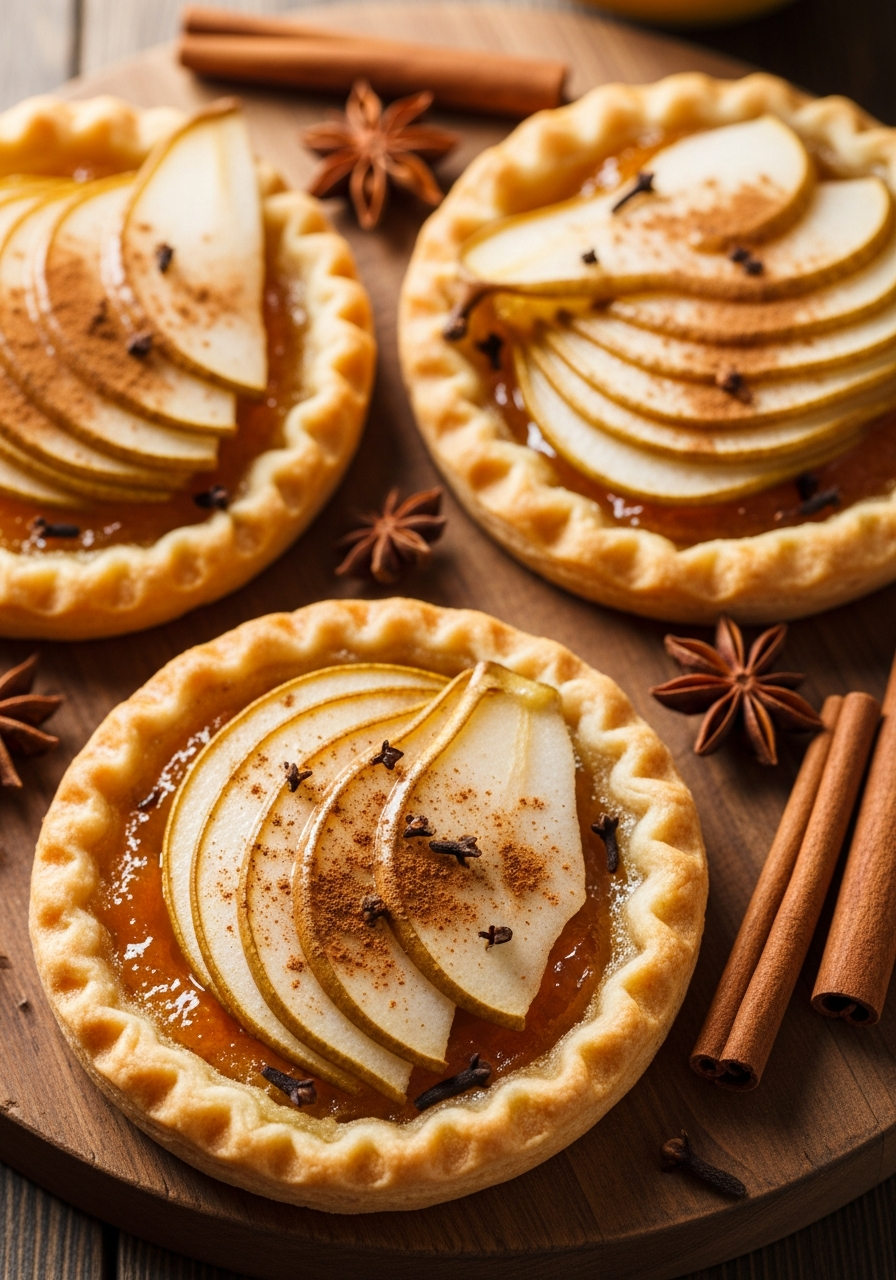
Imagine pulling a tray of the most elegant, glistening pastries from your oven. Each one features a tender, caramelized pear half, fragrant with cinnamon and brown sugar, nestled on a golden, flaky puff pastry crust that shatters at the lightest touch. That, my friends, is the sophisticated yet simple magic of these individual Spiced Pear…
Imagine pulling a tray of the most elegant, glistening pastries from your oven. Each one features a tender, caramelized pear half, fragrant with cinnamon and brown sugar, nestled on a golden, flaky puff pastry crust that shatters at the lightest touch. That, my friends, is the sophisticated yet simple magic of these individual Spiced Pear Tarts. This is, without a doubt, the most impressive dessert you will make with the least amount of effort.
Here’s the thing about elegant pastries: they often seem out of reach for the home baker. For years, I thought something this beautiful had to be complicated. But this recipe is my most treasured secret weapon for easy entertaining. By using store-bought puff pastry, we skip all the hard work. The “hardest” part is tracing a pear shape—and the result is a bakery-quality dessert that looks like it took hours to create.
I promise you, there is no greater reward than serving these warm from the oven, perhaps with a scoop of vanilla ice cream. The combination of the soft, sweet, spiced pear with the buttery, crisp layers of pastry is a true textural masterpiece. It’s a show-stopper for a dinner party, a special holiday, or a cozy weekend treat.
Get ready to create a stunning, professional-looking dessert that will have everyone believing you’re a pastry chef.

Why These Pear Tarts Are an Absolute Must-Make!
You are going to be completely smitten with how easy and elegant these pastries are. This recipe is a true gem. Here’s why you’ll love it:
- Effortlessly Elegant: These tarts look incredibly sophisticated and beautiful, making them the perfect dessert to impress your guests with minimal effort.
- The Ultimate Pastry Shortcut: Using store-bought puff pastry is the game-changing secret that delivers a flaky, buttery, multi-layered crust without any of the work.
- Incredible Flavor and Texture: You get the perfect combination of tender, warm, spiced fruit and a rich, crisp, and shatteringly flaky pastry.
- Ready in Under an Hour: With just 15 minutes of prep time, you can have these stunning individual tarts baking in the oven.
- A Perfect Autumn and Winter Treat: The warm flavors of cinnamon, brown sugar, and baked pear make this the ideal dessert for cozy fall and winter gatherings.
Recipe Snapshot
| Prep Time | 15 minutes |
| Cook Time | 22 minutes |
| Total Time | 45 minutes (including cooling) |
| Servings | 10 tarts |
| Calories | 656 kcal per tart |
| Course | Dessert |
| Cuisine | French-Inspired |
| Difficulty/Method | Easy / Baking |
Your Shopping List for These Elegant Tarts
This impressive dessert comes together with a surprisingly short list of ingredients. Here’s what you’ll need:
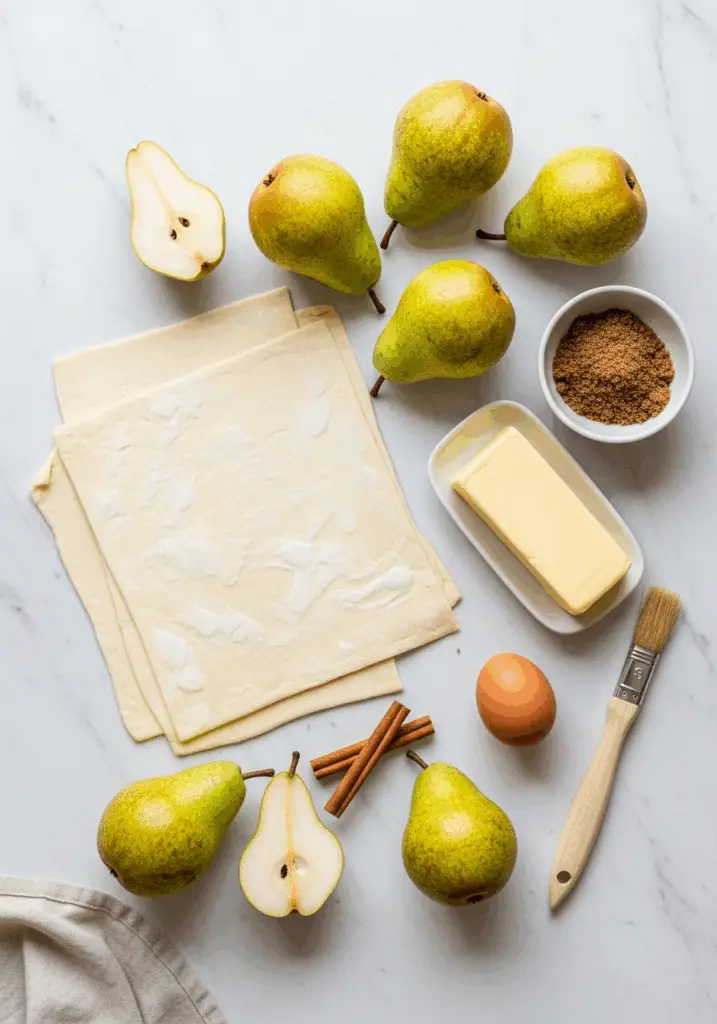
→ For the Tarts
- 4 sheets (about 960g) puff pastry → Thawed if frozen. A good quality, all-butter puff pastry will give you the best flavor and puff.
- 5 medium pears → Choose a firm variety that holds its shape when baked, like Bosc or Anjou.
- 1 large egg → For the egg wash that gives the pastry its beautiful golden sheen.
→ For the Spiced Brown Sugar Topping
- 4 tablespoons (57g) unsalted butter → Melted, this will create our caramel-like coating.
- ⅓ cup (71g) dark brown sugar → For a deep, molasses-rich sweetness.
- ½ teaspoon ground cinnamon → The perfect warm spice to complement the pears.
- Pinch of salt → To balance the sweetness and enhance all the flavors.
Let’s Get Baking! Your Step-by-Step Guide
Ready to create a dessert that looks as good as it tastes? This comes together in a few simple, satisfying steps.
Part 1: Prepare the Pastry and Pears
- Preheat and Prep: Preheat your oven to 400°F (200°C). Line two baking sheets with parchment paper.
- Cut the Pastry Shapes: On a lightly floured surface, gently roll out the puff pastry sheets to flatten any seams. Take one of your pear halves and use it as a template. With a small, sharp paring knife, cut out 10 pear shapes from the pastry, making each one slightly larger than the pear half.
- Prep the Pastry: Arrange the pastry shapes on your prepared baking sheets. In a small bowl, whisk the egg with 1 tablespoon of water to create an egg wash. Brush this all over the pastry pieces, then use a fork to poke holes (dock) the pastry all over. This prevents it from puffing up too much in the center.
Part 2: Assemble the Tarts
- Place the Pears: Center a pear half, cut side down, onto each piece of puff pastry.
- Make the Topping: In a small bowl, mix together the melted butter, brown sugar, cinnamon, and salt.
- Coat the Pears: Spoon about 2 teaspoons of this mixture over the top of each pear half. Use your fingers or the back of the spoon to pack it around the pear, covering it almost completely.
Part 3: Bake to Golden Perfection
- Bake the Tarts: Place the baking sheets in the preheated oven. Bake for 20 to 22 minutes, rotating the sheets halfway through.
- Baste for a Perfect Caramelization: When you rotate the sheets, use a pastry brush to baste the pears with any of the sugary butter mixture that has melted onto the parchment paper. This is the secret to a beautifully caramelized finish!
- Cool and Serve: The tarts are done when the pastry is puffed and a deep golden brown, and the pears are tender when pierced with a fork. Let them cool on the baking sheets for at least 10 minutes before transferring to a wire rack. They are delicious served warm.
Spiced Pear and Puff Pastry Tarts
Ingredients
Equipment
Method
- Preheat the oven to 400°F. Line two baking sheets with parchment paper.
- On a floured surface, roll out the puff pastry sheets. Using a paring knife and a pear half as a guide, cut the pastry into 10 pear shapes slightly larger than the pear half. Place them on the prepared baking sheets.
- In a small bowl, whisk the egg with 1 tablespoon water. Brush the egg wash over the pastry pieces, then poke them all over with a fork.
- Center a pear half, cut side down, on each piece of pastry.
- In a small bowl, mix together the melted butter, brown sugar, cinnamon and salt. Spoon about 2 teaspoons of this mixture over each pear half, packing it around the fruit.
- Bake for 20 to 22 minutes, until the pastries are golden brown and the pears are tender. Rotate the racks halfway through baking.
- While rotating, baste the pears with any of the sugar mixture that has melted onto the baking sheet. Cool at least 10 minutes before serving.
Notes
WiseRecipes’ Top Tips for Perfect Pastries
These simple secrets will ensure your pear tarts are flaky, beautiful, and utterly delicious.
- Keep Your Puff Pastry Cold. Puff pastry gets its flaky layers from the cold butter within it hitting the hot oven. Work with it while it’s still cold from the fridge, and don’t let it sit out at room temperature for too long.
- The Egg Wash is Essential. Don’t skip it! Brushing the pastry with an egg wash is what gives it that beautiful, shiny, deep golden-brown finish.
- Docking is Key. Poking the pastry all over with a fork (docking) prevents the area underneath the pear from puffing up into a giant dome, creating a more stable base for the fruit.
- Don’t Waste the Melted Sugar! The step of basting the pears with the runoff sugar mixture is crucial. It glazes the fruit, creating that gorgeous, caramelized, glossy finish that makes these tarts look so professional.
- Choose the Right Pears. For baking, you want a pear that will hold its shape and not turn to mush. Firm, ripe varieties like Bosc, Anjou, or even Concorde are all excellent choices.
Keep It Fresh! Storing Your Pear Tarts
These pastries are at their absolute flaky best on the day they are made, but they can be stored if you have leftovers.
- Storing: Once completely cooled, store the tarts in an airtight container at room temperature for up to 2 days. The pastry will soften over time.
- Reheating: To bring back some of the crispiness, reheat the tarts in an oven or air fryer at 350°F (175°C) for 5-7 minutes until warmed through.
FAQs: Your Pear Tart Questions, Answered!
Can I use apples instead of pears?
Absolutely! This recipe would be wonderful with apples. Choose a firm baking apple like Honeycrisp, Braeburn, or Gala. Follow the same method, cutting the puff pastry into apple shapes to match.
Why did my puff pastry get soggy on the bottom?
Soggy bottoms are usually caused by the juice from the fruit. Using firm pears helps, as does docking the pastry. Also, be sure to let the tarts cool on a wire rack after a few minutes on the pan; this allows air to circulate underneath and helps keep the base crisp.
Can I make these ahead of time?
Because puff pastry is best enjoyed fresh, I don’t recommend fully baking these ahead. However, you can do all the prep! You can cut the pastry shapes and keep them on a parchment-lined tray, covered, in the fridge for up to a day. You can also peel and halve the pears (toss them with a little lemon juice to prevent browning) and mix the sugar topping. Then, just assemble and bake when you’re ready.
What can I serve with these tarts?
They are stunning on their own, but serving them warm with a scoop of high-quality vanilla bean ice cream, a dollop of crème fraîche, or a drizzle of caramel sauce would be absolutely divine.
Final Thoughts: Your Easiest Elegant Dessert
There is nothing more rewarding than creating a dessert that looks like it came from a Parisian patisserie with just a handful of simple ingredients. These Spiced Pear Tarts are a perfect example of how a smart shortcut can lead to a truly spectacular result. I hope this recipe helps you feel like a pastry pro and brings a touch of elegance to your table. Happy baking!