The Ultimate Spooky Eyeball Halloween Cake (So Easy & Fun!)
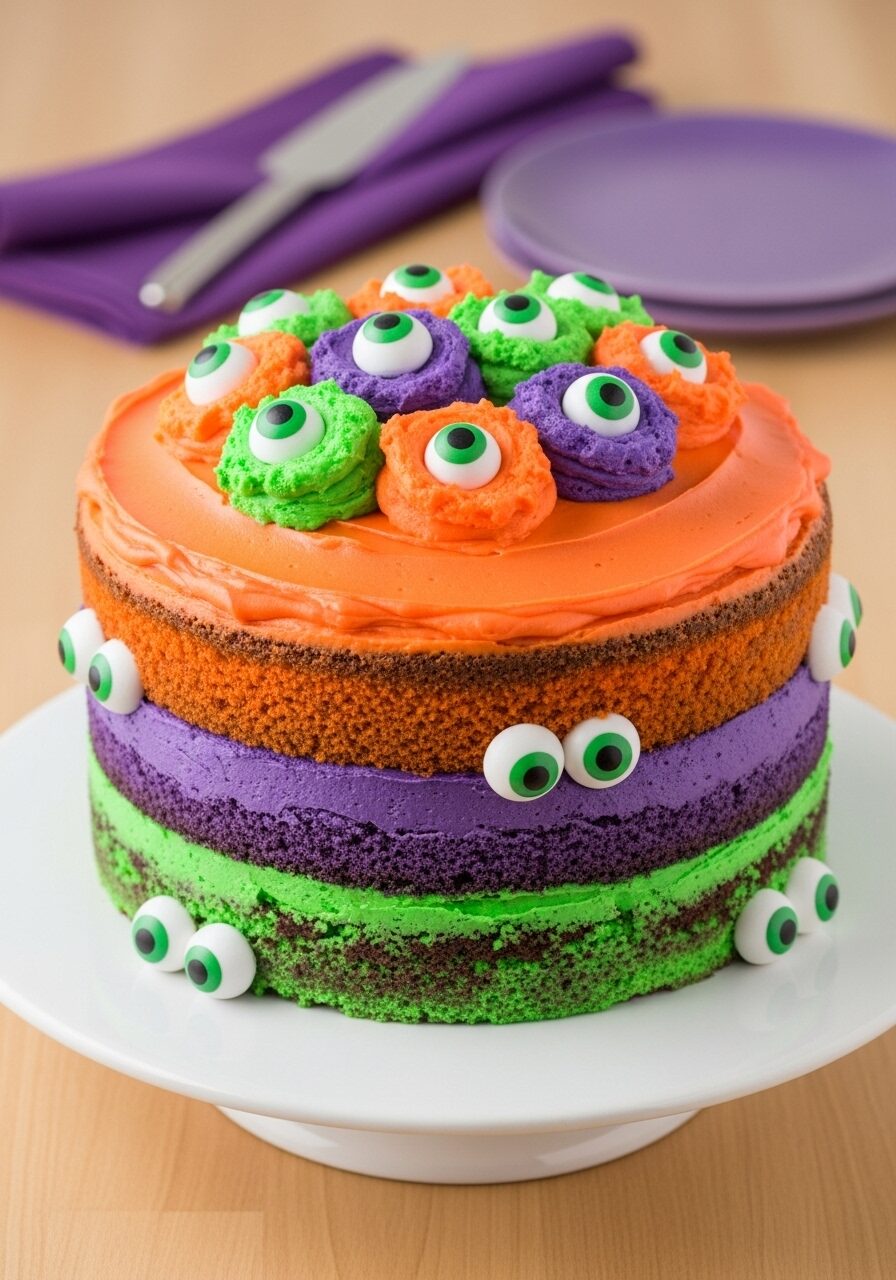
Imagine a Halloween party centerpiece that is bursting with color, personality, and goofy, spooky charm—a towering, three-layer chocolate cake, with vibrant frosting monsters peeking out from between the layers and a whole party of them on top, all staring back at you with googly candy eyeballs. That, my friends, is the monstrously fun magic of…
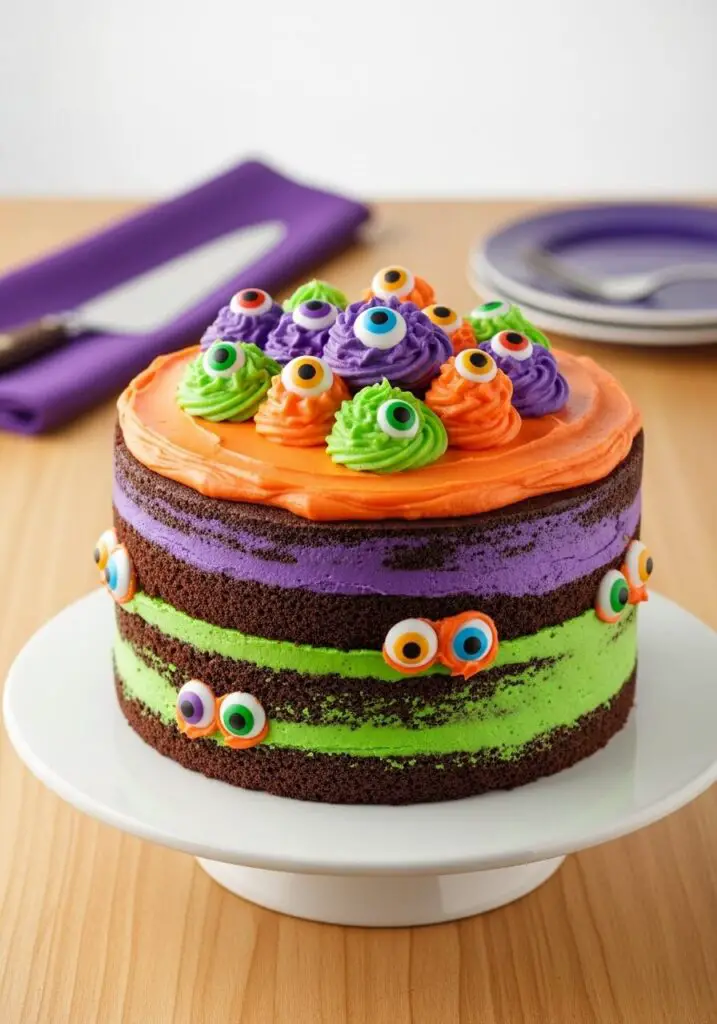
Imagine a Halloween party centerpiece that is bursting with color, personality, and goofy, spooky charm—a towering, three-layer chocolate cake, with vibrant frosting monsters peeking out from between the layers and a whole party of them on top, all staring back at you with googly candy eyeballs. That, my friends, is the monstrously fun magic of this Spooky Eyeball Halloween Cake. It is, without a doubt, the most playful and impressive cake you will make this season.
Here’s the thing about a great party cake: it should be a total show-stopper, but it shouldn’t take all day to create. This recipe is my secret weapon for exactly that. It embraces the brilliant simplicity of a boxed cake mix and pre-made frosting, freeing you up to focus on the best part: bringing this delightful monster mash to life! It’s the perfect, low-stress project for a memorable Halloween celebration.
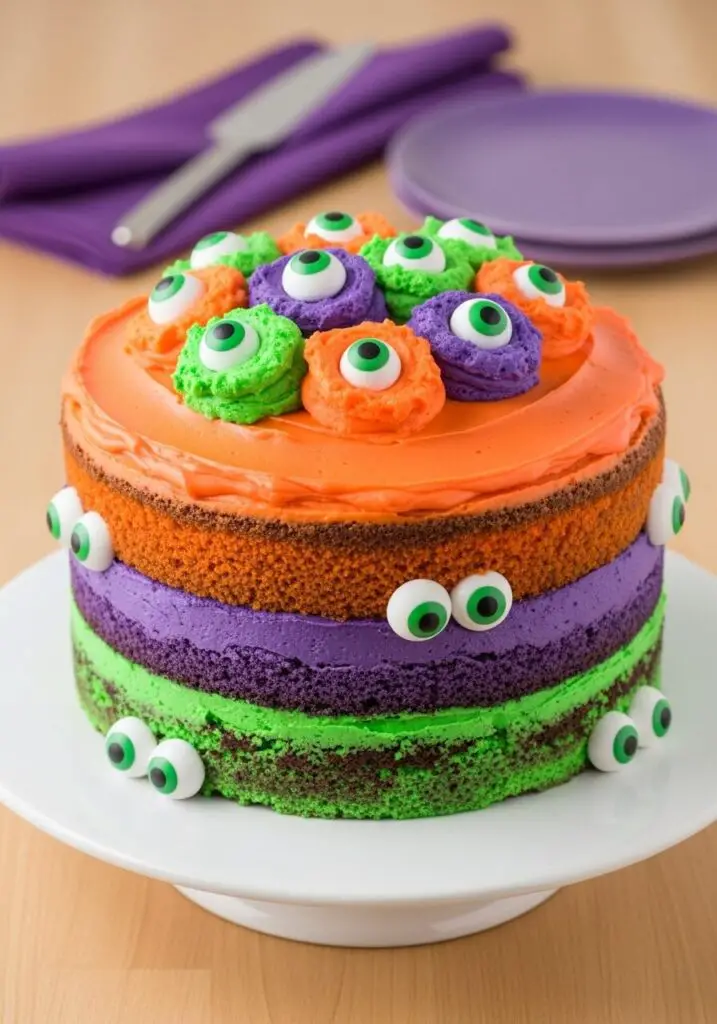
I promise you, there is no greater joy than placing this colorful, googly-eyed masterpiece on the dessert table. The rich, moist devil’s food cake layers are the perfect decadent backdrop for the sweet, fluffy frosting, tinted in classic Halloween hues of green, purple, and orange. It’s a treat that’s as fun to make as it is to eat.
Get ready to create the cutest, spookiest, and most talked-about cake at your Halloween bash!
Why This Spooky Cake is a Halloween MUST-BAKE!
You are going to have an absolute blast creating this adorable monster cake. It’s a guaranteed party hit for so many reasons. Here’s why:
- A Total Show-Stopping Centerpiece: With its three colorful layers and crowd of googly-eyed monsters, this cake is a true work of art that will be the star of your Halloween party.
- Incredibly Easy with Smart Shortcuts: This recipe brilliantly uses a Betty Crocker™ cake mix and pre-made frosting, which means you get a spectacular result with minimal fuss and a perfectly moist cake every time.
- Super Fun to Decorate: This is the perfect creative project! Piping the monster blobs and placing all the silly eyeballs is a fantastic and fun activity for bakers of all ages.
- Perfect “Naked Cake” Style: The exposed chocolate cake layers and the thick piped frosting create a trendy “naked cake” look that is both rustic and incredibly stylish.
- A Guaranteed Crowd-Pleaser: The classic, rich flavor of Devil’s Food cake paired with sweet, fluffy vanilla frosting is a timeless combination that everyone loves.
Recipe Snapshot
| Prep Time | 1 hour |
| Cook Time | 21 minutes |
| Total Time | 2 hours 15 minutes |
| Servings | 12 servings |
| Calories | ~425 kcal per serving |
| Course | Dessert |
| Cuisine | American |
| Difficulty/Method | Easy / Baking & Assembly |
Your Shopping List for This Monster Mash
This recipe is all about smart, simple shortcuts to create a spectacular result. Here’s what you’ll need:
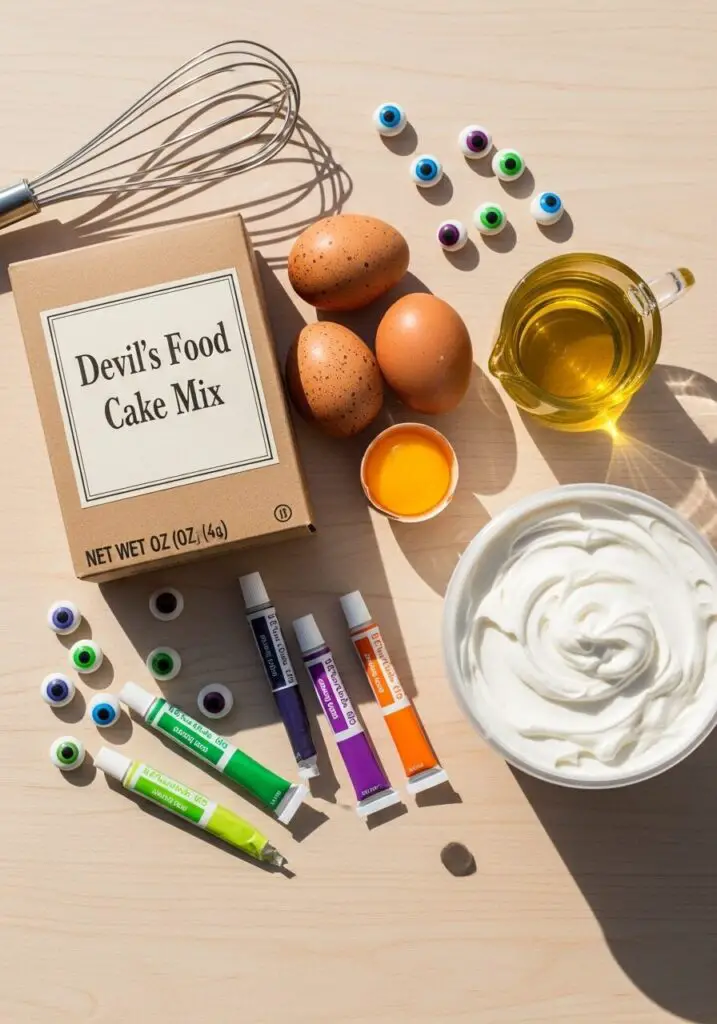
→ For the Cake & Decorations
- 1 box Betty Crocker™ Super Moist™ Devil’s Food Cake Mix → The perfect, rich, and foolproof chocolate cake base.
- Water, vegetable oil and eggs → As called for on the cake mix box.
- 2 tubs (12 oz) Betty Crocker™ Whipped Fluffy White Frosting → This light and airy frosting is perfect for piping.
- Betty Crocker™ neon gel food colors → In orange, purple, and lime green for that classic Halloween palette.
- 1 package (0.88 oz) Betty Crocker™ Candy Shop candy eyeballs → The essential ingredient for bringing your monsters to life!
Let’s Get Baking! Your Step-by-Step Guide
This impressive cake comes together with a few simple stages of baking, coloring, and fun assembly!
Part 1: The Chocolate Cake Layers
- Prep the Oven and Pans: Preheat your oven to 350°F (325°F for dark pans). Grease and flour the bottoms and sides of three 8-inch round cake pans.
- Mix the Cake Batter: In a large bowl, beat the cake mix, water, oil, and eggs with an electric mixer on medium speed for 2 minutes, scraping the bowl occasionally.
- Bake and Cool: Pour the batter evenly into the three pans (about 1 ⅓ cups each). Bake for 17 to 21 minutes, or until a toothpick inserted in the center comes out clean. Let the cakes cool in their pans for 10 minutes, then invert them onto wire racks to cool completely, about 30 more minutes.
Part 2: Assemble Your Spooky Monster Cake
- Color the Frosting: Divide the frosting equally among three small bowls. Stir a different food color into each bowl (about ½ teaspoon of gel color) until you have one bowl of orange, one of purple, and one of green.
- Prep the Piping Bags: Fit three separate decorating bags with a ½-inch round piping tip and fill each with a different color of frosting.
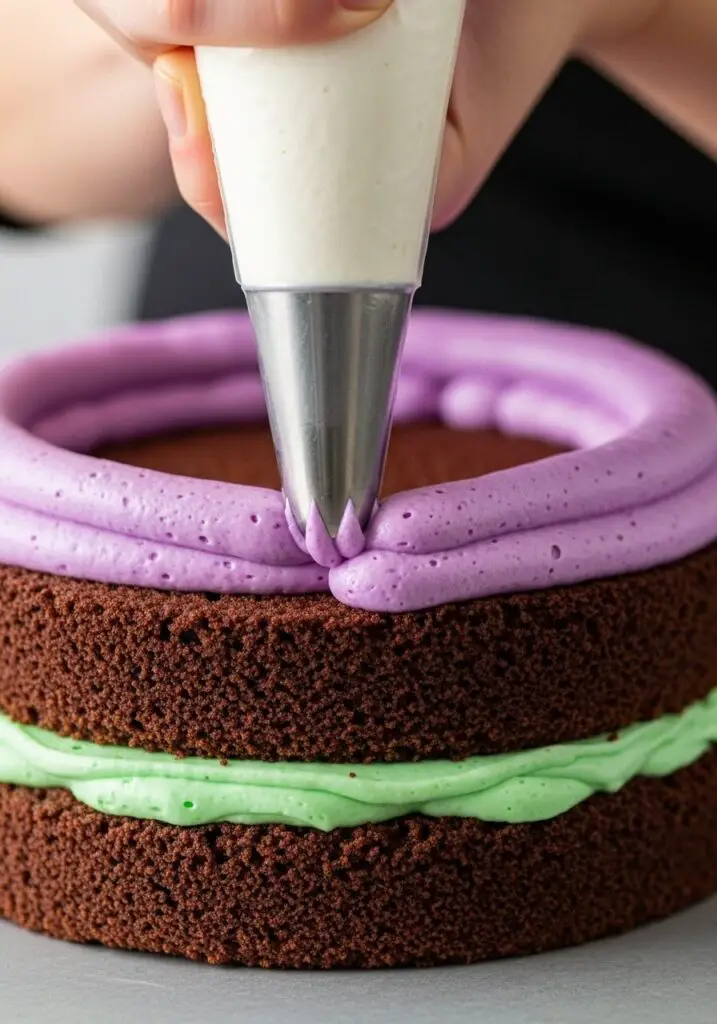
- Build the First Layer: Place your first cooled cake layer on a serving plate. Using the green frosting, pipe a thick, dam-like border around the top edge of the cake. Fill in the center of the border with more green frosting and spread it smooth. Gently press a few candy eyeballs into the side of the piped border.
- Build the Second Layer: Carefully place the second cake layer on top. Repeat the process with the purple frosting, creating a border, filling the top, and adding eyeballs to the side.
- The Top Layer: Place the third and final cake layer on top. Repeat with the orange frosting, creating a border and filling the top.
- Create the Monster Mob!: Use all three piping bags to pipe the remaining frosting into a crowd of different-sized mounds and dollops all over the top of the cake. Get creative and have fun with it!
- Decorate and Serve: Press candy eyeballs onto all the little monster mounds on top of the cake. Store the finished cake, covered, at room temperature until ready to serve.
WiseRecipes’ Top Tips for a Perfect Monster Cake
These simple secrets will ensure your cake is a spooky, spectacular, and delicious success.
- Use Cake Mix with Confidence! Don’t be afraid of the shortcut! A quality cake mix like Betty Crocker’s is expertly formulated to be moist and delicious every time. It’s the perfect, reliable base for a fun decorating project like this.
- Cool Your Cakes Completely. This is the most important rule of layer cakes! If you try to frost a cake that is even slightly warm, the frosting will melt into a soupy, sliding mess. Patience is key!
- The Frosting Border is a Pro Trick. Piping that thick “dam” of frosting around the edge of each layer before filling it in is the secret to getting those clean, distinct, and substantial frosting layers in your final “naked cake” look.
- Use Gel Food Coloring. For the most vibrant, intense orange, purple, and green colors, gel-based food colorings are a must. Liquid food coloring is less concentrated and can thin out your frosting.
- Get Goofy with the Eyes! The best part of this cake is the personality. Don’t try to make the eyes perfect. Place them at wonky angles, use different sizes if you have them, and give your monsters some character!
Keep It Spooky! Storing and Make-Ahead
This cake is a fantastic make-ahead project for a stress-free party day.
- Make-Ahead: You can bake the cake layers up to two days in advance. Once they are completely cool, wrap them tightly in plastic wrap and store them at room temperature. You can then frost and assemble the cake on the day of your party.
- Storage: The finished cake can be stored, covered (a cake dome is perfect), at room temperature for up to 3 days.
Spooky Eyeball Halloween Cake
Ingredients
Equipment
Method
- Heat oven to 350°F. Grease and flour bottoms and sides of three 8-inch round cake pans.
- In a large bowl, beat cake mix, water, oil and eggs with an electric mixer on medium speed for 2 minutes. Pour about 1 1/3 cups batter into each pan.
- Bake 17 to 21 minutes, or until a toothpick inserted in the center comes out clean. Cool for 10 minutes in pans, then remove to cooling racks to cool completely.
- Divide frosting into 3 small bowls. Stir about 1/2 teaspoon of a different color food gel into each bowl to create green, purple, and orange frostings. Fill three separate decorating bags (each fitted with a 1/2-inch round tip) with the frostings.
- Place the first cake layer on a plate. Using the green frosting, pipe a thick border around the top edge. Spread more green frosting to fill the inside of the border. Press candy eyeballs into the side of the border.
- Top with the second cake layer; repeat the border, filling, and eyeball process with the purple frosting.
- Place the third cake layer on top; repeat with the orange frosting.
- Pipe the remaining frosting from all three bags into various-sized mounds over the top of the cake. Decorate all mounds and the sides of the cake with candy eyeballs. Store covered at room temperature.
Notes
FAQs: Your Spooky Cake Questions, Answered!
Do I have to use three 8-inch pans?
Three pans create the best look for this specific design. However, you can use two 9-inch round pans instead. You’ll need to increase the baking time by a few minutes and will only have two layers instead of three. Alternatively, you can bake one 9×13-inch cake and cut out smaller rounds to build a mini layer cake.
Can I make my own frosting?
Absolutely! A classic American buttercream would be perfect. Simply beat 2 sticks of softened butter until creamy, then gradually beat in 4 cups of powdered sugar, a teaspoon of vanilla, and about 3-4 tablespoons of milk until you reach a fluffy, pipeable consistency. This will give you enough to divide and color.
Where can I find candy eyeballs?
Candy eyeballs are a fun decorating staple! You can find them in the baking or seasonal aisle of most major grocery stores (especially around Halloween), at craft stores, or online.
How do I get the eyeballs to stick to the frosting on the sides of the cake?
The key is to work one layer at a time. After you pipe the thick frosting border around the edge of a layer, gently press the candy eyeballs into the side of that border while the frosting is still fresh and soft. They will stick perfectly!
Final Thoughts: A Monstrously Fun Masterpiece
There is nothing more delightful than a dessert that is bursting with personality and fun. This Spooky Eyeball Halloween Cake is a true celebration of the playful spirit of the holiday. It’s a simple, joyful project that results in a spectacular and delicious centerpiece. I hope you and your family have a blast bringing your own monster mash to life. Happy Halloween!