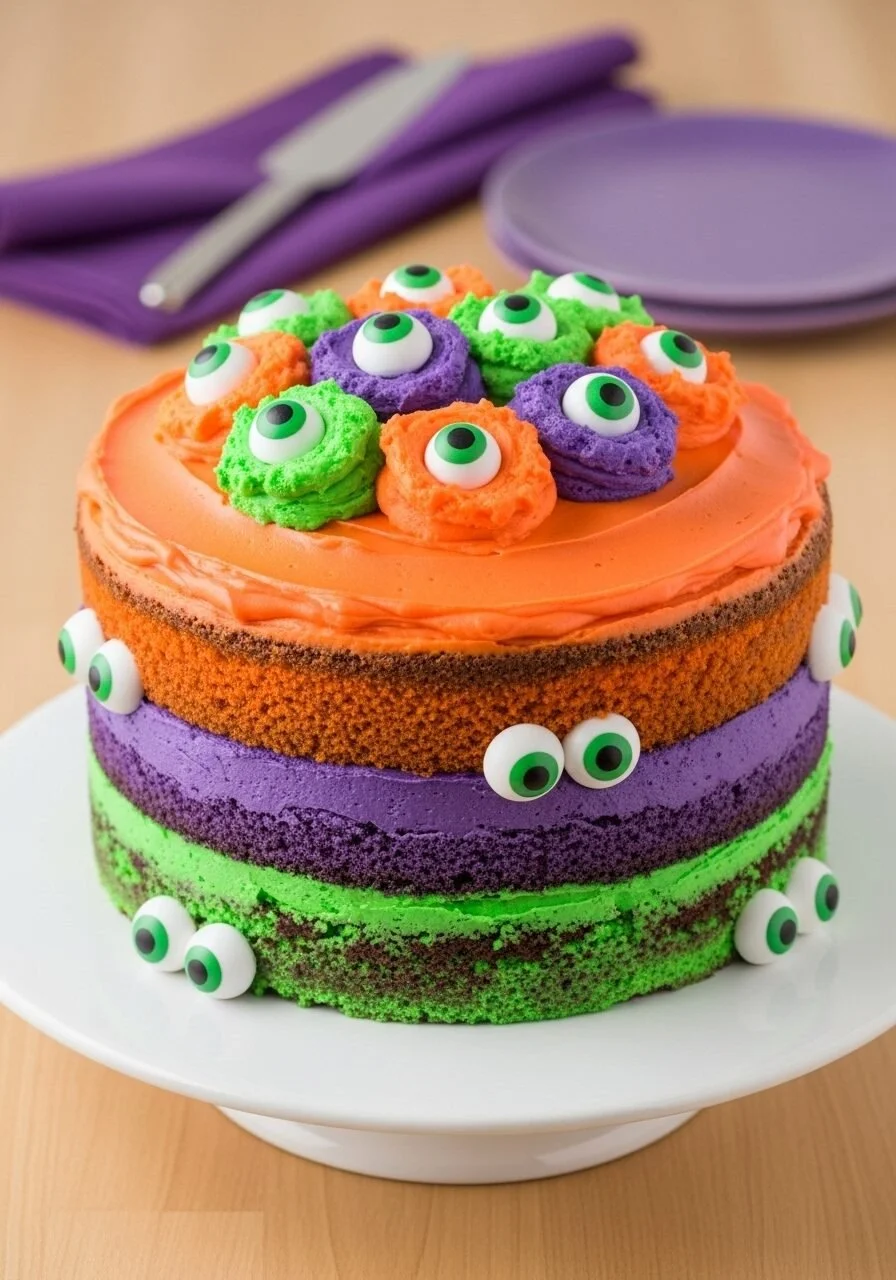
Spooky Eyeball Halloween Cake
How I Found This Freaky Favorite The first time I made the Spooky Eyeball Halloween Cake I was convinced the neighborhood kids would scream. They did scream, but with delight, not fright, and that moment is exactly why this has become my go-to for October parties. If you want a similar spin on monster-themed desserts,…
How I Found This Freaky Favorite
The first time I made the Spooky Eyeball Halloween Cake I was convinced the neighborhood kids would scream. They did scream, but with delight, not fright, and that moment is exactly why this has become my go-to for October parties. If you want a similar spin on monster-themed desserts, I once bookmarked a page that inspired my first take and it helped me refine how the eyeballs sit on the sides and top of the cake: a spooky eyeball Halloween cake guide. I like telling this story when someone asks how easy it is—because honestly, it is unbelievably simple and ridiculously fun.
Ingredients That Make It Work
I always tell people the trick to a dramatic cake is not flashy baking skills but choosing the right building blocks. For this one you only need a few familiar items: 1 box Betty Crocker™ Super Moist™ Devil’s Food Cake Mix, Water, vegetable oil, and eggs (as called for on cake mix box), 2 tubs (12 oz each) Betty Crocker™ Whipped Fluffy White Frosting, Betty Crocker™ neon gel food colors (in orange, purple, and lime green), and 1 package (0.88 oz) Betty Crocker™ Candy Shop candy eyeballs. That whole list reads like a quick stop at the grocery store, and I like recipes that let me buy everything in one trip.
If you want an even more eyeball-obsessed reference about candy eyes and placement, there is a handy write-up I pulled from time to time: the ultimate cake eyeballs guide. That piece influenced how many to press into the sides so they look purposefully creepy rather than just slapped on.
Putting the Layers Together
Start by preheating your oven to 350°F, or 325°F if you use dark pans, and grease three 8-inch round cake pans. The smell of the oven warming up is oddly comforting and immediately makes the kitchen feel seasonal. In a large bowl I mix the cake mix with the water, vegetable oil, and eggs exactly as the box calls for, and I beat everything for two minutes on medium speed; that little bit of time makes the batter smooth and shiny. I pour an equal amount of batter into each of the three pans so the layers stack evenly and bake them for about 17 to 21 minutes. You know they are done when a toothpick comes out clean and the tops are lightly springy to the touch. I always let them cool for ten minutes before inverting onto wire racks to cool completely—if you try to frost them while they are warm they will slide and nobody wants a leaning tower of eyeballs.
Once the layers are cooled, I split the two tubs of Betty Crocker™ Whipped Fluffy White Frosting into three bowls and color each with a small dab of neon gel to get lime green, violet purple, and bright orange. The gels are concentrated so a little goes a long way; you can always add more, but you cannot take it out, so I stir cautiously at first. Now for the fun part: I place the first layer on a serving plate and pipe a thick border of green frosting around the edge, making a raised rim. I fill the center with more green frosting so it looks like a gooey pond, and then gently press the Betty Crocker™ Candy Shop candy eyeballs into the sides so they peek out as if watching the room. The second layer goes on next and I repeat the same idea with purple frosting, then the third layer gets the orange treatment. Finally I pipe the remaining frosting into little mounds on top and scatter a few more candy eyeballs so the top reads as a chaotic cluster of staring orbs. Store at room temperature until serving and the frosting stays delightfully soft and pillowy.
Little Tricks I Swear By
I have a few tricks that always save the day. First, room-temperature frosting spreads and pipes so much more smoothly than straight-from-the-fridge frosting, so I leave the tubs out for 15 minutes before coloring and using them. Second, when you divide the batter, use a kitchen scale if you want perfectly even layers; eyeballing works too, but weighing is faster once you get used to it. Third, if the frosting seems too stiff after coloring, a teaspoon of vegetable oil will make it silkier without changing the flavor.
Knowing when the cake is done comes down to feel and a clean toothpick. The tops should spring back if you press lightly and the toothpick in the center should come out clean. Texture-wise I like a cake that feels moist but not dense; Devil’s Food from the box gives that perfect tender crumb and a rich chocolate smell that pairs wonderfully with the bright sugar of the frosted eyeballs.
If you want to make this ahead, you can bake the layers a day in advance and wrap them well in plastic wrap, keeping them at room temperature. I usually wait to frost until the day I plan to serve so the colors look fresh and the frosting is whipped light. For leftover storage, I cover the cake loosely with a cake dome or place slices in an airtight container and refrigerate; let slices sit at room temperature for about 20 minutes before serving so the frosting regains its fluffy texture.
Little Variations and What to Serve With
I like to switch things up depending on the crowd. One variation is to add a layer of jam or chocolate ganache between the cake layers for a surprise flavor contrast. Another is to tint the white frosting a pale gray and pipe veins with a darker gel for an eerie marble effect before adding the neon colors. For a kid-friendly twist try white chocolate chips mixed into one of the layers so you find melty pockets when you cut into it.
I usually serve this with a simple cold glass of milk for kids, or for adults I like to set out coffee and a robust dark roast that complements the Devil’s Food chocolate. The bright neon frosting sings against the deep cake so when you cut a slice it is a fun visual pop.
Conclusion
If you want a quick tutorial that helped shape how I arrange the eyeballs and build the monster look, this DIY Monster Eye Cake post was a great visual starting point for me: DIY Monster Eye Cake | The Cake Blog.